Mass Adjustment Workflow with Styles
Lesson 11 from: Creating Your Workflow in Capture OneDavid Grover
Mass Adjustment Workflow with Styles
Lesson 11 from: Creating Your Workflow in Capture OneDavid Grover
Lesson Info
11. Mass Adjustment Workflow with Styles
Lessons
Class Introduction
04:04 2Overview of Working with Sessions
15:01 3Overview of Working with External Editors
05:07 4Ultimate Photoshop Round Trip Workflow
13:05 5Process Recipes Overview
15:58 6"Tokens" Overview
07:05 7Workflow Advice and Demo
21:42 8Exporting with Tokens: Seven Popular Examples
31:07Lesson Info
Mass Adjustment Workflow with Styles
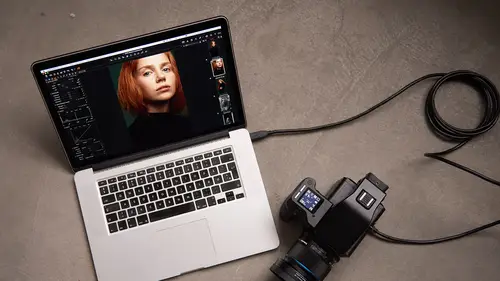
So, we're gonna make a new process recipe and for Jill's website she needs to have them 300 pixels square. So, it's a square crop so I just call it 300 pixels wide or wider. So, let's just correct that. So, 300 pixels wide like so. So, let's bring up the first image. Go to JPEG. We're gonna do sRGB as it's for the web. We're gonna change our width to pixels and its gonna be 300. And I wanna check with recipe proofing that it's gonna look good. So, if you remember if we zoomed to a 100% first. Zoom to a 100% first. Turn on recipe proofing with the selected recipe. That's exactly what it's gonna look like at 300 pixels. So, I could add a little bit more output sharpening so it looks nice and crisp but not too much. So, that's my first process recipe. Oops, I just accidentally deleted Image Name down there. Let's keep that. Image Name like so. And we're gonna do another process recipe. This time we're gonna have one that needs to be printed. And it's gonna be printed, let's say it's gonna...
be printed 12 inch wide print. So, let's do a JPEG for that as well and we're gonna have a width of inches and it's gonna be 12. So, you see how it's proofing in the background and we're gonna go to adjustments and we're gonna do some output sharpening for print this time. Oh, I did it again. We're gonna do output sharpening for print this time. Let's get my Pen Tool back. And we're proofing it already and when you do add sharpening for print, you can either do it at viewing distance in inches, or centimeters, or a percentage of the diagonal. So, you can decide how you want to do that. So, let's say we know it's gonna be viewed at three meters away. So, let's do 300 centimeters and then we can decide` how much additional sharpening that we wanna have. So, we've got a 12 inch wide print with extra sharpening. We've got a 300 pixel wide website picture both processing to JPEG, for example. And I'm gonna run two process recipes at the same time. I've done nothing fancy with Sub Folders here. No need on this occasion, but for my Output Location, I'm gonna do what we did last time and put the Recipe Name. So, it's gonna be divided up between 300 pixels wide and a 12 inch wide print. And Output Naming, just to be on the safe side, we'll put the Recipe Name in there too. So, that when anyone ever sees it any of these images, they know okay, this is the web shop. This is the one that we need to send for printing. So, now that we've done that, we can make sure those are the only two process recipes turned on. Your Process Summary will tell you how many process recipes we've got and then the last thing that we need to do is turn off recipe proofing. Get my browser back, let's zoom out. Select all, press Command + D to process and then if we wanna get straight to our output location we can just tap here. And we can see we've got our 12 inch wide print like so, which is been resized perfectly and it's also got 12 inch wide print in the title itself. And then we've got 300 pixel wide JPEG, which is gonna be perfect for popping on the website and then our 12 inch print as we saw like so name quite nicely into folders. Now that's a really sort of simple thing that any of you could probably do with tokens and benefit from. I think Recipe Name is a token for everybody, especially if you're gonna process more than once. With different kind of outputs, dividing them up by Recipe Name is just a really nice tidy way of keeping this Output folder less cluttered. And also by adding the Recipe Name in the file name itself also means that you're never gonna be confused about what this image is before. See, if I hadn't put the Recipe Name here, what I would actually have is eight items here and eight items here with exactly the same file name. And that's kind of bad, so we wanna distinguish between them somehow. And it only meant I had to kick off one process recipe by having them both checked on Select all and process and we optimize sharpening for each one, and this this now a repeatable process. So, if Bruno the photographer who shot these, he has another client that comes in and they have the same specifications from the same corporate company, for example, it could be a colleague of Jill's, then he can shoot, he can use exactly the same style, which we used before and then process to exactly the same output without having to do any sort of that additional work. You can shoot very accurately as he did, apply the style, do a little tweak if he needs to, whiteout the background as a suggestion of something else you can do with a local adjustment and then process without having to enter any process dialogues or anything. Just tick those recipes that you want and boom job's done, out the door. Any questions on anything? (laughs) One question on-- Just a little bit of a random one about whether you can import or export brush adjustment styles into Capture One. Well, like a brush preset I guess? No, so I guess what they're looking for is some way to save a preset of brush settings and the answer to that is no. And it's not actually a bad idea to have a brush preset I guess. It's not something I've personally thought of. I think it's because my brush settings vary so much from image to image, it's not something I've felt I've needed, but potentially in the future that could be a good idea. Yes Okay Okay So, good over here. Good over here too. Alright, fantastic. _ Yup So, any final thoughts? Capture One is a very big and deep program and I would imagine that every single person who uses Capture One is not gonna use every single aspect of Capture One, but certainly when it comes to work flow, I think we can all learn from doing or to asking Capture One to do the things that we don't like to do. Like we enjoy adjusting images. We enjoy working with local adjustments. We enjoy perfecting color and do all those kinds of things. And that's the stuff that really excels in Capture One for our enjoyment. And all the stuff that we don't like doing, the boring things like processing images and sorting things into folders and so on, if you can just take away a tiny bit of what you've seen in the past couple of hours on this particular course, then I'm sure if we can save you 30 minutes a day if not one hour a day, then that's an extra hour where you get to do the fun stuff. And I would say, don't be intimidated by all the functionality of Capture One. It is a learning curve, so set yourself goals. Okay, today I wanna learn how to be really good at selecting colors. Tick that one off. Okay, I wanna be really good at dodging and burning. So, tick that one off. And then gradually as you learn all these new things, everything gets rolled together into sort of one powerful package, which can do so much for you images in itself. So, if you look at @david.grover.c1, then you can see all my wonky landscape pictures, and a few other things that I post up there as well. But yeah, if you wanna follow me on Instagram, that would be great. I'd love to see what people are doing with Capture One, what kind of photography you're doing, we have such a diverse client base. It's really nice to see how everyone's using it. So yes, please give me a follow.
Class Materials
Bonus Materials with RSVP
Ratings and Reviews
Bartek Furdal
Great seminar / class!!! Realy helpful. One Question - I have Capture One Pro 10 - when I want to "Edit with" I do not get the option to open it as PSD file I have only TIFF or JPEG way to do it... any help on that?!
Kristen
Very helpful!