Lesson Info
2. Overview of Working with Sessions
Lessons
Class Introduction
04:04 2Overview of Working with Sessions
15:01 3Overview of Working with External Editors
05:07 4Ultimate Photoshop Round Trip Workflow
13:05 5Process Recipes Overview
15:58 6"Tokens" Overview
07:05 7Workflow Advice and Demo
21:42 8Exporting with Tokens: Seven Popular Examples
31:07Lesson Info
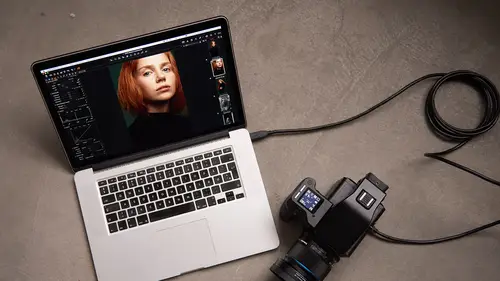
Overview of Working with Sessions
What we see on the screen at the moment is a catch one session. But we're gonna make a session from scratch so that you can see exactly what a session is and how it builds up and how you can add images to it and how you can control all those various different processes. So, let's close this one down. We're gonna come back to that. And let's go back to Capture One. And we're going to say file, new session. So this pops up a dialogue window where we can give our session a name and decide where we're gonna store that session. So let's call this session creative live. Actually, let's call it, I know what I'm gonna put in there, so let's call it headshots. And I'm gonna leave everything else on default. So we have some options here. But I'm not gonna touch any of these things. Everything's gonna stay on default. The only thing we could change is where do we want the location of our session. And in Capture One, if you see a box with three dots, that means it's an external menu or an addition...
al menu, and, for example, I could choose where to put it. But I'm just is gonna put tin my pictures folder. So let's say okay, and we will get a brand new empty Capture One session. Now, if you've used catalogs before in Capture One or catalogs in the light room, for example, this concept is a little bit different. And it helps if we right click up here. And this is a good shortcut to see exactly what our session looks like. So by default, what our session created was a Capture folder, an Output folder, a Selects folder, and a trash. And we have the co-session DB, which is kind of the database tracking where everything is. And everything is held in one master folder which has the same name as the session itself. So if you remember when we said file, excuse me, file and new session. We gave our session a name. And I called it headshots. So therefore the master folder is called headshots. And by default you get these four single folders like so. Now, the way the most basic session work flow works is that we have images aren't Capture folder. This is whether we put them in there or shoot tethered, for example. We move our selects to the Selects folder. We process to the Output folder. And any of the bad stuff goes in the trash. So it's a simple one, two, three step work flow. Very, very simple. So right now we don't have anything in our session. It's empty. And we can do a couple of things. Like working with a catalog in Capture One, we could go to import window. And we could import some images. But if you want to really simplify it, what you could also do is simply take some images, let's grab some images from my hard drive. So let's just take some headshot images from Zach. Let's just copy these into the Capture folder. So that's 81 images going in like so. And if we go to Capture One and click on our Capture folder, you can see these images popping in, pretty much they're already so instantaneously. So it's really fast to get images into a session like that. You can see there's a little activity monitor going on in the background. If we look at activities, we can see Capture One is just generating the previews, which is what we're looking at when we're moving through images like so. We don't have to look at the raw data, we simply look at the created preview file. But even whilst previews are creating in the background, we can still scroll through. We can go to an image. We can open up anything and it'll be ready and available to work on Capture One straight away. Let's close that down, go back to our finder. So you can see these images have now popped up into the Capture folder where I copied them from from my external hard drive. Now, you'll also see another folder here called Capture One. So this is just a sidecar folder which basically holds all the previews that we just generated any of the settings for the images that we might work on as well. And that all sits in that sidecar folder like so. You can see in the first tool tab of our session, which is the library tool tab, that we have the Capture folder, Selects folder, output and the trash folder. They are of course exactly the same as these folders here. So if I click on the Capture folder, I'm looking at the Capture folder in exactly the same session. If I click on the Selects folder, it's currently empty because we don't have any images in that collection and you're told here like so. But in my Capture folder, we have one of 81 images. Or 81 images in total. Now, the way you can use this session, we're gonna look at this in a basic way. And then when we move through today's course, we're gonna see additional ways that we can really expand the power of this session. But in a basic way, what we could be doing is looking through our various images like so. And when we find one that we like and we want to keep, we can drag and drop it to the Selects folder. And that physically moves it to the Selects folder like so. And you'll see the same image in the Selects folder here. So we can either do drag and drop operations, so drag and drop into the Selects folder. Drag and drop, drag and drop. Or we can use a shortcut key. So if we look down here, you can see move all selected variants to the Selects folder. Command + J, if you're on a PC, it will be Control + J. So this way I can kind of put the mouse or pen down. I could just use my cursor keys to go through. Press Command + J as we go through. And then those images get moved to the Selects folder, for example. Then the next part of the process would be to take your selects, do some adjustments, and then process them, which is what we're gonna look at later. And then they will arrive into the Output folder. Now, the whole point of working in a session like this is that everything is now held into this one master folder. So if I want to pick up the session and move it to an external hard drive, I can do so. If I want to back it up, it's very simple to back it up. If I then want to open that session again, let's just close it down for a second, all I need to do is double click on the can co-session DB. And then it's loaded up straight back into Capture One again as well as. So it's a really nice portable all inclusive file management system. Now, as well as having the ability to organize in our physical folders, we also have session albums over in the corner here. So if you don't want to move to the Selects folder and you want to do dynamic kind of searching and filtering and organization, then you can use session albums to do so. So if I make a new album, let's just call this John, for example, he can be our first candidate. They will make a simple album, which I can grab a bunch of images. Let's just grab the first set and drag them over, like so. And then that gives me an album of images of just those ones. But they're not physically moved on disk. So a slightly different way of doing it, for example. As well as normal albums, we can have smart albums. And by default a session will create you a five star image album and an all images album which shows you every single image in the session itself. So, for example, if we take our images of John, for example, and I press 5 on my keyboard to make this five stars, it then pops up in the five star album, and any other images which are five stars are part of that session too. So if we then took this one to zero, then it disappears from this smart album, as such. So whether you want to organize in physical folders like the Capture folder, or use albums in smart albums, that's entirely up to you. We can also use a combination of smart albums and physical albums, which is what we'll look at as we get to more extensive sessions as well. Now, the basic structure that we've seen so far, if this is enough for you, like if you want more than one Capture folder, more than one Selects folder, it's totally possible. So if, for example, in Capture we made a new folder, let's just call that Bob, for example. Like so, let's change that, Bob, for example. What we could do is drag some of our images. Let's just take this bottom set of images and then drag them up to our Bob folder, like so. So they've now dropped in there. And did you see in the background, whoops, whack 'em going crazy. You saw in the background that it updated immediately. So I took some images out of the Capture folder and it updated immediately. That's because unlike a catalog, Capture One is always watching the current session folders. So if I was to add something in my Capture folder or delete it, then it updates straight away. So if we look in the Capture folder and I get rid of 760, let's just delete that one. Let's delete that. And then you see it disappeared straight away from Capture One, let's delete 761. Straight away it deletes as well. So you can freely manage your images in the finder, or Capture One. And Capture One is always watching it. So again, it's a bit different from a catalog. But what about my Bob folder here, for example? Right now, I don't have any way to sort of access that within Capture One because the Capture folder is only looking at the Capture folder. But what I can do is drag these things and add it to session favorites. And now if I click on Bob, I can see all my Bob images like so. So if you want to further organize this area you can. So let's make another folder called John, for example. And let's just dump a few images in there, like so. And then let's make one last folder, let's say Jim. And then drag those images in there. We can do so, and all I need to do to be able to access them quickly and easily within the session is add them to session favorite, and now I can scroll through those different things. So if you want to organize your session in a more extensive way, then you can easily do so. So you can move that around no problem at all. If I dragged an image from here to here, then Capture One would update is no problem as well, without me having to do anything in the session itself. So it's like a true optimized file browsing experience whether you're in the finder or whether you're in Capture One. If we go to the Capture folder here, you see now there's now nothing in it as such because the Capture folder is actually empty. It only has our subfolders in it and such as well. But if we right click and we say show in library, we can then actually see our complete structure, like so, and scroll through those. The reason for adding them to favorites is that it's then easier to access them. And if we do any searching and filtering, it's really worth knowing that Capture One will only search through folders, the Captures, Selects, Outputs, Trash folder and anything that's also placed in session favorites. So if you have additional folders other than Capture, Output, Selects, and Trash and you want Capture One to be able to search them, then you must add them to session favorites. But it's a really easy way to just quickly access a more extensive session too. Then when we come to look at processing and so on, we can look at a way to use all of these things to automate our processing tasks. It's just really important that you know exactly how a session is set up. And then it makes much easier for when we come to the more complex stuff. But if we were to just go back to Bob, for example, let's just take three shots here. And we're gonna grab a process recipe which we're gonna talk about later on. And if I don't change anything away from the default, and I just hit my process button, let's say process down here, oh, come on, D for shortcut, those images by default will arrive into the Output folder like so. So you see captures go in cCpture, selects go in Selects if you want to, processed images goes into the Output folder. And then everything is neatly bundled up into that master folder, which is easier to move, back up, copy, and so on. So it's quite different from a catalog where you have this kind of overarching database that looks where everything is. Everything is much more visible and open in a Capture One session. Any questions on session structure so far, Jim? David, there is one question. Yup. So, the question is for session favorites tab. Is it possible to visualize the total images for the folder besides each line name? Ooh, what do they mean by that? Maybe we can get a clarification from the student out there. Yeah, say the question again. Is it possible to visualize or see the total images for each folder, besides-- Ohhh. --besides each line name. Ah, so they want to see a count here, for example. Yes. No, it doesn't show up. Okay. But it does show up at the top here. So it is on the screen? It is on the screen. It's just a little bit faint so it's probably hard to see. So you can see it at the top there. Great, I think that answers the-- But not text to the folder itself. Yeah, but I think having it up on the screen is perfect, thank you. Yup, you can see it up there. Great. Yup, we got there. (laughs) Cool, all righty.
Class Materials
Bonus Materials with RSVP
Ratings and Reviews
Bartek Furdal
Great seminar / class!!! Realy helpful. One Question - I have Capture One Pro 10 - when I want to "Edit with" I do not get the option to open it as PSD file I have only TIFF or JPEG way to do it... any help on that?!
Kristen
Very helpful!