Ultimate Photoshop Round Trip Workflow
Lesson 4 from: Creating Your Workflow in Capture OneDavid Grover
Ultimate Photoshop Round Trip Workflow
Lesson 4 from: Creating Your Workflow in Capture OneDavid Grover
Lessons
Class Introduction
04:04 2Overview of Working with Sessions
15:01 3Overview of Working with External Editors
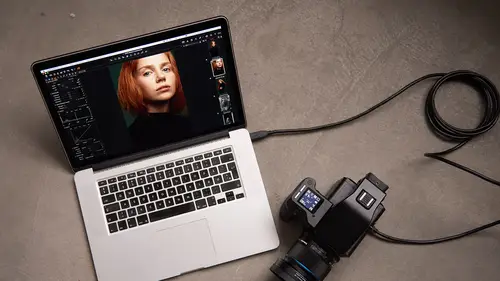
05:07 4Ultimate Photoshop Round Trip Workflow
13:05 5Process Recipes Overview
15:58 6"Tokens" Overview
07:05 7Workflow Advice and Demo
21:42 8Exporting with Tokens: Seven Popular Examples
31:07Lesson Info
Ultimate Photoshop Round Trip Workflow
Let's say that we've, have we done any adjustments here? We've done a few adjustments to this image so we've just added a bit of contrast, let's bump up the exposure and brightness, levels are pretty good. So we're happy with what we've done so far to this image but we need to send it for retouch for example, or we want to retouch it ourselves. We're not gonna do any retouching in capture one, we're going to go into Photoshop and we wanna use all the tools that's possible in capture one, sorry in Photoshop. So let's say right click and we're gonna say edit with. And this time, instead of a TIFF, I'm gonna use PSD file just for something different. I'm not gonna do any resizing. I want the full resolution of this image because it's gonna be retouched. And under adjustments I'm gonna ignore crop and have no sharpening for example. So now I'm gonna say edit variant. Capture one's gonna create me a PSD file. Open that straight into Photoshop as you can see and if we just briefly go back to...
capture one, you can see there's my PSD file sitting along side it right next to the original raw file. If we right click and say show in finder, you see right down here we've got our raw file and we've got our PSD file like so. So there's my PSD, sitting right next to the original raw file. So let's go into Photoshop. Let's go into Photoshop, like so, and remember I'm not a re-toucher, so you're not gonna learn any fantastic retouching techniques, but let's just show you what capture one is capable with MPSD files. So I'm gonna make a new layer, and I'm gonna call this retouch for example. Like so. So this is gonna be my retouching layer, so we've added an additional layer to my Photoshop file. So now I can show you some really bad retouching techniques. So let's just do a few changes to the file. So I'm gonna grab the spot healing brush tool and let's just take out a few blemishes and things. Alex has pretty good skin, so it's not really a huge issue. There's a couple of little spots there, and one here, and one here, and so on. Now I'm not gonna flatten it, I'm gonna leave my additional layer and my retouch layer here. And of course, this could be more layers if you go and do more extensive retouching and working in Photoshop and so on. So all I'm gonna do now is close this down, and I'm gonna save the changes to my PSD file, click save, and really important for capture one is that you have maximize compatibility on, otherwise it's not gonna work properly. So now if I say okay, like so, let's go back to capture one, open up my PSD, and if we uh let's see. Let's bring up the original raw and the PSD next to each other, let's zoom into 100%, like so, let's grab our hand tool, and then you can see on my PSD file, I just did some little changes, some little fixes like so. So even though I've got that layered file in Photoshop, capture one can represent that perfectly as well. So we can see that layered PSD in capture one. Now what if I'd forgotten to, I'll just bring up the labels, so that's our PSD. Now it looks like I've forgotten to retouch something. I've missed a blemish here, so I can go back and right click on my image with my pointer and say, open with, and now go back to Photoshop. So this will open up, I've still got my two layers intact, so now if I zoom in for example, let's go to my retouch layer, grab a retouching tool, let's get rid of that blemish, one there as well. Close this down, save my PSD, go back to capture one, and you see it'll update straight away. If you didn't see it, it just updated the preview so now we're seeing my full retouch PSD. So I can keep going back and forth into Photoshop no problem at all. So whenever I feel that I need to do something else, I can do so. So now we're this far, we've got our raw file, we've got our PSD, but we have a, you know a fussy client, they're not sure whether they like this one, do they want a slightly different color grade, do they want black and white perhaps. But as you're working in capture one, we can make a new variant which will give me a virtual copy of my PSD file. Let's get rid of that one. So let's make another new variant. So now I've got one, two, three variants of my PSD file. So let's go to this one and let's make this black and white for example. So let's say turn black and white on for this one and we're working on the PSD file here, remember, it's totally possible to do that and just have a little bit of extra contrast. And let's go to my other PSD, like so, and let's do a bit of a grade with the color balance tool. So let's have some cooler shadows, let's lift the shadows a bit, and let's dark brighten up our mid tones, and let's also take our saturation down a little bit as well. So we've got our original raw file with adjustments, we've got our PSD version one with all our retouching, and then we've got our black and white version, and then we've got our color grade version like so, as well. So now we can deliver these off to our client and they can decide which one they would like to have. But again, let's bring up all three. So we've got our three different versions, all PSD files, but let's say okay, we need to actually do a little bit more retouching. So let's just open one of the PSD files. Remember it is only one PSD file and we've got three variants in capture one. So we haven't duplicated our PSD, we're just looking at it in a different way in capture one with different adjustments So let's say open with again and go to Photoshop. So now we're opening up the PSD with it's retouching, and let's say we just wanna do a crop like so, we're gonna do a crop like this. Crop that down, close it. We're gonna re-save. Let's go back to capture one and you'll see in a second it updates and then the crop is then represented on all three of those variants. So we're using the power of capture one and Photoshop together and now we can deliver these of to our client and then they can decide do they want the color, do they want the black and white, do they want, oh there's the crop updated. Do they want the color, do they want the black and white, or do they want the one where we did the additional color grade. And if at any point I need to open up my PSD file, like so, open with Photoshop, and do some additional retouching if there's any other retouching to do, let's have a look. I can grab our spot healing tool and do some, oh that's a mark on my monitor, do some other sort of additional retouching that we want to. And as soon as I close that down and save it and we go back to capture one then it will immediately update and make the changes. So you can ping back and forth between Photoshop and capture one as many times as you'd like, you can work on PSD files and capture one. Obviously you don't have four at raw data but for doing a nice black and white grade like that and adding a little curve there's still plenty of information to be able to work with that comfortably and then it means you're not having to retouch three final PSD's, you're just retouching one, and capture one is showing you the different representations. Any questions on that Jim? Looks like one in the studio, we'll start with that one. Photoshop updates all of the variants, what if you didn't wanna update all three of them, if you wanted to make a change on one and just have that not carry over to the others? And the in that case what I would do is I would do an edit with and then that way we would make another PSD file as such. And so you would edit from the original raw file? Yeah, from the original raw file. We could actually say edit with, from the PSD and that would make another PSD from the original PSD. So we could do that as well. That actually would work too. Can you actually do edit with with multiple images? No, just one. But what you could do instead of that is if you, when we look at in depth at process recipes, you can actually say in a process recipe, open with. So if we, hang on a second, let's bring back capture one. I just had a little hiccup on my part there. Okay, so in the process recipe itself, in the process recipe itself, you can choose to open with varying different external editors. So if you then selected ten raw files, and then in your process recipe said open with Photoshop, it would process them all and then pop them all into Photoshop as such. But it won't automatically bring it back to the session in that respect. But another trick you can also do in a process recipe is you can set the location to the image folder. So if we selected, let's say we went to, let's just go to a different collection for a second. Let's say you went to this collection on images and we processed these three images out, and you set the location to image folder then those PSD files would sit alongside each of those and as the session is always watching the folders, then it would automatically update in capture one and show you those outputs as well. So that would be the way to do it. But edit with round trip is just one image at a time. I think that answers this question form Arika saying this new file appears physically in capture one folder, or in output folder? It's along side the raw file. So if we go back to, I just had this little collection, so if we right click on this and say show in finder, it put it right next to the original raw file. So if we extend this out, you can see that's the Nikon NEF file, and then that's the PSD file of the same name sitting right next to it like so. So a roundtrip will always drop the resulting TIFF or PSD right next to the location of the raw file it came from. So they're always together in that file management. Great, and do you happen to know if capture one can read PSB files? Well that's the big ones. I think the answer to that currently is no But that's probably something that wouldn't be too much trouble to add in the future I guess but the current answer is no. Okay, I think we're good over here. So that's the kind of nice way to work with Photoshop, back and forth, back and forth, back and forth, and you can do that as many times as you like, and it means that your capture one session is that central location for all your raw files and final process PSD files, and the fact that we can read the layers on the PSD files in capture one means you don't have to necessarily flatten your PSD file. From this point we can then just take whatever final image that we wanted and then process that our as a TIFF and a JPEG in many different ways, which you'll see coming up in the later lessons.
Class Materials
Bonus Materials with RSVP
Ratings and Reviews
Bartek Furdal
Great seminar / class!!! Realy helpful. One Question - I have Capture One Pro 10 - when I want to "Edit with" I do not get the option to open it as PSD file I have only TIFF or JPEG way to do it... any help on that?!
Kristen
Very helpful!