Lesson Info
6. Learning to use Blend If in Photoshop
Lessons
How to Combine Images using Blending Modes in Photoshop
17:44 2Advanced Blending Modes in Photoshop
08:03 3Adding Text in Photoshop
13:34 4Working with Stock Images in Photoshop
04:52 5Accessing the Blur Gallery in Photoshop
02:08 6Learning to use Blend If in Photoshop
06:59 7Creating a Double Exposure Album Cover in Photoshop
32:34Lesson Info
Learning to use Blend If in Photoshop
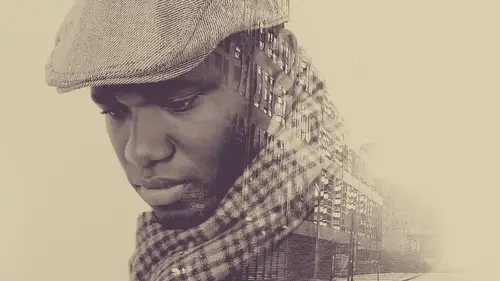
L j r seven seventy and two other people want to know can aaron explain blend if please this layer versus underlying layer yes, I'm happy to do so let's go ahead and go back to our first image to talk about blend if now blend if is incredibly helpful it does take a little bit of time to kind of like get teo get to figure out how to actually use blended so we'll just do a very abstract example that that should have that should help out all right so we've got on this later I'm gonna just create a we're gonna create here we go a couple different colored shapes here all right? This one will be white and this one will be black and I'm keeping this all on the same layer here okay? So we've got red, white and black so by default let's say I wanted these to be visible on lee where my background was visible or on lee where my subject was visible by default we all think ok, I've got to make a layer mask or I got to erase that away and often times that is the right answer but a lot of the time yo...
u can use what's called blend if to change the visibility of your layer now blend if is based on the layer underneath your current layer whether it's light or dark so I know just looking at this that if I wanted a layer that was visible just in the lighter area of our subject, I can do that with blend if if I wanted to be just visible in the darker area of other subject, I can do that with blend if as well so just think of light versus dark so let's go ahead and go into our layer blending you khun for our uh later south of here we go you can get to it by double clicking right here or you can go to fx and then don't do blending options okay, so we have a few different options within blended and blend it is right here you'll want to click on blending options right at the top and then blend if is going to be this the's set of sliders now you do have options for your different channels you can go to red blue or green channels ends in my experience they don't it doesn't actually make a ton of a difference between your great channel it seems like they're very, very similar, so I usually stick to great but if you feel like you need a next orbiter refinement, if you have a lot of red in the underlying layer you can you can nail it down to a specific color, but I find that gray works pretty much just as well most of the time okay, so let's show we have two different siders we have a fighter for this layer in a slider for underlying layer so this layer is layer five I've got it highlighted and the underlying layer is basically everything underneath it the rest of my image so if I don't hold down alter option if I just grab one of these sliders and start dragging this from left you're going to see things start to disappear down here in the darks appear the lights and you have to think about whatever color you see hear or whatever lighter dark that's what's going to go first so taking this from left to right instantly my black disappears because it's basically saying anything left of here you don't want to be visible if I keep going my red's gonna wind up disappearing there we go my red disappeared right about right about there because it was basically this level of darkness it happened to be read but it was this level of darkest and if I keep going all the way well it's it's white so it won't wind up disappearing but if I did want the white to disappear I could click here and drag over from this side and then if I keep going the read will wind up disappearing and then there we go all the way to black so the same on the underlying layer if I go from left or the right it's going to start disappearing now from the darker parts of my underlying layer so you can see you can use them in combination if I wanted to change you know to say don't be white and don't be visible where the underlying layers black I could do both of those with these sliders, which is very cool so this is starting to disappear from the underlying layers where they're darker now I'm disappeared making it disappear where the underlying layers are lighter so you could see if you didn't want a mask out your subject you could simply just dragged that there and it would only start to show up where your subject with the dark areas of photo are now it's still going to be visible here on her face so that may not work for you but these are options okay, so everyone cool up into that point actually did have one other that got a lot of traction online. Heather carden and other people want to know why do you create a separate layer for the grady in effect rather than using the greedy in't overlay effect on the layer style menu? Oh um earlier when I was on the surfer girl yeah oh, good question. Personally, I like to control a little bit more I like using layer effects but they do actually wind up restricting you just a little bit because they stack in interesting ways, and I find that being able to use regular layers, it just allows me a little bit more freedom, so that's, you know, you khun definitely use the radiant overlay however you'd like, but I find that I'm a little bit more restricted here, you know, instead of using like the free transformed tool and all the other tools that I enjoy using on a layer, I'm stuck with this dialogue and I tend to find it it's it works, but it's a little bit more cumbersome than just using the tools that I like, yeah, but if that works for you, if the you know if the grady and overly works and you're happy with it, yeah, continue using it, you know don't feel like you have to change everything you do just because you watch me hang out, put lines on a girl's face and creative life if you've got something that works for you, keep keep going with it, okay? Keeping going let's do it let's do it. So we have our lights in our darks and the last thing that we want to show you is the's points they seem like they're they're definite points, but there are actually two different points that come together by default, so to separate them out, hold alter option and this isn't a separate, those two points out. Well, then it will allow you to have a much smoother transition. You can see how that's a lot smoother than what we had before. Without separating them out, you're going to get, like, weird, really jagged edges. We'll show you with dark, so that will be very clear. See, all these weird, jagged edges doesn't look so good. If I hold alter our option, I separate them out. We get a lot smoother oven effect. Here we go, so I hope that explains mend blend, if to everyone, and I hope you can start using it because I use it all the time and super helpful.
Class Materials
bonus material with purchase
Ratings and Reviews
D Kelly
Excellent Class. The instructor is down to earth and he feels like just a good bud who just stopped by to teach you PS. It is very fast so working knowledge of PS is a must! I learned some neat tricks and love being able to be creative. I do a lot of photography so it will be fun to start collecting my own images. in which to be more creative with.
JOSEE DECARIE
His classes are very well explained, very interesting and he is dynamic, I love the courses of Aaron Nace.
Edward Ries
The course content is excellent. However it appears that the instructor assumes the online class are already experts. He zips through actions faster that can be easily followed so the how to value is lost. The results are evident but the various steps to get there are lost in the speed with which they are executed. This diminishes the value of the course except for those who are already extremely versed in photo shop actions.