Lessons
Day 1
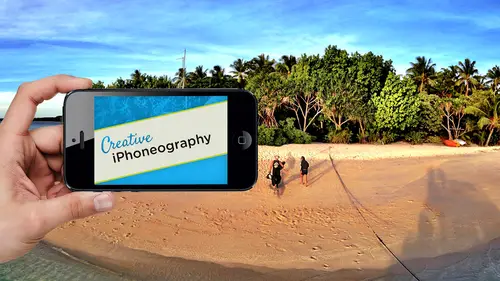
1Day 1 Pre-Show
06:32 2Why iPhone Photography?
30:03 3New Possibilities
29:25 4New iPhone 5S
26:14 5Gear and Accessories
39:27 6Shoot: Panarama, Bracketting and Other Tools
28:34 7Syncing Photos
29:41Camera+ App
37:27 9KingCamera App
16:41 10Snapseed App
35:10 11Snapseed App Continued
42:01 12Day 1 Wrap-Up
04:43Day 2
13Day 2 Pre-Show
06:23 14Additional Gear Review
14:46 15Sharing and Syncing
19:32 16Embellishing Apps
49:40 17Retouching Apps
26:27 18Retouching: Panarama and HDR
32:46 19Printing Your iPhoneography
33:46 20Compositing and Graphic Design
38:13 21Thanks + Credits
01:46 22Painting Apps
34:12 23Video Editing
55:34 24Day 2 Wrap-Up
04:24Lesson Info
Camera+ App
Now we're talking about optimizing the images. We just shot a whole range of images that are here in my camera roll. And specifically I've copied them into a sub folder, so to speak, within here called Studio and again, as I just mentioned there also all here in my main camera roll as well, I because I've just reorganized. Oh, my race. This, um IPad all my organization of the apse is, even though I did get all the updated absent, everything's working beautifully. My abs on my quote unquote desktop, so to speak in my mobile device, um, are completely in disarray. So what I did what I normally will do is I'll have this my home page have everything that I'm working on, which will be a bunch of apse, which I won't go into, But my media, whether utilities, more utilities, files, you know, things like my pdf and things like that, my drives and then I'll have on this desktop I want to have, especially if I was on my IPhone. I would want the camera app in multiple camera APs like bracket mode ...
or clear camp. So in this case, what I've done is I've made a sub folder, four essentials or photographic essentials. So just for now I've done them here. When we get into tonight, I will continue my organizing process and then on the next page will have things like optimizing and shooting video HDR, Pano graphics painting draw, enhance filter retouch adobes applications photo your chillies, retro effects, more effects black and white. So I will do my sub categories of all my APS. But in my first page, I want to get to the ones that I use, you know, all the time. So these are some of the ones that I wanted to cover. Now, in terms of this concept of getting the best color and tone from an image and one that I put down here in the dock because it is so useful is I'm snap seed. So that is gonna be a first kind of go to one. But I think before I do snap seed for some of the images that we just took, I'm gonna show you another app. That is one of my favorites. And we've talked about it before, Camera plus camera. Plus, you see here I've got to camera pluses which is the exact same icon with the exact same name for you at developers. Don't do this if you have to separate APS one for the meant for the IPad. That's I deaf and one that's meant for the IPhone. I understand why you do it, but since you can have both of in one place at least change the color of the icon or call it pro or HD or something, because I have no idea which one of these is the IPad app, which is what we have here, which actually has different capabilities than the IPhone one. And which one is the IPhone app. This is a blown up version of the IPhone app, and I'm going to use this one, even though the camera plus for IPad is cooler and groovy. Er, it allows you soft edge masking of any of your effects Really awesome. They took out one of the best features of it when they made the high def one, and it's probably just a oversight where they just left out a button. But I'm going to start with this one because I know all of you can have it. Whether you have an IPad or not, um, and show you one of the things related to this idea of sorting and organizing and figuring out what images you want to work with. And it's one of the coolest things that there is because one of the main challenges when working with mobile photography. As I've already mentioned a bunch of times I've shot 50 million images. Normally, I would go into the bridge, would go in the light women. I'd call that down to just what I want. Toss everything that I don't want. I just need a few. The problem with the mobile photography is you have these cute little camera rolls with cute little icons and you go through him and you zoom up and you check your focus and you go great. Out of the 50 images in the studio, I love 27 and then you close down the camera roll and you go over to another application and you go 27. Don't tell me I got account. I mean, what you know, because they're all now back to a little tiny thumbnails. So how can you very quickly and easily figure out what images you want to work with. The nice thing about Camera Plus is when you click on this little icon in the lower left, you get its own lightbox. And I mentioned that a lot of APS are now going to this idea of having their own gallery or lightbox or whatever, because now they can control it. One of the nicest thing it allows them to control it allows them to do nondestructive editing because they have the access to their images and they're the ones in charge of creating the effects much like light room and its library. They can say, You know what? I want to do all our jiggery pokery, and I'll keep that separate from the original image so you can come back, open this as many times as you want and change it every single time, completely non destructively. If you're really cool and you're like King camera, it lets you do all your wonderful jiggery pokery. Have it applied to your own little photo book. I think they call it there and then say, You know what? Could you copy all these adjustments on this image? Frame scratches, light leaks, tonal adjustments, and could you paste it or synchronized the setting to 50 different images. You can king cameras. One of the only absolute lets you do that. We'll do that also today. So we're moving to this idea of because we don't have enough control in apples. Um, camera roll manufacturers application developers like the ones for Camera Plus have created their own lightbox or camera roll, because it gives them a lot more control, synchronizing of different effects. Nondestructive editing so I can go back into it are just couple of the main reasons that you could do it. I like using this for this one in this light box. If I come up here and tap on the little plus in the upper right. Yes, I know everything is starting up. I can go into my camera roll. You'll also notice it has all access to all my photo streams. These aren't even on my computer, so that's really cool. Camera photo streams, air so cool because they let you even though it was on my IPhone by you. Take advantage of that little photo stream. I can get access to it, just as if it was a photo album. When it's not it's a stream. It is very, very, very nice. So I'm gonna come up here and here's my images that I just worked on. I go again. I can't check. Focus. Everything looks awful. This is typically how you work. Great thing about camera. Plus, if you click on one of these one, there's a little eye icon which gives you all your metadata gives you the size of the file because I shot this one with a different app. There's no geo tag. It would have told me what edits I would have done. So I would have the entire recipe for this if I had done. It tells me my f stop. You can see that soon. Gonna be F 2.2 my shutter speed by Esso. Everything about the file, including my dimensions. Um, that's cool. I like that. Thank you very much for telling me that I can sweep through all the images in this mode so I can check which ones are lower reds or higher Risk it. Sometimes you're right here coming from a different map. You don't know Was was it compromised when I used a different app so I can check that I can also check in case some of them may have been shot in lower light. I can check my I s O because that's gonna tell me how much I better be worried about things like noise. Um, but what I really like about the role is this little teeny check box in the lower right hand corner. So let's jump back out. I've got the little I in the upper left hand corner. I've got the magnifying glass up here, and I've got this little ability to click on it and either flag it, so to speak as something I want to keep or not. So what I do is I hit this button here. I can say I'm not sure if I want it. I haven't imported anything yet. I'm looking right in the camera roll, and I have complete access to the full resolution file before import Before I even know whether I want to work with it. That's really cool. It's the only out that I know of. Like snap. See you. Can't you have a thumbnail? You say I want to use it or not? I can't say, will you? I want to see the whole Flores. Whether before I start manipulating. So it's awesome because I can check and I can go. Okay, that one. That one. That one. It looks a little soft. I was using the fish eye on the IPhone four. These air, the IPhone, four shot. So I said, I like that one on this one even looks sharper, so I can say you know what? I don't need that one. So now you're going through and doing just what you would do in light room or bridge these air bracketed shots if I want to bring in both of those because they're bracketed and, you know, playing around with this one. This one changed the light. I like that one Look sharp. You get the idea. So it's basically and you can jump back out in this mode and go. You know what? I don't need to do my want this this this, this, this and that. Okay. And that file, I don't want either. Anyway, it's a very quick way. And then you say imports and the import is that quick. So nine images. It's not grinding through each image. How they did it, code wise why have full resolution access to my camera roll an instantaneous import into their own lightbox? I don't know. It's very, very elegant, and it's seamless. The other thing that's great about that is that since this is actually copied them to my light light boxes, they call it I can now arrest them for my camera. On the implications of that are I just went through my 500 shots while I'm lying in bed at night and I figured out which ones I want. I imported them in literally one second. I can now go to the camera, roll and select all of those and tossem, they're safe here. Full resolution, not re compressed. And now, if I wanted to, if all I wanted to do was now bring them back out after I've gone to my camera and thrown him away, which is what I would do in light ruined bridge, right? Choose the ones you want to keep. Select the ones that aren't flagged. Select, all toss. I've just taken all the images. They're safe, They're flagged. I check their their focus there, In here. Now, now I can simply come up here. Click this little save button, and I can save either with or without edits and keep so that workflow of shoot my images there now in my camera roll camera plus allows me to go through them full rez flag. Just the ones I'm interested in working in. Save them. They're safeguarded. Go back to the camera roll if I'm trying to free up space. That was one of our questions earlier this morning. How can I do that? I can now free to toss thes, keeping do whatever I want it it's up to me. But if I'm trying to clear up space, that's a great thing. Tossem. And then if I wanted to if they need to be back in the camera, roll for something else, then I can literally just say save without edits were saved with that. It's no, that's the other great thing about this, since these air nondestructive it always keeps my original file with him with here. So if you're using camera plus is kind of a safety net backup, you know you always have your original and any tweaks you've got in this application. So it's again. I think it's very, very elegant, and I like how they've done that. Okay, so now we are in camera Plus, and let's actually will do a tweak here. And then we will also do a similar tweak in other amps. So I'm gonna go back here and let me find one. Don't like that when we have a person in here. Let's see if I can find I don't think I need the fish. I So let's back up and find one debts. I guess we're gonna use fish high. Should have brought in some other ones will use. This is the perfect image I wanted to do. So I'm gonna come up here, and I can either edit right within this in the lower left hand corner, you can see we can edit, so I'll go ahead and head it now that I know what I want. And you very have a very limited set of options here within Kimber Plus, but they have upgraded. They have recently upgraded in the last few months to allow from multiple effects and the fading of multiple effects. So you start off with all your options are at the bottom thes air. The only five things you can do to a file within camera, plus scenes. Adjust, which is your rotation scenes is your tonal range of the image. Adjust is the orientation of the image crop is crop. Hence the term crop effects is where you're gonna do your little filtering effects and then borders are bordering effects. So that is your option. Clarity is this little feature that you've heard so much about. People just love clarity. Clarity here is like clarity in light room or adobe camera raw. It's similar. It's not the same algorithm. Nice. It's similar to structure in snap seed, which people love absolutely love structure in snap seed. It's the pup. And for landscape or a lot of things, it's doing this local area contrast a judgment adjustment. Okay, in a photo shop, this would be what I would call high pass popping when in the high pass filter with a special blend mode. Or people do this with an exaggerated on chart mask. With a radius of like 50. You can get a similar effect, but it's giving you a lot of information. A lot of bang for your buck. You'll notice. Even while I'm editing, I can still come up here and zoom in, but you can't do in snap. See, we love our staff, See? But again, there's a few things that we wish were in snaps. He'd like being able to zoom up while you're working on it. You also have auto and flash and backlit and dark and cloudy you've gotten Some of them are based upon typical camera ones. Some are based upon how you might use it in terms of, you know, orientation. They're doing both tone and a white balance. So things like, you know, portrait is gonna have a different white balance if you wanted to pull out to arrange. The problem is is that you have no controls. Once you do night, you can't say, Well, I want 75% night or whatever you're doing for night. If it's a mid tone contrast, you can't adjust it. Okay, so that is the problem. But you're seeing the different white balance. And again, in this case, we're still life will go with clarity. Like it great. We'll go now, go to crop. So let's say that I do want to do a little crop on here. Great. Thank you very much. There's a done button in the upper right. The great thing about that done button and why it's different from a lot of other ones again, snap seed is if I come back up here and ah, come up here to edit it again, I go back to Crop. Here's my original file so I can un crop after it's cropped. So from that standpoint, it's non destructive. I'm gonna jump right into effects. You've got your range. You're kind of all on instagram hips, dramatic kind of effects. You do have none as an option, so color we could spend. Some of these are actually really nice. Your magic hour is nice in this middle on the right hand side. Vibrant is gonna be nice, but it adds contrast as well as adding vibrancy so you can see what it's doing to the, um, shattered detail on the image. You've got a nice couple different black and whites. I'll just go through some of these here. This is their retro effect. So Loma Graphic seventies toy camera. You'll see. They're throwing in light licks, tailfins, hipster, different cross processing and antique ing effects. Even a nice not toe. Ansel Adams there and a special. They've got some nice ones, including things like Miniature, which is a depth of field that's automatically going to blur the background. I don't have any ability to fine tune this little tilt shift effect. I do have. You'll notice once I apply effect. I've got the ability to change its intensity. But I can't change some of these, like depth of field or tilt shift. I can't direct where it ISS, so that brings it really limited in comparison to a lot of APS that do give you absolute control over it. But I could do a little bit, you know, of a diffuse glow to it, and then I could add an effect. This is something that's come in in the last couple months so I could do something like a HDR. Now that HDR is going to do some exaggerated tone mapping. The nice thing about this new the slider on it, especially with adding the apse, is you know it's usable or forgivable, you know, at 50% at this it's flattened the image too much, so pulling in and just using a little bit of in effect is great and again before that, it was more limited. Use Continue to add whatever affects you. Like the thing that is different with the now will jump to. I love analog is in the IPad app proper each one of those effects. Not only can you add them, not only can you change the opacity much like layers, but you also have a soft edge layer mask to apply them. Has a lot of APS. I'm do so it's great That's not in the IPhone app and that ability to zoom up it full rez and link your images and choose which images you want to import is not in the IPad app. The reason why I'm not showing you the IPad app is it doesn't have the ability to zoom up before you flag mark check box those images so I don't use it for tweaking the files or bring them into something. Um, I like calling it down to a one specific set of images that I want to work with. Kimora Plus does do that automatic sinking between devices which I take it will also sink right between my IPad and my IPhone version. So what I do on the IPad on the IPhone version, which is what I'm working on now. This is my little IPhone version. Um, I believe it's gonna be there for my IPad version right right next to it. Okay, so it could be that I do want a little, you know, pinhole now is re balancing out all those effects. Now, here's a little pinhole. And again, I just want to kind of mute it and maybe do that sort of thing right there. Okay, so now the check box, you'll notice it's not done. It's not spitting me out of the edit process. It's just giving me this one right here. I now can go into Borders if I want On Borders. I've got a simple styled has been around Hollywood. They've just added recently Styled is nice. It's where I found that instant, one that I showed you from, um, the Grand Central Station. So here is that you'll notice that even here down the lower right, I've got captions. So I've got wish you were here. Have no idea the reference of that or why you'd want to be there. But there is an isil thing. It's got that texture. It's a nice little hand frame to it. And, you know, you can also go back to crop and go that cropped it to a perfect square. Muchas a Polaroid. But I could say, you know what I don't want. I want it to be, you know, not square. I wanted to be a wide Polaroid, and I still want you to do everything that I tell you to do, and it says, Okay, it'll look kind of lame, but I let you do that. So again, procedural nondestructive editing every single one of the effects is being reapplied in real time to now a new crop, including a new frame in this case, a bit Matt frame, with all that texture and everything in place that's really cool is a lot of technology going on here, and I think this is actually how most of this source stuff should be done. So let's just go back. We'll goto a true square, and, um, we'll move it over a little bit, okay? And in this case, we can even say done, and now it's back into my light table. The nice thing about that, because it's completely non destructive, I could go back and change that anyway, I want I'll give you a little shortcut. And a lot of these applications are taking advantage of this ability to have hidden features because there are so many things that are possible in terms of features to simplify an interface, it's a little bit like hidden features within light room or dough became a raw. I've got an option for save right here by hit Save. It's going to render all that. It's going to cook it kind of like light room, and it's gonna put it in my camera girl Kim role, and it's gonna toss it out of my light box here, which I don't like. I like I actually use. This light box is kind of a safety net for my images, so here's a little tip for you. Click and hold down on the save and you get more options. That's a little hidden Easter egg so I can save it and remove it. That's the default. I can save it and keep it so it keeps it in here. In other words, it's gonna render I can save it without edits and keep. So I go back to my original un cropped UNT twigged unclassified unr, Etro unframed or I can commit edits to it. And so now it's no longer continually to be edible. But now I can do some other stuff with it, which I couldn't do before. I could blur as an example the Polaroid frame because now it's cooked into it. So now if I do something like that till shift, I could actually tilt shift, something that I couldn't do before. So say without edits and keep. I will save and keep saves it to the camera. Roll cooks everything at full rez and you're good to go. Which can do here is you can't batch process this effect and hold that down and say, Would you please apply it to 50 other images? That's what we want if I come up here and do my info. One thing that's nice. As you can see, it's keeping crop tells me exactly the size of my file, what I've done, the percentages, everything that I've done to the file. It has the recipe why I can't copy and paste that recipe between images. I don't know. I'm sure it's coming, Um, but it's it's not quite there yet. Questions questions about that. You could do. You use camera. Plus, do you know if it came or places available in the enjoyed? It's not well, that's why you wouldn't be using. But you do have an IPad now. And you did just get an IPad. Speaking of which, let's just go ahead, back out and check something. So now I'm going to go back to my IPad version of it. And, um, this is my eyes. It could be I'm not seeing the exact same pictures. I was wondering if it would automatically sync. It's gonna sink if I come over here to my camera. Plus, which I'll do right now, said Hub. Not 100 menu. You can set up the my motto Sinking, he says, with integrity live I cloud lightbox sinking off. Okay, so I wanted it on. So that is for those of you. If you're looking over the shoulder, guys are looking over the shoulder will keep these next here, that ability for it to automatically do that, it's explain why that's not there. You just need to turn it on on both devices and let's again go to the menu here and go to that's on here. So because it wasn't on that one, it wouldn't have sent it here. So, um, I take it that that is going to start sinking. But let's go back here and we'll do something similar just to show you that variation on. Because I think for a lot of people, especially with soft edge ability to manipulate things, it's going to be a favorite for a lot of people. So we'll add. Photo will go to the library, will go to our camera roll, will actually to use the exact same image. Let's do this, I said. I like this as an option. I come up here, save save without edits and keep. Now I have the exact same image that only takes a second to do. So now when I go in here and go into the camera roll, there's that image. Untwist it. So I have my tweet image. Here is my untwist image, and if you're like me, you like experimenting with different APs. The fact that camera plus lets me import my image is just that I want tweak them as I want edit out, send back out the exact same file without any edits and makes it so. It's easy for me to find, so I can come up here is great even though you go one other in two different places. Yeah, I don't mind that for me. That's a really nice tip that I don't have to go. Okay. Where was the original? I just had 50 samples that looked really similar. Now, I know this image, which I may work in a different file, is exactly the same as the other one. So it again, it has some nice features to it. So we'll just do something similar in here real quick. So clarity will do that crop. It is now full resolution. So it's actually nicer toe work in the IPad app. And I'm hoping again that sinking will take place automatically and we will do. It has things like the golden mean and things like that. So you can take advantage of those sorts of cropping. But it does have some nice crop features to it. Yeah. Okay. Well, say that is exactly what I want. So scenes we have that with crops. We got our effects. We won't go through all of them. Maybe we'll do the Hollywood effects. We do have some things that are a little bit nice home movie or even the dream state, because you have this ability to change the intensity, looking down here on the bottom as well as let's say we take down the intensity. And if I don't want it on certain portions of it, you'll notice there's a little mask icon. So that mask icon there's the size of the brush. I can erase all of it and then paint in the effect. So now I'm painting in the effect just where I want it. And if it's a warming and cooling of my outside in here and I don't want it, I can change that intensity of the brush and just bring back just a little bit on the inside. So that is gonna, you know, for a lot of people, be a nice alternative to some of the a little bit more elaborate. I think it's very intuitive and how they have it here, and then again, you can add additional effects over here on the left hand side. So now I can come up here and do, um, there's my vibrant. Let's go back to a special. We can put in just a little bit of hdr if I wanted in certain areas take my HDR. It also changed the order in which they're doing it. So if I just want that in the foreground again not in the background, we'll leave that 100% would do that same thing. So the brush erase all I want to use the brush. Not the eraser will take the intensity up and again There is the size of my brush. You can change the size of the brush and the softness or feather. And now I'm painting in the HDR effect where I wanted keeping it out of the background. And that also means that if I go ahead and choose an effect that does do some excessive darkening of the file that like here, even the pinhole come up here and again do that same thing. So we'll come up here, take that down intensity. I will say in this case we want to again Ah, like painting in the effects. So you start off with the race all and painted in as opposed to use the eraser. But now I'm going to be actually take our softness up on our intensity down. Jack, would you mind if you just reiterate? Just confirm your in the pro version? I mean, as you look so similar, correct? They do look similar. Eso whether you call it pro or HD And then if they're calling it pro in the app store than Yes, I'm in the pro version of it, pro or HD, but not just irregular, not just the regular. This, I believe, is if you go on the IPad. This is the only IPAD app camera plus on the IPad. Is this right? You can still buy or sink the IPhone version of it, which I do because it has that ability toe select and zoom up. I want to zoom up before I select. So I have both of them on here. But what we're looking at now is the IPad version and its claim to fame is the fact that you have soft masks as well as multiple variable filters and the ability to do that. The painting as well. Correct. That's the soft edge, Mr Exactly. Right. Thank you. Okay. And again, we've got our borders and everything else like that that there is. They, uh, that one. My other favorite that I mentioned to you that I really like is offset and offset is nice because it actually, um allows you to have this little you can come up on it. It has the density bars, the color checkers out of registration, by the way, which is awfully nice. Your registration marks and a magenta and scion cast from a bad blanket on your offset press. It's cool. Your print geek. It's really cool. And then, of course, in your caption, you come up here and you go that you know the job. So it actually says, you know, Okay, so it lets you label it and do that and the labels. You can even come up here with the captions and have it automatically above the right. Do a date, your location, the time or whatever. So you can type in your own or automatically does that. You get the idea. It's got some cute stuff to it. So that's camera, plus both versions of it. I'd like it for doing, um, the effects and of course, obviously being able to paint on specific effects is really nice, so it's worth it for having the IPad version of it. At what point will they add that to the IPhone version? There's really no reason why, especially with the new IPhone five s. The horsepower in it is ridiculous. There's no reason why any app won't be on the IPhone except a person's choice. The processor in the IPhone is absolutely, ridiculously powerful in terms of what it could do and throw that you're going toe king camera because my question bridges the conversation from camera Plus two King camera and deals with the presets and being able to batch apply presets. So when we were looking at the recipe stack in camera plus and talking about the ability to apply it to 50 images, it occurred to me that if you had cropped your image, which I think we had at that point, and then we had a successive recipe stack, you might want to apply everything else in a batch application except the crop. And so, in our own photo at Beta, we do have the ability to save presets, but we don't have the ability yet that I think we should add it to select which part of the recipe sack you might want to apply. Can you think of other things? Perhaps besides Crop, that wouldn't necessarily be universally transferrable. And one second part of that question, if you apply presets to 50 images, what what are the risk inherent? And we're presuming they're all in the same scene, are setting in somewhat similar like conditions. But where do you run the biggest risk in image degradation or not getting the look that you want? It's a really, really good question, and I'll answer it just because it ties into my light room class. We did hear the three day class. I'm actually in, um, October next month I'm doing a three day class in adobe camera Raw because really, that's right. What we want to dio Adobe camera raw, which is the same engine, is light room are completely procedural. Nondestructive editors and both of them allow you the sinking process and there are different ways that you can tackle it. So to answer your question, um, what you would like and again, this is another teaser. As you may have noticed from the keynote at Footer Shop World, which I'm sure you all were watching is that Adobe is working on her yet to be determined shipping date and final name of something that might be a light room mobile. So if that comes into existence, possibly before the end of the year, that also was gonna be a game changer. But what you would say dancer question in terms of what you might want to see, it cannot sink. I would want, as there is in both light room in adobe camera raw the ability to choose everything because you want a preset for year than yet. You want a preset for your skin softening. If you've already made a black and white image and already has a nice vignette and you've got a preset for skin soft and you want apply it, you don't wanna have to say that. Make it a preset for, um, skin softening. That's also black and white. That also has been yet, so you could if you are isolating different things that you like. The most practical way of doing a preset is Have you determined exactly what you want for preset? That's how my presets work for light room in Adobe Camera um and certainly crop would be a great example of something that you would want to have either included or not included. Camera Plus, I mean, king camera that we're gonna show to keeps the crop as part of the preset adobe came around like him. Do not you can't actually save a crop is a preset because it says I don't know what you're gonna crop to. Also, as long as you're in a nondestructive editor. Which King camera is you will. When you apply those preset to 50 images, you will want to tweak fine tune those because there will be slight changes in contrast, brightness, tone range or whatever your likelihood that you're gonna have exactly the same tonal range in all 50 images is very unlikely. So what's a feature? Sharing synchronizing settings turns into a bug If you can't find tune, Um, I mean, it's it's okay, but if out of the 50 images 30 work in the 20 year after we dio in a sense you've made more work. You did 30% ottoman automatically. You've got 30 of them done, but you really need to be ableto make your adjustments. If you can't find Tune the preset itself. You better be able to find tune once you're done with it and keep camera lets you do that. So the main concept here is how can we start working more and more procedurally, pixel pushing images One image at a time. One effected a time which I'm afraid snaps he does is so last century. Procedural editing as opposed to pixel pushing is really how things need to be done. Everything needs to be nondestructive. You need to be able to undo everything. What you just saw in camera plus is that way I can go back and now and undo everything, including the brush strokes on the mask. Every single thing is procedural. Dobie camera works that way. Light One works that way. Even our little camera plus works that way. And the same thing will go with King camera, which will start right now.
Class Materials
bonus material with purchase
Ratings and Reviews
Phillip Ziegler
Jack is terrific and there's a lot I learned watching the videos. Of course this is a fast-changing field so some things are dated--some of the apps no longer exist--but I highly recommend this course to anyone wanting a wide and pretty in-depth orientation to the world of Iphone photo apps.
Student Work
Related Classes
Mobile Photography