Lessons
Day 1
1Day 1 Pre-Show
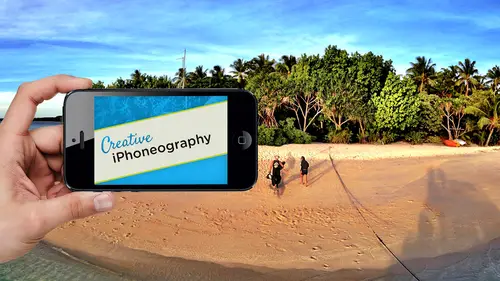
06:32 2Why iPhone Photography?
30:03 3New Possibilities
29:25 4New iPhone 5S
26:14 5Gear and Accessories
39:27 6Shoot: Panarama, Bracketting and Other Tools
28:34 7Syncing Photos
29:41Camera+ App
37:27 9KingCamera App
16:41 10Snapseed App
35:10 11Snapseed App Continued
42:01 12Day 1 Wrap-Up
04:43Day 2
13Day 2 Pre-Show
06:23 14Additional Gear Review
14:46 15Sharing and Syncing
19:32 16Embellishing Apps
49:40 17Retouching Apps
26:27 18Retouching: Panarama and HDR
32:46 19Printing Your iPhoneography
33:46 20Compositing and Graphic Design
38:13 21Thanks + Credits
01:46 22Painting Apps
34:12 23Video Editing
55:34 24Day 2 Wrap-Up
04:24Lesson Info
Retouching Apps
we left off saying, Since I have photo shop on a know photo shop, at what point do you do something in Photoshopped? Because it's better and easier than doing it on your IPhone. And typically, retouching fits into that category because no matter how good the retouching, maybe on the mobile device, we're gonna have more at our disposal in something like Photoshopped. Even now, like room like five has got a healing brush, as it were, where you can actually paint and not just use circles. So, um, but I love having access to retouch on my mobile device, because it but that almost seems like an oxymoron when I say that I'd rather use photo shop for certain things like layering and compositing. The thing with retouching, of course, is if there's some, just some little thing is not quite right. It's annoying. And it's what is the distraction that takes a bad story to a good story, A good story to a great story, because there's nothing in the frame that is gonna distract from the story being t...
old. So retouching is at the top of my list, and I put it right into that optimizing category. It's not really an enhancement. It's getting rid of something that's just messing up my picture. And because we're doing everything so spontaneously, even though we could walk over and remove that can from the beautiful field in the sunset, Oftentimes we'll just shoot. And then when we get home, we'll do retouching. Fortunately, there's some incredibly cool, groovy bitch and retouching APS available on the mobile devices. And if you know that some of these are familiar with some of these on the android, you let me know. But they're actually very, very cool. And so I thought we would start off with some of them. One of my favorites is Touch retouch, and again, we will use the, uh, let's actually back up and start from scratch in here. So let's we've got Let's see, I was gonna use that shot from Tonga. We'll use this shot. This does. It's nice because even though you're working with something like a high resolution panorama touch, retouch is, um, great at maintaining the quality of the image. It also has some very nice videos at its disposal for you. Teoh do all the different tools because it actually has quite a range at its disposal. And let me I'm going to rotate this because when we have a panorama but to that's gonna make our icons at the bottom a little bit larger. So hopefully that will show up when we do that connection, okay, and you actually can see it. It's one of those APs that does its best job to actually allow you to see true pixels. Because you're working at a pixel level at the bottom, you'll notice the little hand in the center that lets you move around. That's its default way of working. Um, the right little arrow is a commitment to whatever you're going to retouch. You'll see that in a second you do have a clone stamp or rubber stamp at your disposal in the rubber. Stamp does have different options in terms of its tip. Whether that tip have kind of a little dotted version. A soft edge, um, the clone stamp. I don't usually use too much because it's based upon the same sort of thing you doing photo shop where you select a source and a destination and paint over it. It's painting the exact same pixels as opposed to doing what is being done over here with the brush and the lasso tool, which is more of a content aware fill. It's not the same technology as adobes, but it's pretty darn nice. So, for example, if I click on the brush when I paid over an area and then clicking on the brush again, I can change the size of the brush toe. What is appropriate? So let's actually do that and make it a little bit. You do want to go outside of the offending area. You can't come up here and do multiple ones at a time, but I often will do one kind of component and then hit that play bear, play air or go and let it do one little area at a time rather than getting greedy. Because if it doesn't do a great job, then you're left at undoing it. But as you can see there, that did a pretty darn good job again, it gets you back in the hand mode so you can again zoom in on the retouching. But especially when it comes to mobile photography and probably something we're not gonna have people looking at a individual pixel level. It really, for most things is going to do a great job. And sometimes when you get to the edge a near of contrast, it gets confused because it's trying to figure out to choose the white or the black. But let's go ahead and hit play on these as well. The other thing that you have at your disposal works great for me. Awesome is matter. Fact. That's just great. You have a lasso. If it's a larger area, you can do this. You can combine the lasso with the paintbrush as we've seen, so you can combine different masking methods, and you have those at your disposal. Um, it is freaky cool. It is really almost magical. And it's in this case that line is probably part of the Pano right there, because this is a multi shot Pano. So it could be that you can even try and get rid of some Distracting seems in an image by blending them so it's not related to a retouch of the image but blending of the scenes of a panorama. So that's touch retouch, and we could spend a lot more time there, but it's just great and have that in your as I call it your bat utility belt. To whip that out and get content aware fill for your images. It can recreate a huge amount of work and do it very well. So that is touch, retouch. And if you want to fine tune your mask. You do have an eraser so you can come up here and, you know, fine. Tune that as well. Okay, so that is touch retouch. Hit your save button. It saves it out at that whatever resolution you want. And again, we've talked about sharing most of these abs now are letting you immediately take them out to another mobile sharing device. Social networking in Open Another APS. And this came in, I think, with IOS five and six started five elaborated in six, where it's going to come up here and now take advantage of this ability to go between APS. So don't forget that if you're doing it for you to immediately open it up into another app. If I was going to do a painting as well due later on, I could open it up in foolproof. Foolproof is the app that I used yesterday for that little teaser that I was talking about. Also, what you can do, um, is immediately do. Ah, back up. So this may be something that you do If it's the keeper shot. Remember, anything that you do in Dropbox is going to, um, automatically show up not only a Z accessible on your the mobile devices, but on your desktop at home, because this is going up in the cloud. Your home computer is usually considered the base for something like a cloud storage in this case, dropbox. And therefore, if you do this, it will be at your home by the time you get there. Okay, No, there is saving it. I've mentioned portrait, and there are few APS that I like for doing portrait retouching, and one of the ones that I like is called Visits Lab. Envisage Lamp pro will use that right here, and we'll rotate back. Our frame started off with the image of the world's most beautiful daughter. Fortunately, Children do not have no interest in their parents social networking or, in my case, instructional skills. So I know she'll never see this video, and therefore I can use her without asking permission and that what it just did is it just did. And maybe let's. Actually, if I start from scratch, it looks like it's that did that even quicker. But it did six different elements. Let's actually choose. Let's go back up and choose a different image or choose the same one from our gallery and we'll go into Is that photo stream for? So things like family pictures, I'll use, um, photo stream for it. So that's how quick it's doing it. So it did. Skin softening, teeth whitening. I enhance that. You know, acne, um, wrinkles in the skin. It does all sorts of things at one time, and it does it actually doing a facial recognition. So one. It's kind of bad to use this image as a sample because she's ridiculously beautiful to begin with, even with her green hair. As you can see here, Uh, but here's the original, so you can see the shine. You see just the slight little crease under the eye. You see, there's a little teen. It's actually a birthmark, not acne. But it's doing that. It's actually softening the speculum highlights throughout the file. It's actually sharpening the eyes If you look at this, I hear it's actually sharper, even though it is softening everything else throughout the scene. And it's bringing back the speculum highlights to the teeth. So it's not only doing a teeth whitening if necessary, but it's actually doing a total correction as well. It's a very elaborate, um, portrait Retouch to it, and, um so it's very cool. This is what it did. And you can say, You know what? I like what you did, but maybe it does something with the ear doesn't realize the difference between a shadow on the ear in the shadow underneath the eye. So it could be If you say you know what, I don't need the wrinkle smoothing so you can come back here. It's gonna re do the effect. You see the processing and now what it should do. You'll notice that just that slight crease underneath the eye is actually still there. Okay, Once you have done image and again, you confined tune, whatever you want to do, you can't say can I do have 30% of the skin makeup or whatever. It doesn't allow you that if you did need that control, this is where that blender comes in. You could just save it both ways and fine tune it. But it is giving you more tools. I think that any other beauty app And then once you're done here, of course, everybody is getting into the instagram hips. Dramatic effect. So you do have other things at your disposal. Some of the ones, like glamour, you know, that's not across processing is actually going to do a little diffuse glow on top of everything else. So here is our little, um, glamour effect applied to the image as well. So here is our before and after you're seeing a warming taking place to the file. Okay, It looks to me like it's also doing a little bit of a softening of the background as well as everything else. Okay, It's got a diffuse glow to the background. Um, so that is visage Labs that is pro in terms of background and all of these air gonna b'more elaborate in terms of effects. Hot sunset. You know, drama. Look, it's up to you if you want to do that. But since we are, so many of hers are doing these selfies right. What's the problem with doing a selfie? Is that my case? You are a middle age man. So by definition, that means that you have to do some tweaking to the image before you share it with the known universe. So something like Visage Lab is, I think, great to have in your bag of tricks another one that would can't possibly fit into that category that I like IHS Pig beauty can be similar will actually go back. Let's choose that same one just so you can kind of see how that's working, you're going through my my, um socked or very, very quick. You can see this is a IPhone app. Visage Lab has both a pro and non pro version. Anything that you're going to use on a regular basis. I wouldn't hesitate. Pay the money if it's too few bucks extra or if there is an IPad version. Um, here is the comparison so you can see this is doing elaborate. Almost ah, high key glamour glow to the image while maintaining the trying to maintain the sharpness of the eyes so it starts off really elaborate, but the different areas that it works on Whiten smooth anti acne and skin tone. Each one of those does have a variable slider so you can come up here and you can see that high key effect can be separated from the smooth, which we don't need anywhere near that amount. Because my beautiful is off. My daughter's awesome, the anti acne You can zoom up on it, but it's trying to find little elements. In this case again. It's not really finding any. And then skin tone is actually going to be a warming or yellowing a red towards yellow to fine tune the skin tone based upon your white balance of the scene or a person having John Dis and you want to fix that. So here is our compare, so we have taken it down several notches. It's more heavy handed even than visits labs, but it's probably cheaper. And, um, again, you can come up here and save it or share it or whatever. Okay, so those air to that are used for that I use for glamour. Um, let me see if I've got one other one. Like I said, I don't have on here. Skip bleach is another one that I have. Okay, So skip bleach is not only just for portrait's, um, we'll go ahead and use that same one here. We'll do another. She just is just too gosh darn cute. Um, and what is immediately going to do is it's going to decrease the saturation on the image and do a high key effect, so its purpose is to blow out the image so it starts off with a little higher contrast you've got it automatically will take the brightness up. Um, you confined to knit. Like I said, it automatically takes down the saturation on the image, and you can give it a little color cast. If you want. You can add, you know, a little color cast to the scene. But really what it's doing in terms of its main effect is this kind of, you know, high key diffused glow that it's doing to the file. So, um, skip bleach can be used as more of an effect, then specifically for fashion. But that's one of the nice things about fashion. If you're blowing out all the skin tone intentionally, then you've gotten rid of the biggest defender you know, to most of our situation time, so skip bleach is another one. Before that was not working. Ignore the person behind the technical break that you know what this I have to say that creative lab creativelive and everybody social. It is in such a great job. If you've seen any classes on on pornography before, you know, to have a multi camera shoot over the shoulder, live feeds of the devices and everything else it actually is working, um, about is fantastically seamless as you can get. So I think it just put it out so overall and I can go back to the IPad, which hopefully I have not change that one. In terms of from how it's working. Let's just go back to our IPad and we will play with that later. And just to let everyone know everyone. So many people were asking what those stands are. And I believe Genet, our producer, created them out of foam core the day before workshop taped them together. Yeah, if you want to do the over the shoulder, uh, this is all gaffe ing tape gaffer's tape and over foam core. So this was designed and manufactured in house. It actually has a little creative live patent in here, but it has the little sticky feet which are great, both top and bottom for it. And they're excellent. There absolutely is. You know, she's certainly not getting paid enough, but, um, So anyway, yes, they're they're excellent little stands, and they're perfect for what we're doing. And the camera that we've got remote camera on the ceiling that's doing are over the shoulder shots is actually a Knauss, um, set up a swell for them to be able to do that. So I'm very vory, um excited about what we've got going on here. Okay, A couple more things related to retouch. We did touch retouch things that come into here. Anti crop, anti crop. What is anti crop? Anti crop is is the equivalent I hate to keep using the analogies of photo shop. Um, but photo shop is the, you know is the king of the mountain. And so everything has to be kind of compared to photo shop and what it is, the equivalent is what's known as content aware scale. Basically the constant world concept that adobe originally bought, originally done by some college people for, I think, a graduate degree program. It looks what's known as high frequency information leaves that alone, takes low frequency information and allows you to actually create new information where none existed by replicating that. Let's say we've got this great shot of Tonga and we want to have it be a headline for Tonga. I want to put a headline at the top that says, Tonga, come here and enjoy the whales. So what you gonna do with this is I can actually come up here and say I want this much at its space and it creates it out of thin air and even down here because I want to do my subhead down here so that what what's the technical term for that class? It's bitch. It's just bitching. So a few things that you could use for this one if you have your proverbial instagram square shot and you have a close to square. But not quite. You could rather than crop it down because you can't crop it, cause if you crop it a little bit, you were close to the edges. And so you do want to add it up because you like the square format. It could be that you're going out to a print and what you have is, instead of it being an eight by 10 is a seven by 10. So again, the only way that you'd get that if you didn't have this issue, have to crop that seven by 10 and take down the 10. And now you're throwing away more and more information every time you crop it. So rather than having seven by 10 and then cropping you seven by 10 yen, you take it out to eight. And you actually recreate this content that happened before. The other thing that you can do with this and, um is come in and cropped the file and you're not really seeing it. But content aware scale works by both changing. Um, let's see if we can do this and again it may. It may not do, um, it may not it. It's adding this space, as you can see here, but it's not doing content or scale that photo shop could do, and that doesn't surprise me. I've always used it to extend a new element rather than condense images. But if you're familiar with content aware scaling a photo shop, it also will allow you to squish things together, maintaining the integrity of the subject matter and not just cropping. You're actually condensing so you can take a portrait, turn it into a landscape and actually not distort the central image. So this is a little bit different technology than content aware scale. But it's more of a content aware fill where it's filling in the areas that weren't done. But it's awesome. Yes, question. Yeah, if you go back to the square there were you extended both the sky and the water. Can you talk a little bit about what it's doing on the water? Makes it look so organic like it's not just copying and pasting. It's recreating it. It's actually trying to look at area texture and tone within the area, and it's recreating when you're seeing those little tiles that's actually analyzing the tiles. When we come up here and extend the sky, you'll notice the arc of the sky. It's trying to maintain that again. There are different if I take this edge over here and let it recreate this. This is where you're going to start going, Okay, But I seethe scene. That's tough because we've got a natural Been yet I actually may have added a vignette to draw the eye in. So you see that edge of the vignette? So this is this, like the touch retouch is a good example where you would do the retouch before you do your elaboration, especially if you're like me and you're doing some exaggerated effects or vignette ing or things like that. Take your original photograph your raw file as it was captured, and do your retouching to it prior to do your optimizing enhancing. Because, remember, anytime you to optimize your hands in each one of those is going to degrade the file somewhat, you're gonna have less information at the tail end. So taking advantage of the maximum amount of information, which is what you got when you press the shutter is how you should do you re touching. So I would start that, you know, before you do anything. And that may even include things like that Visits lab. Where does a little, you know, a wrinkle removal or stuff like that, so that if your image you fix the biggest problem first, If you have real tone issues, then you may want to do some tonal work on it before you retouch it, because until you pull out the detail, you don't know what you need to retouch. So again, you're always gonna make those determinations. But this program for what it is as a mobile lab, it's great, but it's brings up a really good point. If I have access to photo shop, if I can click and send this to my dropbox or used, you know, phone view, or it could do something else if I know that I want to take advantage of adobes. Fantastic content, aware scale, content aware move content were feel Phil Continent where he'll you know you've got all those content aware next year there's gonna be a content wear clothing line and content where pets they're gonna be. Anyway. It's fantastic technology, so there's no reason in the world why, when you get to that point to not do it. The cool thing is, is this still makes it a pure mobile image, but you may use the concert of what we just did there with our anti crop and then combine that with touch retouch and if you do have the seem like I found in that other Pano you confined to that scene by using touch. Retouch. Okay, good question. Another one. That kind of fits into this same equation, especially when you're talking about recreating images. This is an app called Big Big Picture. Big photo right here. And it's a fairly new one. And it brings up this context of getting images ready for print. So I wasn't sure whether I'd share it now or when we get into printing, which we're gonna do after lunch, because we just got some prints in from my photo art. Amazing company. Great great people. They head up competitions and groups as well as often printing printing services. So thank you for to them for sending some samples. But in terms of getting things ready for print, I'll just I'll mention it here and we'll go more into detail about how many pixels you need and have big Incan print. But the nice thing about this one is specifically this one feature here called resize and resize actually allows you to take. This is this is a sample image that they apply that they supply with the the document. So this is their image to begin with. So it's a 16 megapixel, but you can see the scale factor. You can actually take this up to 100 megapixel file. Okay? Which there's no reason in the known world why you would do it if you're doing that kind of heavy lifting. The problem is, as you're still under mobile device, you're still trying to maintain it. You still need to get it off the device. If you're doing that much taken into Photoshopped, especially Photoshopped, Sisi has new algorithms for uprising files that are better than they've ever been before. Typically, that's been something you've sent off to, you know, other applications. The genuine fractals is the one that's been around for a 1,000,000 years. It's now been renamed by a great software from on one software. But, uh so But this may be a situation where you're starting with a smaller file and you do want to do some sort of adjustment and taking it up 200% or something like that. And, um, resizing the image is totally fine, so if you want to do it in your device, you certainly can. Big photo is one of those applications that does it. I also mentioned Filter Storm has that built into it as an option. That seemingly out of all the things that slowed it down dramatically, is that's re sizing capability. So this if we want to, you know, resize and look at our image. It's maintained, even though this is a 200% enlargement, it's doing, you know, quite a good job of maintaining detail in hiding the pixel artifacts, right? So that is pretty darn cool. Um, with what the photo can dio, I wouldn't get too greedy on it again. We'll get into the formula for printing, and how big do you need to be based upon what media you're going to go out to?
Class Materials
bonus material with purchase
Ratings and Reviews
Phillip Ziegler
Jack is terrific and there's a lot I learned watching the videos. Of course this is a fast-changing field so some things are dated--some of the apps no longer exist--but I highly recommend this course to anyone wanting a wide and pretty in-depth orientation to the world of Iphone photo apps.
Student Work
Related Classes
Mobile Photography