Advanced Enhancing with Snapseed App
Lesson 11 from: Creative Wow: Mobile and iPhonographyJack Davis
Advanced Enhancing with Snapseed App
Lesson 11 from: Creative Wow: Mobile and iPhonographyJack Davis
Lessons
Mobile Photography Overview Part 1
28:23 2Mobile Photography Overview Part 2
33:07 3FreePreview: Gear and Accessories
26:21 4Shooting Basics: Apps and Settings
22:58 5Advanced Shooting: Panos and Exposure Bracketing
42:34 6Shooting Q and A
08:24 7Shooting: Samsung Galaxy 2
15:20 8Mobile Workflow: Retouching and Syncing
30:42Lesson Info
Advanced Enhancing with Snapseed App
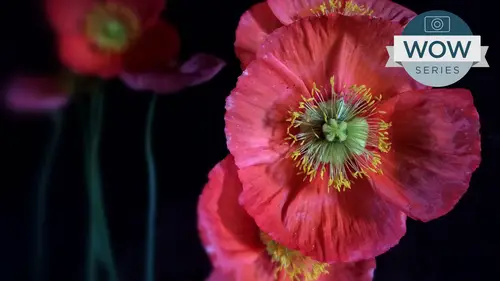
We've covered a few things, not nearly, uh, everything that is possible, my friend. That would be a week long seminar. We want to get anywhere close to dealing with mobile photography, but we do have some other basics, and we've done a number related shooting. I still want to do some tweaking of shots, and I also want to cover the sinking of shots. So I think I'll jump into tweaking because we really haven't done enough creation of the pretty pictures. So let's jump into that and will save the sinking for a little bit later. So I had mentioned that my some of my favorite go to APS amongst many, many ones for tweaking. We did a little bit in our camera plus, but, um, snap seed is one of my definite favorites. It is just really, really cool. As I mentioned, it was created by the gang at Nick Software and bought by Google and now giving away free from Google. If you're familiar with Nick Suite of APS, this is basically taking all of them and bringing down them down into a freeze dried con...
densed version of it. But before I go into snap, see it I'm actually going to do. Um, One other thing is obviously you when you go to tweak an image, you're looking at your camera roll what's traditionally been called her Kimbrel and finding an image to work on. And as I mentioned the challenges trying to figure out which of those images that I took to I want to work on and snap. See, it is one of the only APS that has a really cool feature. So I'm gonna go into my camera roll going to my albums. I've created one for this class. So if I want to work on, let's say, um, this image here that we have up on the wall, Um and you'll notice that I have a number of images that are like this and I go Well, it was at this one. Or was it this one? I think it was No, that's this one. So now I know this is set, but rather than go back in, zoom out and try and memorize. OK, it's the 4th 1 down in the third row taken, and it's got that little you know. You simply press and hold down on its a copy And the nice thing with Snap Seed is that snap Seed actually has jump back to our desktop as it were, Snapshot snaps. It has the ability to click on the plus and say Paste image. And that way, Actually, I obviously didn't press on my press and hold and say Copy, Make sure does its thing. I'm double clicking on the home screen, which is obviously bringing up all my open app so I don't have to jump all the way down back to the desktop here. Paste image. And I didn't have to memorize where the images in my camera roll. So for no other reason, that's worth the price of admission. You go through your APS, your photographs in your camera roll. Whatever album Your N find it. Press, hold copy press hold from within an email in a you know, text press hold copy. And why doesn't every single app support paste? I don't know. A few of them dio blender does, and some other ones do, but anyway, so here we are, inside of snap seat and see if this gives us a little bit better picture snap see to set has based upon these magic modules on the left hand side or if we rotate it there down at the bottom. But they actually designed on the IPad. You can tell better. They're supposed to be little packages as if you bought a box off the shelf. But guess it relates to their Siris of APS. You know that Nick has had forever. But, um, they're excellent, and what I would typically do is first, I would use that. The one thing you have to remember with snap seed is that you can't undo when you do these steps. This is not nondestructive like camera plus is or like light room is or even like Photoshopped expresses, which we're going to get to you next. This is when you do a step, it cooks it in and you move onto the next one. If you need to back out, you go back to the very first image that you did. In other words, you're reverting to saved. So think about that. In terms of your workflow, the last thing you'd want to do is do a lot of work and then crop at the last step, and then once you're done cropping, you're going Oh, I didn't like that crop. I cropped out that thing you'd have to revert to the very beginning, so I would do your crop first, make sure that it looks the way you want and then continue to edit it. And I would do it in a certain sequence, and this is the sequence that I would do. So I'm gonna come over here to straighten. And basically, how snap seed works is your using your fingertip in the main window to do whatever operation you want. And you have the ability down the bottom to either fine tune the effect or do other variations on it. So in this case, it's telling me that if I move my finger around in the window, I can straighten. I have the little arrows left and right. That'll let me rotate the file. But I'm simply gonna come over here and rotated a little bit. Now it doesn't have, um, crop and straighten, and one would like it to be able to crop. Most actually do. But this is one step, but what they've done by breaking this into multiple steps, it's very, very fast. Even if you bring in a 40 megapixel panel, Pano. It will open it very quickly. It will work on it incredibly quickly. It will save it very quickly. Um and that's how it's maximized the memory by doing it these little teeny chunks, whereas a lot of APS are gonna be a lot slower. So then we're gonna come over here to crop. It starts crapping even more than I want, so I'm gonna come over here, will crop in a little bit here, Say yes, Great. It does have an auto feature in the upper left hand corner. I'm where it's going to set both contrast and color. And this is where the main interface for snaps he'd comes in. You click in the center and go up and down, and that chooses what you'd like to correct. And then you go left and right. This is a color correction. So I can, you know, warm or cool it and go down To contrast, I can say less contrast, More contrast. So up down left right is how you move through the different options within each one of these modules. It's actually very, very elegant In the upper right hand corner. You'll always have a preview, okay? And you'll always have a check box in the lower right for Yes. Please go ahead. And the X on the lower left says no, thank you. Move out. I'm actually gonna move out because I don't want an increase contrast before. I've done other things in the file. And I'm not so fast that I want you to automatically do that for me of color and tone. So I don't use auto as a first step. I actually use auto as the last step because that little contrast that it did is setting a black and white point so I could do all this jiggery pokery. And then the last thing I wanna do is make sure, especially since I'm working on a mobile device, maybe shooting outdoors and bright light, trying to figure out on this little screen what's going on? That auto feature is really good as a last step, especially fine tuning it to make sure that you've got a full dynamic range in that image. So just keep that in the back of your mind. Auto is a great last step. Not a good first step, because everything is is in a sense, sequential and destructive. The last thing I want to do is throw away my tone before I get into fine tuning things like it's an example. Shadow detail. I increased my contrast to make it look punch here before I've pulled out my shadow detail. Well, I already threw away shadow detail by adding contrast. So you have to just like in photo shop, you have to worry about the order in which you do things as opposed to adobe camera on light room. You could do anything in any order. Those air procedural processors, they're all numeric. You could do anything in any order, and it is, well, we'll give you the exact same result as Photoshopped Express for the Shop Express, which will do next is also nondestructive while you're working in the file and you can do anything in any order. If you add contrast one place, you can take it off somewhere else. Anyway. The first thing I'm gonna do here it's overall. Looks good. I'm going. Teoh. Get my tonal range where it should be. I will not do color first. I'll always do tone before color, for the most part, and there's a couple of really cool tone capabilities built in this AP. I actually mentioned three of them here both what they call tune image, which is the yellow wrench on the side and detail, which is the sharpener on that right hand side. And then down here, drama, those little clouds, all of those air going to allow you to shape the tone in the file in some really cool ways. Actually, we continue on. Right next to drama is HDR Escape, which also will allow you to do some tone mapping of the file. But as an example, we'll start off with Image Tune because image tune, when we do our top down left right, have all has all these capabilities Ys six Brightness, which is middle tone ambience or ambiance, and that's gonna be kind of a shadow and highlight. It will both lighten shadows and dark and highlights at the same time. Very, very cool. Contrast is Mentone contrast saturation, shadow detail and then temperature or warmth. So as an example, if I had a image with Challenge Shadow, which do in a second, I could instantly come to shadow and I could pull out that shadow detail with just my shadow slider. Take this back down to zero ambience you're going to say is gonna be pulling out shadow. And it's also darkening the highlight. Okay, It's actually bringing out shadow and highlight detail, which can be excellent. Indians can be excellent, but in this case I like the drama of the darker back of the car. So coming back here, the contrast between the dark car color and the chrome on this hood ornament is what I like. Keep that mind anytime you do. HDR effects, which is our entire class tomorrow, is by definition by lightning out shattered detail and darkening highlight detail. You're flattening out the inherent contrast in the file. And for me, that's really where your composition comes in the contrast of lights and darks in your file. That's one of the reasons why a lot of people don't like HDR is. It's a very artificial look, the very illustrative look. That's how illustrators do that because we like putting detail and everywhere. That's not the world we live in. We have lights and darks, and actually, that's the main way we have. Of shaping of composition is lights and darks, so keep that in mind. I actually like that. Um, You can see I can actually put in a negative ambience number here. The default setting looking down, that numeric value is zero. So let me give you another really cool tip. Positive is gonna flatten out. Contrast negative is going to increase contrast, but it does it with a soft edged matt mask. It basically blurs a copy of the file and use that. Either add this information or subtracted. Watch what happens when I put in a negative ambience. It actually is like a diffuse glow. I don't know if you can tell. Here's our before and after, but it actually is. Is adding a glow to the file you'll notice is I'll try and pull in a portrait. This is how you can get a nice, um, softened skin tone, a diffuse glow for beauty. Portrait is using a negative ambience inside of snap seed, but you'll notice that it did dark in that background quite a bit by going that negative. The nice thing is, is I do have a shadow slider so I can get my shadow back where I'd like and give me this little diffuse glow at the same time. Okay, so you can increase contrast without losing shadow detail, because this one little box has both shadow resuscitation and in the sense kind of a contrast enhancement, in addition to contrast here. But this is doing it through this kind of soft edged mask yesterday. That's a landscape, even though it's not in the upper right hand corner, that glow in the corner. If I wanted to darken that, I've tried a snap seat and I have problems. Whole love it. It's awesome. It's got great capabilities for doing that. But that will come. That'll come. So we'll get to that very good question. Um, the last thing I could do here if I wanted to is I could take that saturation up. Okay. Like that, I could add that warmth going a little bit cooler. I could take it down or a little bit warmer. Okay, so we'll take that. So this one area here has allowed me toe increase the contrast. Okay. Which I like, as well as add this little diffuse glow as well as increased my saturation. I'm even gonna take that shadows up a little bit more. Maybe not get quite so greedy with the ambience. Okay, so so far, so good. This is just tone. I haven't worked on detail yet, so let me go ahead and say Check. Yes, now this is before After you can see it's the entire before and after I'm tapping in the middle of the screen. OK? Normally, it's the before and after is in the upper right hand corner. But when you're backed out, since that's your output option in the upper right, it's there. I'm gonna now go to two options either detail to make these edges pop or into drama. Let me do drama first, and then I'll back off and show you the more subtle, which is detailed in drama. Um, you have these options down at the bottom. You see that little star that star means that there's other options at your disposal as a default. You could just come in here and say, filter strength and give you this ability to change the intensity of the file and saturation. Those are the two things that you can change in this one setting. So that's the default setting for what they call drama. But clicking on the star. You can see I've got drama. One drama too bright, one bright to dark, one dark, too very moody that lights and the darks air kind of cool, but they're definitely special effects drama. One is the halos or subtle as it transitions between these areas of contrast. And the drama to is, you can see, is a huge amount of popping. It's similar to the clarity built in adobe camera, raw and light room, but more so the halo is larger, the sphere of influence is larger, and again, you have a saturation slider so you can see between that before after before, after a huge amount of edge contrast is brought in with drama. And it's definitely looking like that. It's it's definitely gonna bring in some artifacts with this area. It's up to you, whether you like that artifact or not, may have done it here again. These prints are looking a little bit dark from the master file. I'm not going to use drama just so I can compare and contrast it with the other one, which is known as detail. So I'm gonna hit X back, back out, go to detail the little blue pencil sharpener. And here I've got two options sharpening and structure. I mentioned before that I'm very, very cautious with any sharpening on any mobile device because even though this has got a little magnifying glass again saying, Click on it and move it up here so I can see that's not even 1 to 1. So I can't really see pixels so sharpening when I can't see the pixels. That's just kind of makes my skin itch a little bit. If you wanted to add a little bit, it's actually an excellent sharpening algorithm. Remember, Nik Sharpener Pro is is a great app. They know sharpening well, if you wanted to add, you know, 10 to 20 in here, you know you could without worrying too much about art if acting, but being very, very cautious, and for the most part, you know, unless you thought it was actually a blurred photograph. In some reason, I'm I'd be very cautious with sharpening, but structure is its form of clarity, and structure is awesome and structure. Let's hide that magnifying glass. You can see that structure is also doing a huge amount of edge detail, but it's not doing So with these large halos, it's actually doing it with a kind of like clarity inside of light room and a CR. But beautiful. I hate to say it, but I like structure better than clarity. The only other thing that I like a lot is that clarity that we saw on camera plus those air to algorithms for EJ details that are not sharpening its a broader sphere of influence and sharpening, but not as broad as that drama mode in here. So anyway, just a beautiful ability to bring in detail. That structure is on 100. I'm 100 kind of guy, and I'm you know, I'm not settled, so I'm gonna take that up, But you can see why I get addicted to that. I'm gonna go ahead and say check box on this And now here's before. After before, after it's actually a beautiful, beautiful adjustment to the images. Um, the last thing that I'll do this we've got vintage vintage can do, you know, antique ing. I won't use it on this one, but you got all these styles again. You have a little plus here, so I could go in four. Gives me a nice, little muted. I can come over here to the right gifts. Gives me a different noise and dust patterns grant ification on it. Both of these I can change. So if I come over here to, like texture, strength, I can exaggerate the texture again. I can't really see it. I can't zoom up in snap. See? Remember, that's their compromise. For speed is, you're not working with the full rez image, so it's hard to see the texture. But it's in their texture. To is the most subtle texture to tap it twice. It will continue to cycle through the texture, kind of rotated around, Um, and you could add back in a little bit of saturation to it. And you also have looking up here. You have center strength, and that's a little vignette capability. So this is the vintage effect. You have different colors. Some of them are mawr cross processing. You can see I can get some extremely different. Very nice all of these air, nice little antique ing effects and some more subtle some or extreme. But they're nice. There's there's nothing wrong with them. I like them a lot, and and if you're using. It's interesting. There used to be a desktop version of Snap Seed and I even have it as a plug in in light room. Just really cool. But they don't. Google doesn't allow that anymore, but it is built into Google, plus their photo sharing. You know, social networking. This is the built in photo editor for Google Plus and it actually lets you if you come up with a formula that you like of any one of these different modules, you can save it as a preset. You can't save all the parameters. But if you come in here and you make your own little preset, you could actually save that on the Google plus version of snap snap seat. I'm gonna back out of here cause I'm not gonna do the antique on this one. You also have. Like I said, you've got a HDR escape. This is they're pretty heavy handed. You can see here you've got nature, you've got people, which is more subtle, really fine. This is gonna pull out a lot of detail, but it's definitely is an effect. You can see how you know, look at the darks in the lower right hand corner. It pulled that all out to a middle tone grey. So as cool as that is, it's definitely an HDR effect. So I typically do not use this HDR toning that they have here. If I do, I use the one that's made for people, and it's more subtle. But again, looking in that lower right, you can see that it's pulling out. I'm shattered detail that I don't particularly care for, but and you have grunge here, which gives you 1500 as you go left to right. It gives you 1500 different grunge effects by simply sweep sweeping over. And you can change this, which is a blurry edge. You can actually move it around. You can see so you can, you know, take out of the equation by blurring and changing the size. It's what they call the center size. Here within grunge, you've got texture, strength. The style is when you sweep left and right, you get completely different styles. Very, very cool. If you're going for a grand effect, you've got a huge amount of control in this one area called grunge. But back to your question, John Photo Center is actually an amazing vignette ing tool that not only gives you the ability to blur the edge but also change the outside brightness and the inside brightness. And the thing that makes this really, really cool is one you can do a little blur, and that's kind of nice, especially if you've pulled out a lot of shadow detail. You start getting noise. You can soften that background as a default. It's a diffuse glow, but if I hit that little two circles you see at the bottom next to work, says 100 by click on that, it actually is doing a true blur. It's actually blurring the file. That settled version is a diffuse glow. You actually can see detail through it, but it is softening it, and that is nice for softening up noise in the background. So let's say that I keep that, um, softening on there to draw attention to the center of the image. I also have outer brightness so I can come over here, and usually what I'll do is I'll take it all the way down so I can see what's going on, and then I'll put it where I want it and then I'll lighten it back up. So I just put in the amount of darkness that I like. So what I'll do is I'll set the amount to 100 for outer brightness. Change the size of it by pinching you can actually you can see that can actually move that around in the files. It's not just locked into the center, so I can move it wherever I want, which is awfully nice. So if I want as an example in the landscape, I can pull it down to the bottom two. Do more darkening to the sky, having my foreground subject matter not darkened as much. Awesome what every vignette ing tool should have, Um, and then I will find, too, in the amount and then you. Also, there's also an inner brightness, so I can also do both of these where I'm darkening the outside, enlightening the inside as well as doing a little softening in one fell swoop That's a little bit darker than I need, but it's a wonderful way of doing, um, been yet ing on the file, okay, and it's called this little red here center focus. I'll give you one other tip that's really cool about center focus. When we end this, we're going to go into what they call targeted adjustment. This right here. This selective adjustment is a great way to go in, and James specific areas lightened just eyes or certain portions in the background. But that is going to use an auto masking technology that Knicks had for a long time known as U point technology. Really cool, but it will try and find a hard edge transition that same little thing here. Center focus. If you come in here and turn the blur all the way down to zero, take that out of brightness all the way to zero. You're left with inner brightness, and they don't call it in her lightness. They call it inner brightness, and that's because you're not only limited to going up and making it bright, you can also go down and make it dark. And because you can pinch it and make it small, you have now Ah, little burn bug that goes around with a perfectly smooth edge that lets you go anywhere in the file. Let's say, John, you that corner was bugging you or some other area that you wanted to just, you know, add a little darkening or a little lightning me again because I can make this. This is a nice soft edge selection. I can just put this where I want and fine tune this little a soft edge spot right where I want it. Very, very cool. Very few abs have this kind of soft edge, you know, circular adjustment to it. So I actually like that dark spot there. There's really no area in here where I see it Really benefit for that one particular. Maybe just right there. Toe begin before it after. Okay. So just remember that center focus just because it's called Focus and his made for vignette ing, it's a great dodge and burn tool. You can only do one rule bug at a time, so you have to go out and do it. But it's awesome. Um, you'll also we've got a little antique. Obviously seen here, we have Tilton shift, which does both a, um, linear and elliptical shortening of depth of field. It's actually is really nice that will typically do elliptical. It's a similar blur to what we just had, but this could be you know it can be elliptical. You can make it any ship you want. You can move it where you want. You can change that transition between that focus area. You can change the strength of it, and you can do global brightness saturation. Contrast those air not based upon the oval, their global. But in terms of being able to come in here and, you know, do an imitation of a shortened depth of field. It's actually very nice. We already did a little softening on the background, so I won't use that. Retro Lux is one mawr on top of everything else way of doing retro. So you can see these arm or extensive in terms of antique ing, because a number of these actually add things like lens flare and, um, light leak in the file. So here, and you'll notice that each style I've got these 11 13 styles here. When I click on the button, it cycles through its all the same style. But it's cycling through different light leaks, different scratches in one basic tonal adjustments. The cool thing is just like in the other portions of the app. If I can find tune any of these parameters. I click over on the other side of words says brightness click. And now this is going to cycle through that's actually cycles through all my different setting. So I click on this and then over on the right, You see where it says properties? Now it's gonna come up here, and I can change the texture. I can change the light leaks. I can use one and move it to different spots. I can, you know, fine tune it. And each one of these styles actually has different textures in different light leaks to it. So a huge number of parameters in here and you can get it just the way you like it, okay. Or just hit random until you find something that you kind of like and then fine tune it. But coming up here and change your parameters, including exaggerate the scratches or whatever you like. So that is known as retro Lux. Very, very cool almost done here, you know? So I canceled out of that. Oftentimes, if I do want to use retro Lux, I'll come up here to frames first, and I've got a number of frames, including, like Polaroid, transfer, which is what this one is, and these other with little frames. Okay, little ghosted edge. It's kind of hard to see the detail. It's, you know, do some that are more easy to see. Let's do that Polaroid transfer like that, because you can kind of see that if you hit it again, you'll notice that it's rotating that little edge right now. The Polaroid transfers on the right hand side. Now it's on the left. Now it's on the right, and each time it's also, um, rotating it up and down so it rotates. It does flips this way and this way so you could do a series of at least four shots used the same basic flavor of the frame. Each one would be slightly different. Very, very nice. And if you click on the center, guess what? You can shrink that frame. It is procedural. It will follow. Whatever the shape of your document is your crop and it lets you find Tune it very, very cool. Click here. Say Okay now, since I've got that frame, I will often use that retro Lux. If I am going to use it and, uh, come up here because now that frame kind of continues that flavor with it. I'm doing it to both so I can come over here and style strength Lightened that up. Darkness. You get the kind of effect. OK, I'm not going to use that retro looks because it's a nice photograph to begin with. Um, last thing that I may do on this particular shot is, um, black and white, Beautiful, black and white is built in the snap. See? So come over here. I'm gonna go to black and white, Black and white has there's are generic, you know, D saturation clicking on the little circle on the right hand side There. These are red filters orange, yellow and green. Completely different stories by emphasizing one of these channels over another Awesome, that green one. I kind of like I can come up here and find Tune it by going on the left hand side and doing the contrast. Okay? Changing all of these different parameters here. And I can also come up here and on the inside changed my brightness and contrast, can take down that brightness contrast and add a little film grand to it. So beautiful black and white conversion before I do that. Black and white, though. What? I probably I'm gonna hit X and save it. Save a copy. Saved a photo library. Now that saved. So you can do multiple variations on. And that's what I do. Since you can't back out if you see something you like, hit it. Save it. Now I'll go to black and white. Use that little green here. Come over here. Fine. Tune these settings here. Okay, Check box. Save it. Maybe I want to do a little c p a. Tony. I can go back into something like that. Vintage use. I like number four. I like texture to OK. And a little bit close. So there is little antique ing like that. Save that. Maybe set that dynamic range by going back to my automatic, and it's going to set that range, making sure I've got a pure black. I don't need all that much contrast. So there it is, as it was. Just add a little bit more contrast to the file. Okay? And again, save that you also have the ability to not only save it, but copy it to the clipboard. So now you can paste it into an email or paste it into a text, and you don't have to go find it in your camera roll again. So it supports both paste and copy, which is really nice. Okay. Makes sense. Not your head. Enthusiastically. Great app. Yes, it really is cool. Let me just do one other one in here just because it is so useful. And I added some images from the canyon in here, so just talking about pulling out ridiculous amounts of information. There's a challenged file. Okay, there's a challenge file if ever I saw one. This is actually a Pano. And it's so challenge because they started up looking at bright white, puffy clouds. And so I ended up with this exposure, Did a focus lock. So, um, let's go ahead in here and cancel press and I'll copy. Make sure that it copies back into snap seed, press and paste, and I'm gonna do this quicker. Since now you got this wired, I'm gonna do fix my biggest problem first. And that's gonna be my tonal range. So did that image tone go into shadow? Pull out a huge amount of information in one fell swoop. Maybe a little bit of saturation. I can see so far. That's looking good. I like that right there. That detail. If I wanted to do that, let's go into that details here. Come up. Add my structure. Huge amount of detail. Thank you very much. Come over here. Maybe I'll go right over to that center. Focus. I'll come over here, not use any of the blur, but do a little outside darkening. As I said, I like taking it to 100 then changing its size. So it's where I wanted to be. And then fine tune the amount and you'll notice that inner brightness you can also find Tune that there hit. Okay, maybe last but not least, I'll come over here to my automatic to set that dynamic range. No, I've got it. And here is my before, after before, after very, very fast. Once you get used to it and understand how you want to work on it, it gives you great options. Save it. This is again. This is probably over 20 megabyte file. And you saw how quickly that is. It opens. It saves that it manipulates it. That's why it chose to do things in the way that it does. If I wanted to One little last thing in there, that selectable just I can come over here and basically that little plus in a circle lets you come over here and choose in the area. Pinching it shows you the mask area that's gonna be changed. I'm gonna increase the brightness and go up. And now I'm doing it for just this area. So I'm doing brightness, contrast and saturation for just these greens and I can actually move it around. You'll notice as I move it around the scene, Whatever's underneath it, it's choosing that area. And here is my before after before, after little carried away with my contrast. Don't need all that brightness, Okay, But it is a hard edged selection. So just, you know, use it a little bit judiciously, okay, and then can save it. That is snap. See, it is awesome. It has so many capabilities on it. It's a go to app, a bunch of different ways, since in that image I was working on doing a lot of total control. Let's actually do one other app that I love for just doing this sort of exaggerated what's known as tone mapping of the file go back into my photography, and there's an app over here known as dynamic Light has been around for a long time. There's even a desktop version of it in the Mac app store, but funky interface, to say the least, going down the lower left hand corner. I'm going to click, and it's gonna ask me to find an image. Let's find my mobile class. Let's use another one of those landscapes would do a variation on that one, and here is what it did, and there's actually is a before and after. And then the bottom you see are so that is, does a split so that in one fell swoop, it's default setting. It did that. You'll also notice that slider in the in the middle that's supposed to look like a dial coming out. I can actually come over and exaggerate that or minimize that just by dragging that over. So there is again before, after tone mapping in one fell swoop. But there's more. You click on this little red switch in the left hand side again. This is not our typical interface you now have. This little sphere in this sphere lets you actually change how this mapping is taking place so you can really find Tune exactly how and what portions of the image are being adjust. It's like it's putting through a Grady INT map a Dodge and Burn Grady int map on the file and allowing you to do just a huge amount of tunnel work very, very quickly.
Class Materials
bonus material with purchase
bonus material with enrollment
Ratings and Reviews
SFinSC
Along with showing a large number of beautiful photographs, Jack Davis provides a useful in-depth review of gadgets to add to or use with your smart phone. He also provides a valuable survey of the most useful smart phone apps. Of necessity, Apple's iPhone 6 is the primary smart phone discussed. Trying to decide whether to buy an iPhone 6 or 6 plus, the video of Jack Davis utilizing the latest apps for photo tone mapping has pushed me to favor the Apple 6 plus.
a Creativelive Student
A very useful, inspiring class! I was prepared to leave after a few hours, but I couldn't because there was so much more that I wanted to learn. Jack Davis' depth of experience makes this a "must" course if you want to learn more about taking stunning photos with your mobile device.
a Creativelive Student
Enjoyed the course. Tons of new apps that will allow my creativity show. The iCloud sharing; where we can have a url is another new feature i learned that i will be using. Filmic pro was mentioned; but would have loved to see Jack demonstrate it. Great course I definitely would recommend it.
Student Work
Related Classes
Mobile Photography