Advanced Shooting: Panos and Exposure Bracketing
Lesson 5 from: Creative Wow: Mobile and iPhonographyJack Davis
Advanced Shooting: Panos and Exposure Bracketing
Lesson 5 from: Creative Wow: Mobile and iPhonographyJack Davis
Lessons
Mobile Photography Overview Part 1
28:23 2Mobile Photography Overview Part 2
33:07 3FreePreview: Gear and Accessories
26:21 4Shooting Basics: Apps and Settings
22:58 5Advanced Shooting: Panos and Exposure Bracketing
42:34 6Shooting Q and A
08:24 7Shooting: Samsung Galaxy 2
15:20 8Mobile Workflow: Retouching and Syncing
30:42Lesson Info
Advanced Shooting: Panos and Exposure Bracketing
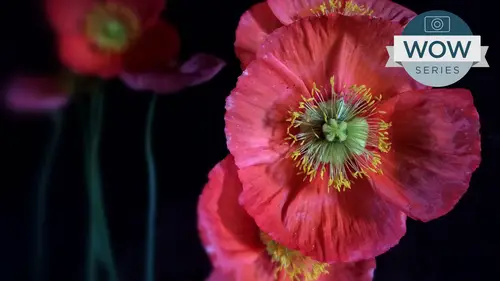
we'll jump over to burst mode just for a second. So I'm gonna come over here and I'm gonna do a little pan and, uh, watching click and hold. And really, what I should do is turn on my speaker because that is so cool. So that's that 10 frame of second scenario. And let's actually you'll also notice that it's doing a face lift facial recognition, even on something that's so small, handsome but small. And this him and it automatically found that its own automatically focusing over there. Okay, so the thing about that talking about sharpness when you're shooting in this burst mode the thing to remember, that's very cool when you come over to your camera what used to be camera roll? This has If we look in the upper left, it says that there is a burst. This is a burst Siris of images. We go to all images and we go to our albums to recently added, you can see that little matter of fact will do this zoom. If you didn't know a triple finger tap now allows you to zoom in on your interface. So no...
w I can come over here and with a triple tab. I can show you that thumbnail has that little teeny I'm ring on it. So if you're zooming in so that right there is showing you that it's a medical trick, it's also it turned on. If you don't have it turned on its available inaccessibility and your settings, that zoom tap is actually before IOS eight. You could still do that as well, but by turning it on, that's a triple finger tap and a triple finger pan and zoom. But that is showing me that that is actually a series of shots. When I click on that, you notice at the bottom there is a select option, and that shows me all the images. But we're talking about sharpness right now, and you'll notice the very bottoms if I could do this again at the very bottom. It has a little dot on some of my images, and that little dot is telling me those are the sharpest images. So zoom out. So each time that it gets to that, that's gonna be the sharpest out of the Siri's. Okay, so in this case, I'm moving in low light, extremely fast, purposely doing that But that shot, because it has a dot, is sharper than that shot. So all things being equal is those are going to the sharper woods and what you do. It's actually none of these air selected now. So if I look at this Siri's if I like, you know okay, that one will do. If you tap on, it gives you that little checker box in the lower bottom, right? And that's great. And I also want to do one of these with the flower. None of these. I was going so fast. You can see that, but we'll just say that I like that because it's a motion blur shot. So I click on it, and it saved that one. And, uh, I need and again, if you scroll down the bottom, you can scroll through them or you can swipe you swipe up here. You can actually zoom up to check for focus, but when you're done, you say, done in the upper right hand corner and they keep everything or just only keep those two favorites. So that's great. So you can shoot, burst to your heart's content and not worry about it. Filling up your camera will take advantage of it. Okay. If we come back here to our camera, the other neat thing about that burst mode which also people may not have realized going back up to the top of our interface, our little timer. So this is either a three or 12th timer for shooting them if I come up here and I do, um, well, just use three seconds. Let's say you hand your camera to somebody. You want somebody to take a series of pictures, you take a picture of us real quick. You know, we do this all the time, gonna come up here and you teleported. Just click on it. Now, when you're in selfie time remote, it takes pictures and burst mode because you don't want to trust the person who's growing your camera or the people that are in front of the camera to actually smile. So with 10 shots, you can actually have your group full around muck about smile, laugh. Throw the friend air whatever you want. And the person who's taking the picture just taps once, and no matter what they do, you get 10 shots and then you go through that and you get that same burst mode and say Select. Now I've got 10 versions of those and now, especially in this since the same shot, I could just come up here and say Just save that one. And that certainly is going to be the sharpest shot out of that 10 which is pretty darn cool that automatically instantaneously. Doesn't analysis that a pixel level for sharpness and tells me which ones are sharper set of that set. It also is looking for faces. It's also looking for smiles and faces. So if I was doing a Siris of people either a selfie or something else, it will highlight in that set the ones that have faces and the ones that have smiles on the faces. It's doing that. That's like I said, It's got a super bloody supercomputer in here, and it's using that to do stuff that would never be done. An SLR right? The SLR. They're just getting in a facial recognition right now, right? That's been around and pointing shoots for 100 years. Finally, we've got facial recognition in a you know, $10,000 Essel argument. Anyway, I digress. So back to our camera. So that is our timer is awesome. You can turn that off. It stays on. It's obviously in the upper right for sweeping around. Well, we're here. We'll just, you know, mention how close you can see that you can get a pretty darn good close shot in this scenario so we can focus on that exposed for it. And that is like I said, it's a 10 centimeter. You can see the edge of this so you can see that proximity were about 4 to 6 inches. That is sharp on the edge. The center of the little flower here is not so that's giving you the range of the closest. And, of course it goes back into the distance has actually quite a nice depth of field. The lens, by the way, on the current IPhone, is a 2.2 f stop, and, um, they continue to add to the sensitivity the number of lumens that I could gather by using software and stuff like that. The size of the pixel locations, the sensor locations is actually quite good. It's the same as it was on the five s, which was significantly better than the five. So even though it's still in eight megapixel, they continue to improve the camera and the the optics. But really, what they've done is they've used software to extend the capability. Like I said, the H D R. Is now new in terms of how it does that the low light has been improved. And, uh, again, that burst mode is still ridiculously cool. And the fact that they're adding it into things like your timer just is a really cool effect. Okay, so, um, square is a square again. It's cute, obviously, is geared toward instagram. Um, the thing to remember. Well, check this out. Now we're gonna take a shot. Go over here to our shot. There's are nice square shot we're going to edit will go into crop. And it is It's now shooting a true square. You can't un crop it in Iowa. Seven. The crop was nondestructive. It still had the full rectilinear image in there. Now it is a true square image. That shot. I don't know why it did that. Because everything else that you do inside of the editing function within the camera, we're just gonna jump ahead to that right now, since we're talking about it is nondestructive. If I come over here and say I come in here and I crop into this shot and I say that is my crop and I say, done, um, that one is the crop shot, and I could go on to another shot. If I come back to this shot and say, edit and go back to crop. It is actually uncrossed there. I can un crop a crop. So even though I did crop this, it was crop square. I cropped it even tighter. If we come over here and cancel, let's get out of a square shot because that's just I just don't like that that bugs me. So we're going to edit and crop. And now we're crop it to, you know, horizontal, that My point is here when you say done and save and you go back to your image and say, edit and crop, there is your entire image. Okay, so, um, all edits done inside the camera camera camera roll ab are nondestructive, including have become over here to our effects. And that looks like a little bug right there. So let's go, because I hadn't saved that crop yet. So we'll go in here to edit and we'll say, our effects. So if we choose, there's actually some really nice little you know, Instagram esque kind of effects here, especially the black and white, are really nice. But any of these changes, if we go ahead and say save this we say Done. Now we've got a black and white, we go cash. That's a flower. It's a full color flower. That's kind of dumb. So I come over here and say, Done, go back into my little camera will find my black and white and go, I'm ed it and go back to my effects. I can go back to my full color. I couldn't even go back to crop and uncrossed my entire image, and I've got the full frame image. Everything that you do with inside the camera roll is nondestructive, including your edits, which is very, very, very, very cool, especially what gets very cool here is, um, when we get into those effects, you kind of go well, those air kind of nice. I like some of them, but I would like to be able to doom or I wanted to fine tune it. So if you go right next to where the effects are into the little teenage knob icon that brings up like color in black and white, and this is actually a very elaborate image adjuster, if we go into black and white, I can come over here and I can actually go through the full spectrum of this image and come over here and save as many different options as I want. Here is a light ball with the light, um, sunflower in here. I love that. That's a great black and white You know what, but maybe I want a dark ball in here. Or maybe want some sort of balance between them with shading, So it's a great little black and white. I'm option here, and that's the default when you click on that. But if you click over to the right, you will see that little three lines clicking on that brings up intensity, neutral tone and grain as all adjustments within this black and white section so I can come over here into intensity and you'll notice that I've got now an intensity slider at my disposal. Go back here, go into the neutrals. I conduce an incredible amount of fine tuning, seeing the highlights on the pedal there find chewing of my black and white. Okay, so it is tone tone, really more of a contrast thing and even ad film grain to the file If I've gotten a little greedy with my processing, Okay, so that is great. If I go back into color in here now, the color setting is hasn't taken me out of black and white. So let's actually go back here and go back to a color mode. Go back into a color mode. It should be able to. It's not giving me that ability Go back out. So I'm actually gonna cancel out of that and go back into this one, and we'll edit again aside from canceling. But that's not a good scenario. We'll just go into now light, which is your overall tonality. You'll notice I can adjust the overall luminosity of my file. I can also go back into here. Exposure highlights shadows, you know, very elaborate, you know, adjustments that you can do now built right into the camera, including setting a black point, you know, which I can lighten up or take down pull out A little bit of black detail would be nice if this was actually shooting raw. Not quite at that point yet, but pretty darn cool. Okay. And again, color. We can set overall color here and then again go into the fine tuning such as a color caste. Okay, what would be the closest to the white balance as well as our overall saturation? Okay, so it's an excellent app. Speaking of which, android? Not that you android users air going. Um, guess what Google has said what they're going to do with their next incarnations of Android are going to allow Dobie, d and G the raw file format to become a native format at the android level. It will be up to the individual camera manufacturers, whether they're processor can handle raw processing. But D N G is gonna be a file format in the android operating system. And for a lot of people who are shooting with the IPhone, that may be enough to have them switch over to the android operating system. If you can shoot raw in your point and shoot, that's pretty darn cool. You know, the potential of billions of colors versus million's. So anyway, that is the built in shooting within the APP. This is also saying that anything that you do in terms of the processing of the APP is also now greatly extended. I'm gonna do one more thing in terms of editing. See if I can find a slightly, you know, better image Will will use this one here, and that is going back into edit. You'll notice right next to the little, um, knob. There's a little three dots in a circle next to it, and that is going to allow you to open up your images directly into another AB, which is kind of built into the android already that one of your previous abs can show up on that on your gallery screen. But in here you'll notice I have turned on camera. Plus, I mentioned Camera Plus has a really great clarity. But you can come over here to Mawr and these right now or my currently installed abs that would allow the camera roll to talk directly to it and what this does If we go, will you see camera, Plus the main ones Scanner Pro is nice. Forgetting that a distortion. You can actually do some perspective fixes, but we'll just use the camera. Plus because it's great. It lets you come up here, and it will jump you right over to camera plus right into the editing mode. Camera Plus has a little gallery setting, so it bypasses. Their gallery, goes right into editing. You can come up here and go right into clarity. If you want, you could go right into their lab, which allows you to do that's expand this a little bit so you could see all these things of tint and sharpen and soften. And saturation and temperature will go right to vignette because you've got this Barrett ability to We're going to dark in that, you know, background a little bit. Not that you guys aren't devastatingly good looking. We can change the um, whether it's going into the edge or not like that. It's a nice little then yet feature. We say check box again. We could do white balance and other stuff like that. We could go straight into filters again. This is Camera Plus, which has a great built in camera. It has all these different filters, so we can come up here. Maybe we'll come over here and we'll dio I love analog and go into um ah, little Diana Diana camera. Um, the nice thing is, if you go into, um, any of these abs well, say, that's nuts. Choose a different I'm filter. So say done. And what set is going to do is again it bypasses camera. Plus is normal little gallery setting where it takes you back and saves it into its own gallery. And it takes you right back into the camera app. So I'm right back where I was before, so and I can continue to move on. And if I come back here, I can say done and go into that. But back in to edit. And, um, we're back into vertical. I have access to, um, continuing to edit the file using the built in apple capabilities and done there. Okay, So, back to that we've got our shooting we've got You can just, you know, even well, you're shooting. You can go right into these different modes of those eight primary filters, including things like Noah. If you do shoot something like that and you want to shoot in that scenario. Let's go over to our photo and do it in that you can do that. Same effect were coming in to take the picture. Actually, Well, let's come over here. Click on it said the exposure by clicking on an area and continue to find Tune it so you can sink all these different options together by turning on either live, um, effects like this one. Here, take a picture. Come back over here, continue to tweak it, including edit. And I actually shot a full color shot. As I said, it's nondestructive. So even I shot it black and white. I can, after the fact, continue to find, tune it and go back to full color. So just because something may look like black and white in your camera roll, you will still have access to the color or any other particular fact. Like I said, in this case, even something like one of our special effects, you could come up here and se done. Go back, say done. Save it to, you know, instagram or whatever. Come back, edit it later, go into our effects and go back to full color, and you've got that so really nice what Apple has done to allow for completely nondestructive editing for the images within the Epp. You also have a new feature in here. Down at the bottom are little heart. We click on the heart, it just does a little flag. Consider this is kind of like a flag inside of light room. And the nice thing about that is as you go through and you go, Okay, that's a favorite. No, no, no, that was neat. And etcetera, etcetera. And I'm gonna go back to all photos, and you're now going to see that, um, favorites is its own category. So it's That's one of the challenges we have zillions of images. How do you are you able to go through them in any useful way and get back to him, Especially if you want to edit him? If you've got 50 shots, I just shot of these flowers. And now I'm trying to figure out which one am I gonna bring into, um, mobile light room or put a shop express? Um, it's hard to dig back through, especially if they're really similar. Which one did I want? Was that this one or this one I wanted to edit. So by throwing the ones that you really want to edit into favorites, they're all gonna come into this little folder here. And, of course, it's not actually doubling it because it's in favorites does not mean that it's not also in the recently shot on files. Okay, so that is again going back to our camera favorites. Um, photo Pano. We're going to a panda right now. That's actually just go ahead and do a panel. And the thing to remember about Pano, aside from the fact that it's ridiculously cool and groovy, is you should still do the primary rules for shooting Pan O's as you would on another camera. And the primary one is that you want to rotate the camera around the sensor, This case what's known as the nodal point, and, uh, you'll notice all your cameras, your big boy cameras and others are always gonna have your tripod mount over the lens. And specifically, they're usually overwrite where the sensor plane is. Um, so that nodal point is gonna be important, especially if you want to shoot a pan. Oh, that is, has the subject matter fairly close up to you like that one in the canyon of the flower Really important, Because if I shoot a Pano and I'm rotating around my torso, Okay, this view of this room is completely different from this view. Everything about this view is different in terms of vanishing point. Everything else if I rotate around the nodal point, that's just gonna resting my finger in the upper right hand corner and rotated around that they're all sharing the same vantage point. And when I do something that's close up, I'm not going to get a distortion. If I were to go like this, I'm actually stretching out the scene because I'm moving at over a wide area. So if you don't want distortion in your panoramas and you're gonna want to rotate around the nodal point and if something is close up, that distortion is gonna be obvious if you're not rotating around that nodal point, So let's go again. We've got our low light thing. Another thing about the panorama built into the camera is wherever you start the pan. Oh, it's going to set the primary exposure as a default will try and change the exposures that goes around. But that's very, very subtle. It knows it doesn't want extreme changes of exposure. So if you're looking directly into the sun by the time you go away from the sun, it's gonna be pitch black. If it's gonna expose for the sun I'm or it's gonna be totally blown out actually be light because it's gonna compensate for that, son. So, uh, the place where you start the panorama is going to set the default exposure. But I don't want that. I want a nice If this is the sunset here and I'm trying to get the entire coastline, I want to choose some middle exposure for the sun. And I don't want it to be dark, because but the time it gets to the sun, it'll be completely blown out. It's exposing for, you know, nighttime coast, not straight, son. So what do you do? Well, let's say it's the most important exposure for May is gonna be these flowers. I want to be gorgeous, so you press and hold inside the window and you can do this at any time, and you get this double blink little auto exposure, autofocus lock, and you can do this for any any seen. It becomes really pertinent when doing Pan owes. Because now I can recompose over to the left hand side knowing that those flowers, even though appointed that way, we're gonna be exposed correctly. I'm gonna start my Pano, which you can't see over my back. But when you start that Pano, I'm gonna rotate around the nodal point trying to keep it at the same angle that it was before. I don't have to press the done button because my finger is actually being used, so I don't want to do that. Anyway, if I rotate back, it automatically stops. So if you haven't been using that feature that's been around for a while, it knows as soon as you start rotating back, it stops it based on the gyroscope in here. So if we look at our Pano, here is our correctly exposed, beautifully sharp panorama. That's another thing that's great about the IPhone. Six is if you've done panels in the past because it's knows that you're moving well, you're exposing. It actually has to use a very high I s o for very fast shutter speed. They were kind of grainy and noisy in low light the panels. Now it's using their little technology to do anti noise in here. So you actually can do Panos in low light and still keep them sharp and noise free. If I do that same thing I say done. And I do that without that exposure lock and I come over here and I'll just do that quickly and we're just gonna get a bit of a difference in terms of probably both the focus on this one silicon good. You see, it's not isn't focus. I was also going faster. But doing an exposure lock on what is most important for you in a panorama is really great feature. So the thing about the panels is one. You have the, um, ability to do that automatic exposure and focus lock to. If you click on the arrow, it will switch from starting left to right to write toe left. You didn't know that If you want to shoot a vertical pano, you can come up here and click that arrow and start either top to bottom left to right so we'll do a vertical panel. Like I said, let's do that same sort of thing. We're gonna do on exposure lock recompose give you my nodal point click and a vertical Pano. Okay, which again is very nice. Remember that because that closeness, I can get about 10 centimeters. The neat thing about this that you can dio is a close up on Pano, which will do so. One you can get this kind of, you know, cool, dynamic panorama of even something quite close up to the scene. But you're also remembering you're increasing your resolution anytime you do. Pano, what was an eight megapixel? This is now probably 12 toe 20 megapixel. Remember, it'll go up to over 40 megapixels. So not only can you use Panos for grabbing a larger a larger portion of the scene, but if this scene, if we come over here and say done okay and see what I'm capturing with a regular photo will go into photo and get out of this mode here. So if that's my, um, my field of view right now, that's eight megapixel. So you kind of see that? That's from the top to the bottom. Right? So that's eight megapixel. I jump over here to Pano, Rotated this way. I'm still getting the basic same field of view. I'm gonna start over here and now, by cropping into this, I can actually get that same basic aspect ratio. But I increase the resolution so you the idea of using Panorama is to increase resolution. Not only increased field of view is cool when one reason why I'm doing that getting more resolution is that this is a horizontal vantage point by going to vertical and doing mawr of the field of view. Im actually grabbing more information. And that's how that's working. Okay, so the panorama, those features square we know it's silly. Photo is cool that has that burst mode video the default video again. This is where you could set that frame rate in your system preferences. Cool, Groovy. It is now software stabilized, dramatically improved video on the IPhone six and six plus because it's using software stabilization. Very, very good software stabilization. The IPhone six plus has an optically stabilized lens, but it does not use that for the video. It uses that for, like low light, get rid of camera, shake eso both the video on the six plus and the six are excellent, using a software stabilization on it on the fly. Very, very good. If you've seen the comparisons is a number of things online. Um, I should do a comparison with the five s, but it's excellent. The stabilization on there, even though it's software based, not optical, is great. Slo mo is where we've added some really cool features. And in this case, looking down on the lower right, you can say I can switch between 122 140 frames a second for the video. When it goes into slow motion. It is what's known as 7 20 terms of the resolution of the file, So it is not a full 10. 80 p high def. But it is 7 20 it's 240 frames per second. It's awesome. I take it you guys have done it. Um, if we if we do this, if we take her little friend here, say hello to my little friend. So I'm gonna come over here and we start. That's a little quick, but you probably know this. You've probably played around with it. We'll go back to this frame how it actually works and you'll notice up here in our, um, top of the file where we click on it, and it actually can't tell because it's full resolution. But probably by the time I let go of it. Did I not Okay. Did it go so quick? You can see in the timeline that it's That's just odd. This is what I wanted to mention is this little row at the top here is letting you determine this is normal speed. This is slow motion. So if I come over here, this should and then back it up, this should. And if I wait, it's already dropped in just a fraction of a second. So I bring back my play head and hit play. Well, we've got some interesting little gremlins I'm going on in here because, um, it's showing me in the range. Come up here and we can trim our video. It's trim it because we don't need all of that information trim. Thank you very much. Oh, okay. So that thank you. So, um, let's take this back. Thank you. I appreciate you, but I can't even see the play head. So So coming up here, I can take that slow motion change that it is, then it's something to do with the video sinking because you're not seeing. Oh, because it's video output video output. When you are using a video output on here, it's thinking you're wanting to project out to a TV set or something like that. So the playback of video, you're not even seeing my interface. So the camera over my shoulder is seeing what I'm seeing. The problem is, is that the interface is looking at the video feed. So that's why my touch controls air. Really funky. So, um and I can't camp on there to change it to change where that slow motion is in here. So I apologize for that and see if I moved back here. Whether no canceled. Maybe that will do it. No. Yeah. Okay. Good. You guys air. You've done this before? Okay, so come over here. So now you can see I can say exactly where it is, and I can click on this that your brilliant come over here until it loses, goes out of the scene. So there is dot, dot, dot So standard. Thank you very much. So over my shoulder. But it's not showing the slow motion it's It's a stupid plastic fish dropping. Couldn't you do anything more exciting? I should have had Kerry come over here and dance for me. Okay, So anyway, so that that is the slow motion. That's the basic concept. How it works is that not only are you shooting at this 240 frames a second, but you can also go in here with the slider and show where it speeds up and slows down. And, uh, let's see if I do have the video one in here because this should showcase on here videos. I won't show in here. Usually. I've got something of my daughter doing slow motion. This is okay. So, yeah, not even you. I'm glad you got. And let's see if it goes over to slow motion. This is animal abuse. Don't show this to the, uh there's slow motion. You get the hair flake 240. Krames the second on, then goes back to regular speed. My dad is gonna kill me anyway, so that is and I could set it just for the big hair flick, you know, for left thing. Um, it's really fun from that standpoint of being able to do that. That video we won't to anything else in there. Okay, back to the camera. We're almost done here. We've got our slo mo. We have a brand new time lapse, and time lapse is great because one it does with traditional time lapse that it turns the IPhone into an interval. Ometer again. There are time lapse built into a lot of the android APS and will, after the break, will pull out the android inch of some of the apse on there. But the thing that's very, very unique about the time lapse is it's shooting at a set time frame. But it doesn't give you any control If we start that time lapse right now, it's shooting time lapse, and it'll go for hours if I leave it. What frame weight? Was it shooting? What was it doing? What actually goes? Okay, you shot It basically says you probably want about a 32nd clip anything more than a 32nd clip. And so I'm gonna take if you shop for 30 minutes, I'm gonna use the frame rate that will take the 30 minutes and turn it into 30 seconds. If I shot for 10 minutes. It will do a different frame rate and turn that into 30 seconds. But she less than 30 seconds, it'll be less than 30 seconds. But it changes the video frame rate based upon the fact that it knows you probably want a fairly short clip. I mean, if you leave it on for longer, the clouds will be moving faster. Okay. And if you only have, you know, five minutes of the clouds, those five minutes will move perfectly smooth and gorgeous over that 30 seconds. It's brilliant. I've never heard of another time lapse scenario that automatically compresses or expands that time based upon the fact that you probably want a nice clip you can't set up. There are other time lapse apse where you can say I want a time lapse, and I want you to shoot for 30 minutes. And I wanted to play back at this frame rate, and it does a little calculation, but the apple one is built into it, and it basically does it automatically. So in this case, just to show you one that I did here, um, here is time lapse. And so here is one in Los Angeles, which, if the IPhone is set up, this is that the Adobe Max conference. So this is probably Owen hour or so, but it compresses it all in so that the light is you can't see there. But you're seeing the sun rise and it panning down this base of this building in downtown Los Angeles, shooting from the Bonaventure and very, very cool. And it just works and it's beautiful, and it's obviously changing the exposure throughout the entire time lapse. And it did it quite a good job of changing the exposure on the fly. So from pre sunrise to sunrise to what is a couple hours into day, so time lapse, I think they've done an excellent job of it. I'll jump over to another little thing since we're talking about time lapse, and that is this one right here, hyper laps, okay, and that one is awesome. That is the one from Instagram. And the thing about the hyper lapse time lapse feature for Instagram is that it does a motion smoothing through the entire time lapse sequence, so hyper laps as opposed to time lapse, the general term is kind of known as when the camera is moving through the scene as opposed to the scene, moving over time. So if you have your IPhone on your bicycle or something else when you're walking through a city normally a time lapse where you're shooting every you know, a few seconds very jittery, just very, it's almost nauseated. Toe watch the time lapse where somebody is carrying a camera through a town. Hyper laps. Does an amazing piece of software jiggery pokery toe blend out to do, um, frame averaging to smooth out motion during the hyper laps recording? It's amazing. It's a free app. It's gorgeous. Um, uh, see if I can find some you to, but if you just do a YouTube search for hyper laps, you'll see some excellent examples. So if you are watching the movement to our scene than the built in time, lapse is great. If you are doing a movement through a scene, hyper laps I would use is excellent. If you wanted to do a time lapse, I'm either using the traditional IPhone app or another set you've got. This will end so close to getting up. This is the motor mot are are Galileo and This is a beautifully industrial design element that actually takes it, and you can use it in concert with even something like the Olo clip. And what it does is it gives you an automated, motorized, remote controlled I'm rotating tripod. That also allows you to move not only in what would be the why access what would be a yaw, but also pitched the camera during the process. And it can move in minute increments and, you know, little micro fractions of a degree so you can actually have a panorama that not only pans around a seen what it's doing the time lapse, but actually comes up here and will zoom up so it can follow. The sun won't automatically truck to track the sun, but it will automatically do whatever you tell it to do. And this is also useful for doing a virtual conferencing because you can. Basically, there's dozens of APS that work with this. Basically, it's an open source code that allows you to control the Galileo from Moto, so there's a whole series of abs, but you could also use it to have this at home and use things like it would be the equivalent of face time and say, um, you know, Hi, Billy, how are you? Are you can look around your house, pan up and down and look through and use it as remote viewing. Very, very cool, but it specifically for time lapse. It's an awesome set up. You can also use it not controlling it in an augmented fashion. But you can put it in what a lot of people in real estate or doing put it in the center of a room on a tripod or whatever. Turn it on and depend upon the software that you're using. It'll do a three panel, 360 quick time virtual reality movie. It will do it in one row, pan it up to another rope, ended down to another road and stitch it into a complete virtual reality that you can then post onto your website. They actually host the quick time VR video, and you can navigate a full, completely 360 degree video with nobody in it, where the person can pan through the room looking up and down at the environment. So this is indispensable. If you do Panos or if you do time lapse. The motor Galileo is absolutely awesome. It comes with a little teeny adapters that obviously fit a specific phone, and I have not checked to see if they have the plastic inserts for the IPhone 66 plus, and I don't know about Android inserts, but they're little plastic ones. I'd be surprised if the most popular android phones also don't have it, but it is an open source code, and it is excellent. And like I said, there's a dozen different pieces of software that work with it. If you type in Galileo in the APP store or the play store, I bet you'll find a number of little options there.
Class Materials
bonus material with purchase
bonus material with enrollment
Ratings and Reviews
SFinSC
Along with showing a large number of beautiful photographs, Jack Davis provides a useful in-depth review of gadgets to add to or use with your smart phone. He also provides a valuable survey of the most useful smart phone apps. Of necessity, Apple's iPhone 6 is the primary smart phone discussed. Trying to decide whether to buy an iPhone 6 or 6 plus, the video of Jack Davis utilizing the latest apps for photo tone mapping has pushed me to favor the Apple 6 plus.
a Creativelive Student
A very useful, inspiring class! I was prepared to leave after a few hours, but I couldn't because there was so much more that I wanted to learn. Jack Davis' depth of experience makes this a "must" course if you want to learn more about taking stunning photos with your mobile device.
a Creativelive Student
Enjoyed the course. Tons of new apps that will allow my creativity show. The iCloud sharing; where we can have a url is another new feature i learned that i will be using. Filmic pro was mentioned; but would have loved to see Jack demonstrate it. Great course I definitely would recommend it.
Student Work
Related Classes
Mobile Photography