Lessons
Class Introduction: Crochet Hats
01:45 2Toboggan: Getting Started & Working Crown
23:45 3Hat Body
09:32 4Ear Flaps
10:34 5Braided Ties
05:19 6Pompoms: Finger Method
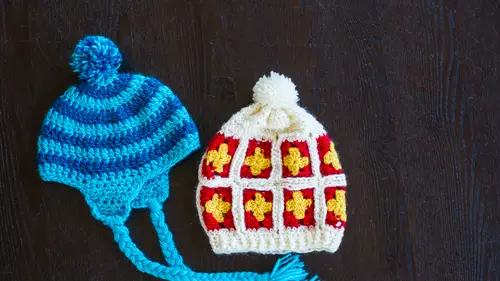
06:27 7Granny Hat: Crochet Small Granny Squares
10:54 8Sew Granny Squares Together
06:15Lesson Info
Close the Hat
All right. So we have now finished all of the rounds to create the crown of this hat, and you can see now you basically have a tube. There's a little side note. If you wanted to ditch the entire crown and just repeat the band on the bottom, you'd have a mini cowl. Same pattern, totally different accessory. But I digress. So we're done with a rose, and now we're ready to seem together are tops. So I'm a huge fan of the slouchy beanie. Um, I just like it. I think it looks cool. I think you could wear it with any outfit, but But But to do that you don't always need to do any shaping for the crown like you would normally for a hat. So I put I came up with this technique to close a hat that involves zero shaping and gives you a really nice like slouch as well. So we've joined around and I did not cut the yarn. If you did cut the yarn, do not panic. Just rejoin it with a slip stitch and we can start at the same spot. So you have your front piece and your back it's all connected. But you know...
what I'm saying? If you're laying it flat, you've got a piece in front on a piece of back and you're going Teoh, just find any area. It doesn't really matter where you're going to insert the hook under the loops of the stitch in the back piece and you're gonna yarn over and slip them together. So now you can see that you've connected that part. So now I'm going to switch it over and pinch it together. So you get kind of like we move my hook out of the way just so you could see kind of like a little star formation or flower formation. You see, if it's pinched like that, you want that? So you're gonna jab your hook through all four of the layers of fabric that you've now created urine over pool loops through. And then I just do a little signal. Cochet. So now you've created this little like, basically X, right. So you're just gonna continue this manner and this is how we're closing the entire top. So I've got this little open area. I wanted clothes. I'm gonna insert my hook in. Come in a year in over, slipped through and then do a single Cochet. You could probably slip stitch to I just like the other. Secure the extra security. I'm gonna do that for the next open gap, and I might, actually, and this is where you can kind of just free form it. I want a little more stability, so I might go back to the center and pick up that loop and then go through the loop over in the space here in over, pull through all the loops and just keep doing that and you can get to the point where it doesn't even really matter where you're doing it. Your goal is to just get rid of all the holes at the top. So concert through and just keep rotating the peace all the way around. Now for this piece, If I were doing a piece that wasn't gonna have a pom pom, I would be a little more careful about what my top looks like. But since we're gonna be adding a palm Poland, we're putting a palm on it. Um, I'm not gonna worry as much, and I'm just continuing to do this until I'm satisfied that they're satisfied that there aren't a bunch of holes. So I'm getting there. There's still this big, gaping gap, and I kind of like they're not to be this gap as well. So I'm gonna just keep going. And while I'm here, I might just go ahead and do another one. Once you've gotten the main gaps closed after that, it just becomes more been eyeing it kind of thing. This is a really cool method to if you're working with someone who feels a little intimidated by head shaping or doesn't want toe dive into like what we were doing up the for the other hat where we started the crown and really just wants to, You know, even if you weren't doing this whole Granny square hat, if you wanted to step back a little bit and just work by making a just a big rectangle and then turning that into a hat, you could absolutely do that. Seem that up the back and then use this crown method this closing method and you could make just a really super basic hat. It's kind of a fun way to just make make a shape work, right? Okay, so I think I think we're pretty good. Let's kind of pull out a little bit. I'm I'm not I don't like how that loops sticking out right there. So I'm gonna go ahead and do one last little seem up, and then I'm going, Teoh, cut my tail, Pull it through. Then I'll just bring in a large I tapestry needle. I'll string that tie through and just feed it through the top. And then from there you would just turn your hat inside out, and you could do or not if you wanted, may or may not be necessary, but either way, you want to definitely kind of weave in and out the end so that your hat doesn't come undone. And there's not really a method to this madness. You're really just kind of because you did this kind of scrunchie clothes closing. You can really just kind of weave your needle in and out and bury it where you need to, and that's it. That's the entire hat. Now, from here, we're just gonna we're gonna put a palm on it. But I'm gonna show you a method that's a little fancier than the one that we worked on for the next one. So that is up next
Class Materials
Bonus Materials with Purchase
Ratings and Reviews
Student Work
Related Classes
Crochet