An Unrefined Look in Illustrator
Lesson 18 from: Design Surface Patterns From ScratchBonnie Christine
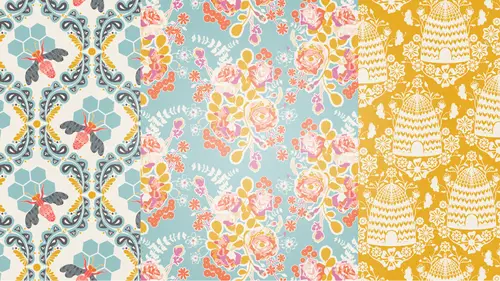
An Unrefined Look in Illustrator
Lesson 18 from: Design Surface Patterns From ScratchBonnie Christine
Lessons
Day 1
1The World of Surface Pattern Design
35:40 2Living Your Creative Dream
22:15 3Introduction to Illustrator
27:16 4Basic Tools: Pen, Text, & Blob
22:28 5Color & Function Tools
32:27 6More Tools: Rotate, Duplicate, & Replicate
19:16 7Custom Color Palettes
18:49Essential Tools for Pattern Making
41:59 9Tools for Sketching Inspiration
27:50 10Inspire & Nourish Your Creativity
34:55Day 2
11Creating Objects from Scanned Sketches
17:04 12Tracing & Coloring Sketches
30:46 13Tracing & Coloring with the Pen Tool
37:44 14Working from a Photograph w/ Live Trace
36:24 15Hand Tracing Over Photographs
31:27 16Building Pattern Tiles in Illustrator
21:13 17Adding Textures to Illustrations
28:52 18An Unrefined Look in Illustrator
26:10 19Typography & Students Homework
21:39 20Legality of Design w/ Annie Tunheim
27:33 21Trademark & Licensing w/ Annie Tunheim
27:50Day 3
22How to Design Repeating Patterns
18:52 23Complex Cluster Patterns - Part 1
27:38 24Complex Cluster Patterns - Part 2
28:35 25Getting Noticed: Portfolios & Trade Shows
39:43 26How to Drape on Pattern Mock Ups
19:07 27Fun Stuff: Desktop Backgrounds
19:42 28Fun Stuff: Gift Cards & Tags
29:05 29Fun Stuff: Clip Art & Shipping Labels
28:17 30Spoonflower: Stephen Fraser
29:04 31Uploading Patterns for Web Printing
20:29Lesson Info
An Unrefined Look in Illustrator
So when you're working directly in Illustrator, a lot of times you want that really fine tuned look for geometrics and hexagons. Sometimes you don't want that really refined look and so you need a way to be able to make something that originated in Illustrator look a little more warm, a little more hand drawn. So brushes with textures are a great way to do that. The other way to do that. If I need a polka dot or some dots to work with, I can create a perfect circle and we'll go this orange color. I can make a copy of that by holding the shift key and the option key and make lots of copies of it by duplicating it, hitting command D. This is great, but they are just a little too perfect, so one way to combat that is by using the smudge tool. It's over here under the width tool. Smudge, I believe it's called the warp tool. So grab the warp tool. The keyboard shortcut for that is shift R. And you can increase or decrease the size I believe, no you can't. It's just this one size. So the way...
this works is if you have something selected, you just start drawing in from the side and just kinda warping this around a little bit, okay? Cool. Cool? To get back to, I said this a few times, but it's one of my favorite features in Illustrator. When you need to select something else, all you have to do is hit command to get back to either the direct or the indirect arrow tool, whichever you used last. Holding down the command tool, you can select something else and as you release, it'll take you back to the tool that you were working on. So I can very quickly kinda come in here and just mess these up a little bit, which can be just really nice to give it a little less perfection. Okay, a way to get a similar look is if I, mess these around a little bit, if I have these selected, I can use the effects panel and the distort and transform. Come down to roughen. That will bring up the roughen panel and go ahead and select preview. You know what? I'm gonna exit out of here and hit command H to hide my edges so you guys can be really sure to see what I'm doing. Effect, distort and transform, roughen. So when I hit preview, that's pretty rough. It's too rough for what I want, but if I change it to smooth and then maybe play with size and amount of detail that looks really nice. It's just ever so slightly imperfect, okay? So you could do this with the blob tool, you can do it with the pen tool, but this is an easy way if you have something perfect to just mess with it a little bit and get it a little more hand drawn looking. I'll bring my edges back though and after you do something like this, it's a good idea to go ahead and expand it so that it's not carrying this live effect with it, or editable effect with it. The other great way to work is with the symbol sprayer tool. This is not something that I use a ton, but I did use it just recently for a pattern and it came in really great use. So I will take our little dots over here. Let's draw a triangle. Doesn't it really increase the size of the file? The symbol sprayer tool, when you expand everything out, it will not increase as much. It won't increase the size of your file. So the symbol sprayer tool, I believe it carries with it a bit of like a live effect too and that's when you run in to issues with file size, but I'll show you how to expand everything once you're done with it and steer clear of any crashing. Fingers crossed, y'all cross your fingers for me. So I'm just gonna kinda create an irregular triangle. I might change it a little bit with the warp tool 'cause I just, I like things not to be so perfect. So say this is my symbol. I will open the symbol sprayer tool and I think I'm gonna have to find it 'cause I don't use it very often. Guys, remember, here it is. So it's over on the left in your tools, symbol sprayer tool. So I will double click on this to bring up some panel options. Diameter is 200. You know, I think we will go ahead and use it as is and I think what I need to do is actually take my symbol and drag and drop it over to my swatches panel. That way I believe it's symbol now and when I click the symbol sprayer tool I can select the symbol. Please select a symbol from the symbols panel. I need to drag and drop that to the symbols panel. Give me just one second and let me open the symbols. Okay, so I did that just a little backwards. What I want to do is open the symbol panel and drag and drop the triangle over to the symbols panel. That will alert you that you're creating a new symbol. I will name it triangle, and it's not a movie clip, it's a graphic, and everything else is okay, so I'll click OK. Now when I select my symbol sprayer tool, I can make sure the triangle is on and as I start to do this, it's just gonna drop a lot of triangles for me at one time. So I was filling this mountain shape in with hand drawn texture that I had and this is exactly how I did it. It was triangles in one, it was little imperfect circles in another and this made my work go really fast. So there are a couple of options we can do once we have some on our paper. I am done with the symbol, the symbols menu over here so I'm just gonna X out of it. So this is great but they're kinda all layered on top of each other and they're all exactly the same in every direction so under the symbol sprayers tool we have a couple of new options. Symbol shifter, you can grab the symbol shifter and as you come back and work with your symbols, you can just see how you can move them around a little bit. So I'm just creating a little bit of space in between these and making it look not so obvious that I kind of did that S shape with my sprayer. If you come back, the next one is symbol scruncher. So this kinda brings them in to a certain point or if you, let's see. Sorry, let's see, there we go. Think I clicked on something that it didn't like. Let me do that again. So symbol scruncher tool, and you just kinda roll over it and it kinda works as a magnet to where it draws things to you. Okay, the next option is the symbol sizer. So you can make things really big, wow. So the longer you hold this down, the faster it makes them bigger so just a simple click will kind of change the size of just a few of them, okay. And I believe if you hold down the option key, it's gonna reduce the size. Okay, so you can increase the size of some, decrease the size of others by holding down the option key. We're getting there. It's looking a little more natural. If you come back to the symbol sprayer tool, the next one is the spinner tool, so this is the best way to get these not all aligned so perfectly. So as you come around, it's just gonna kind of shift these all over the place, okay? That's cool. Yeah. So we're getting a little bit of a more free flowing look. The stainer tool and screen, okay so those are the only ones that I use. They have a couple of others that will let you stain them with colors and things like that, but that gets into gradients and I just never use them in my work. So this for now is pretty good. It is, like you said, kind of this live effect so it's gonna add, kind of slow down your document a little bit, so when you're done with the symbol sprayer tool, you can expand it and then you'll have all these little objects independent of one another and not attached to this effect anymore. So what I wanna do is select object and expand. Object fill, yes. I'll ungroup this and you can see all those, sort of like what was happening with the brushes, all these little squares and we don't need that, so I believe I can get rid of them. I'm gonna select everything and expand it one more time. Sometimes you need to do that more than once and now we have all these individual shapes. So if I didn't want them all on top of each other like this, I can come in and manually do some rotating and some sizing, but the bulk of the work was done for us using the symbol sprayer tool. This is great for small objects like triangles and dots, but you can drag and drop anything over to the symbol sprayer tool, the symbol sprayer dialogue box that you want, so these big florals that we're doing or anything that you're illustrating, you can make a symbol out of, okay? Did you say you have to ungroup them before you expand them? I expanded them first and then I ungrouped them. Okay, thank you. Yes. Okay. A couple of other things I wanna show you that I do just a bunch directly from Illustrator. I showed this one yesterday, but it's so great that I just wanna make sure that everybody gets it. It's the blend tool, and I use it all the time to create artwork and also to grab colors from. So if I have a couple of shapes, I'll use a circle today and I just draw these two together or they don't have to be in a line. You can do whatever you want. I'll duplicate that by holding the option key down. If I want to see kind of what color comes between this orange and this really light pink, those are kinda in the same family, and I just can't find the perfect color, I always use the blend tool. It's over here to the left and the keyboard shortcut for that is W. So if you double click on it, the blend options come up. Smooth color is, I'll show you a couple different options so if you do smooth color and just hit OK, you'll click once on the first object that you wanna use and once on the second object that you use and this has created a smooth gradient from here to here. Now really, if I were to expand this, this is made up of who knows how many tiny little circles, so I can expand that and start pulling out circles to use. But what I would rather do is use the specified steps, so if I go back to the blend tool, I will do specified steps. Let's do 12 steps in between and I always leave that the same, and hit OK. So I click once the first object and once on the second object and that has given me 12 specified steps of what it took to get from the light color to the dark color. You can do this, I believe if I'm not mistaken, you can even do it with more than one color. So let's see how orange gets to teal. So I'm not sure on this, but I think this will work. If I go back to the blend tool and say specified steps and then I think I can click here, here, and here and it will give you all the steps it took to get from one color to the next and you could just keep going and keep going. So this can create some really cool effects if you're doing borders on things. You could just have fun with this all day long. You can make this one smaller. Does that mean that you have to document all those colors you used? What do you mean do I have to document them? If you're only allowed to use like, 15 colors, and then you did a blend? Yes. Those count as extra colors right? Correct, yeah. So I don't use this in pattern work, but what I do use it for is to find that perfect color. So if I do something like this and then select all three of these and use the blend tool. 12 steps if fine, OK, so I'll click here, and then here, and then here. It's gonna do those specified steps for color and size. So this is still kind of one of those live objects. It's carrying effect with it. I always expand everything that I do. If you haven't learned anything yet, I like to expand what I do, so it makes your document run smoother. So if I expand this guy, hit OK, then I have all these circles and so you're correct that I wouldn't necessarily use this in design work, but I what I would use it for is to find that perfect middle hue. I need to ungroup these. The perfect middle hue of the light and dark orange, okay? Or if, you know, I'm not sure how beautiful this color is right here, but if you needed something right in between this dark orange and this teal or you needed a kind of a muted teal, you can start pulling colors out that way and add them to your swatches panel. So it's just a really nice way to start playing with color. So if I wanted, say, those three colors new to add to my swatches panel, all I do is select all three of those, come over to my new color group, I'll name this blend tool. You don't have to name it. And if I select OK then I've got those colors in my swatches panel to use in my artwork. So you actually could create lots and lots of color combinations. You can absolutely, yeah. When you're doing that, how do you save those new color groups that you're setting up so that, say, you open another document two weeks from now. Yeah, let's do that. So I am just gonna get rid of this. If I wanted to save this color story just the way I have it, when you, I believe I'm correct, when you do this, everything you have over here in your swatches panel is gonna get saved so, I think it's gonna save one, two, three, four of them for me, which is totally fine. So to do that, you come out to the swatches panel fly out menu. Go to save swatch library as ASE. I will save this as blend tool. Hit OK and now if I come over to a new document and I want access to that, all I have to do is go swatches fly out menu, open swatch library, user defined, blend tool. So that pops it up in a new window and to have access to these to actually use, you just have to click on this folder to get them added. So I guess if you didn't want all of them, you could just click on the one blend tool to use in that illustration. The last thing I wanna show you is how to add a watermark to the work that you do. So this is a great tool to use when you're sharing images online, whether they be photographs or images of your pattern work. I'm gonna use a photograph today just because we haven't created any repeating patterns yet, but it's the same process and tomorrow after we've made some patterns, then I'll show you how to pop your watermark on top of that. So this is a good idea when you're sharing images online because, as we all know, as wonderful as things like Pinterest is, it's really to get your work lost out in the world if people aren't sourcing it correctly. You can have your artwork out there and it kinda gets lost and nobody knows how to find whose it is and then it gets shared and maybe copied and that kind of thing. So attaching a watermark to pretty much most everything that you share is a great idea. The trick is to make it still appealing. You don't want this diagonal, I mean, sometimes maybe you do but you wanna maybe try to avoid this big diagonal Bonnie Christine, Bonnie Christine, Bonnie Christine, Bonnie Christine because you're not really letting people see your artwork. You're also saying something pretty loud about your work, which is good. It makes it clear that you don't want people to copy, but from a blogger's perspective, I wouldn't share your work because I wouldn't put that on my blog because it's so distracting to have a giant watermark over it. So the trick is to get your information on your photo but still make it lovely enough to where people want to share your images. So like I said, I am gonna use a photograph for this. Maybe one that we were using in the last segment so. I don't know. How about this one, okay. I'm gonna copy it and I'm gonna work in a fresh document so I'm gonna select command N for a new document and name it watermark. Letter size is great, or better yet, let me give you a tip. If you're a blogger, I know that my blog column width is 570 pixels wide, so I will make this document 570 pixels wide and save this to use on my blog, so I'll hit OK. I'm just gonna copy this image here by hitting command V. So I also want this image to be 570 pixels wide, so I believe I can do that right here under transform. Right now, the width is 236 point something, so I can just change that to 570 and hit tab and that will make that image 570 pixels wide. So I think, you know, I'm not saying, I might share this picture on my blog, but just pretend like it's a picture you would definitely share on your blog and my watermark is my logo. I don't know, if you don't have a logo, you could absolutely add text, but I'm gonna grab my logo and pull in here to use for this. So I have it right here in Dropbox. It's my Bonnie Christine logo so. I'm just gonna grab it and copy and paste it over on to the document that we're working on. Command V paste it. So I'm gonna scale it down and just kind of put it down here. So this is really great for surface pattern design because, like I said, you can attach this to the work that you put out in the world. You can add little banners to it if you want. But just something that will encourage people to share it but make sure they know that it's yours. So if this was a dark background, I would do my logo white and change its opacity to 50%. So I'll just show you how to do that, but this is black and I would change the opacity to 50% and that would give a really nice, kind of white opacity to it. I'm not working, since this is a white background, so I think I'm gonna pull a color from the flower to use and to do that I have this selected, my edges are hid. I'm gonna use the eyedropper tool, so the keyboard shortcut is I and not sure what color I wanna use for this. What's to stop people from erasing your name? A good heart. Yeah, you know, we're gonna talk a little bit about this tomorrow whether to share your work or not because it's a scary thing to do that. My philosophy is I'm gonna do best that I can and if you're gonna do something like that, I just hope you can sleep well. (laughing) 'Cause I couldn't, but you can't cover all your bases and I want to share my work more than I'm afraid of somebody doing that. So if somebody does that, shame on them. They need to get in touch with you and discuss this. If there's something I really wanna blog about and the only image I can find has a watermark on it that's just not pretty or whatever, I will email the person directly, say, hey, this is what I wanna do. I wanna show your image, I wanna send traffic to you, I'm gonna credit you perfectly, I'll let you even see the blog post before it goes live, but will you let me use a different image or attach your website small to it or something like that and always they're happy to say yes, but I never ever do it without permission. I would, you know, sometimes I get artsy and kind of play with it with, kind of hide it into the illustration. Sometimes I just stick it in the bottom right hand corner and I can type in my website address. So just T for the text tool and I can say goinghometoroost, actually, a lot of times, I don't put my website like .com, I spell out going home to roost blog and then I would change the color of this to that burgundy color and change the character to something, you know, I won't take time to pick out a pretty font right now but, actually, I love Baskerville Italic. I always love that one. So something like this is great. Just something down there. I think that's still a little obtrusive. I will work on this. If I had a dark color, I would use white like I said or hide it a little bit more or even put it below the image or hide it up in the pedal somewhere. But for time's sake right now, I am gonna leave it as is and show you how to quickly save this image to actually get on your blog. All you have to do is grab the rectangle tool. You're gonna come in and draw a rectangle right over this image, perfect size. Your smart guides will help you. And I'm just gonna convert this to an artboard. So we did that a little bit already, but all you have to do is go object, artboard, and convert to artboard. I have a new artboard the same exact size as my photo and to save this, this is a funny, this is a really long, complicated keyboard shortcut but I use it so often that I memorized it. Believe it's command shift option S. Command shift option S. (laughing) If you don't wanna do command shift option S, that is under file, save for the web. Oh. Okay? So file, save for web, or command shift option S will bring you up to this panel and if you scroll, you can see our whole image here. This is a GIF. I usually say save it as a JPEG or PNG. If you save it as a PNG, you have the option to save it as either art optimized or type optimized. Just totally depends on whether it's type heavy or art heavy. I like art, usually it's art for me. Depends on what it is. And this is automatically saved at 72 DPI for the web, all you have to do is click save and name this, oh yeah, could've left that. Save it as watermark. I'll just save it to my desktop and save. So now this image is on my desktop. You can pull it up as a JPEG and upload that directly to the web to use on your blog or social media site or whatever.
Class Materials
bonus material with purchase
Ratings and Reviews
Emily Leggett
I am so glad I took the time to sit through all 3 days of this course. I have been to hour long classes that I can't wait to get out of and this one I sat in for 3 days and I am wishing it wasn't over. I take a lot of continuing education classes and am always trying to learn new things and I have to say this is by far the absolute most informative, educational, inspiring, and motivating classes I have ever taken. Bonnie Christine was an amazing teacher. She took the time to take us through all aspects of the process and even beyond showing us so many things that can be done with everything she taught us in this class. I think she did a great job with the class, was easy to follow and is someone I would love to learn from again. Great job on everything. I would recommend this class to anyone who wants to learn about surface pattern design and Illustrator. Great job to everyone involved in putting this course together!
a Creativelive Student
Awesome awesome awesome course! Thank you Bonnie! Thank you Creative Live! I have learned so much... so much great information packed together in one class. I am so glad I bought the course so I can rewatch it any time I need to.
a Creativelive Student
I'm about halfway through my first viewing of the course and I have to say, its been electrifying! There is so much quality information here, its an excellent starting point, and I do think I can start working towards a career in design now. It also makes me want to find more information and courses in the art and design area. Bonnie is such a joyful, honest and enthusiastic instructor and really, it feels like she';s hosting an amazing party for her friends. Thank you Bonnie for doing this course and thank you CreativeLive for pricing it so affordably