Fun Stuff: Clip Art & Shipping Labels
Lesson 29 from: Design Surface Patterns From ScratchBonnie Christine
Fun Stuff: Clip Art & Shipping Labels
Lesson 29 from: Design Surface Patterns From ScratchBonnie Christine
Lessons
Day 1
1The World of Surface Pattern Design
35:40 2Living Your Creative Dream
22:15 3Introduction to Illustrator
27:16 4Basic Tools: Pen, Text, & Blob
22:28 5Color & Function Tools
32:27 6More Tools: Rotate, Duplicate, & Replicate
19:16 7Custom Color Palettes
18:49Essential Tools for Pattern Making
41:59 9Tools for Sketching Inspiration
27:50 10Inspire & Nourish Your Creativity
34:55Day 2
11Creating Objects from Scanned Sketches
17:04 12Tracing & Coloring Sketches
30:46 13Tracing & Coloring with the Pen Tool
37:44 14Working from a Photograph w/ Live Trace
36:24 15Hand Tracing Over Photographs
31:27 16Building Pattern Tiles in Illustrator
21:13 17Adding Textures to Illustrations
28:52 18An Unrefined Look in Illustrator
26:10 19Typography & Students Homework
21:39 20Legality of Design w/ Annie Tunheim
27:33 21Trademark & Licensing w/ Annie Tunheim
27:50Day 3
22How to Design Repeating Patterns
18:52 23Complex Cluster Patterns - Part 1
27:38 24Complex Cluster Patterns - Part 2
28:35 25Getting Noticed: Portfolios & Trade Shows
39:43 26How to Drape on Pattern Mock Ups
19:07 27Fun Stuff: Desktop Backgrounds
19:42 28Fun Stuff: Gift Cards & Tags
29:05 29Fun Stuff: Clip Art & Shipping Labels
28:17 30Spoonflower: Stephen Fraser
29:04 31Uploading Patterns for Web Printing
20:29Lesson Info
Fun Stuff: Clip Art & Shipping Labels
This is another thing I do in my Etsy shop all the time. I design clip art. Clip art for people to use. They use it for all kinds of different reasons so you can use this on your blog, on your website, social media. You can use it in your own design work. Stick it- Scrapbooking. Oh, you can use it scrapbooking and digital scrapbooking and real scrapbooking. So I want to show you how to save digital papers and how to save digital clip art illustrations. Okay, I am done with this illustration so I'm going to close it out. Let's say this, you guys didn't really get to see this because I finished it over break. But I finished my little office print. So this is gonna be the perfect thing to use for the illustration. So I'm gonna copy this and I like to just use a fresh clean art board as we go so I'm gonna open a new art board. Command N does that for me and I will use a regular letter size document for this. Command V, paste this pattern here for me. So I don't want it a pattern right ...
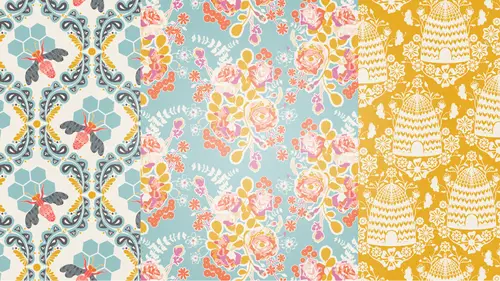
now. I want all those individual little elements to be separate so I'm gonna grab access to all those by dragging and dropping the fill to my art board. So this is huge, pretty huge. This is where, I believe, we left off in session one. I was wanting to scatter some more of these elements around so that the repeat wasn't quite as obvious. And this is my illustrated desktop take on a pattern. So what if I want to make all of these elements available as digital clip art? That's what we're gonna do right now. So they're all grouped together right now and I will un-group them. And I just have a couple of separate ones. I'm gonna delete this 'cause we don't need it anymore. I'll drag this over here and this. My washy tape, maybe my vase of flowers. I ended up, this butterfly will be good, I ended up adding some, I don't know, I have some confetti on my desk apparently. It's a party. It's a party on my desk. I have a notebook and this little vase of flowers. Anything else I'm missing? Pantone. Pantone colors. And I think that is all. So done with this now. I can delete it. One thing I like to do when I'm making an illustration set is that you need to make sure that the illustrations are large enough to where people will be able to use them for most any application. So I like to blow 'em up pretty big. I don't have a set number for that but let's say 500 to 1,000 pixels either high or wide so that really this is a high quality piece of clip art that people will easily be able to use on the web. So I will just start making these bigger. Let me decide. You can either do it now or later. Do we want to do it now or later? I'm gonna show you how to do it later. So I'm gonna leave 'em the size that they are. And what I need to do is get them each on their own individual art boards. So to do that I'm just gonna cover them up and draw a box over the top of them. So now would also be the time if they're at an angle and they're not at an angle, now's the time to change that. So make that a little bigger and just draw a box right on top of it. Quick trick that I learned as well is that I'm gonna use the select same fill color feature to grab all these boxes and change them in the art boards. So I wanna use a color I haven't used anywhere else on my art board. So I haven't used this really bright purple color. So I'm gonna use that to draw my boxes with. This little thing I can do this with. We'll just draw a little box over it. My washy tape turned out to be pretty cute, I think. Purple, the butterfly's purple. My little paintbrush, made a mess on my desk. Just gonna keep covering these up. This is also the time to change colors if you need to change colors for any reason. And I'm not entirely happy with, there's not enough contrast between this teal and this green so I'm gonna come in here and just change the color of this vase. Even that is kinda pretty but let's do something like, let's see, that's the same color I had, clearly it's my favorite. We'll do yellow. Yellow's fine, okay. No. So I'll keep drawing over this guy as well. And then my Pantone color. Little book. I think that's everything. And, oops, I left off this little edge right there so, that looks better. I know that I'm not gonna need the art board that they're on right now. So I can come and delete that in second. I'm just gonna select one purple background object. I'm sorry, select same fill color. And I'm gonna turn all these into art boards by coming to object, art boards and convert to art boards. Like I said, I don't need this back art board and it's gonna make things a little difficult to, it's working fine now, to get from one art board to the next. So I'll leave it. I seems to be fine. If you want to delete that all you have to do is drag and drop it to the trash in your art boards panel. So to save this as a piece of illustration for sale or whatever, all you have to do is save it for the web by that long keyboard shortcut which is, command shift option S. And here it is. So the key to clip art is a transparent background and all you have to do is click transparency under the PNG-24 option and save for web. So this is what I was talking about a little earlier, we could have expanded this and made it really big in our document. If you don't wanna do that and end up sizing it down or having these big objects in your document, you can increase the size right here, image size. So say I want the width of this to be 500 pixels wide. It's gonna enlarge that for me here. And because we're working in vectors it's not gonna lose any of it's integrity as an illustration. And I can save this. I'm gonna create a new folder called clip art. And I'll just save this as one. One. So, I might not do it to all these but we'll just roll right through and keep going. I'll save them all at a width of 500. And save that as two. And I'll show you in just a second what this looks like. Three. Oh, I think I, command shift option S. Save for web. We'll do width as 500. Save, that can be three. Do this one, I'm hitting my keyboard shortcut incorrectly when that happens. Width of, let's make this one a little bigger. Let's do the width of 1,000. Since it's such a big illustration. And you can kinda see what that looks like. So I'll save that as four. So I'm not gonna go through the rest but you would just do this for all the rest. And what that does is now when you bring that back into Illustrator, let me see if I have a photograph somewhere I can show this with. Photos, okay, if I have a photograph, I was using this one yesterday, in fact, this is the same photograph I got the illustration from. I'm gonna scale it down. I have this folder on my desktop now. This is where I just saved all those PNGs. Oops, I can grab this. Drag and drop it to my Illustrator document and you can see that it has a transparent background now. It is not a vector. It's not editable. It's not an editable illustration. It is a PNG which is sort of the same idea as a JPEG. But it has a transparent background. So this is great for laying on top of photos. If you're using it on a blog that doesn't have a white background. Anytime that you need to get rid of that white background and have a transparent background, this is how you do it. This is also great, I'll show you one more thing. Also great for when you want to save something with a transparency. So if I save this butterfly, change the transparency to say 50% or maybe 75%. Then I'll hit command shift option S. Command shift option S. As long as transparency is selected then that's gonna save this at 50 or 75%. So let me increase the size a little bit. And I'll hit save. I'll save number five. And then I think I probably still have this open, yeah. I'll just drag and drop that to my Illustrator document. And you can see now that it has saved the transparency of that. This trick comes, it's really, really nice for when you're working on the web or in graphics for things like that. I can expand on this idea just a little bit for another minute to really show you how you would package this to sell. So I'm gonna delete all these art boards. I don't need but one large one. So that is, I know that's two through 10, 'cause number one is what I started with. So what I do is place all my illustrations on an art document, just like this. I just try to arrange them to where everything can be seen that's gonna be included in this set of illustrations. So I'll bring this over here. And so a lot of times I wanna name it. So I can just grab the text tool by hitting T and name this maybe, Artful Desk. I'll just grab my text and using the scale increase the font size and I want it on two lines so I'll just hop back in here and put it on two lines. Now if I want it to be centered, all I've got to do is align it to center. Change it's color maybe and it's font. Something like, where am I? Something like this will be fine. I'd probably play with this a little bit more but if you are say setting up an Etsy listing, this would be a great image to start your listing with. So I would just save this for the web. We don't need transparency for this. In fact, we can just use a JPEG. So I would do a JPEG high. It's still, quality is only set to 60% which is gonna make it pretty pixelated if it gets large. So I like to take that up to at least 90%. Art optimized is perfect and I'll save this as Artful Desk. So it's in the same folder and that way it gives you a really nice image to start your listing with. An then to package these together, I would select all of them that you've saved. Select all of 'em in your folder. Right click and, let me make sure I didn't lose that, right click and compress the five items in order to make a zip file. So you can double click on the zip file to name that clip art set. And that zip file is what you're gonna be uploading to your Etsy listing rather than the bunch of individual illustrations. The other thing that's really nice to accompany these clip art listings is something like a digital paper. So the perfect thing to go along with this would be the repeating pattern that we pulled all these elements from. So to do that, I'll just drop an eight and a half by 11 inch size of paper. I'm gonna turn it into an art board but I know that I'm gonna need the exact same box on top of it to fill a pattern with so I'm just gonna go ahead and make a copy now and make an art board out of that one so I don't have to redraw. Because command C and command F to make a copy is really easy. I'm gonna object, art boards, convert to art boards. So now that's an art board. It also has a rectangle in it. And I believe our pattern is right here. I didn't have it selected. I believe that's our pattern. So if you envision this as a piece of eight and a half by 11 inch paper you can decide what might be nice for a scrapbooking or something like that. What kind of size would be nice for them. So I think I need to scale it down some. So I wanna just make sure it's selected. Right click and scale it down. Click off of transform objects and scale this down by maybe 50% or if you go up a little bit they won't be able to tell what the repeat is. And then you can just save this document as a PDF. So I would file, save as, repeating, let's do Digital Paper, PDF. So you also have the option to use art boards down here or a range of art boards. I know that I don't want this to be the digital paper, just this one, so I can say range from art board two to two and hit save on that. So I'll do high-quality print. And let's just go ahead and say view PDF after saving, so I don't have to open it for us and hit save PDF. So this is what you get and I also, this is another great thing to sell people. Use these as digital papers or as printed papers. You can also use this for wrapping paper for small projects or cut it up and use in your craft projects and things like that. I think I'm gonna show you how to make these shipping labels that we looked at on the first day. I'm just gonna open these shipping labels up. They're just using the patterns that- I'll just use the patterns we created. Which is perfect 'cause I have four and they are printed on white sticker paper, cut out along the edges and it is such a nice way to send gifts. And if you put your information at the very bottom, you can't see it, but it has my web address. So this is a great way to get your artwork out in the world. Send lots of packages and make sure that it's covered in your patterns. And you never know who is gonna be handling your package. So you want to make sure they wanna know how to find you. So we'll hop right back into Illustrator. And I'll show you how to do that. I'll open up a new document. Letter size is great. This is gonna be for print so I wanna make sure I'm in CMYK. These, and you know what, I believe I wanna have my, I want this to be in landscape instead of portrait so I'm gonna redo that. And you can change your orientation to landscape by this little icon right here. So landscape will give us this kind of document which is exactly what I wanted. I'll just draw four rectangles. And a quick way to do this, I'm gonna fill it with black. Quick way to do this is, actually, I got pretty close, didn't I? But if you didn't get pretty close you can just draw four really quickly even if they're to big or to small and just select all of them and scale them simultaneously from one corner. So with the scale tool I'll drop a marquee there and you can scale all of them together. And so I wanna make mine about this size. Okay, so what I need to do it grab the patterns we've been working on. I have all four of them right here in this document. So I'll select all four and copy and past them over to the new document. And using that eyedropper tool, I will just quickly fill these squares with our pattern. I lost my eyedropper tool, right there. And I'm done with this so I can delete them. These are, I think, the scale on that one's fine but these are way to small. I can't really tell what's going on. So I'm gonna select all three of those and increase the scale. Pretty significantly, don't wanna transform the object. So let's see what 300 looks like. I think that's better. So in order to make these out- You know what else I did on here, which is nice, is that I rounded the edges of all these. So let me show you how to round the edges. I could have done that from the beginning. You can also do that really easily in Creative Cloud, if you're working in Creative Cloud. But if you already drew a rectangle then you can just select all four of these and just apply an effect. I believe stylize, round corners. And that will bring up this dialogue box. You can hit preview to see. Those are just barely rounded so let's take this up to say 50. Or maybe something like 35 and hit okay. I've said this so many times but this is an effect so we need to expand it. So I will go tot object, expand appearance. Now we have our rounded edges. So I wanna come in here and add some circles so that we can write an address to it. Circle, I use a circle on a couple and a rectangle on the others so we'll start with a circle. Just start drawing using your shift key to keep that in line. And it's filled with pattern right now. And I wanna fill it. I'm gonna bring my color palate over. And fill the circle with just the off white color. But I might add a border to it. Maybe the orange. I'm sorry, X toggles between those. And maybe add an orange border. You can increase the weight right here on your strokes panel. And I'll bring that down right there. I'll do the same thing for this guy down here. And because I have my smart grid on, it automatically finds the center for me. It kinda snaps to it. It feels almost magnetic when you're working with it. For these two I want to add a rounded edged rectangle for those. So the other way to do that is just come into the rectangle tool fly out menu and grab the rounded rectangle tool. They have updated this in Creative Cloud, so if you're using that, you'll be doing it a little differently but for all the rest of us, we'll be using this feature. You can change the curvature of your corners by using the up and down keys on your keyboard. So I think that looks pretty close to the same. And I'm just gonna drag and drop this over here so I don't have to do it again. So just to make sure these are all even, I'm gonna use the align tools so I'll grab both of those. And under align, I wanna make sure that they're aligned vertically and horizontally. And I'm just gonna do this to all of 'em just to ensure, those were perfect, just to ensure that they're all lined up correctly. So I'm gonna come in and start adding just a little bit of text. I have already drawn this circle and it's exactly what I need so I'm just gonna steal it and use it again. So select it, grab the scale tool by hitting S on my keyboard and just hold the shift key down to bring it down to about right there. I'm gonna make a copy of it by hitting option. And I want, I'm basically creating a path to type on. So we have done this a couple of times. I'm gonna grab the scissors tool to cut this circle in half. We could have also drawn this line using the pen tool but it would've been pretty hard to get exactly the right curvature to match my circle so why not use the circle. To type on a path, you just select T for the type tool and as soon as you get into this path you'll see that it changes to that curved line. And I like to say, kindly delivered to you. I think that's kind of a vintage notion that is really sweet. So I want this to be centered. So I'll select all of that and make sure that it's aligned. The paragraph is aligned to the center. And hide my edges because text is one of the things that makes it, has that black highlight over it, makes it really hard to see. So the other thing I want to do is change the font and I see that two of my letters are capped right there but it's okay 'cause I'm gonna cap them all. So I'm gonna change this to quicksand, bold and turn everything into caps. And I'll also increase the size here. Okay, I'll change the font to match our document here. That's the stroke, oops, tellin' you. You wanna make sure to change the fill. And I'll change it to that brown color. So I don't have to do that again. I can come right down here and copy and paste that here. Range and bring it to the front so we can see it. I'll do the same, add the same text here. Kindly deliver to: We'll drop that right in the middle. Give that color and I'll drop that right over here too. So the last thing I wanna so is just add some little dotted lines and I haven't showed you this yet so this'll be nice. If you wanna add some lines you can grab the line segment tool. The keyboard shortcut for that is, forward slash. So I'll just come in here and start drawing. So to keep this a perfectly horizontal line you just need to hold down the shift key. I'll add a weight to it. Maybe this teal color and I want this line to be dashed so Illustrator makes that really easy. All you have to select is dashed line. Then you can change the dash and the gap, depending on what look you're going for. So if I want this to be a little different or a little closer together, something like that, or maybe a little further apart, you can do that. So I just wanna make a couple of these. So we know how to do that, shift, option, copies it. And command D duplicates those all the way down. And I can grab this one and bring it in a little bit using the scale tool. Okay, so I'll grab all of those that I just did. Oops, group them together. And zoom out and add them to this one over here. And then I can quickly add a line up here and do the same thing. This time, it's gonna remember what I did last. So I'll just quickly make a duplicate of those. This makes, I cannot tell you how much I love the duplicate command, it makes projects like this super easy. And if you're ever adding lines to stationary or a card or something the duplicate tool just makes easy spacing or perfect spacing really easy. The last thing I wanna do is just add my website. Goinghometoroost.com Just in case anybody comes across this who wants to know who I am. I'm gonna do this just regular so it's not so light. I'll decrease the size there and I'm just gonna sneak it in right here at the bottom. So if you have a website and these are your patterns put your logo, put your website, something like that.
Class Materials
bonus material with purchase
Ratings and Reviews
Emily Leggett
I am so glad I took the time to sit through all 3 days of this course. I have been to hour long classes that I can't wait to get out of and this one I sat in for 3 days and I am wishing it wasn't over. I take a lot of continuing education classes and am always trying to learn new things and I have to say this is by far the absolute most informative, educational, inspiring, and motivating classes I have ever taken. Bonnie Christine was an amazing teacher. She took the time to take us through all aspects of the process and even beyond showing us so many things that can be done with everything she taught us in this class. I think she did a great job with the class, was easy to follow and is someone I would love to learn from again. Great job on everything. I would recommend this class to anyone who wants to learn about surface pattern design and Illustrator. Great job to everyone involved in putting this course together!
a Creativelive Student
Awesome awesome awesome course! Thank you Bonnie! Thank you Creative Live! I have learned so much... so much great information packed together in one class. I am so glad I bought the course so I can rewatch it any time I need to.
a Creativelive Student
I'm about halfway through my first viewing of the course and I have to say, its been electrifying! There is so much quality information here, its an excellent starting point, and I do think I can start working towards a career in design now. It also makes me want to find more information and courses in the art and design area. Bonnie is such a joyful, honest and enthusiastic instructor and really, it feels like she';s hosting an amazing party for her friends. Thank you Bonnie for doing this course and thank you CreativeLive for pricing it so affordably