Lesson Info
5. Working with Design Elements
Lessons
Lesson Info
Working with Design Elements
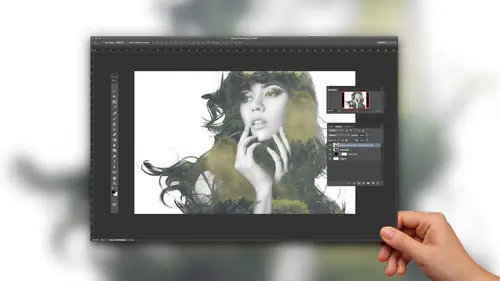
So now that you've seen how you can take, um, an element like a brush splatter, right? So that the design element when you're designing stuff like if you got the job to design some album cover, right? And maybe the album was called splatter. You were like, I know exactly what to do for that. Uh, you would, you know, probably start researching like, Well, what does that mean? How do I want to go? Where am I gonna go with this? You might start looking for Slattery type design elements that you could incorporate into your design and you might find great stuff. You probably will, because the Internet, there's so much amazing this out there. But maybe you end up wanting to make your own. It's just depends on what you're looking for. But that's a divine element. So there's a whole world of design elements out there. Brush easy, have a lot of free ones. There's a fight that I really love called creative market that has great, high quality stuff that's totally affordable. So people create beau...
tiful pieces and they sell them on creative market on. You can buy things for, like, $3 or you can buy things for $ or, you know it runs the gamut, but there's a lot of great stuff out there, and then you can download it and, you know, you might be downloading brushes. It might be custom shapes. It might be layered PSD file. That could be anything. It could be textured files that could be font, all kinds of things. And they're all design elements that you can use when you're building a design piece in photo shop. So this is a look at some water color redesign elements on. Then I went ahead and made some for you because I thought, Well, maybe you just need a little freebie. Let's take a peek here. There's our I'm gonna close. Some of my five million open images will keep that one in case we need it again. All right, so I'm made some doodle for people. Um, and you confined doodles. You confined. You know, hand drawn elements is like a huge crave. There is a whole Pinterest boards devoted to hand drawing and hand lettering and doodling. And all of that. Yeah. In fact, we have lots of classes here on created by about the same exactly, because it's really awesome, and it's a very hot thing right now, and I don't pretend to be the world's gift when it comes to doodling. But this is what all of my homework looked like. Engineer and I thought, I'm gonna get some use out of all those doodles after all these years. So I doodled doodled it up for you on. Then I just digitized it. So that meant that I just scanned it. And honestly, you can scan it with your phone if you have. You know, like I have a scanning app. I forget what it's called. Probably like quick scan or even I don't know, some scanning app so you can basically take a photo, but you can do it with your phone and bring it into photo shop and then just remove the background or whatever on that would work really great, especially with Leinart like this. I also busted out some water color for everybody and made these design elements, and I'll show you how you might use these. But I made these for people to and this I also tried to scan with my phone, but of course the water in the water color warped the paper a little bit. So I was getting shadow in my scan, my phone skin. So I ended up having to throw this one on a flat bed, so you compress it and get a good scan of it. But anyway, the point is, it's really simple. And you don't have to be Picasso are, you know, amazingly talented to pull this off. Although I will say once you try making your own, you will so appreciate the people who are really good at this. So I don't pretend to be those people. I aspired to be those people, but I gave you my care Rivers in so you can enjoy its Not too terrible, I don't think. But I'll show you how you might how you might play with this. So, uh, let's make a whole new graphic from scratch, Okay? Not everyone realizes you can do that in photo shot, but you can. So instead of going to file open, we're gonna goto file new and let's make something that's what's the 12. by 7 20 will make a nice like screen size Ah, document. So just blank document like this and we're going to drag in some elements from this doodle here. So let's grab the move tool. Now, I separated all of these into separate layers for you, for your convenience. So you don't have to, like, select this thing and then drag it so every layer I don't know what active right now. Oh, these little exit. Okay, So every element is I didn't label them because I didn't know what to call them. And I figured whatever I called them, you wouldn't know what I was referring to, anyway. So? So I didn't name the layers. But here's the trick for you. When you have the move tool selected, you can always turn on auto Select. But I that makes me bonkers. I can't do it. So instead, what you can do is if you hold down command when you click on something, it will auto select that layer so you don't have to, like, go through here and try to guess that the of layer 33 just Commander control. Click with the move tool on it and it'll select it. So now I've got it here, so I'll drag that over into this image and we see this. It's large. So there are scanned them all. They're pretty high rise. So you can do some decent stuff with, um I'm gonna press commander control t to put the transform box around it. And I'm gonna press commander Control Vero to scooch back so I can see the corners, and I'm gonna hold all tor option and shift to scale it in evenly from both sides. And then I'll just maybe not so far. Think about here. Right? Coming ish like that. Okay, so now we have this fun little element, and then I'm gonna add some type to this. I'm teaching a type class tomorrow, and I I love working with types, So this was going to be fun, and I'm just gonna make it black because we're gonna actually get rid of it later. Anyway, um, I'm going to click, and my cursor is enormous because, wow, I dont know why. Thats wow pretty okay. We'll do something like this and I'm gonna change the font. Normally, I wouldn't type in the name of the font before I typed the word because I wouldn't know what I'm going to use, So I always tell people that Get your word out first before you start changing the font and stuff. But in this case, I know exactly what I want. So I'm gonna type the word Relax. Um, And then I'll set this if you don't know how to use type. Don't miss my class. Tomorrow, I'm gonna show you all these basics. But I put the word out here. You can scale it a lot of different ways. I could select the type and just scale it up like this. I can also just transform it because it is vector. So I don't have to worry about losing quality of the image. So I'm gonna type the word relax, and then I'm going to go back to the type tool in a press t to get it. And then if I click down here Oh, there we go. Um, on all type. You've got this, and I'm gonna change that font from Bonn jur two. It was like a video horse. Small up. I don't remember and we'll scale that down. Grab the move, tool, Moving it over. All right, so that's looking decent. Okay, so I've created the meat. Little graphic. Now using just one of the doodles that is in the bonus goodies and then a couple layers of type. Now check out how we're gonna elevate this like no other. Okay, I'm gonna go over to my watercolors. You may be looking at this, like, nice job care of that. Like preschool. It kind of is. But preschool art can be awesome, too. So I'm going to command or control click on this blob right here so that it's active. These ones you can you can actually see pretty easily so you could just click to get it. So I've got it selected here. I'm going to drag it over, drag it down, drop it in its huge So I'll do you command or control tea and you'll notice I can't even see the box because it's so big. So a lot of times people ask me, Well, how do I see the box? Well, press commander control zero. And then it'll scoot you back to see the box. And it's huge. I told you, is pretty high red, so I'll drag this not too small, but a little smaller. Maybe like there we can adjust it if we need Teoh. Now what I want to do is actually drag this on top of everything. Oh, anything Multiply blend mode. Sorry. I think I change them in the downloads to be normal. So it's normal. I think my versions not is updated as your risen at home. So I want this to be a normal blend boat. So now it is. And, um, now I want this toe actually fill in all of these objects here, so I'm going to clip it admitted earlier. But if I just alter option click like this, it's only gonna stick to these this layer of text because that's the layer that's directly below it. Whenever you're clipping things, you can only clip from one layer to the layer next layer down only one unless you group stuff. So if I want to be able to click this watercolor to both text layers as well as the doodle layer, let's just rename that doodle. So I double clicked in here and you can rename your layers press enter, then I need to group these. So all I'm going to do is select one of them like this type player here, and I'm gonna hold down the shift key and then click the bottom one that I want. So now all three are selected, and I'm gonna group them by oppressing Commander Control G for group, which is also found under layer group layers. Okay, so now we see that those layers are there still here. But now they're in this folder, and, um, it's just called Group One. But we can remain that, of course, and call it stuff, because that's really descriptive. You can open and close that folder by twirling down this arrow right here. But now that there are grouped into a folder, I can take this layer and clip. Um, clip it to the whole collection. So to do that, I'm going to hold down again. Option or Ault, and click right here and look at that piece of awesomeness. And that was made by my cheap Crayola to dollar watercolor set. Not even a good brush, You guys, in fact, look how bad the brushes. This is embarrassing. Look at that. It was shedding in my watercolor, and I thought I caught them all, but I didn't. So now you can practice using the clone tool to clean that but, um, or you can leave it because it's authentic. So, um, that took a couple of simple little doodle and a simple blob of water color on. We have this fancy looking thing, and if we want to, you know, move it around or just it We can grab this layer right here and the move tool. And I could pull it down until I run out of room. Of course, I go too far. I ran out of water. Color could move it over. Maybe Maybe he want the little brush to so of in there or not. You know, you can just push it out of the way. So that is up to you. You could also rotate it if I want to bring up commander Control T to get our box here, zoom out a little with Commander Control minus, I could spin it. Maybe I want it kind of at an angle this way. So however, I mean you, it's totally flexible. Let's add some splatter to this, because what water color graphic is complete without a little bit of a splatter. Um, instead of using a brush like we did, we're gonna use an actual splatter. So we have some of those in the fine graphic that I made for you. Um, some of them are here, and I might just see if I can grab this guy. And again, yours is in normal mode. I believe so. You won't have to change the blend mode. Somebody grab it and pull it, pull it in its big, bigger than I need it. And I'm just dragging around to see, like, compositionally what I like. I'm going to scale it down with Commander Control T because then I can see more of it. Maybe I'll spin it this way because kind of like that, maybe, Like like that. Okay, that's good, Then so will hit. Enter. Now it's purple, which is cool. But what if I want it to look like you know, this paint? Then I want to change this color. So let's add one more splatter. First, we'll just duplicate this, so I'm going to duplicate this platter and we'll put it over here and spin it another direction. I could go get a different splatter from here like a linear one, like one of these, but I'm gonna show you how you can also just reuse stuff that you already have. So I'm going to duplicate this, um, a couple of ways we can do this all, grab the move, tool. And I'm gonna hold down all tor option, and then I'll just drag from over here, and it makes a copy. That's that's how you do it on the fly. If I undo that, you could, of course, also come over here, drag this to your new layer button. Or I could press commander Control J and jump a copy of it up. But usually when I'm working, I like to just stay fluid. Eso I would just hold alter option with the move tool and then just drag a copy over. So that's kind of neat. And commander control t spin this around who? Maybe like that kind of dig it? No. What do you think? Tough to say. We'll go with that. All right, so now I have these two separate splatter layers, but I actually only want to perform this color adjustment that I'm going to make. I really only want to do that once, So I'm gonna merge these tooth bladder layers together. And actually, now that I look at this? I want it. I think we're being a perfectionist. Just you fall into a trap. All right, well, just That's good. That's good. I'm gonna stop. All right. Stopping there. So it's on to separate layers, splatter one in splatter to I'm just gonna merge them together by pressing commander Control E for eat the top layer eight, the second layer. And now there's one layer on. Now they're both on the one layer, but they're purple, and I want to adjust that. If I make a hue saturation adjustment layer, that's one way I could do it. I'd have to clip it to this so that it doesn't affect everything else. But I'm just gonna rip it old school and come over here and do image adjustments. Uh, hue saturation because I'm just going to do this one. I'm not gonna leave. My felt the option to tweak it endlessly. Salt do this once, and I'm going to take this huge slider. And if I look over here, the purples air here, and I'm just gonna push it towards this side. We'll see if we can. There, that's about right. Right. Something like that. Maybe a little more orange there. I could boost saturation or or dial it down. That looks wrong. Give it a little boost. And then if I'm like it's stealing too much limelight, I could fade it a little bit. Maybe in the, uh, a passerby over here. So those are two different ways to use the same sort of design element asset, which would be the watercolor, flatter or the watch. You can just use it straight up like like it is and clip it to stuff, or you can convert it to a brush on. Then you that as a brush, like we thought same with the doodles if I wanted to make any of these into a brush also, I'll show you quickly how you could do that on day. Then you can apply any of those same dynamic color changes and angle rotations and stuff, too. So let's say that I don't know which we make a brush this heart kind of fun, right? If I want to make this a brush, uh, I'm gonna actually have to select it. So to do that, I'm going to use the lasso cause it's kind of a weird shape and I don't want to include any of this, So I'm gonna grab my I call it the Freehand Lasso, and I'm just gonna last. So I'm clicking and just dragging around to make a selection, right Then, to turn it into a brush, I would just choose edit, defined brush preset and again, this is the same with your watercolors or anything you want to make into a brush. You select it, you isolate it, then select it and then, uh, edit defined brush preset. We'll call it heart Click, OK? And I can get rid of my aunts now by pressing commander controlled deep. And if I press be for my brushes and I scroll down, look with here at the bottom of my panel, it's just there waiting for me. So let's put it in action. So I'm gonna get it, and we'll just come back to this image and we'll just hide all this so we don't mess up our pretty stuff that we built. Now I have to make it smaller because it's a good sized brush and this is a low rez image here, so we'll make this and let's turn on our goto our brush panel. We'll turn on shape dynamics, but I don't want it to be upside down, so I'm not gonna give it 100% wiggle room. We'll just let it deter, like, 50%. We can let the size deter more, though. Maybe let's come down to color. Dynamics will leave that huge Inter 2 100%. And then let's give it a good starting idea of color something like this. Okay. Are we ready? Let's see what happens. Oh, wait. One other cool thing we can, um, change is ah, scattering. So let's adjust the scatter. What that does is if I draw a line straight across like this scatters Gonna like the name implies scatter the artwork away from the line that the stroke that we just made So I can draw one line and I can get artwork all over the place if I want by letting it scatter. So I'm gonna let it scatter Ah lot. And then let's see what happens. It's kind of crap shoot. I should say it's only going to dio Hold on. Let's go back to color dynamics. We want to change this to apply per tip. There we go. Whoa, let's do some tweaking. That scattering has a lot of, um, spacing. We need to change. I don't want him all on top of each other like that. So we'll go back to brush tip shape and spread them out because that was a little crazy, even for me. So this is a lot of trial and error. But now look at that. Can make a big goal. Fun. I might need to space that out, but you give baby a So maybe I'll just click a little bit like this. So it's not so big, but you can see it's automatically changing the colors. And now I can use it like a brush, even though it started life as a doodle in my sketchbook. Um, so, yeah, questions. I just think all of these things. They're so fun. And it's like it's like stamping. Yeah, digitalized like scrapbooking and all their that don't even get hinky. Exactly. They it's fantastic to have any questions in the studio. Uh, I do have just a really quick question about what kind of drawing pad your using. Yeah. So this is a walk, um, into us. Something I thought it was called Oh yeah, this is a newer one because I replacement. It's just a small intro welcome tablet I wanted on Amazon. I think it was like 60 year, 80 bucks or something. Um, I can try to post a link to it on my Facebook if that helps anybody. But it's just it's awesome. It's not terribly expensive. I used to have one of I do have I still have one of their original tablets, which I bought a Photoshopped world like I don't know 10 or more years ago. At least 10 years. 15 years ago. I still have it still works Great. What time is awesome? I've worn down my nib. They called a little tip their nib and they just, like, send me new ones. I mean, they're just So I dropped and broke my pen once. They sent me a new one for dollar. There does great their stuff last a long time, but this is now my favorite. My other one, I think when you retire it cause I'm a mobile girl now. That's right, though. Yeah,
Class Materials
Bonus Materials with Purchase
Ratings and Reviews
Janaina de Assis
I loooooooove Khara, all her courses are so much fun and energetic.
Dianna Gonzalez
Khara's teaching style is one of the most superior styles, in terms of Creative Live Classes I've taken. She is clear about what she is saying, without being overly wordy, and her lessons were well organized. Two thumbs up for Khara Plicanic... very informative!
Flavianny Menezes
Amazing class. Khara makes everything easier.