Global Image Adjustments
Lesson 6 from: Designing Marketing Graphics in Photoshop and IllustratorPaul Trani
Global Image Adjustments
Lesson 6 from: Designing Marketing Graphics in Photoshop and IllustratorPaul Trani
Lessons
Class Introduction: Design Fundamentals
07:33 2Creating Graphics in Illustrator
13:12 3Using Type in Illustrator
16:43 4Creating a Branding Library
08:17 5Creating Effective Marketing Graphics
06:03 6Global Image Adjustments
11:13 7Touching Up Photos in Photoshop
08:12 8Selecting and Removing Backgrounds
06:59Lesson Info
Global Image Adjustments
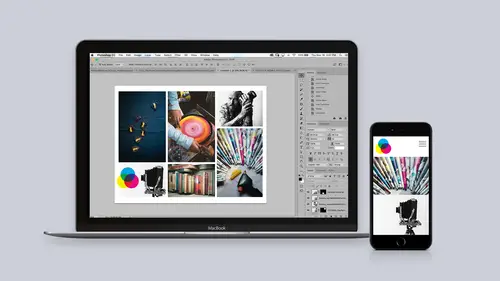
Now we're gonna be designing some marketing graphics and really making some global image adjustments in Photoshop. So the fastest way to awesome in Photoshop. In fact here I am, you can see four photos. The one's on the left image adjustments have been made, they look fantastic. One's on the right need work, okay. And just so you know how I got this view is if you got to Window and take a look at arrange I have everything tiled. But you can also consolidate everything to tabs. So just getting familiar with the interface I can click through all these different tabs, maybe focus on this first image which needs the most work. Happens to be the founder of the company. I'll do command zero on a Mac, that will bring it up fullscreen if you will, filling the area and I can get working on this. Notice as I have my tools off to the left hand side as I roll over them I get hints. But really what I want to do is I'm gonna make some global image adjustments. So we can see off to the right hand sid...
e we have the adjustments panel. Under window, adjustments, and then we have our layers right here. So this is on its own layer. So let's just like make this look better, that's really what we need to do here. We not only need to make it look better but we need to make sure it matches our branding that we're working on. And what some people will do is you can go to image and you can go to adjustments. Anything you do here is gonna be destructive, we don't want to do that, so don't go into this area necessarily. The easiest thing to do is use the adjustments panel. All of these deal with sort of the brightness and contrast, then we get into color and then more drastic adjustments. But I can use this panel. When I click on an option it will actually show me the properties for it. So I can say for instance, check out brightness and contrast. Clicking right there I get the controls for it, I'll just zoom out and I can start to adjust this, the brightness and the contrast pretty easy. Typically any time I see an auto button I just hit the auto button just to see what happens and that gives me at least a good starting point. So I can start to increase the brightness and the contrast. And that might be what I'll do for a little bit. I'll go into adjustments further, I can go into Levels for instance and add some levels which also just adds more brightness to it and then I can even get into the hue and saturation. So what I'm doing, every time I click is I'm adding an adjustment layer. We can see it over here. My layers panel. So I clicked on three, you can see my brightness and contrast, my levels, my hue and saturation, globally changing this graphic, this image and from here I can start to manipulate the different properties of this adjustment layer. So if I want to maybe take down the saturation, you could obviously see what it does, okay. So this is how Photoshop works. I could come to my layers panel and maybe turn off one of these adjustment layers to kind of see what this looked like initially, and then some of these settings. And this works out pretty well for some scenarios but in this case I just want to like make the image better. Right, just make it better. Like I've added three adjustment layers. Is there an easier way? And yes there is. So what I'm gonna do is I'm just gonna go ahead and I can always delete these layers like I'm doing right now. Just hitting that trash can. There we go. And I can go to filter, camera raw filter, alright. So if there's an easy button in Photoshop I think it's in here, it's in camera raw because rather than me adding all these various adjustment layers, which is great sometimes, I can just come over here and say hey, you know what, auto, automatically do all those adjustments. Right, so what does it do? Increases the whites, increases the exposure, but you can see all of these settings from those adjustment panels are all right in here. And I can adjust accordingly, right? So this works out great, just hit auto and then it will adjust accordingly. This photo happens to be a little too warm. so what you could do is you can adjust the temperature if you want to, right up at the top, adjusting temperature down. Another way of doing that are using some of these controls right up here. So the white balance tool, selecting that I want there to be, I want to select a nice medium tone. So I can click right there in the background and this is already like drastically better than what I had before. I'll click okay, just like that again, that looks a lot better. Alright, check this out, this is really awesome what I'm gonna do right now. I did those various adjustments and they were actually destructive. Okay, what I mean by that is I can't go back. Other than undoing, I can't open up this file tomorrow and then go back to what it was originally. So I always want to preserve those pixels. How you do that, I'm just gonna go ahead and do a command z to undo and I'm gonna right click on this layer. And I'm gonna say right here, love this, convert to smart object. So this is going to basically protect all of those pixels. As I select it I notice it's a smart object because I have that little icon right there. So this is the smart objects thumbnail. Technically it's a separate file that's protected but this is fantastic. So when I go to filter, camera raw filter, and do some of those adjustments, really all I did is hit auto and then I sampled that color right there and maybe increased the saturation a little, whatever I want to do, but every adjustment that I make is actually right over here, a layer. Right, I love this, it's a layer effect that's added that I can toggle on and off. I can say hey boss, this was the original and this is all the work I did even though I really only made a couple selections. Alright, so let's actually go beyond this photo and since I've done these global image adjustments I've made it look better, but it's not necessarily that unique, okay. And what if I want to add some more unique color adjustments? I'm gonna do that as well. Right down here in my layers panel I can add, again, some effects if you will. I'm selecting this option, which is going to give me all of the fill or adjustment layers. I was playing with some of these, I'm gonna go beyond that, I'm gonna dive into some of these that are a little bit more unique. Such as a gradient map. So these are gonna be the fun ones that I'm gonna play with. So selecting gradient map, yes scary I know right? It just turned into a horror film. But what just happened here is it gives me this gradient map for this particular photo. So it's mapping all of the lighter pixels to black and all of the black pixels to more of a white. And what I can do is actually just select one of these options down here. A different gradient as I click through all of these. Again from scary to something actually a little bit more normal that just gives it maybe a little bit more personality as I start to deal with this photo. I like this one because we have warm tones and then cool tones. If you're curious as to where all of these various gradients come from, you can select this fly out menu and you can add these different ones. Photographic toning are these ones right here. So a quick way to add some global color adjustments in this case, and what does it give me? That gradient map right there. You can always turn that on and off. Creating a more unique style. Let's actually open up a different photo. Let's go to even this one here, right? So we have this very nice photo and I want to do something similar to it. Because I want to add an adjustment but in this case I want to do this color lookup table. So I encourage you to explore these color lookup. It adds that layer, I can see this is a lookup table otherwise known as a LUT and these will sort of simulate these different film stock if you will. Actually came from video. But from here I can try out some of these and see how this affects this photo. So we could do two strip look. Love it, love how that looks actually. Three strip. What's going on behind the scenes it's like it's taking a ton of adjustment layers and putting them in one neat little file and it basically does all the work for me. So we can go into candlelight, but from here I can start to figure out what will work. I can add multiples of these. So if I happen to like this one, I might want to keep the crisp warm maybe I'll turn that off for now and then add another color lookup for instance and compare it to the drop blues for instance. But I do like going through these and just seeing what works for my artwork as I even pick this late sunset, this adds definitely a unique look in this scenario. What I actually did here is I started with a bunch of images that you may or may not have. And how I got those, is I've actually used Adobe Stock, so last thing I'm gonna take a look at right over here, opening up my libraries panel I can go to, say, type in, gentle, gentleman photos for instance and we can see these different photos right in here. SO I could take this one for instance and I can save a preview of it to my library and that's where these photos came from. So I encourage you to take those sort of, even if they're stock photos, you really need to make them you're own. Make them your own marketing graphics really that meet your brand's needs. So if I take this photo and drop it in here just like I'm doing now, hitting enter, I put it underneath that lookup table, and we can see it takes on that same tint. So feel free, you can use stock photos, you do need to make those image adjustments to sort of map them to your branding and make them unique in Photoshop like I did in this case, by making these global image adjustments. My next step of course, would actually be to do some local adjustments, really do touchups to these photos, would be really my next step.
Ratings and Reviews
Tomas Verver
It's a fun beginner class/project. I already has advanced experience in the programs, but as a part of Creative Pass it's still an intresting/fun watch. I played on double speed:) because the information was not really new. Still you see the teacher is engaging and inspiring.
Christine Wigaard
This was a great and informative class. Even as an experienced user I got great value out of this!
Lacey Heward
This was by far my most helpful class for graphic design!! I've watched so many classes, and even went to school and didn't learn the tricky tools in Illustrator and Photoshop I just learned today! And it was so short!! I didn't have to watch hours of tutorials to learn it! In one day I already feel like a master designer! Thank you, Paul, for sharing your expertise, tools, and tricks! You solved so many problems for me today! :-)
Student Work
Related Classes
Adobe Photoshop