Set up your Design Document and Layout Grid
Lesson 3 from: Designing Websites in Illustrator: Effective WorkflowBrian Wood
Set up your Design Document and Layout Grid
Lesson 3 from: Designing Websites in Illustrator: Effective WorkflowBrian Wood
Lesson Info
3. Set up your Design Document and Layout Grid
Lessons
Understanding the "Responsive" Web Today
15:26 2Getting Started
08:03 3Set up your Design Document and Layout Grid
11:58 4Setting up Artboards to Mock up Device Sizes
05:51 5Work with the Pixel Grid, Live Shapes, Pixel Precision
10:44 6Design with Web Fonts
21:47 7Using Styles and Symbols to Make your Life Easier
22:46 8Mocking up Dynamic Buttons
12:09Lesson Info
Set up your Design Document and Layout Grid
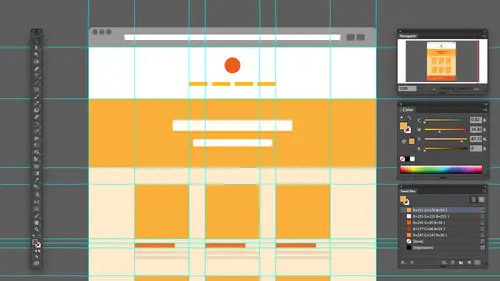
All right. So let me go over the illustrator. And when we are ready to get started, which we are, we're going to start designing a full design. I'm gonna because we're not gonna get this whole design done today. There's no way. But we're gonna kind of start it and lead you down the path. Let's say that. But so when we go in, Illustrator, for instance, if I go to file new start out and I look up here, I'm gonna say, this is you know, my website global block. Let me zoom in a bit. You're going to see that to start with, we actually choose a profile. Okay, Now we can choose Web. We could choose devices. It's kind of interesting, but webbing devices are very similar because they're both rgb. They're both, you know, pixel based, if you will. If you choose web and you look under here, you're going to see the sizes Now, Unfortunately, illustrator, we don't have a lot of the sizes today. Okay? You don't have built in, you know, IPad, I this, you know, whatever for the web profile. Okay, If we ...
go under the profile called devices, though if I take a look Devices, you'll see that we have most of devices at least a smattering of devices up there that we can start with. So if we want to start mobile 1st 1 of the things may 1 might want to do is choose device and choose. You're going to see that they don't have IPhone six up here, but that's okay. We can kind of fudge that size, but you'll see, like IPhone five s. Okay, Um, IPhone six is like 60 year bigger. I think I can't remember. So we pick a size out there and you're going to see that it's gonna pick a with pick a height. I'm actually gonna go desktop first just because that's the way I started this design. Okay, so I'm gonna go with with Web brother and I'll choose a desktop size and I go pretty big on desktop. If you're going to start out with the size and you decide to go, that's not first. You're not going 10 24 you're going to go. At least I go at least 1100. A lot of people go up to 1300 Ardmore. OK? Depends on your taste Choosing a Web profile are choosing the device profile. If I look under advanced here, this is really cool. It kind of sets it up for us or RGB, which is awesome. It's Web where screen resolution, you see right there were also right here online. New objects to pixel grid. The pixel grid is huge. It's big and illustrator for Web because when we go to create a box, if you've ever made a button in here and saved it out in the past, it could have a fuzzy edge. Why needed picks? The raid will automatically snap to this imaginary grid that we have on the on the dartboard. You can if you want to set the preview mode to pixel automatically. And some people do that preview mode pixel is awesome because it's going to take that vector content and rast arise it to the screen so you can kind of see or get an idea of what it's gonna look like. OK, I'll show you When we get in there, I'll leave it a default. All right, so once we get set, I'm gonna click. OK, get it open and you'll see that we've got the starting point. Here, let me move out a little bit. Now, let me say this out to my desktop. So we have it out there, and one of the things that we're going to start with immediately is we're gonna go into setting up things like our grid. We're gonna go into setting up things like our our actual illustrator grid, if you will. Eso we're gonna go in. We're going to set up the layout grid now and see how that works. Typically. Like I said before, if we're gonna go into design, we want to try and design to a grid. Now, there you go out to the web and find illustrator files that already have the guides in there and all that stuff. Okay, it's pretty easy to dio, but let me show you method for getting that done. An easy way to do it is you can take, like, you know, half on hour and drag him all out. Line him up. That's fun. Or you could do this. You can go in and draw a box the size or are bored on the box. Could be bigger. And I actually do that. I used to make the box bigger than my art board. But make sure it's the exact wit that matches the with. You are bored. The height is okay. We're gonna take that box and we're just gonna basically divide it up and then turn it into guides. Gonna call. So with that box out there and really you know, you guys, it really doesn't matter the color. But I'm gonna tell you right now that if you already have design elements out here, you want to make sure it's a color you're not using. I'll show you why in a few minutes, but now we can easily select and delete it. I'm gonna choose some, like hot pink. Okay, we go. Beautiful. All right, Now I'm gonna take it and make it guides. So come on. Your object and you're going to see that we have path split, integrated, so object path split to grin. And if I do this, it's going to say Okay. Well, what kind of grade do you want to make? We have rose. We have columns. We've got a lot of things that weaken dio I'm gonna say you know what I'm looking at? Either migrated that I set up for my fluid grid or my framework and saying, Oh, it's 12 columns at 16. It's whatever it is, and I'm gonna set that number of columns. Then we can go in and set things like the gutter. Now you've got to be careful. And you guys, I'm actually using the shift key to go faster. It jumps faster if you use a shift key on these. But I'm looking at the width of each column. We want to try to get rounded numbers, right? That's, Ah, huge thing on the Web trying to get part of a pixel. So we're gonna do is we're gonna try and figure out where we can get a whole value here. Maybe it about 20 or 16 year ago that divides it up nicely and got herself set. You'll see. The total is 12 80 which is good. That's matching our board size. And now all we need to do really is just preview it. Take a look at it and then say, Let's add guides. So it's going to generate a series of guides for us. Put it out there Now. The interesting thing is, these are not really guides there. Just lines. But we can turn him. I'll click. OK, now, the whole thing here, if you take a look. These pink boxes now we don't need him. You can keep them if you want. It's fine and keep them. But what I'm gonna do is this. I'm gonna select one. Then select the mall. It'll staters got an awesome little feature up here that says, Let's select all with the same fill color. That's why I said, let's make him all this horrendous. Pink fill, color, delete. And there we go. There's our grid. Okay, so we've got it out there now. The only the last thing I'm gonna do here, you're going to see it. Actually, these are just lines. Like I said I want actually treat him as guides. So if you click on this, you'll see it's a whole group. I can double click and get into the group and all. There's there's guide above and below. You can delete. Those are moving on to the art board. You can do whatever you want. I'm gonna delete these. So I'm just gonna say, give it to that one. And there's one down here It always makes these at the bottom of the box on top. Here we go. Okay, Now I'm gonna click on the actual objects. These air just drawn lines. Okay? I'm gonna click on their whole group now. I'm gonna convert them to actual guides. If you do it first thing you could do if you want to, and I suggest doing is because your page area may grow go taller. You might want to actually make these tall. Excuse me? You might want to make these taller, so I'll just dragging make until you can always do it to the guides later. It doesn't really matter. So make it pretty big. And then I'm gonna come under and say, Let's turn these into guides. So if I come under view and come under here, you're gonna see guides. What guides make guides. The guides. Guides. If I choose that and you see is a nice shortcut to that. I will just say do it. We now have a serious guys to work with. So you can do this if you want to to all of the different, you know, settings. You're working with all the different outboard sizes, etcetera. because later on, when we go to design, we want to make sure that we are snapping or hitting the edges here, making sure we're dividing evenly. That's the key there. Okay, let me save now. Another thing you can do and what I suggest doing is working with layers. You got to do layers. I know this is like a broken record. If you work in illustrator or photo shop. If you don't work with layers, you're in for trouble, Okay? Unless it's got three things on the airport. So what I'm gonna do is I'm gonna start by setting up layers here, and honestly, you can do this a lot of different ways. If I go to the layers paint over here, you're going to see that we actually have a group. And these are the guides themselves. If I crack this open, you'll see. Let me move this out a little bit so you can see it. You can see that these are actually the guides. They're all grouped together. Okay. What I want to do is I want to make sure that this layer is the guide layer. Okay? Now you can set this up. However, you want, and I'm going to set that as a guide leader. And here I can lock it. You can do your thing. I'm gonna make a new layer and say, Let's call this something, like desktop artwork or something like that. Okay, You're gonna set it up. How you want the thing? The reason why I'm actually putting in the word desktop here is because when we're designing this, we're going to in the same file. Most likely create a whole bunch are boards or series of our boards that represent the different major sizes. Okay, that's one way to do this. Let me save. All right. So layers are gonna be important. Something that we're gonna use quite a bit. We just got our are kind of our layout grid. Now, the other thing you can do is faras working with content in here. And this is also still part of the layout grid is that we can actually snap to the grid built in an illustrator. Okay, If I zoom in a bit, let me let me first show you something I think is awesome. Let me zoom in. If you're an illustrator and you're working on the Web or you're working on icons or different things. If you take a look down here at the zoom value down in the lower left Okay, we can go upto light 6 billion% right? If you go up to 600% or greater. Okay, let me do that. When they go to 600% or greater, we can actually show what's called a pixel grid that we could snap to. Now, To get this to work, you need to be previewing in pixel preview. So it's an easy toggle. If I go interview and look. And this was what we could set up when we first started this, we can say starting pixel preview this toggle right here. This this shortcut is a great way we're gonna bounce in and out of this if you will or stay in it. It's up to you. But if I choose pixel preview, what it's gonna do is this gonna show me my great out here? Sometimes you might a little bit. This grid is the pixel grid. It's called and when we design content and we put it out here, we're gonna be able to align directly to that grid. Okay, It's a good thing it's something we can use and you're gonna see the grid is actually set up a 72 PP. I whatever we set up the defile to be, and that's kind of what it sets, too. Now, if I go to create something like a rectangle or something like that, you're going to see that as I drag out. And if you guys could see this but as a drag out snapping, it's actually gonna snap to the grid itself. And that's awesome, because we can What's called a line to the pixel Red. This is huge. That's something we're gonna talk about just a few minutes here. All right, so we got that set. Now, another thing you can do. You notice how he zoomed out. It went away, okay, It's still there. Were still snapping to it, if you will, still aligning to that grid, but it's just not visible. Another thing you can do. And this is what some people will dio. They'll actually show a grid and they'll they'll work with this grid. Okay, there's a couple. Like I said, a couple ways you can do this, but you'll see down here. Interview. We have show grid. Now, the reason why this grid might be more useful for years Because it's showing all the time. It depends, but we're still going to snap if we want to. That pixel grid snapping the pixel. You'll notice here that this grid let me zoom in a bit and get up here so you can kind of see this. Sorry. It's pretty big. Meaning that the squares air pretty large. Okay, this is one thing I never liked about it. But you can control that. Okay? So if I go up to Preferences for Illustrator and I got a per perfectly honest, always forget where this stuff is, we're gonna see guides and great. I'm sure that's it. Right. So if I go to now, I'm on Mac. Ill stated preferences. If you go to edit preferences from windows, you'll find the same stuff. Here we go. Right there. There it is. You'll see the grid. We can set up a different color Ford, if you want. You can also set up grid lines every so many pixels, okay. Or every so many. So you can set that up for yourselves. Some people will further subdivide it. They'll set up. You know, the grid lines every so often. However, you want it to work to match your workflow. But this is something that we can dio you'll also see. Actually, I should mention this the pixel grade right here. This is actually something you could turn off if you want to. Some people just they don't really use it. They snap to this other grid and work that way. But that's something we can do. Quick answer. I'm not gonna work with that grid, okay? Just just right now if you want to, you can actually, if you look down here at the bottom there, check this up, you're going to see that the great is on and you're going to see that it's actually snapping to the grid because we've got the snaps turned on here. But if we want to weaken, just simply hide the grid and not even work with it, Okay? That's what I just did. So I want to use it
Class Materials
Bonus Materials with Purchase
Ratings and Reviews
user-ef521b
Quick introduction to Illustrator's website prototyping use. What I needed for better understanding of designing for retina screens, designing at pixel level, smart guides, and wireframes. I like the real-world suggestions for how to show website plan to clients efficiently. Hope to find the next course on best practices in exporting website from AI.
a Creativelive Student
wonderful thank you
Nikkita Cohoon
The class was very useful and offered a number of tricks and techniques I found useful. The PDF mentioned appears to be missing, and I think there should have been a video that touches on best practices for exporting.