Work with Raster Images
Lesson 10 from: Designing Websites in Illustrator: Effective WorkflowBrian Wood
Work with Raster Images
Lesson 10 from: Designing Websites in Illustrator: Effective WorkflowBrian Wood
Lessons
Understanding the "Responsive" Web Today
15:26 2Getting Started
08:03 3Set up your Design Document and Layout Grid
11:58 4Setting up Artboards to Mock up Device Sizes
05:51 5Work with the Pixel Grid, Live Shapes, Pixel Precision
10:44 6Design with Web Fonts
21:47 7Using Styles and Symbols to Make your Life Easier
22:46 8Mocking up Dynamic Buttons
12:09Lesson Info
Work with Raster Images
So we're setting up our our you know, our template here. We've got a lot of this kind of stuff in here. One of the other things I want to talk about. I want to talk about raster content because it's a big deal. I mean, this is part of it. We're gonna have images on site. You know, we have content that we work with the fortunate and unfortunate thing about illustrator, is it? It's sector. So we're really not gonna create raster artwork unless you save out or export. Okay. If we want to work with imagery in here, we can easily do it. Okay? We could just pull right from 40 shop right from anything, J peg gift paying that kind of thing if we want to. We need to be careful about file type, because if it's already a JP gifting, it's compressed. What's likely is a J pick. For instance, we need to be careful what we're working with. I know that some people, when they work with raster, they'll actually use footage Shopper another program to actually create the final form for that. But they'll j...
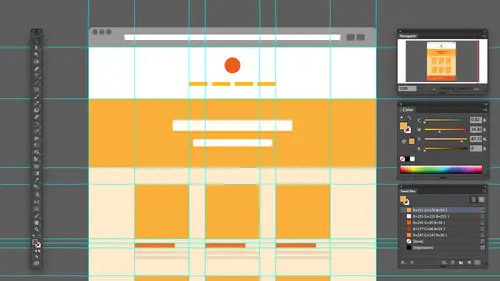
ust bring it in here to do the design work itself if we want to bring in one of the work flows that you know I tend to use and in a lot of people tend to is if we go to place and we place content if you paste in, you're gonna in bed. If we place one of the great things about working with with raster content is that we can go in and we can If you look down at the bottom here, pull us up. You can't actually link to content. Okay, so that allows us to do a nice updating later on, which is great. Um, you can link across multiple pages, art boards, anything you're doing have multiple instances. Is this out there? One thing that I love to do is I love to bring in Photoshopped files because I'm, you know, doing the hard work in there, that type of thing. If you bring in a PSD and you could see here's an example we can use If I bring in a PSD this original Photoshopped file, let me actually show you what it looks like only crack open footage up real quick. This has a few layers in it. If you have a ton of layers. You can if you want to place an illustrator, decide which layers to place. But there's a catch to this. Okay, you got to kind of set up the Photoshopped file the photo shop file itself. If you go in and you set a player's one thing we can do is we can actually set up what it called layer cops. And that's how we bring things across. A lot of times when we open that up again, it looks like it's not okay, you know, I pad to stop, So you see that it's really simple. I have two layers in here. I actually have my get some kind of weird, But I have just my hands and I have me now. This is kind of interesting designers working when she's like, I want to put a virtual IPad that is vector in your hands. And I was like, How do we do that? So I kind of had this just split up a little bit anyway, so we've got two layers and what I can do them is in photo shop. I know this is an illustrator, but they're going to foot a shop. We can use what are called layer cops later. Cops are awesome. What they do is it's kind of like history. They let you capture layer states and effects and position on off all that kind of stuff. And what you can do is if you go in and I know a lot of people myself included. If you're a photo shop, you'll be like showing your customer file or something. Your client through, Boss, you say, Oh, well, here's the original. But you know, like you tell him to turn around for second, you turn a bunch of layers on and off and you say, Well, but here's the final. Okay, here's what I did to it right. Instead of doing that, which you could do ahead of time is you can actually get it looking the way you want. Go to layer cops and actually tell it. Capture the layer comp right here just captured the state. Everything's in was really cool, so it captures things like position, effects, appearance. Is it on? Is it off? And then, later on, I captured a bunch of these later on, You can come in here to layer cops and If I just basically go in here and say All right, let's show him I can say Let's show all the show Just Brian Let's show just the hands and it's gonna do the heavy lifting for me So I did it once. I save those in the file and it's there. The reason I'm going through this is not to show photo shop, but just to give you an idea that we can take. This is a PSD and go directly to illustrator. If our workflow allows it, Let me go all illustrator. The one catch to this is if you want to build to see that content like eternal, that on and off you can't link. You've gotta in bed. Okay, It's different workflow, but you're gonna do It's called show import options and that's kind of like in designing design does. It's and we can say, Let's turn on and off What? We want to see different options. They couldn't place that you'll see this. This is where I can go in and say which layer Compton we want a lot. Brian. I want just the hands and we choose to place that object there. The thing And what's really cool is that you can either say Let's bring in the layers. And actually, the layer is gonna be a layer in Illustrator are you to say, Let's just flatten it out, Make it what it iss Okay, I'm going to say, Let's make it a layer object and I could say Let's bring it in hands only. Place it in there and there's some weird floating hands. There we go Now I could do is I can place another one. I'm just using a shortcut to get to that place. Command and place the other one and say, Let's place just Brian and Layers objects Click OK and place it in there and we could go in and then stack these together if we want and kind of get them to work together. You see the hands there. Okay, so working with Photoshopped allows us to go in and to be able to create this different content to be auto, place it pretty easily on to work with it pretty effectively because we're not all going to work with PSP's when you're designing, obviously, sometimes you have to work with what people give you J pegs etcetera. One thing to think about it. We're always going for the highest res. We can larger file all that kind of stuff because you may be responsible for doing what needs to be done. Pull that up a little bit. All right, So placing these raster images now, the only other thing that I wanted to point out was if we place another file and decide the link to it because then we can update the link when we goto file place again and take a look at let's say, like, Okay, here's an image I would actually go in and just link this. So at the bottom down here, if I choose link for this, this is another PSD. What? We can do this for other things if we want. And I'm gonna put this in the background out here. I'll place it right here. Let's say you gotta be really careful with raster images, and this is I tell people all the time. A lot of us know this, But if you place a raster image, you want to try not to scale it right, because if you look up here, you're gonna see that the PP I we actually have a certain PB I on this thing. And if we scale this up and down, you're gonna notice the PP I actually changes. So it goes up, it goes down depending on what you do to it. So this is the one of the issues with working with raster and side of illustrator A lot of times. What I my designer does what I do is we use for placeholder. Okay, just to kind of get the idea will set content out there. We do have it linked, which is cool, but we work with it, you know, pretty simply, Just kind of set it in there and that it's up to your workflow. Basically. Let me do this. I'm gonna set opacity on this just to make it a little easier to see. There we go. Okay. Cool. Yeah. Teoh A smart object with that, Not Cheney. Wouldn't Yeah, No, that's the thing Smart objects don't really translate from for the shop to illustrator. She asked if what if we converted to a smart object in photo shop. I really wish the illustrator had smart objects go in this direction. But if you if you take. That's actually that's a really good question. By the way, if we take, you know, vector content from illustrator, you know, and we copy it or place it in footage shop. So we go to photo shop and I like, pasted in there. It's gonna say, Do you want to pace too smart? Almost everything now is a smart object we're gonna use. It's gonna louse to work non destructively and the original data, etcetera. But going back the other way? Yeah, it's illustrator. Really? Honestly, it's interesting because you're going to notice that if I go in and change the scale of size, the resolution changes, right? Even updating the image if you go to update it somewhere else in photo shop, Come back, you know, tell you it needs to be updated, but it won't update automatically. There's certain things that just won't do so. Working with Raster in here could be a little more challenging, you know, but it's still not that bad, but yeah, that's a good question. Just one quick thing. If you ever seen image out there and you see that is actually a picture, it will say, like file like filer embedded If you ever seen X through it, that means that it's actually linked. If you click on a picture and you don't t and X through it, that means it's embedded. Just a quick visual for you. Okay, so working with this content, we've kind of got some of that done. The raster content, etcetera. Um, there's couple of things that we can work with. I'm not gonna go too crazy with this, but we can if we want to. With Raster and Vector, we can apply masks and alfa masks if we want to do that. And this could be really good for working with pings and kind of fading things out, etcetera. I'm gonna do one. But I'm also going to kind of share a few things with you about that. I want to take me here. And what I'd like to do is I'd like to fade the bottom out a little bit. Okay, So, an illustrator, if we go out and draw a rectangle, we're gonna create what's called a mask. And we could do this a bunch of ways draw a rectangle that can't covers the object. Okay. What I can then do is I can go out and select the object and the rectangle together. Now, what's interesting is how do I select the picture underneath, right? There's 50 ways to do this. I gotta layers and find it. Do that. You can also do this. Gonna hold down command key on Mac or control on windows. And if I hover over where the to overlap and click as they start to click, you're gonna see this arrow show up. It'll suddenly select what's behind. I can then shift clicked, object in front. If you can do that, that sometimes is easier. It's command clicking through the objects So all right, so I've got this was selected. If I go over and take a look now we're going to make some adjustments here. But if I go take a look at my transparency painful I can't move my miles Greater transparency panel here. What we're gonna do is we're gonna create a mask out of this Now. A mascot is either simple or complex. This one's gonna be called capacity mask because we're gonna go in and kind of fade things. You're gonna see this uncertain certain objects we use. I'll click on make mask, and it's kind of weird, but the black box black means Hyde White means show is just like photo shop. Okay, since it's a solid box, it's gonna hide everything. So well, here's what I can do right now. I've got the image selected. You can tell because it's kind of like a little outline around it if I click on the mask itself. So this is the object being masked. This is the mask cooking the mask, It selects it out there. Then what I can do is I can go out and just change color of it. So if I do this, if I go and I'm gonna use my if you look down here, I got my stroke. And Phil, I'm gonna use my ex. Key to switch started, fell on. What I'm gonna do is I'm gonna ply ingredient to it. So I'm actually gonna hit my period, which is this button right down here. Switch. You created it, period. You're going to see what it does. So we're actually using a Grady int out here now and you can see that it's kind of hard to tell, but this is what it actually looks like, Okay, I can Then take the Grady int tool. And if I go grab the grading tool in the tools panel and you could do all this before you don't have to do it. While you're messing with this, I can then shift drag toe, actually tell which way to go and how toe fade out. That's gonna cool. So we're just doing an Alfa mask. You know, this type of thing, you gotta be careful with this kind of thing, because I know that myself included. A lot of designers like to use things like blend modes like to use lots of layering of content, like to use things like Alfa masks, etcetera. But sometimes on the other side, when you go to actually use this content could be a little difficult to able to do it because you've got all these things layered on top of each other and you're trying to compress them and save them as a single object that can sometimes be a little a little challenging. But this is what we do. We do a lot of these capes and masks to kind of get it to work, So I would actually probably need to do it on their hands if you take a look and we get this copy and paste, otherwise that would look really funky. But we get this copy paste a mask on another object. So all right, so something is kind of simple, but something we will use quite often while we're designing. Let me say this may pull this out of here. Okay. So as Faras Raster is concerned, there's a lot of things we can do with that. Um, the one thing you do want to try Thio Thio check is if you are working on objects. And let's suppose that I've got this button here and what I'd like to do is I'd like to actually go in and I don't know, do something different. There's the last thing we need is last thing we need to dio I was forget this. You gotta make sure you click off the mask onto the object. Otherwise it can't select anything. Go back to the object. Now I can start clicking on stuff if I have a button like this. And what I'd like to do is I'd like to take the button body and add a drop shot into it. Pretty simply. Okay, if I go over to my appearance panel, this is usually where I'm gonna wind up doing this and use the appearance panel for a lot of this. We're gonna play this defect. Okay? So go to bomb down here. We're gonna play new effect. Stylized drop shadow. The one thing we need to kind of be careful of once again is making sure we have round numbers with everything, making sure it's something that we can actually achieve on the Web. And I know that sounds ridiculous, but how do you know what you can achieve on the web? A lot of designers that I work with, we always kind of battle and talk about how much code should you know, You know? I mean, and as a designer, I don't I don't know. I don't think you need to know how to code a website from scratch, but it's helpful to understand how things were put together, how they work and haven't least that knowledge just understand things. Because I get my have ah, designer I work with sometimes. And she will put in a drop shadow when she does a really good job. She knows to use round numbers. He's everything right. But every once a while she gets little nutty with the drop shells and goes like, feet wide with it. And I'm like, OK, I get what you're trying to do, but it's gonna look a little rough for Meteo duplicate on the Web. So anyway, if we do something like this, anytime we use something, that's what's called a raster effect or some object like that will blur. We use a drop shadow. We use all this kind of stuff. The one thing we really need to check and it's probably gonna be set for you automatically, though, is we need to check the raster effects settings. Okay, if I come under effect. This is especially useful if you're coming from a print document to a Web document. And maybe you just changed colors and you start working right. If I come into document raster effects settings and click on that so affect document rest affects settings, we want to make sure that we have the color model and the resolution set properly. Okay, they're only reason why I'm saying this is it's gonna work fine on the Web. If you don't, it's gonna be fine. If you go to export to save the file. Everything's good. Okay. But I'm saying that for smaller file size and to make this a little bit lighter weight and run faster, you want to make sure you got these set properly rgb and 72. Because if you said it 300 the shadows are gonna be really dense, really beautiful looking, but there we don't need it. We're not going to, you know, kind of use that on the web. So this is just This is just simply for file size limitations, etcetera, previewing etcetera. All right, let me cancel it. I don't need that anymore. And once again, if we have an object and we do all this work, we probably want to save it is a graphic style. So we're gonna make sure that we're constantly paying attention toward type styles or graphic styles are symbols and making all that kind of work together. You pull this off the side. All right. Um, I one last thing here about some of this are you constantly see me pulling off panels. I battle this all the time do you ever? I mean, it's one of those things where it's like, you know, I I don't have the perfect set up. But what you want to try and do is you want to try and get at least the panels out there you're working with and save it is it works best. That's what I try to do with soldiers. What's called New workspace, you can dio.
Class Materials
Bonus Materials with Purchase
Ratings and Reviews
user-ef521b
Quick introduction to Illustrator's website prototyping use. What I needed for better understanding of designing for retina screens, designing at pixel level, smart guides, and wireframes. I like the real-world suggestions for how to show website plan to clients efficiently. Hope to find the next course on best practices in exporting website from AI.
a Creativelive Student
wonderful thank you
Nikkita Cohoon
The class was very useful and offered a number of tricks and techniques I found useful. The PDF mentioned appears to be missing, and I think there should have been a video that touches on best practices for exporting.