Storyboards, Animatics and Layouts
Lesson 9 from: Developing Characters, Environments, and Story BoardsMary Jane Begin
Storyboards, Animatics and Layouts
Lesson 9 from: Developing Characters, Environments, and Story BoardsMary Jane Begin
Lesson Info
9. Storyboards, Animatics and Layouts
Lessons
Class Introduction
01:21 2Start with Words and Ideas
10:58 3Drawing it Out: Creating Character Shape and Gesture
09:28 4Exploring Movement, Facial Expression and Costume Design
24:50 5Developing a Cast of Characters with Style
11:26 6Color Scripts
10:17 7Developing a Style
09:49 8Creating Compositions with Perspective and Dramatic POV
16:15Lesson Info
Storyboards, Animatics and Layouts
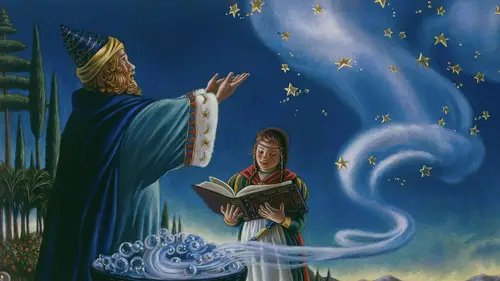
So storyboards, animatics, and layouts. Now, this is sort of the, I would say the next step or stage of creating animation or a video game or a book is that you've got your characters, you've got your environments, now you have to arc out the action of the story. Narrative is just, it's event-based. It's what happened, what went on. First, second, third, how did it arc? And so that's the job of the storyboard or the animatic is to convey that action, either to someone else who's making a more finished animation or for yourself. When I'm making a book, I have to have a storyboard to know what's happening in each of those scenes. So, swinging back to Permadeath, I wanted a short storyboard, because they can be quite long. You can see, even in the short storyboard, the action that's happening. You have this human boy and some creature has done something probably fatal to him. His doppelganger, his hero, his other, alter ego, his Apollo. He's playing a video game. Apollo is his avatar. Com...
es to rescue him. You can see it's probably not going to end well, but it moves from action, another step of action, we're pulled back in the scene so our point of view is really framed from somewhat distance, an establishing shot. Where are we? Who are these people? Then we zoom in and we look at the expression on their faces. And so that's -- When you're framing a scene, it's just like in film and photography, where are we? Are we far away from what's happening? Are we in the middle? Are we super close up? Typically you come in close when you wanna see what's happening on the faces of the characters. It's usually where the emotion is most visible. If a student will draw a scene from far away and it's like you're trying to read a facial expression and it's super tiny, it doesn't make sense. So these are simple conventions in film, in illustration, to try to convey what's happening beat by beat, and a pull-back or establishing shot versus a closeup. The other thing I want you to play attention to that every moment isn't illustrated. It's like beats in this, in this scene. What's most important that we need to show? What could we move to next that will still explain things? You don't have to see every single that happened in between that to understand it. Comics do this, books do this, and storyboards do this, and so it's a special talent and I'll just mention, there are students, this is, they're really good at this. This is like their specialty. Not everyone is really good at storyboards, but you can learn to get better the more that you practice. So I just want you to see a few cues on how to do that. I had to learn to get better at it. It wasn't my natural inclination, but I've had to learn to get better at storyboarding to make books. So here's another scene, and again, it's a little more rendered in terms of, it's got a value structure, it's got linework, so the pictures are very clear. But this moment is where Artemis is going after Niobe's children, and so they're just trying to establish, the artist is trying to establish in this scene what's happening in terms of the battle. What point of view are we at? We're close up, really close up, the foot of the child, we pull back, establishing shot, they're running, and then she's powering up to fire on them. So the power-up scenes, in terms of storyboarding, arrows tell us the action or direction or motion of an action, and typically, you see them in these note spots. You notice these are constructed in a way you have lines, that's for note taking, to give direction for an animator. And here the red cues us into the heat of his power. So these are very gestural. They don't look at all like a super-finished illustration. The best storyboarders are people who do gesture. They're quick, they're fast, they capture the action. They're not noodling. So it's a special talent, but it's also a good exercise, because it gets you into that realm, like gesture drawing, keeping a sketchbook. Storyboards are really good for pacing action. Now this final project that I wanna show you, it's called High Seas. It's amazing because it was created between three students. Their names are right there. And they together developed the characters, the environments, the storyboards, and the animatics, which just is an animated storyboard, for this concept High Seas. The story is meant to be a pitch for an animation, and they're working on this right now. This is the stuff they did when they were in school. But what's so interesting to me is, and this is kind of wrapping up the character part with the environment, pulling it all together. This is the original translation of this character Oona. And Oona started out here, and really changed and transformed. Now remember, there are three people working on this. So that's not just one person's sketches. And they kinda had to keep going back and forth to figure out, who is she? What does she look like? What would she wear? And they had in their mind a pretty clear idea of this character's action, their behavior, their personality, so that transformation took time to figure out and a lot of searching, and so this is where they ended. This is the final translation of the character on the end here. But I love seeing this, it's like a timeline of character development and this was the case for each of these, some of these were actually turned into gifs, and I'll show you those shortly, but I wanted to share the programs, because people often ask, "How did they make that gif?" Or "How did they make that animatic?" Photoshop was used for the gifs, so that's pretty straightforward. They also used, for the trailer I'll show you, it's called TV Paint and Photoshop combined, and then they actually used AfterEffects and Premiere Pro to make the, it's like a mini-animation that I'll show you at the end. But those are some programs that are also, again, standard programs a lot of students at RISD use, and I thought, if that's of interest, that's what these students used. Again, this is Mila, and Mila transformed pretty dramatically. She's the sister of Oona, and you can start to see the relationship. The proportions, the shapes, the contrast between each is a little less dramatic than, say, the Permadeath characters, because they're all human beings, but there had to be variation in color and in shape. And the hat became a sort of prominent element for this character, and you can see that hat was played with again and again and again. Now Nes, this is the -- this character is not related to the other characters. This is kind of a mythological character, and so they wanted the palette to be a little more magical-looking, so purple of course comes into being. And they started out, which I think is really funny, with the idea of the '90s. Now, I don't think of the '90s as magical, but they loved the kind of clothing, and so they started to riff on that. And then there was a shift to sort of someone who might be European in the '40s with a beret and what would that look like? Sort of steampunk. And there kept being these shifts of, how are we defining this being who's sort of otherworldly and magical but is also tied to some concrete elements in the real world? And so they finally landed on the translation where the character is more human, more of a 20-something, not quite so lofty and experienced as they initially thought of, and that really reflects the character in the story that they developed. So again, translations from several different students keep trying to figure this out, the size is shrinking and growing, the costume changes, they had to go through all this. I mean, look at that, by comparison to what they ended with. This kind of ideation is, again, the most important thing you can do. Just keep figuring it out. And when you land it, you know it. You're like, "Oh, there they are, that's the one." You just intuitively sense it. It looks right. And so I think if you don't feel that way, you have to keep drawing, keep figuring it out. Now here is a very simple storyboard for a scene from High Seas, and it's drawn in the loosest fashion, which is fine, but it's easy to read. You can see there are two characters. This is a child and that's a parent. They're hugging, close-in shot, the tight shot. You can start to see the arc of the action. The parents are leaving. We pull away to an establishing shot. Where are we? We clearly are on a boat and we're seeing a boat leaving. Now we're watching this main character look out the window and she makes the decision, the closeup gets super tight here, and slows down, no glasses, the glasses, thinking, and then action of her jumping off the boat to join her parents after the fact. So this is a really beautiful translation of an entire scene that, if you animate it, it's gonna take a lot more moments than this, but this identifies the basic action that tells you the story of this scene, and I think it's done really, really well with just simple value contrast and linework. And so this is kinda the goal, I think, when you're storyboarding, is to figure out how to translate or convey the story in a simple fashion organized in a way that it's sequential, it's paced from moment to moment to moment to moment. It's the reason why all the scenes are the same shape. Because if you're looking at this on a screen, the size of your format won't change. So this is really, I think, it's just beautifully done and we're talking about very simple drawing skills here. It's smart, it's clear, but it's not complex. Pointer. Now, the other thing, and this is not always something that people do, but they wanted to do it because they wanted to get a feel of the flavor of the space, and of course you know, you color, we know what color does. It tells us so much about the storytelling and even without looking very focused on what you're seeing here, you can see the color transition of going underwater and then coming out in some other space with a different lighting situation. The palette is cohesive of this whole scene, but it also shows this beautiful transition. I'm reminded of the color script that we saw back with Permadeath. It's very much like that. You could take this and color script it and it wouldn't be hard. They didn't do that, which is interesting, but they did it in a kind of more complex way by illustrating with color scenes they'd drawn in black and white. You just covered it in Photoshop in layers of color. But I think this tells us a lot about where they would go when they make the final animation. And this, I believe, I can just -- I think I just hit it and it should activate. This is a gif. This was provided for these students to understand what would happen. It's just loops. What would happen if you have your drawing and add color to it and imagine the character moving. This was not super complex to do, but it gave them a kind of starting point for creating their final animatic. This is the same. This is also for High Seas. Gonna activate it. And again, these are still drawings they've added color to, they've created the gifs in Photoshop, and it gives a sense of what this animation would feel like. And so this as much for the students as it is for who they're pitching this to. They're not going to make the whole animation. It's too complex. It would take too much time. So they're trying to put all the materials together to pitch an animation to a large company or a smaller animation company. And finally, let's see if I can get this to go. This is their animatic. See if I can do it again. There it is. This is much more complex, took much more time, and this was actually the one that they did in AfterEffects and Premiere Pro. But it effectively gives a snapshot, a little flavor of what their intention is for this project, and so for animation, it's a really important part. And I think in doing this, it took three people to do this, it's brilliant and they had to, again, go through all those stages to land on this.
Class Materials
Bonus Materials with Purchase
Ratings and Reviews
MikeD
I have to say, this class and the companion class were very humbling. I assume I am not like most people who would watch this class in that I have no such artistic talent. I cannot draw at all (limited to "Spike" from TED Talks), but I had no idea such thought, imagination or ideology went into creating these designs. Professor Begin has an amazing presentation style, she is clear, concise and thoughtful. The subject matter was amazing and I can only see it helping me in evaluating my own work and taking a whole new perspective on art, light and evaluation. I highly recommend this class whatever no matter your creative bent. Thank you Creative Live for hosting this wonderful speaker.
a Creativelive Student
This course is well organized, very informative and goes into great detail regarding the best way to develop character(s) and how they should relate to their environment. Mary Jane articulates her points through art fundamentals, color theory and the power of strong research - as well as her extensive experience in the creative industry. I highly recommend this course for anyone interested in advancing their career or pursuing a career in animation, game design, or children's book publishing.
Nancy Morrison
Excellent!! This is a course that I will review over and over for there are so many great bits of information extremely well explained embedded in the broad concepts of composition and detailed illustration both in her own pieces and that of constructive critiquing her student's work. MJ is an excellent teacher! I am looking forward to her other classes! Nancy
Student Work
Related Classes
Design Inspiration