11:15 am - Frames, Filters, & Blurred Backgrounds
Lesson 14 from: Digital Scrapbooking for BeginnersMichelle Stelling
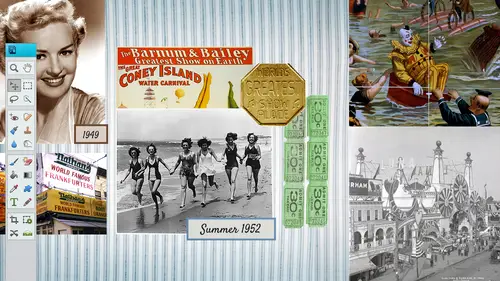
11:15 am - Frames, Filters, & Blurred Backgrounds
Lesson 14 from: Digital Scrapbooking for BeginnersMichelle Stelling
Lesson Info
14. 11:15 am - Frames, Filters, & Blurred Backgrounds
Lessons
Day 1
19:00 am - Intro & Michelle's History
38:59 29:45 am - Intro to PS Elements & Organization
44:46 310:50 am - Using Quick Pages
36:10 411:30 am - Second Quick Page Example
15:42 511:45 am - Useful Tools
12:08 6FreePreview: Red Eye, Feathering & Collages
34:33 71:30 pm - Creating a Simple Cluster Page
16:301:45 pm - Different Modes & Making a Bookmark
31:54 92:30 pm - Creating Cards With Digi-Kit Elements
41:29 103:15 pm - Constructing Cards Without Digi-Kits
33:30Day 2
119:15 am - Collaging: Alignment, Guides & Grids
23:50 129:45 am - Paint Bucket, Brushes, Gradients & Text Effects
45:13 1310:45 am - Cookie Cutters, and Personalized Background
22:38 1411:15 am - Frames, Filters, & Blurred Backgrounds
42:12 1512:45 pm - Photo Restoration: B&W and Color
37:22 161:30 pm - Photo Retouching
44:41 172:30 pm - How to Use a Pre-made Template
37:02 183:15 pm - Creating your Own Templates
38:31Day 3
199:00 am - Creating Your Own Paper
36:09 209:45 am - Photomerge: Panoramic & Style Match
21:18 2110:15 am - Text Clipping & Guided Modes
17:05 2210:45 am - Postcards from Digi-Kit
50:20 2311:30 am - Postcards from Scratch
17:40 2412:45 pm - Creating a 12x12 With a DigiKit
34:01 251:30 pm - Creating a 2 Page Spread
44:18 262:30 pm - Creating A Collage
48:47 273:30 pm - Second Collage Example
21:25Lesson Info
11:15 am - Frames, Filters, & Blurred Backgrounds
Frames is kind of the same, you know we've got all kinds of premade frames within this program all right? So I got to bring leo into the gig here, so when you go into graphics down at the bottom, you're going tohave all kinds of drop downs. We went through the backgrounds yesterday a little bit and by the way, if you are not connect, I just want to bring this up, but this might happen to people out there if you bring in a background on dh you're not connected to the internet if you bring in a background that is attached to the adobe site to speak careful because it could bomb your system it's trying to pull it from the internet I think I'm not connected so and it could just like give you a share, a message or whatever, so that might be the reason it has a little ah blue triangle in the upper right hand corner and those I think are pulls kind of from the adobe side. So underneath the backgrounds there's a thing called phrase and we have all these pre made frames one of my favorites is t...
his this old time aged frame and this will be great to use if you have old letters and you want to pull them inside of a frame and make it kind of fun so I'm just gonna pull this and dragon inside of my little picture here. Good. All right. And so it just looks like an old time border it's kind a little arrester rusty it's a little hard to see on their butt. You could always drop that over the top of the old letter. Some of those old letters that they were talking about in the chat rooms but you just drag and drop any of these into your page so whatever's appropriate. So we've got this one here is kind of fun. Sure, let me pull this one in he's gonna pull in those sea that one gives it the old time fashion look old fashioned look it's kind of fun and it is all of this is a drag and drop if you want to use this on another page all you have to do. Of course. It's good and file new you're doing an eight by eight. I know I do this over and over again, but it's kind of good teo ingrate into your system that it does have to be three hundred resolution. I do mention that each time and you just drag and drop it into your page must be a big file size because it's taking a lot yeah, it is a big file and this could fill up that whole thing if you wanted teo and then you should get down to fit and then you can just put some text in there and there you have a page with a pretty it looks it looks okay. I mean it's kind of crinkled and and all but it's it's a premade frame just a really quick question on the sharpening of the photos let's see? Snicker doodle no, I'm sorry. This is I don't know who it's from exactly, but they were asking, why don't you sharpen the photos or d sharpen the photos? Sometimes I do sometimes I don't a lot of we're going to go into mourning the enhancement section so that's going to be more where we really work on sharpening and blurring if you want teo enhancing doing the brightness and contrast and also doing the levels, I do the levels a lot because it's just it's really quick and easy, so yeah, sometimes I do sharpened and we could talk about sharpening too when we're in that section. Okay, great, that was meredith ray, we'll get right on that. All right? Um back to the frame so we have all these different frames again, you can go and you can click on go into the medium thumbnails or you could just view them as small thumbnails, so just remember that if you can't see all the frames, you can go into this drop down and check him out that way I always keep it at the large just because I want everybody to be able to see what we've got going here this one's okay this one's fun I think I've used this before and then you can take your photo and you can enlarge it inside there if you want teo by just taking it from the slider pulling it that way you can rotate it inside that frame if you need thio falling over here so you don't have to have it the exact way that the frame comes in you can rotate it and and and click on the check mark and it will go inside that frame for you you can also I think you can also put drop shadows on the frame this one already has one I believe but when you do drag them into your page you can put drop shadows on that frame to to make him kind of pop a little bit more but I don't want to bore you with going through all the different frames I just wanted to let you know that they were there if you don't like one of them I think you could just drag and drop the next one over the top gonna cancel that it went in that's good in that kid all right? Any questions I'm afraid it's pretty simple let's just remind ourselves we just want to clear myself things will come with elements are these ones you created yourself know these come with element that's? Why a lot of purchase it because I mean, these frames alone yeah, you know, could out out and in the backgrounds all those backgrounds coming there, I don't, I'm there I haven't even added any frames backgrounds? I think I've added a few patterns, but not all the patterns you saw today. Those were all there, but sometimes I add them there they're called like I don't know if they calm plug ins officially, some people call him plug in. Some people call him you know what? You have actions you khun by actions out there that go through and I don't get into actions that much, but I think that's, what I need to focus on next is learning a lot about actions I haven't instructor come in and they do the actions for me because I just haven't had time to learn how to create your own actions, but every once in a while I haven't instructor come in and do something that I'm not really familiar with, so a guest instructor come in okay let's, move on frame's filters we talked a little bit about filters yesterday, but I just want to kind of go in and do a couple filters in a different way. Okay, so this is embarrassing but I'm gonna do it anyway for y'all so this is the picture I took the other day when I'm watching creative I'm hooked on creative life so I have it in my kitchen so I don't really like this part right here and I don't really care for this apartment here so I'm gonna have to squeeze it in a little bit we're going to use a cool tool called the liquefy tool have you heard of that? Vicky san I've heard of it. I use it all time so I'm gonna go in and see if it's in the distort area distort something we're goingto liquefy and this is my lose pet ten pounds in ten seconds or less little gig here so we're going to take what's called the liquefied tool we're going to take the warp tool and I'm going to use this size I don't know no that's way too big actually let's take the size down this is my brush I'm doing, I'm going to the left bracket and I'm making it smaller and I'm gonna go ahead and just like let's pull that in just a bit isn't that nice let's just pull that in a little bit but I might be a little much but I'm going over gadge right here right now I want some skinny legs and I'm just you know I could do this a lot better, but so there I am. I think I lost fifteen pounds right there instead of I love this door and I don't really I really don't use it a whole lot. But when there's, you know, whenever you have your shirt and it's way out there it's really not? You write gonna pull that in a little while. Just thinking we could have marketed this course. So join us in creating life leaves ten pounds in ten seconds. Mr trick. I did the class on that, and it was pretty full. So then when you click on okay, I should done before in africa's, actually. Funny. Um, actually, I think I can so there's the before oh, it doesn't go back, though. Darn it. Well, you get the idea right? All right, let's, go on. That was just one little fun filter this one I had yesterday, but I'm gonna kind of do something a little bit different with this one. I'm gonna go ahead and you don't have to do a filter to the whole entire photo. You can just do filters to parts of it. Like if you want to frame to have a filter, you could do a frame with a filter and I go back to my layers. And this's can be done so many different ways so I always had to say that because I know people in interesting why didn't she do it this way? Why didn't she do it that way? Because there's all different kinds of ways and I'm gonna do it the easy way so that people who are beginners can really kind of grasp it but there we could do this as a mask as well I don't want to go that route just yet because people would be like I didn't get you know I didn't get that, so I want to take this I'm gonna pretend that I want the filter to apply teo just one section if I wanted to apply to just the boy I'm going to go to filter artistic and let's try fresco it's going to just apply it to him I'm gonna go ahead and click aiken I can play around with any of these levels right here, so make sure you know that because sometimes you look at it go that does not look right. Well, it could be because of these levels right here just know that if you have a really high resolution folder our photo that it may take a while to progress, you're going to see this little bar go through and I don't want to do it too much on this because I don't want to take up too much time but there will be a little progression bharat the bottom let me just do it one time maybe there you see it sometimes it takes like twenty seconds that's a long time so just be aware that if you do have a huge high rez photo and you're applying a filter to it it may you may say oh my computer spree zing up but it's it's really not just give it some time so that way I just did on ly part of the photo as with the filter maybe I want to dio the outskirts of that instead I'm gonna undo that and I'm going to go I must select what I need to select go select an inverse I could put this on his own separate layer so I'm going to do that just because I think you should know that I'm going to control the control v o that brought in uh oh I know what it wass let's do this let's go select in verse that's weird we try this control z control v weird to see that it's kind of bringing in I don't know why it still has that in the paste board I bet in the clipboard so I'm just going to delete that and I'm gonna close out of that I think that is that file still open somewhere doesn't look like there let me just try war more time and then I'll move on if it doesn't work so I'm gonna go select inverse, tried a different way. Let's go edit. Copy at it, paste that worked that. Okay, so now can you see that you've got two different layers. You got one that I just copied and paces above. There. Now I can do all kinds of things with that layer, I can go into filter and let's go back into artistic unless issues fresco and it's only going to apply that filter to that outside layer there, click on okay. And now you can see that it has that. And if I want teo to make it a little pop a little bit more I could go to into my effects, maybe put a drop shadow on there. It's going to tell me that and see how now it has that little drop shadow up there. And now it kind of looks like it's indented in there, it's a little bit more. Three d so and you could you know you can raise that if you want to go into layers, double click on the fx and less is push that and really boosted up just so you can see a little more see there's a really harsh drop shadow, and then the more you take it to the right, the more gradual it's going to going to be so you don't have to do it, phil church, the whole entire photo, you can select pieces, you don't even have to select rectangle. You can select circles if you want teo. So if I were to say I want to take the elliptical and I come in here and I just pick this, I couldn't fulfill a feather on that as well. We talked a little bit about feathering yesterday, so it doesn't have to be a harsh, um, selection. We can take that and feather it up a little bit, feather it up a lot, and I'm just gonna go ahead and inverse that. So do you guys all know what inverse thing is? Can you kind of see what it does? Okay, cool. And then I'm going to go ahead, and I can just apply the filter to that. I don't have to put it on a separate layer if I don't want to, I can even blur that leads to a cosy and blur. I'm gonna take that down a little bit and there should be a little bit of a feather on there. Let's. See if we can see since it's a blur, I can't really tell, I don't know if that feather applied to it or not, it looks pretty harsh still. It's pretty harsh so if you do apply a feather you should be able to see more of a gradual change but I'm gonna cancel that and let's just try a different filter but just know that you have those those blurs they're um what's another fund filter let's go to sketch I really like this one I kind of overuse it but I like the one in here and kind of checking out the different ones the graphic novels the one I kind of like but I might have gone into a different way so if you did have a light feather feather on that it would be more gradual. This is a little bit harsh because it is this election. Okay, we see it there's one other demonstration I want to do with the filters this one here is that so bad. All right, there there's all kinds of funky filters like the photo filter the threshold of posterized I really don't use these too much but just know that you have that option you usually between two and three might look kind of cool but once you get up higher itjust doesn't just doesn't look right so there's a threshold posterized I would say down to two or three might work out pretty good and you can kind of play around filters all day long get the invert this actually looks really good with that tiger picture I think I did a inverse of that tiger picture and it turned out it looked really cool one more and then we'll go move on going edges now it's not that much fun graphic novelist to see what this one looks like in here you want to turn into a black and white and then a pencil drawing you have to play around with the darkness a lot I do like this see this? I think this came with version eleven or twelve it didn't they didn't have this inversion ten so those who've you have version ten out there, you're not going to find this, but I do like taking things and making them into black and white and then kind of in a pencil sketchy kind of look so that might work well with some of your photos that you're thinking about putting filters on cancel that not all that you just didn't do it could you conceptual if you had that graphic novel thing, could you have the two little people and I could use that other brushy thing you showed us tohave them in full photo detail and then had the rest of it yeah, you can what she would do let me just do it because it doesn't take very long so what I would dio there's a couple ways you could do it let me do it the fast and easy way I always like that so I'm gonna okay so what I'm gonna do is take a quick selection tool yesterday we talked a lot about the different selection tools and the quick selection tool is a really good tool to select something quickly so I'm going to try and they looked like they could be selected fairly fast I'm going to try and select him first and I'm not going to get picky with this election you know I could spend a lot of time getting the perfect selection but I'm just gonna kind of quickly get him you want them to be black and white and everything else color right? I mean them color and then yeah that's what I meant I just said it the wrong way all right, so I've got that selected I know there's a little piece up here someone hold the all key down get up in there and try to de select that then I go over here and let's make sure that I have the plus sign thie addition someone add him oh, it'd just be selected him well that's okay add this to it. Okay? And at home I don't have to hold the ship, get down no, we don't have to all right some adding him again okay let's pretend we have a great selection there we don't but we were going to pretend I'm just going to inverse it and then back out a little bit so you can see so it should be yep there's little marching ants around there and they're in first so we just go into the filter we go into sketch graphic novel and you know what that's kind of strange I mean there's a way we could do this but it uh doesn't appear to be working but let's just go ahead and apply it and see if it does maybe it's just fooling us but we can always erase them out and then have them shine through as well but you're right I have never tried that before and it doesn't work it doesn't do it that way that's good to know mine does just the file format of everything that's coming and going is that all png psd doesn't need to be good we weren't seven and I were talking about that break it kind of depends on what you're shooting at ifyou're shoot your cameras the first first point of contact really? So everyone has different cameras I have a nikon d seventy and I just shoot at high super high jpeg that's one of my options there's only one above that and that's the raw version and it just take so much memory but photographers that's what they take everything is raw so it depends if it's going to be a raw file format, I can't remember what the uh, does they might know what the extension is for the raw? I can't remember anything after that is a different well, the rocks like j peg, there's j peg and then there's the extension for wrong people are shouting at me right now because they're I know what it is, I just can't think of it, but anyway, then you can bring that you could bring in any time working with j pegs, and then when we save and we wouldn't have layers I work with p d's that stands for photoshopped document, and that keeps all of your layers j pegs will compress, and you don't have your layers anymore, so you have to be really careful with whether or not you're gonna be making any adjustments. I'm hoping I'm answering question correctly general question here a little more specific about is this particular file this or that? But I think, like devon had asked, yeah, what does the file format need to be? Yeah, it sounds like it's what you're shooting at, how you want to import it? Yeah, it also seems like you're saying that you can use all sorts of file types and yeah, you could open up all kinds of file types inside of photo shop like illustrator files, you can pull them in as well if any of you heard of adobe illustrator that's where you can create your own logos and things that are vector rise we kind of talked about that a little bit more technical but you can place those files in here and they can automatically turn into a j peg once you place him in there but really the two that I worked with the most well I should say there's a few more uh p ngs that's a biggie with digital scrapbook er's because a lot of p and g's that's going to keep the transparency going into the more of the technical stuff but p and j's will allow you to reserve the transparency and a lot of the the quick pages are png is because they have to have that window there that you pull in that picture behind it and we talked a lot about quick pages yesterday so um if you need teo like kind of refresh that check that out but that would be one gifts those air more for the web so we don't really work with gifts much but they can be pulled in. You can pull giffen and their vice a versa with photo shop so if you have a photo shop file that you saved from years ago you should be able to open up here but when you get your camera check your settings there should be a place where it says I don't know our could say format type or something every cameras a little bit different, but the lower amount of pictures that you can put on your your sd card so if you're shooting raw, you're only going to be able to maybe to put thirty on there if you're shooting in j peg, you might be able to pay seventy five if he was shooting and really low rez j pay, which she probably shouldn't be you might be able to put like five, seven hundred on there, so just check that out and then that all kind of indicate what file size that you, the file size kind of determines the quality of your of your photo and we've been reminded by our raw for candidates we are there it is, yeah cr v that's easy to remember actually could not think of it. I have asked very much about some of those very specific backgrounds that you're using, but presumably if you're not, you're not finding them. It is because they only exist currently in twelve that's probably wise question are people not finding him? Yeah, I'm sure that's the only reason yeah, yeah, yeah, because they change everywhere like some of the backgrounds that were inversion eleven they don't carry over to twelve, which kind of scares me sometimes because I get attached to some of the background but there's a way around it you can always pull in every background if you have time you could pull in every backgrounds and then just save it off a jpeg and then you can always use it later because there are a couple backgrounds that they used to have inversion ten or eleven like oh no I know they used to have that well I could have just saved them and then re used in later self that's kind of a way around it too all right let me go ahead but we it doesn't work for that as faras doing the graphic novel which I just now learned me there's a way around it though but I won't get into that yes oh I was gonna say could you have just copied them and paste them on another layer that's how I would've done it yeah and then just um you khun mask all the all the kinds of ways but I probably should stick on track but that is something that I never knew and when you go in there it seems like it's the filters it's within the filters so I don't know why when maybe I'm just not catching something all right let's see wrap it up with the blur and background so a lot of people that they will go ahead and they will do a blur background and a lot of weddings from your wedding photos that you got there stacy and I'll be doing a little wedding att the very end of the session today my cousin got married now I'm creating a template if we have time I want to show people how they can create a template on their own it just reminded me of you whenever I was talking you were talking this morning because it's a wedding all right, so with this one here this is another kind of filter but the blurred background is kind of a biggie so and there's also different kinds of backgrounds tio so I'm just gonna go ahead and quickly select him. We talked a little bit about this before but selections they can be a little bit tricky and you have there's a bunch of different kinds of selection, so you have to kind of figure out which one's gonna work best for you, but whenever you put that off key down he always does that to me let's see, you want todo was gonna do it this way is dead. We're going to subtract from it. I'm not going to use the all cake that always kind of acts weird, so I'm subtracting from a selection because I did a little bit too much coming in here and I can go in there I'm just going to do an in versace it's not a very good selection but just for sake of getting through it with and getting all the other stuff in to do an inverse selection no it's kind of an affinity with me right now skin it again here maybe I will let's just escape out of there let's d select maybe there's something that's being selected okay, here we go. Try warm or time and if it doesn't work all right and go back in there. Pull this up. Okay? Select in verse please work? Yes. Okay, so let's pretend I have a pretty good selection with him. We're going to file and blur and there's emotion blur in here. This is for, like, fast, you know, cars or people playing sports people running um you can go into motion blur yeah, and kind of going here or you can push it up, make it look really blurry or down and that just puts more of the focus on the selection that you made so that's a fun one. We go back in here and go to filter blur uh there's lens blur radio blur smart blur it will take you into another area. I don't know why it's not showing me now it kind of is I think, yeah, I guess it is it's got a blur to it, but it should be more of a baby it's not invert that is doing it, but it's not as noticeable so yeah. See how you can inverse inverted. So right now, he's um, focus and if you click on the invert, it'll turn it around. I just wanted to make sure it was working. You guys could see it better on your screen. That's. Good. All right. And I'm gonna cancel that I'm gonna go to filter blur again motion blur actually, I went into that one already. Hold on, go to radio blur this one I did on something and it worked really well, I can't remember what it wass but sometimes it takes forever to have this one go through the filter but looks like it's going pretty good so you can alter how much it's gonna blur? Yeah, it kind of it kind of makes you look like you're in a tunnel fish and it's but with some of the sports things that looks really cool. So I just like that blur area. Yes. On the no on photo shop, you can have the tolerance when you're selecting something. Is there something that's essentially with the subtracted? That too? Yeah, yeah, you can see re fine edges the really cool table and we're going to talk about that. I love it because, you know, you took my picture, my friend in front of a tree it's not I mean there's all kinds of colors behind her it's not a white background are we talking about this the other day whenever a selection if you really want to get a good selection, put somebody on like a solid background or whatever when we did this when I had my little guy just do a little a photo shoot and said, we're going to do a photo shoot today get your uniform on I told him to stand in front of like a white background so it's easier for me to make this election and the tolerance is really good with that on the reed reed to fine refine edge is really good for hair that's sticking out and you can kind of pull all that hair and it really works really good sometimes that works really well and sometimes it just doesn't work and a lot of times it's so funny because you know whenever they're introducing the new product, a new redefine edge or whatever they do it on something that works really good and then you get home it's not working exactly how they showed me and it just depends on the photo so it's kind of funny that you know everything whenever they come out with a really good product it's the best example and then you get home and it's kind of like a kind of a bummer or maybe I'm just not doing it right but happens teo all right, so let's go ahead and close out of there see if I can. How about this one here? Just do the same thing, but I think I'm going to try to do that feather on there. I don't know why it wasn't feathering this time I'm going to try it and see if it works somebody put a big major feather and I wanted to be very gradual somebody go select in verse again and go back into filter and blur and let's just do a blur more actually let's go back into blur so we have control you going tio not letting us go into that. I think gazi and blurred that's where I want to go okay, I think there is a feather but let's, just look at it a little closer here we can take that blur up really high? Yeah, there is a feather on this one, so I was kind of concerned about that. I thought, well, I know you can use a feather on there so it's not such a hard edge don't leave background, michelle, is there a difference between this and the tilt shift effect in the guidance software? Are they till shift effect? I've used a couple times but let's just open it up and see because I do have a few minutes that I can go into that guided section I love the guidance section it's a lot of fun and it's really simple to use teo the tilt shift that that works really well I think whenever you taking a pic ali's show you rather show you than anything here till shift okay so let's just roll over and you can see the difference there whenever you go into any of the guided sections it will show you a before and after that's the before and this is the after so it kind of does a blur but it's a line more so on dh then you khun let's just do it with this one ad tilt shift so it's added it to far below I really want his eyes to be in there so I believe I can take the modify and I can go in here and say okay I wanted to start here and go there instead so that did it did you see that? So let me, um control see if I could do it the other two blows something when you just ended that there are but okay so there's just one blur right now it's more focused on the bottom part and everything's blur I mean everything's blurry on the top and a little bit on the bottom but when I click on modify uh focus area I want to focus his eyes and I want his eyes to be in focus is that that's? Probably a better way to say it, so you just click and I can make this line longer. So if I want more of a space to be in focus or if I want to make it it's kind of the grady in tool, the shorter, the more dramatic and the longer the more gradual can you see that on the screen? Okay, cool it's really kind of a little hard to see on my screen, but I think it looks better on khan the screen appear so now, really the eyes of the only thing that's in focus, but this is called the tilt shift, and I haven't used it yet, but it's a fairly new to photos of elements twelve I believe I can redefine the edge and I can blur more if I want to buy, pushing it to the right or go down and the contrast khun bump up it's kind of a funky picture to do this to you, but it's all right, it was roll with all right and then click on done and then you've got and if you go back to expert mode, you can kind of see that that is what's called an adjustment layer right there, so you can go in there and you can play around with that as well, but that was kind of good to bring that up because it does have to do with the blur a swell, so I'm glad that question came out any other questions from we got some questions regarding backgrounds set, which we will get teo because there seems to be some challenges with differences in not just with thirteen additional elements eleven and twelve but within eleven so I promised everybody I'll actually chapter michelle off like that. I think we should take up time with that, but there are challenges that you may know the answer to yeah purchased twelve no there's not a huge difference between eleven and twelve, but some that the they have changed around like the layers down here and the effects and the graphics and all that you will find up here. So if somebody is very new to this, they're going to go. My screen looks totally different than what her screen looks like, but really they are there it's just in a different location and then this was another thing that was new to twelve I believe is this thing pops up down here, which it took me a while to get used to because that that takes up a lot of real estate down there and I didn't like it at first, but I like to make my photos big and see everything um and I always have to click on this little air okey that points down cause I wanted to have a much what I should do is just have two monitors where I have all my tools on one and then have the actual photo on the other but I haven't gotten around to that one yet but yeah there are some little bit of differences all right well I have finished actually with what I need to if there's anything in the audience that you want me to read do for the next couple minutes I could do that because photo restoration is what's going to be when we come back and that's going to be a whole lot of fun because that's where we take the old photos and you could scan a man and a high resolution and you also can do it in quick mode in quick mode or inthe e expert mode so I'll show you both ways in which you could do it also going to talk about the refining tool which is this is the one where we go in and this is the photo that we're going to be cutting out of see how you know her hair is kind of the same color as some of the pieces in the background I would be insane to try and go in there with my lasso tool and try to go into each individual hair right I'll be crazy so the redefine I always say it wrong refined tool this one right here it works pretty darn good with this particular photo and with a couple others I've used to but that will help select those individual hairs and then we could take her and put her in the sea if I haven't uh a outcome before and after that here's the eyelash a b r a b r file which we were talking about a different format types the ap art file is a brush file in this one here is an eyelash so you have you remember we're talking about the brushes you just go in there and you picked the eyelash thatyou want they have really long eyelashes, they have costume eyelashes it's hilarious and you could pick the one you have to kind of size it to your eye click one time and then you got the eyelash right there I put it on another layer and so that I can adjust it if I want teo but for glamour shots and stuff it's kind of fun so we'll be talking a little bit about that. I don't think I have that after after one see here but yeah, we'll be we'll be talking about the quick quick mod expert mode and then the little retouching how to brighten eyes and how to brighten teeth how to get rid of wrinkles um and that's pretty much it will come back well, I think we've really learned a lot about just enhancing photos thiss morning, I know we're going to look forward to knowing much more about further restoration retouching it set when we come back after lunch let's hear from our students before we do take our lunch break, and if anything that's been sort of really exciting, you saw wow, you've had in our moment of thought, I now know I can do this, I'm having his heart may again. Yes, yes, you know, I just I just think so much of this graphic stuff is really exciting for me when I do I do a lot of marketing stuff for my cos I do a lot of stuff on my website and, you know, I'm just thinking like, that post is no aggression, you know, it's not straight out scrapbook, but it's, exactly the same staff, the frames, the shadowing staff, and I just love some of those effect I do have a question, I mean, back, maybe misunderstood, but when, if I buy for that awesome prices, like, fifty whatever year the elements think, did I have to worry, I photoshopped or just under buying that? Just buying it, so you gonna buy that bike checkout, costco, she might be on sale for fifty nine dollars if you if you remember forty nine ifyou're not fifty nine, you can just go online, just go online and you can adobe dot com even download a free trial version thirty days travel strike tio tio no, you don't have to have photo shop, you're hotter version eleven you could just straight out by it that's why I love it so much it's because it doesn't do so much stuff people I may be five or six years ago when I was going just do photos, elements people like, well, it doesn't do nearly as much as photoshopped doesn't like, and when they see it, they're like, wow, it really does and so if you're not a photographer, if you're not a graphic designer that's why a lot of my business was coming from elements, so I went ahead and said, you know what I mean, simplify my life, I'm going to go ahead and and I'm still gonna have photoshopped there for backup reasons because I was still not one hundred percent sold on elements within probably six months. I haven't purchased the upgrade for photo shop since then, I mean aside, like our small business person that's trying to do a whole lot of different things and it doesn't have much time that's what you're showing us is like case stuff. Yeah, just get it done and make it look right and, you know, and the thing is, is that it's? Not in the cloud. We were talking about the cloud. And so I guess I think people have to pay a certain amount every month for to hurt, too, to work with photo shop. Now, this is not in the clouds one time purchase, you have it forever and you don't have to worry about the monthly. I was really worried about that whenever they were talking about the cloud that could have broke my business because people had to pay forty nine dollars a month for bishop elements. They're not going to do it. So I was like, please, please. So, so far, so good, it's funny. Because yesterday, when I went into work on stuff like I thought the photo shop is on my my husband's computer and I was like, oh, yeah, photo show, whatever and I see he was like, oh, it's photoshopped elements, actually, e o e o so funny, they just look so much alike. Exactly. Yeah, no. Very cool. Liquefied. All of those extra pounds is gonna be a whole new way. Wade got some great comments back from asked you sorry, our online audience thank you always for sharing way are going to take a forty five minute break now and get some lunch in san francisco. Take a bio break wherever you are in the world. Would you want to share a couple of them? The our house designers? I love that name and I really love this comment, she's saying scrapbooking is a big, beautiful closet with all little boxes in your mind and where you strollers, precious memories, she really loves it. I thought that was really something and then j spiro was saying we are more than photographers, the scrappers we are the keepers of the memories, I thought that was terrific to wait. Great way to describe a scrapbooking now don't forget we're talking about when we came back from the last great. There are number of bonuses that come completely free with enrollment. If you go to the course page and just click the enroll, but I'm completely free, you'll get twenty five disc, twenty five percent discount coupon for snicker doodle designs by karen, you got a three day membership tow n a ods dot com your ten percent discount coupons for the four persnickety prince, and you'll also get other bonus material to digital scrapbooking templates. But that's, just free with enrollment, but with purchase. And maybe you can help me out with a little bit of this. Michelle number one is that fifty percent discount again, teo stick of designs by karen yeah, ok wonders. And off your first purchase, you can get all kinds of goodies, all in one purchase for fifty percent off. And then you can also get five free twelve by twelve prince from persnickety prince, because good value there I was, adding everything up, like you're only paying, like forty nine dollars for the class. Then with, you know, the one month membership to my site, which is in a ods dot com, you get a one month membership, which is around thirty dollars. So and then also that bonus material is the tears of those graphic element, all of you hybrids and digital scrap pickers. Welcome, welcome.
Class Materials
bonus material with purchase
bonus material with enrollment
Ratings and Reviews
PJ
I really enjoyed Michelle's teaching style. I'm new to digital scrapbooking and am on my way to becoming an die-hard convert. Thank you so much for explaining everything so clearly. I'm so glad I bought the course and all the extras you gave me were wonderful - a quick way to get started. Hope to see you again on CreativeLive soon!