Lessons
Day 1
19:00 am - Intro & Michelle's History
38:59 29:45 am - Intro to PS Elements & Organization
44:46 310:50 am - Using Quick Pages
36:10 411:30 am - Second Quick Page Example
15:42 511:45 am - Useful Tools
12:08 6FreePreview: Red Eye, Feathering & Collages
34:33 71:30 pm - Creating a Simple Cluster Page
16:301:45 pm - Different Modes & Making a Bookmark
31:54 92:30 pm - Creating Cards With Digi-Kit Elements
41:29 103:15 pm - Constructing Cards Without Digi-Kits
33:30Day 2
119:15 am - Collaging: Alignment, Guides & Grids
23:50 129:45 am - Paint Bucket, Brushes, Gradients & Text Effects
45:13 1310:45 am - Cookie Cutters, and Personalized Background
22:38 1411:15 am - Frames, Filters, & Blurred Backgrounds
42:12 1512:45 pm - Photo Restoration: B&W and Color
37:22 161:30 pm - Photo Retouching
44:41 172:30 pm - How to Use a Pre-made Template
37:02 183:15 pm - Creating your Own Templates
38:31Day 3
199:00 am - Creating Your Own Paper
36:09 209:45 am - Photomerge: Panoramic & Style Match
21:18 2110:15 am - Text Clipping & Guided Modes
17:05 2210:45 am - Postcards from Digi-Kit
50:20 2311:30 am - Postcards from Scratch
17:40 2412:45 pm - Creating a 12x12 With a DigiKit
34:01 251:30 pm - Creating a 2 Page Spread
44:18 262:30 pm - Creating A Collage
48:47 273:30 pm - Second Collage Example
21:25Lesson Info
2:30 pm - Creating A Collage
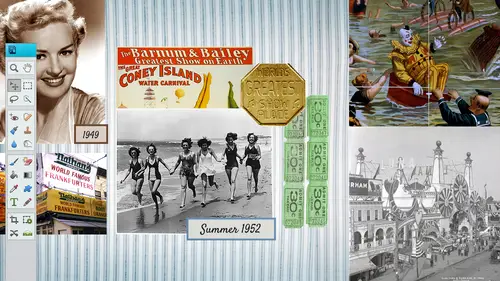
All right, so what we're going to work on for the last hour and a half here we're going to be doing collages, which is one of the things that a lot of people really get into so we'll be tying everything together a lot of selections and just kind of wrapping everything up so we're going to maybe be able to get to two different collages now just because I do sports collages doesn't mean that that's what you have to dio you can do any kind of klaus you want to it could be gymnastics or cheerleading or you name it um you can go ahead and just pertain to your particular subject so we're gonna go ahead and get started and in here we have a background that is already created for you in photoshopped elements I'm gonna kind of dissect this so that you can see exactly what's going on here and for those of you who have been with me from the day one this will probably be it won't be real real easy for you but it's going to be not so bad if I would've showed this to you on day one, it would have be...
en a little bit intimidating but I think that you are to the point where you can do this on your own and again please stand me your examples I love saying it so we've got a couple things going on here we've got a background which was pulled over from the internet and through elements which comes with your elements we also have a paper that I create are that was created by karen I pulled in and then we have an adjustment we are going on here and then I had my son post for me because I wasn't able to get these total pictures exactly right while he was playing so if you are going to be doing a collage it sometimes can be really really hard to get the actual pose right so what I would suggest you would have the subject go in front of a solid wall have them do their poses or whatever they're going to be doing take a picture that way and then you can select them a lot easier so that is one step I didn't take these while he was actually playing because they're usually blurry they're not the right direction so you want to have your subject kind of do a little photo shoot with you it took him about twenty dollars to get him to do this I had to keep saying come on that one wasn't good enough let's go different different pose so that would be a key thing to dio so we're gonna go ahead and each layer here that's another layer here we have three different selections and then we also have a little bit of graphic work in their two lines going down along uh uh rectangle box so pieces air very, very easy to put together. We have some text and I'll let you know what that font is because I think it's a scrapbook font that's free on the internet and then we also have an embellishment from the graphics area. So all of us all these pieces you don't need to purchase because they are pretty much they're for you, so and it looks a little bit different cause it's not a twelve by twelve. This is an eight and a half by eleven or you could do eight by ten whatever size, but this is more like a poster, so it won't be a twelve by twelve I think it is a day by ten so let's, go ahead and get started so I start out with that very size go filed blank size I'm gonna switch it two inches and it's going to be eight by ten, then three hundred rgb and click on okay. First thing I'm gonna do is I'm gonna bring in my background so I am going to go over to my graphics area and I'm gonna go up into the upper right hand corner and choose backgrounds and some of these backgrounds will probably start to get your creative juices flowing because you know you have fall background, you have birthday backgrounds here's the one we're gonna be using the baseball field but I am going to bring in a couple more backgrounds just so you can see how um detail they are so the one we were doing before would have actually worked really good with this one because it is the sand background and we were doing a little segment on text clipping as well so you could do text clipping with any of these backgrounds? Um if you don't have your own backgrounds and there's some really nice papers in here this one here reminding me of what kind of the seniors air doing now with that grungy background look and again you can change the color if you need teo as well. So let's, go ahead and bring in the baseball field, drag it and drop it in and it's going to be lighter at the end, but we're just gonna go and keep it as is for now I am going to save it right off the bat somebody go file save as psd go ahead and call this two thousand thirteen baseball now at least we have that saved this is cool because if for some reason in the future they do get rid of this background in version thirteen or fourteen, you still have it it's not attached to the internet or any of my dad's not going to disappear like, you know, used to be things that were attached to stuff. And if you deleted it's gone it's going to be there so that's no worries there. Okay, then we're going to start working over the top of that. So I'm gonna bring in another sheet of paper. This one here actually looks like, well, we can use that. Actually, this one looks like we can use this one. So what? I'm gonna do it? This is another thing. If you bring this one in, then the other one will go away. So what? To get around that we go to my layers here so you can see the other one just went away. I wish we could just put it on top and use it, but it disappears. So to get around that gonna undo it, I could just go into file and new and blank file or I can right click on this and simplify that layer and then I should be able to bring it back in let's this look, make sure that that's correct. So bring this one in, and if not, we'll go ahead and do it the other way. Now, why didn't I thought maybe that would do the trick, yeah. Created new blankly yeah that's what I'm gonna do I thought maybe if you simplified it would but yeah you do have to do that I was gonna do that at first I thought well, maybe if you simplify toe work so let's just bring that back in and then go vile new blank file and then just bring it back in where did you say just to a new layer but you just got a new layer iook existing okay gotcha let's see if that'll work it just rang in my head when you said that which makes sense it doesn't work didn't done work I know I thought well maybe that would work so we'll have to go back to the original thought worth a try though it's always good to try yeah exactly good try could think and that was pretty smart thinking all right, so we'll go with eight by ten same size three hundred k it and then we'll go back to the graphics and bring it on in then move it on or had to trick it right? All right, go back to our layers. I am going to go ahead and simplify it um it has come up a couple of times can you just go into the term simplifying a layer? Yeah so basically if you place anything it will be it will come in as it won't be a graft it'll be a mathematical piece pretty much like if you bring in anything in from illustrator or any other program you will have to simplify it in order to do certain things to it it looks like that's that wouldn't work with in this case but in other cases when you had to put the drop shadow in or all the different kinds of effects it'll say you must simplify this layer before so if you don't simplify it it when you simplify it becomes pixel based all right and that will allow you to go ahead and put those drop shadows and such on there so you'll notice that if if if it's not simplified there will be a little box in the bottom right hand corner where you can right click and then just to simplify the layer right yeah just yeah you just select that layer and just to simplify and then you're you kind of make it into a uh the pixel based simple yeah it is a simple way could throw this layer away because they don't need that to leave the layer and so now we have this background layer up here and you notice that they are locked so I'm just gonna double click on it and click on ok and it should locket alright should unlock it let me just see if we can do this maybe it won't let us use it but we'll see yeah it will okay all right, so what I did was I had like a little halo effect around it just to give it the dirty look and then I'll start bringing in those other pieces over the top of it so in order to do like a vignette type of thing with this and keep this paper I am going to put a, um, feather around it so before I go in to choose my selection, I am going to go down to my feather and I'm going to push it up to about thirty or forty pixels then I'm gonna go up to view and grid just because I wanted to be pretty centered and I'm gonna probably go two blocks in so let me zoom in a little bit so you can see this so here's my grip grid if you can't see the grid, you can always change the color of the grid by going to edit preferences general and then guides and grids they're purple right now I think I need something a little bit brighter teo show up better maybe this bright blue that shows up pretty good so you just know that you can change the color of your good if you need thio because sometimes your paper might be so close to the to the color that it isthe I'm gonna go to in so two down and two over and it should snap to those guys and I'm also going to go to over on the bottom and on the side now it'll give you a little round corner and that indicates that you do have a feather on that but I think I need the feather to be a little bit more because I wanted to blend a little bit more so sometimes you have to try it and see if it works and if it doesn't then it doesn't and try it again so I think I'm going to go with a stronger feather I'm gonna go with maybe a oh one hundred pixel feather so I go back in make that same selection that's two down and two over and then I'm gonna go ahead and hit the delete key and that gives it a nice hese kind of look all right I could go back in there if I wanted teo and dio two hundred feather if I needed it to be a little bit more gradual but that'll work for now I think that works out good I wanted to look a little bit more dungy so there's a bunch of ways you can do that I am going to go ahead and put a um adjustment layer on there we've been talking about masking a lot throughout the last couple of days and we'll just go ahead and put in a mask on here so I'm gonna goto my levels and see if that'll work I'm going to darken it up a little bit, some pushing the little sliders over to the right to give it a dungy look now notice that it is affecting that background layer. We really don't want it to affect that, and this is what we talked about earlier. We are going to just tell it no, we don't want you to go to the background layer. We only want you to go to that top layer, so all we have to do is go in here and go control g to clip it into that so now it only affects that that layer right directly below it. So hopefully you could see the difference there, so right there it is, affecting the two layers under it and then control g will on ly effect that layer below it. So once we're finished with that, I'm gonna go ahead and turn off the grids for now so that we can kind of see what we've been dealing with here, even if we wanted to be a little bit darko can go in there and adjusted later, a swell as we bring in our photos, but for now, I think this is going to be fine. I'm gonna go over and open up the first photo I'm gonna bring in the one that's in the bottom right hand corner. And we're just going to make a quick selection with this we're probably going to use the quick selection tool somebody go too quick selection and we had a whole section on how to use selections ah day one so if you miss that and you're not real familiar with selections, you might wanna check that out, but you can use quick selection or any other selection tool to make your selection someone go ahead in there and I'm gonna go over the top of what I want to select and if it's not perfect, you can go in there and mess around with that if you need teo, I'm not gonna worry and fret about it being exact, but I am going to go in there and I'm going to de select parts of the inside here, so as I get my quick selection tool, I'm going to press the all key to make it a negative so it is going to de select in that area hey, so pressing that all key will d select a selection so there's a little piece right here too that I don't want on there holding down the all key going in there and you can go back and forth between different selections I'm going to try toe click on that perfect all right? We still have some in here if I would have been a better photographer, I would have figure that out before, but I'm not so I am going teo de select in here try to get the best shot right off the bat. We talked about saving selections just in case you need to leave your station or whatever. So I have a pretty good selection right now and I don't want to lose this so I can go to select safe selection and I'm just going to call this that and click on ok now if I click away or I d select or I leave my computer or something happens, at least I can come back into this file and go to select load selection. I choose bat from my list of drop downs, I only have one selection anyway, but you can have five or six or seven in there and I'll pick bat click on ok and now I've got my selection again, which is really nice so let's just say this is a great selection and we're ready to move it on into our page we could put a little feather on it, but we don't know for sure we'll bring it over just as is and we can kind of trial on air if it needs a little feather, we'll put one on later if not, we'll just use it as is someone get my move tool dragged, drop it into my page and it doesn't look too bad I'm gonna move him down a little bit on the bottom right hand corner he's going to come up from the side here I might shrink him a little bit but like you were saying vicky earlier it's better to have it large than small so I'm gonna keep him large for now until we finalize all the positions of the three, um positions that were going to bring in so I'm gonna keep him large were probably to shrink him down, but I want to make sure that everything works out okay, kyle, see, here yeah, we probably will. The next one, we're probably gonna put a little bit of a feather on there because this looks a little bit harsh and to that refined tool that we talked about yesterday is a really good one as well. So I'm gonna kind of mix get up with all the different kinds of ways of selecting so that everything kind of falls together, okay? So he went on top there. Now I'm gonna go back into the other photo that I want to bring in. I'm gonna go ahead and bring this one in. Actually, I think I'm gonna bring this one here. This is what I mean by going ahead and putting him on like green background or or something that is a little bit, um more contrast, e this wasn't really perfect because his pants are pretty close to the color of the wall. But, um was one of those things where I wanted to get it done quickly so but if you are a photographer or mohr into that, you would wanna make sure that whenever you do take that photo that it's kind of better better in the beginning stages. Okay, so I made a little bit of a selection. I know that his bottom leg right here is not going to be in the photo anyway, so I don't have to worry about this bottom right foot, but I do want to go in there and I do want to select inside of here is well, so I'm gonna take that quick selection tool, hold down my all key and then d select inside there, get that little shadow there, go down a little bit that's looking okay, we have some shadowing over here is well, so I'm just gonna hold my cup my old key again and bring that on over it's kind of going like going back and forth, adding subtracting until you kind of get the good selection. All right looks all right, not the greatest selection, but we'll go ahead and go with it a little bit here is, well, well, zip in and zoom on, ian get our selection are quick selection again and d select you could go back and forth between the lasso as well which is really cool so I'm going teo add to that with my lasso this little piece right here and I can subtract as well gypsy never go I'm going to say this for now because just in case I d select someone save selection and now in case I do select away I can always bring that back let's go back in here and make sure and we could dio what's called a mask at this point so if we wanted to we could do a mask so I could go in there and do a mass but I'm gonna go ahead and add this attract right here now once you have your nice selection if you want to do a little bit of a feather it might make it look a little bit more realistic so you could go in there couldn't see underneath there let's get that selection again oh there it is okay so you could go up to select and feather and maybe put it like a maybe a light feather on it may be just about five pixels and pretty much totally depends on what your photo is and what you're using it for I'm only going to be doing this if the eight by ten so it's not going to be poster side so it doesn't have to be like totally perfect, but if you were doing something that was twenty by thirty, you're going to see the imperfections muchmore than if you were just doing a, uh eight by ten so all right, I'll pull this in here and what that kind of bleed off the page at the bottom keeps on jumping down there right about there would be good if I move him over just a little bit having any kind of go off the page now, some people are saying, well, why don't you have him facing in? And you can, but I kind of like this lay out a little bit more that would bring in another photo at the top, but there should be a little bit of a feather and sometimes there's a little bit of a halo on it just depends on if you want that halo or not, but if you don't like that halo, maybe you would go in instead of a you see that halo a little bit, yeah, maybe you would go in and he would shrink it a little bit. So I'm going to show you how to do that as well, because that halo is going to say to somebody, oh, that doesn't doesn't look natural so you could shrink it just a little bit and then put a feather on it after the fact as well and when you do the shrinking that was in select and then modify and then you have it in that area because I think we talked about smoothing the other day when we were doing those templates so you can do it the opposite way as well inside that select area case I'm gonna go to this top layer I'm gonna bring in one more image but before I do that I must save it someone go file and save profile and open and then coming to bring in this one hey come on in get my quick selection get this one here and this is gonna be the total body here and there we go you would go in there and get the areas here is well too option our ault to delete that area and here is where if you wanted to you could go select, modify and contract that will pull it in a little bit that makes sense okay somehow contracted just maybe one or two pixels and then maybe I feather at one pixel so it kind of overcompensates back and forth I know what kind of it's kind of a weird thing to do but I don't want that halo to be there so I'm gonna go ahead and try tio trick it a little bit somebody go one feather and ok and now we'll see if there's a halo or not okay some of the drag and drop and close out and it looks a little bit better, I think. Yeah, there's no halo now. So that's another way around it from you r b judy, are you able to select our d select after you move it to the page? No, because you've already cut and pasted it in. Okay? Yeah, once, but if you say that selection, then you could go back in there and at least load that selection and then add to it. So that's good to do before you move it over it's just say that selection just in case you want to go back into the original and then you load that selection. Hopefully this is making sense. If it's not, I'll show her because it's, pretty important because you go, you bring it in. You're like, oh no, I missed I missed a piece. Well, you can go back into the original and say safe of load selection, and then you can add to that and definitely keep your questions coming in. We we've had were in the third today. Now we haven't been able to get to all the questions. We have some questions that you're asking today, we actually may have answered on day one, but we are definitely keeping track, so keep sending him on in on one thing we will of course always collect all of your questions and we will be sharing them with michelle after the programme whether she has time ever taught so that's completely different and she will have a chance to review the mission those will be documents that should we have to take with her? Yeah two info at a o d s I n f o at n a ods dot com you can email me directly to try to get back to you within twenty four to forty eight hours also too you can join us on me on facebook at learn photo editing so it's forward slash learned photo editing and there's all different kinds of people that go in there and they could help you as well if you have a question, go post it there and then some of my members can come in there and help you if you need answers and I can't get teo on time so that's another great place toe to get information all right, so I'm moving it so I moved the wrong layer so as you noticed, I didn't move the wrong layer and if I don't want teo uh if I don't ever want to make that mistake again, I can go to that layer and lock it so that I don't move it so I'm gonna go to those layers lock those bottom once and now I can go in here and move these around. This needs to be made a little bit smaller, so I'm gonna go ahead and shrink it down a bit and with this in here and we're going to make room for a title above in the upper area. So that's, why? I'm kind of shrinking them down a little bit. This is where I'm going to start positioning mohr and layering. Now I think I need this one to go on top, someone of drag and drop it above and then that looks pretty good. What is kind of getting a feel for where each piece is going with this on over and then I go ahead and save it. So on the top we're going to go ahead and bring in some white text it's just going to be the name of the baseball team, and then we'll bring in some techs down here and one embellishment, and then we are pretty good to go, except for maybe that background, I might darken it a little bit. So it's not so stark. Um, and then we'll be done with this collage, and then we'll do it twelve by twelve collage as well, so let's go with the top layer and I'm gonna get my text tool. I'm gonna click once now this is a question earlier where they said it doesn't automatically do a layer on top whenever you are putting in text so right now I did not put in a layer but when I click it does automatically put in a layer above that which is wonderful okay and I'm gonna go ahead and enlarge that and I can't remember the font name but let's just find it too because it's kind of a cool font zoom in here to find the perfect font I might have to go back to my original just to see the name but let's go into the font area see if I can't find it it is available for free I believe on the internet so once I know the name of it you could just search that if you need teo find it I don't see it right off the bat so I'm just gonna go ahead and kind of cheat a little bit open up my original just to find the name of that of that fought which is always nice that you could go back into your old layers and check out the font georgia okay no it's um sketch call it that's what it was okay so I just need to go to my s is close out oh, here we go okay, I've got that just going to go in there and present s k got it in there there we go it's kind of a chalkboard font actually isn't it a museum in there so you could see it looks kind of like a chalkboard may be all right so that fought name is sketch college all right let's go ahead and move us back and I think I'm gonna keep it that size until I finalize it let's just pull that there and then I'm gonna go ahead and dio I'm gonna copy and paste this I'm gonna go right click and duplicate that layer and I'm gonna pull it down here so I have the consistency and then go in there and create the name of the player the one bad thing about knowing how to do these posters is a lot of people come up to me and they want me to teo my god I don't have time I barely have time to my own like oh that's so cool would you do a couple of my kids and like no teacher go to my class all right so I'm just gonna put number thirteen oh boy did I just say that I think it's still under there and put the name go all right you know you could do this with anything can do this if you have a dog a cat could do collages with anything how to repair those photos nor way learned that all the way back in the beginning well, say it if you don't have kids, you have probably maybe a pet or you know you can find something to do a collage with a collage of husband what do that friend had a wedding photos? You could do a lot of your work. You go well, you're my tv husband, you have one at home and the list keeps growing. Yeah, because I do a lot of collages of sports doesn't mean that has to be a sports plush. Let your imagination fly. All right, so I left a little bit of space in between there for one thing. I'm just going to put a little. Was this a golf ball? Yeah. It's been a long day, huh? Yeah, yeah, we're switching over, I'm gonna put a little baseball in there, all right? So I'm gonna go to the top layer and go on over to my graphics and there's gotta be a baseball in the graphics area. So let's, go to graphics again, we can go by type. I'm wonder if this is my sport. No let's, just go ahead and kind of scroll through her there it is right there. So gonna bring that in. You know, you could bring images from the internet as well, so just make sure that you're not, um stepping on any toes with copyright and such especially if you're selling your stuff that's when it gets a little bit tough because you don't wanna sell something that's really not your art all right, let's bring that in the middle I might put another space in between there, right? And you know somebody said well, why don't you put the number thirteen in there? And I thought about that on top of the baseball here, but then it would have been a little bit, um heavy on one side, but you can put some text inside that ball if you wanted to, you know, it's an idea the number, but I wanted teo be balanced, so I put the number thirteen at the beginning, I pull myself back. And what do they have a top ok, so all I really did actually die did to a, um I could leave it like this or if I wanted teo let's, just go ahead and do that that people know how to bring in a box, go ahead into a go back back to my layers, do a new layer and then bring in a box. So I'm just gonna go ahead with a white box for now, but it'll probably pry pulled the color red from his shirt let's just fill it with white well, actually it's got a feather on it, so let's go back if it ever does something like that and see how it went and it's not really a rectangle in its rounded corner, you might say, oh, there must be a feather on there, so let's, go back in there d select take that feather down to zero and then we'll go ahead and fill it with white for now, but we want to go in there and get that red from his shirt school hadn't feel that it's obviously not in the right order, so I need to drag and drop it below the layers that I need to pull on top and I think I want to move this up because remember a quarter of an inch for sure so it's way to close the bottom so I am going to go ahead and select those pieces and move them up. You don't need to move up that baseball as well, so go ahead and move that as well, all right about their looks good that definitely gets far enough away from that edge. I'll get this up going up here too, and if we want to see what it looks like with a drop shadow just to see if it's gonna pull it a little bit more, we can always put that drop shadow on it I'm gonna go to this red box right here and check out a drop shadow ok, that looks pretty good on go ahead it's like my baseball to a drop shot on that as well and maybe for my text just to give it a little bit of the three d look and what's really cool about the sports collages this is coming up in the chat room is that you know, sometimes this the scrapbooking sometimes the layouts for the parents or for the person making it but actually who is it that brought this up? Oh yeah t w bev too says the kids love sports posters I know so this is really for everybody yeah, d'oh! The kids really love these when I did first first year second day I'm getting it all mixed up we did those little bookmarks and all the sports team members they wanted it was just such a cool thing or for gifts as well, this could be it this could be kind of fun, you know, I did one that was sports illustrated and I put my son in there and made him m v p of the year or whatever something silly like that and then you know you don't have to frame it, but it eight by ten and just instead of him instead of michael jordan or whatever he's in there so they just really kind of get a kick out of it, I think so the mind you could do so many different things that that will make your kids pop out in the sports world or in whatever hobby or wherever professionally choose not play profession but yeah, right their their whatever it is that they're into yeah exactly all right so that looks pretty much like that might work I think I do want to go back to that background layer and maybe darken it up just a little bit just to see how it would look so we'll go back into the layers and we are going to go to the layer that's background and it does look like it's locked so let's just go ahead and see if we can go ahead and put a he not a hue but a brightness and contrast on top there and then because we haven't really talked about this one but I'm going tio I don't think I'm gonna do too much with it but maybe dark and it just a tiny tiny bit so did you guys catch that or did I go too fast because I think I might have let me just controls the a couple times I went to the very bottom layer my background layer and instead of going into the hue saturation which is where I normally go I can go into brightness and contrast instead so I go into brightness and contrast I wanted too dark and just a tiny bit and maybe the contrast to go down a little bit like unjust darken it up a little bit slit, he kind of pops a little bit more, and then the last thing I did was I went ahead and put a little bit of a border on each side, so I'm gonna go to the very top layer and you could do this a couple different ways, but I'm just gonna go ahead and go back to the grids because they are very helpful close that one up so we can see it a little more and go into view in the grid, and I think I'm going to go into the preferences and tightened those grids just a little bit, but I don't want to really thick border, so I'm gonna go into at it preferences in general and going to guides and cribs. I'm gonna go, teo every four that's still too thick. So I'm gonna go every six that'll work, and this will make more sense. Whenever I bring this in, someone zoom in here and I'm gonna go onto another layer, and I'm just gonna have a line that goes from anybody could have done this a couple different ways. I want to go ahead and get a white color first, and I'm gonna click and drag, and I'm making sure that it goes this the third one in okay it's a little hard to see but let's zoom on ian there's one block two blocks and three blocks and then there's where those little marching anther you can see those in that same as on the other side then we know that they're going to be three blocks over and they're exactly where they need to be some extent some swimming back out and I'm gonna bring in just a uh stroke outline and we can make this as thick as we want it to be if we want to tan laces try ten that's probably actually exactly what I want but if you didn't like that you can co command control z command z and go back and put a thicker one I think that's exactly what I want I don't want it to be too obnoxious but what I want to do is I want to cut off part of it at the top let's take off that grid and I want to cut off some of the bottom so I'm just gonna take my record rectangle marquis tool cut it off this is more of a graphic design thing and then delete that bought top part and I wanted to lead down to the back and I can go down there and cut part of that as well I can put it underneath there or I can cut it so now the eye it's basically you want the eye to lead and stay inside but it wraps it all together kind of or you could have it kind of go on the bottom as well so if you didn't want to do it that way you can kind of have it let me stretch it a little bit just to show you could maybe bring it how it is stretching it yeah that wouldn't work very well but if you wanted to kind of tie it and bring it underneath you could do it that way all right I think it was a wonder day teo you talked a little bit about how to make a button yeah we do have a question because this might relate well to sports you know sort of what you call it school's swag yeah so he wanted to create an arc with the text let's say you wanted to make it into a button how would you do that how would you actually do you want to make the button or do you want to make the text go on a path well it's said the question is how do you have the text form an arc okay god that's that would apply to button so are you know like exactly yeah so if you wanted to do that we would go in it's called but it might take me a couple seconds to find it because I haven't used it well type and warp text so I'm going to do this on a separate sheet all right couldn't actually do it with this two bit it'll look kind of funny but no I'm gonna do to this that'll work let's goto layer type you select your text first goto layer type warp text and this is kind of fun you could go in there and you can do a narc you can dio on upper arc lower arc any of these flag closest to the heart and then you can change it and it was gonna fly up there but you can change the amount of the bend which would kind of actually work well with this if I pull it down well bit hoping that answers the question yeah, okay and we could make a button too but that might take about ten minutes so yes but that was more just me remembering him bring that and follow along yeah, but they're question really was just about our thank you fool awesome so maybe I'll put a little bit of an arch on that and pull it down a little bit then I won't have it so straight and you could do the wavy text or the flag there's all kinds of different things inside of that areas well it's great I kind of like they are better ideo thank you good call that actually looks more like a traditional baseball card that oh yeah baseball cards I do those two that idea you could problem well I don't know if this will be the same proportions, but, you know, making the size of the baseball cards, they can hand them out to their friends and stuff. Yeah, but there's a lot of great ideas coming in. I mean, saffron sal, I'm assuming I think this is saskatchewan saffron cell. I've done something like this when my second grand daughter was born and made the poster as if it was a magazine cover called canadian baby e like those ideas, I mean, keep him coming, because, um, whenever I go to teach, sometimes I forget about some of the things that I've taught in the past, and it brings up all those other areas that I can kind of get into this well, so awesome, and then I would go and probably and cut off a little bit more of this, since it is overlapping a little bit, but I have to go to that layer that it's on and then hit the delete key and the nails the lines will come up to that. I had to make sure that I'm a quarter of an inch away from each side before I save it, so I'm gonna pull it in just a little bit more, maybe it is at least a quarter manage, but I am going to make sure that it does. And when you are transforming these, sometimes it does take a little bit of time especially if it's um kind of intricate text I would probably move this down a little bit, but I'm not gonna get picky right now, so once we are finished we're going to save it right before we j peg it some of go file and save and then I can go file save as and I'll pick j pick from the list of drop downs save it high quality and click on okay, so now if we do look and see what the file size differences, you can always see that the psd files this one's a psd it's one hundred megabytes the j pegs are a lot smaller listens a two point are three point one two megabytes so that's why we compress it. All right, so one layout down and one more to go. All right, if anybody has any questions expounds on in oh, no, they're not loving it. The ideas they're bouncing, coco thank you. Yeah, wait it's anyway, to put a curvy background in back of the brighton battle like it on the bottom. Yeah, you mean take maybe maybe take a, um rectangle and curve it yeah matter if we could go into that type school and do it that way and I'd be curious to see and let's just try it because I have never tried that before let's go in and do a probably a red background just to try it and I don't know if it has to be text or not but we'll try to see if we can warp it just like we did the text so go ahead and fill that with that red and let's just go into layer won't let's do it that way I know there has to be a way to do it though, but I'm trying to think of it right now and I cannot think of which way we would go about doing that you know we can transform it and everything but as faras um warping it I thought maybe it would let us go into that type tool and warp it that way but then let us but we could I mean there's we could always use our um we could always do it this way we could take our rectangle marquis tool and just go something like this and then I think we could, uh do shift and we'd have to get our add to that, you know, I mean, you know, saying like you take that circle and then you would fill it in that way so that would that would be another way to do it would be nice if we could warp that okay let's go ahead and move onto the next little one unless if there was any question last question on the collage here can you blend herself on the edges of the pictures to make that overall pick look smoother or tohave the pictures kind of blend more together yeah you can put a bigger feather on it before you bring it over like you could put a twenty feather I think we put like a one or two feather but if you want them to be really really blended then you could put more of a feather on it but that's when they halo kind of comes into play sometimes you have to kind of balance it out and see which one's gonna work but you could um cons uh pull it in a little bit and then do your it's all different kinds of ways you could do it but the feathering is where you were work with it you do have though to decide how much feathering before you pull it over kind of glue and trial on air sometimes it depends on the resolution and the image and all that so yeah it's kind of child here yeah vicky feather because I noticed he on one particular picture he had his feet on the rug hunky did a feather wouldn't you get the rug party get a little bit of the rug but if you pulls it in before you do the feather like, uh, what's the word here's the word. Well, unless there, but there is a me open up one of his pictures. If you just selected it like this, it's, just do this and you, let's, pull it in really close. Okay, right now, it's. Going to be a hard edge, but if you went, select, modify and contract to pull it in about overexaggerate, five pixels pulls it in, right, and then you should be ableto feather it after that. Does that make sense? So if you contracted in a little bit and then you put a feather still might give you that little halo effect. You just got to be careful and look up close and and see it before.
Class Materials
bonus material with purchase
bonus material with enrollment
Ratings and Reviews
PJ
I really enjoyed Michelle's teaching style. I'm new to digital scrapbooking and am on my way to becoming an die-hard convert. Thank you so much for explaining everything so clearly. I'm so glad I bought the course and all the extras you gave me were wonderful - a quick way to get started. Hope to see you again on CreativeLive soon!