Custom Brush Creation
Lesson 18 from: Digital Scrapbooking with Photoshop ElementsMichelle Stelling
Custom Brush Creation
Lesson 18 from: Digital Scrapbooking with Photoshop ElementsMichelle Stelling
Lessons
Day 1
1Day 1 Pre-Show
05:43 2PSE for Photographers and Scrapbookers
37:32 3Editing Photos in Photoshop Elements
45:20 4Favorite Features
39:30 5Typography
23:24 6Creating Textures
33:57 7Making Patterns
45:25More Typography and Simple Backgrounds
19:54 9Tools and Techniques
31:41 10Creating Layouts with Digikits
27:43 11Day 1 Wrap Up
01:28Day 2
12Day 2 Pre-Show
11:08 13Using Thumbnails, Templates & Masks
18:38 14Designing a 2 Page Spread
38:57 15Photo Composition 101
22:04 16Poster Creation
27:19 17Card Creation
37:18 18Custom Brush Creation
26:23 19Layout Creation
15:28 20Working Creatively with Brushes
38:01 21Social Cover Templates
45:56 22Create a 10 by 10 Layout
30:54 23Day 2 Wrap-Up
02:33 24Thanks + Credits
03:55Lesson Info
Custom Brush Creation
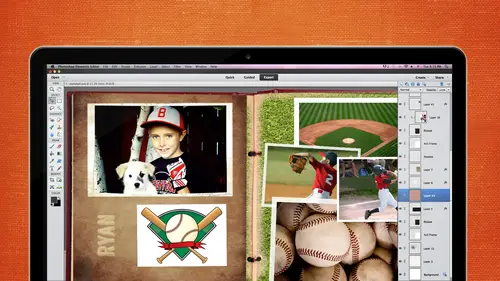
Let me let you know a little bit about karen made this year. First time experiencing her, she is a fantastic digital design artist she's a business owner, she designed incredible digital scrapbooking kids on snicker doodle designs by karen she's been doing that for five years, and she also is a regular instructor on the o d s, which is michelle's site. The national association of digital scrap occurs, you're a regular over there are, you know. Well, now you know you're a regular here, this is your second segment also. Well, I've taken away and blows away. Thank you. Thank you. Today we're going to talk about brushes all day. We're going to talk about making them, saving them how to use them and it's going to be really fun. First of all, I want to share something with you remember how we talked yesterday about journaling your about yourself and of course, about your family and relationships and everything but about yourself as well. And I want to show you one reason why it's really impo...
rtant to make sure you do that? This is a box of letters, and I didn't bring all of them, but remember yesterday or in my last segment I talked about my inheriting a pack of letters from my uncle that were written by my great great grandfather in the eighteen fifties so I brought some of them today only because I didn't want to take the chance of losing any of them and if I lost some I would only lose a small piece of them the stack I have us about about this high and this is the one that we're actually going to work with today I should probably be using gloves when I opened this so it doesn't get any of the oil for my hands on it, but he wrote these letters back. This one is dated september the thirteenth eighteen fifty seven and he wrote for thirty years back to his family and for friends when he was in california out he was in the california seeking his fortune in the gold rush, which he didn't make, so he went tio texas and was able to homestead there under the homestead act the government homestead act. But during that time in his travels he was able tio right back to his family he talked about the presidential elections, he talked about slavery, we have a letter from his sister where she said, I don't know if you're dead or alive I don't know if you've been killed by the indians please let us know how you are without these letters that history would be gone so it's really, really important that not only do we make great scrapbook pages what makes him great in my opinion is the journaling because that's tony the story of what you have laid out for us to see so today we're going I've actually already scanned out letter and that's what we're going to start working on today we're going tio I'm creating a lay out with my great great great great grandfather and I want his handwriting on there I want this letter on there so we're going to turn this letter into a brush there are a couple things that you need to remember when you're making brushes you know actually let me go back for just a second think about the things that you can make from brushes you can just use anything letters, artwork, your kids, handwriting, your own handwriting somebody was talking the other day about having a font created with their own handwriting. You couldn't do that if you don't want to do that just scan something that they've written so that you have captured their handwriting at a certain age book covers I actually have a well the book that we talked about you that we had yesterday we created a texture from you can create brushes from those as well, so anything that you can think of that you can scan or take a photograph of you can make a brush out of they're just a couple rules to remember the largest fresh eyes that you can make and photo shop elements is twenty, five hundred twenty five hundred pixels so if you start to make a brush and you go down to file make brush and that option is great out go look at the size because chances are it's two biggest maybe it's going to be over twenty five hundred the second thing to remember and this is the key is that anything that is black is going to be your brush anything that's white is going to be transparent and any gray will be recognized as variations of gray and that will they will be determined by determined by the opacity so you can have radiations of gray that you'll be able to see but black and white is really what you're going to be going for so we have this letter that's kind of beige what are we going to do with that? We're going to go to the nifty black and white conversion that photo shop elements has and that is in enhance convert to black and white and yesterday we touched on this very very briefly and I said I would come back to it today photo shop elements has built in these styles for us to go through and we can see a real time change in the document as we cycle through them over on the right but also on the left and what I want to look for is ah good black and white contrast the portrait's has a little bit of gray in the background and that would be picked up his transparency, so if I made a brush out of this one, you're definitely going to see the square edges of the letter and there are adjustments on the right that we can use as well I think I'm going to start with the newsletter one and there was a little bit of pinkish red in that paper, so I think I'll move that slider over a little bit to see if I can get rid of some of that and I might bring up contrast a tad now I've lost some of that print but that's okay, we can fix that if you don't like what you've done, you can just click on the undo button and start all over again, but I think that's ok, so I'm going to click ok? And I'd like to bring this up just a little bit and put a levels adjustment on that to make sure I have a good white because I don't want any trends I don't want any gray in there so going to layer new adjustment layer and levels we'll bring up my levels adjustment I can click on this top eye dropper this is going to sample black for me, so I got to come over to the black, the biggest black blob I can find when I click on there did you see how that changed that changed it to a true black and if I won't click on the bottom one that is the white and I will click on the background and that didn't change too much so that's pretty good so I think that's okay right now and I will merge those by just clicking on that top layer and, uh, clicking on merge down and so now I need to check the size and make sure that this is going to be okay to do that, I'll go to image resize image size now I inherited these letters in the eighties and I didn't know anything about scanning or digital scrapbooking, so when I scanned these I scanned them at two hundred d p I um I'm going to resize it to three hundred just by highlighting the resolution and changing it. The reason I'm doing that is that this at two hundred resolution and I drag it or stamp it on a three hundred resolution paper it's going to be smaller? I don't want it to be smaller I wanted to be the same size so you can see the size of seven by nine but you can also see in the hype it's twenty eight, ninety two pixels so that's not going to work because it's too big but I'm going to go ahead and make the brush because I want to show you what will happen if it's too big ah what's open a blank file actually I need to define it as a brush first and it's not going to let me because it's too big so I need to resize it right now and all I did was change the height up there they interest I think the height changed just a little bit in it but it's okay it's twenty five hundred it's going to be just fine so document blank file and a white background did I define that as a brush? I didn't did I okay at it defined brush and let's name it good enough because that was my great grandfather's name his last name and we're going to go over the brush palate and just the brush panel in just a minute but I wanted to show you this first so here is a blank document and the brush that I made is going to be at the very bottom it's right here you can see it's twenty five hundred pixels and now I have to do is make a new layer and stamp that brush right there and now we have his writing on this paper I put the brush on its own layer because I want to make sure that I can manipulate it if I had put it on the background it's there it's stuck it's like glue when we get to putting together the layout, I may want to change that color I may want toe make two layers and multiply the layer so that there it's ah clearer print and so that's another reason why I would like it on its own layer I'm going to stop here just a minute and I'm going to go back to the panel. So over here in the draw section, the first tool is your brush tool and then down on the very bottom you have all your options you have three different brushes that you can use and we're going to focus on the very first one the brush tool but play with the other ones when you're home, they're kind of fun to just kind of play with and see what they do and then right next to the to the brush we have two options, we have the brush mode and the airbrush mode we're going to focus just on the brush mode, the very first option, it says brush and this is going to show you all of the brush is that come with photo shop elements you have a set of default brushes and then a lot of different various brushes that you can choose from if you want to click on the down pointy, narrow you can change the way that the brush is look if you don't like if you want to look at text on lee, you know you want a hard round pixel brush you khun find it easier by having it in text and you can change these very quickly depending on what you need for that project you're working on I like stroke thumbnail because it tells me the size it shows me what it's going to look like if I stamp it just once and then it shows me what it would look like if I drug it across the page but that's just my preference you can also access a preset manager here you can reset your brushes, load and save brushes when you reset your brushes it doesn't mean that you've lost them. It just means that sets it back to the psc default and if you have purchased brushes and loaded them are installed them by hitting reset you haven't lost them they're still where they are on your computer they're just not available for use right then let's grab this brush right here and open a blank document you can change I'm gonna use black so you can see it very easily and this is a round brush that's pretty small, so let's make it bigger actually I'm gonna be on my own player here sometimes my, um brackett bracket keys. For some reason, it just won't work. So you can use your right bracket to make it bigger. Your left bracket to make it smaller. But if that's not working or this is just something I do sometimes I will just go like this. Grab a brush and then come down here and get the size that I want. It's just easier than this kind of a shortcut. So this obviously, is this your size lighter and you just lied that around. Now you notice that this is little faded around the edges and that's because of the that particular brush, there are brushes with harder edges. Let's. Make another that's very small. Make it big so you can see it. And that's, a nice hard edge. Opacity works just like it does anywhere else. It's it will just change the's strength of the caller. Now that was zero percent capacity. That's about forty, fifty percent. Or you can have it is high. She want the mod is just like your blending most right above your layers, panel. Just a different place to access them. And then your brush settings is what gets really interesting that's between those off but a new layer on there you're fayed is let's, move it up to about fifty nine and what this is if you hover over it, if you ever forget you can just hover over it and it will tell you it's set to the number of steps before that brush will fade to nothing so I have it set tio what did I have a set to forty let's see if we can get forty steps out of this before it fades. So if if my rush wasn't quite as big and I hadn't gone off the paper, it would fade to transparency so sometimes that's really kind of fun to d'oh it's control z and make that brush a little bit smaller. It's nice if you're maybe doing some text or something with your brush with your mouth and two nice get a a nice fade off that tail huge iter put it up to twenty and this will alternate your foreground and background collars so let's choose something really obvious a red and the black and said the huge enter at forty percent yeah what's let's turn them paid off and now that's going to go between red and block, but when you had block to color to color, it just makes the lighter color so it's not red and black, its variations of red or that look, I have white hair let's, change it to block so now you have the red and black variation it's kind of fun to do that if you're if you have different colors red, green, orange and black for halloween something that you want to do a little doodle on a scrapbook page I don't use it that much it's just kind of one of those funny, quirky things that are available scatter um that's really fun to use are all of these done? I think I accidentally marked on my background so let's open a new file there are some brushes built in photo shop that that works really well with and I think those are the special effects brush so here's a nice, cute little flower let's put it in red and look at the the scatter on that so when you have a scatter that just means that you're going to have a random scatter, all you have to do is click and drag your brush around and that's going to scatter that flower I'm going to turn that huge it her off and turn that scattering up and I marked on my background again well, it's probably easier just to turn it off and open a brand new way ok, so let's double check it, I have those hugh the fade and the scatter set okay, so now when we go that will scatter that flower randomly across your page and that's kind of fun I think there's a leaf in there as well that works and if you want something bigger than that, all you have to dio is increase your scatter it's a really small brush so it's a small a small scatter but if you have something that's bigger a bigger size brush you're obviously going to get a little bit more of an effect on that and spacing is really fun I really like the spacing like to grab a nice round brush for that and we'll leave that in the red and go back to a default brush and let's pick a size that's easily seen about one hundred ok on a new layer I want to create sometimes you've seen um scallops around photographs something like that so say you wanted to do something like that clip down hold your shift key click over here lips that get the settings right first we want to change thes basing to one hundred percent because I want those dots to be right next to each other so we clicked on the left and if we hold the shift and click on the right uh, let me look and see what I did there you go it didn't like that I stopped in the middle of it, I think so what I did was I always do it again click whole downshift click on the right and that just fills that perfectly because of spacings that one hundred percent if you want space in between the dots increase your spacing so be one hundred ten one hundred twenty five whatever it is you want but you can now take this and make four rows put it around your paper and you have or your photograph and you have a nice scalloped edge it's also kind of fun now that you have this to make a smaller um okay decrease the size of your brush make it smaller make another row laid on top of that and you have a double scallops so it's kind of fun you can also do that around a circle that's really fine too on the hardness of your brush is, um the edges that we were looking at before. So do you want to really hard, clear edge or do you want a soft edged something that close phase two a posse and the roundness is just the size of the brush if you look at the angle, see how it's moving you take it all the way down it's going to be flat if you leave it up I usually don't ever change that it's pretty good the angle is something that's really, really important and interesting and I didn't know for the longest time actually you can change the angle of your brush have you ever used a brush this like this? And you want it to be like this? This is where you go to change that. So I have a brush here on my desk talk that I will load so I could demonstrate that, and this is just a straight kind of grunge edge brush, and if I wanted to put it all the way around the edges, I could stamp it on a blank layer rotated, and that would work, but this is a little easier, so we'll create a new blank layer and stamp down a couple times to make sure because this is not thirty, six hundred and I'm not. I don't care what it looks like right now. I just wanted to demonstrate this one aspect, grab this little arrow and turn it to where you want it to go or you can highlight this and just type in whatever you want. I want that to be a ninety degree angle. And now it's, you know, he degrees for me change it again and I stamped on the same layer. I typically will put these on their own layer, actually, because if I want to move it up or down or anything, I can do that and obviously just go all the way around. So that's, pretty much the brush panel, I could see a lot of uses for that on some of the other page papers to add other designs to keep it from being so plain. I love it absolutely it's, allowing me to make my own instead of having to pay for somebody else to do it, ask you to save me a fortune. Sorry, carry on the wow is that you can turn the breast, so if you're doing some kind of, um, sometimes I'll do water spots with a water spot brush and you know, if it's always in the same spot hot on the page, it doesn't look very riel, but if you could turn it and used a couple of different water spot brushes and keep turning them, you can get a really realistic effect very, very true wow was defined something else when you're using brushes along the edges especially is have you ever used a brush? And it kind of keeps falling off the edge and won't let you put it where you want it to be? Have you increased your canvas size? Do you know how to do that? Okay, we'll do that come over to image resize and instead of image size, go to canvas size, what that's going to let you do is your twelve by twelve paper document is going to stay the same, but the working area behind it is now going to be larger and that's what you want when a larger working area so that brush doesn't fall off the edge. You can do this in a couple ways. Once you get to canvass eyes, you can just say, hey, I just want this to be a thirteen by thirteen or you can click the relative box and then just put in one by one that's just an increase that one inch by one inch. Ah, the anchor points you can play around with its right here. I wanted to go out from the center, but if you had a document right here and you wanted and edge just along the bottom, then you would click on whichever errol that you want that extra space to be. So we wanted to be one by one. And now you see that it's black it fills the extra inches filled with your background color, and now you could take this brush and go all the way up here. If you wanted let's, make sure those air all visible, and then when you're done, all you have to do is go back and re size it. I want my canvas size to be twelve by twelve, going to give you an error message thing do you really want to do this? You're going to cut off. Party your image, and you do because you wanted to be twelve twelve. So click, proceed and now it's back to twelve by twelve.
Class Materials
bonus material with purchase
bonus material with enrollment
Ratings and Reviews
Prairie Chicken
I found this an excellent course on the use of PSE--not just for scrape booking but for any use. And of course the scrape booking ideas and methodology was great. I enjoyed Michelle's approach very much, and also liked Karens.