Lessons
Day 1
1Day 1 Pre-Show
05:43 2PSE for Photographers and Scrapbookers
37:32 3Editing Photos in Photoshop Elements
45:20 4Favorite Features
39:30 5Typography
23:24 6Creating Textures
33:57 7Making Patterns
45:25More Typography and Simple Backgrounds
19:54 9Tools and Techniques
31:41 10Creating Layouts with Digikits
27:43 11Day 1 Wrap Up
01:28Day 2
12Day 2 Pre-Show
11:08 13Using Thumbnails, Templates & Masks
18:38 14Designing a 2 Page Spread
38:57 15Photo Composition 101
22:04 16Poster Creation
27:19 17Card Creation
37:18 18Custom Brush Creation
26:23 19Layout Creation
15:28 20Working Creatively with Brushes
38:01 21Social Cover Templates
45:56 22Create a 10 by 10 Layout
30:54 23Day 2 Wrap-Up
02:33 24Thanks + Credits
03:55Lesson Info
Layout Creation
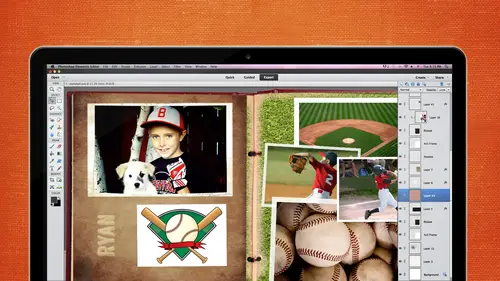
As faras our layout goes I want to go ahead and finish that I want to put together the layout from the patterns the texture the brush that we created today the texture and pattern we did yesterday and once we get that together and see how you can take all these techniques in tow one layout I have some other ways to show you to use brushes but I want to just kind of finalize that so we want this paper and we want this pattern from yesterday we want this cluster in this photograph so let's open us close those just to get him out of my way okay so this is a paper that's in one of my kids the name of its rise and shine and it's the kind of paper that I was talking about yesterday that it has some interest to it but you can do things with that you can out of pattern to it you can have more texture whatever you want to do this is kind of a basic to start with and we created this pattern to put on here. So if I click the select tool click somewhere on this pattern and hold down the shift key ...
it should drag and drop right in the middle and we changed that too soft light as I recall and we dropped it down teo I think was thirty five percent capacity was kind of what we liked no I would like to bring in a pre made cluster I know michelle has talked about those and it's very large so I'm going to she resize it a little bit and I think that looks good and now let's grab our photograph this is a really large photo and I know it's going to be way too big for this twelve by twelve so I'm going to just go ahead and save myself some trouble by uh re sizing they're getting rid of what I dont want right now so it I'll do that by grabbing the marquis tool dragging around it going tio select inverse changing that from a background layer to a layer so I can work with it and then hitting delete and that's really all I want control dd selects it and now I couldn't pull it over into the layout ok and if I were really doing this I'd make sure I was working on a duplicate I don't want to ever work on your original files that's in front of that cluster we wanted behind so just click on the layer drag it down and it is behind that photo for him now and it's a little large so what you get a little bit smaller and I think that is fine I'm just going to delete those areas that I don't want I probably could have done the same thing just drawn a box around and deleted it but just started to do it this way now in situations like this where the picture doesn't go with the frame but I'm lucky enough in that the background of the photo looks pretty close to the paper and that was just a happy accident so I'm just going to clone that out to make it look ok? So glub grab the clone tool get a nice soft brush that looks pretty good we'll make it a little bit bigger by using my bracket keys make sure him on the photo if I click ault and click that's going to be where I sample from and then I'll just brush away that yellow that I don't want there and the other side looks pretty good it might get rid of those little tears and that looks pretty good now we want another layer so we can put our brush on it and I do want it underneath the frame but here's a little trick if you ever want up a layer below if you I'm sorry, I'll tell you that later I'm going toe put the um blank layer below and I want to choose the color of my rush right now so go to the foreground color and I'm going to click on this kind of actually I think I'll click on the light so I can show you something else that's really cool I actually just stumbled upon this not that long ago you know how well let me ask you if you wanted a darker color a darker version of this color how would you get it? Maybe you already knew this and I'm the only person that didn't know it how would you get it? I saw this you know don't you know you can't answer any mail just move a little further down on the panel where you are yeah, just keep coming down that's how I used to do it too I think that's how everybody used to do it click on the color that you want like a light color and notice over here that that is the hugh that's the color I was trying to decide how I could get a darker color in the same exact hugh without any variation going off often to any of the other colors because it's easy when you dragged this down to go a little wobbly and then all of a sudden you're actually in another color. So if you click on the b for the brightness it changes this to a slighter and now those air all the color grady ations within that hugh and if you pull it down that is the color it's just darker it's probably more obvious let's choose that now that's a dark color and if I wanted something lighter I would just slide it up and that's going to stay true to that hugh so I thought that was really cool trick let's grab something like that and now let's, make sure we're all on a blank player can go back to our brush and hopefully it's still there and it's not this is something that I actually forgot to talk to you about, and I'm not surprised because I it's it's really a complicated concept when you load brushes actually when you go to the precept manager and you want to load a brush and you have two options upend or add and I touched very briefly on this in my last segment, if you want tio add a brush, it will wipe out everything that's in there and you will have a new that one brush there by itself. It doesn't mean the other brushes air gone, it just means that it puts it at the very, very bottom of that list as a new brush. If you click on any other brushes, that brush disappears and you have to load it again. The same thing happens with upend upend, though will add it to the brushes that air there already but the same thing. If you go to another default brush under their default folder, it will be gone and I'm not sure why adobe did that and I played with this for a couple hours to see if there was something that I was missing so if there's anybody in the audience that knows something about this how to get a brush to stay there please let us know because I could not find it so on I'm going to have to create that brush again I wonder if I actually made it and saved it I might have let me see if I did and I didn't okay, so we'll just go back and make that again really quickly so do you just say that somewhere else then? Yes normally on you need it yeah, normally I would save it right then and I just I just didn't do it I'll show you I'll do that right now and show you how to do it so pretty much this I think this was the default that we used before and so let's just go ahead and use that again I will bring up um layer adjustment and we'll put another levels on there what's a good way to get experience right keep doing it over and over if you can't find something that you want in the white you just kind of keep clicking around until you get it how it looks good already let's check the size of that again and we want to change that to three hundred and we're going to drop this to twenty, five hundred so we can get a good brush and then we'll go to edit to find brush and name good enough okay and at this point it's a really good idea to save it so if we go down to the brush panel and click on that arrow again save rush is right there when I'm creating a set of brushes I will usually save each brush as I go along so there's one brush one a b r file brush piles are a br files so there's one a b r file if I have ten brushes that I've made I have ten a br fires we don't want that you want one a b r file with ten brushes in it so I will go back once all the brushes air made and they're still in photo shop and make one brush out of all of those files we'll do that a little bit later don't let me forget but right now I'm going to save it because I don't want to have to make it again we're just going to save it on my desktop and I'll name it good enough and if we looked at our brought out my desktop right now we'd see the a b or file closer ok now we're on our own layer we have our color and let's load that brush let's go find it on my desktop that's right there you know it's a brush file because it says a br and loaded and it will be the very last one in your list twenty five hundred and I'll just stamp that down now that's really light and we thought it might be and so I'm just going to drag click on that layer drag it up to new layer and now I have to layers of that text I can multiply that darken it go through the blending modes and see what looks best I actually think multiply worked really well and so I will just leave it at that when I'm going to go ahead and merged those two together so that one of them doesn't actually get bumped and then they look odd raising your hand multiply actually do does it do the same thing is duplicating the layer ah the multiply is a blending mode which will darken whatever layer you're applying it to so without that see how light it is and then when I duplicated let's put this one turn this on and put it back to normal it's okay but if we multiply it it's darker actually if we go to color burn it's even a little bit darker I don't know if that's very obvious on the screen so if you want something darker you can change the levels adjustment on it and sometimes that'll work sometimes it's just aziz easy to duplicate it and then play with plenty moans so elmer shows together because I'm fine I'm not going to do anything else with that I'd like it a little smaller and offset it just a little bit, and I would probably at this point, grab another color, maybe the lighter, maybe one of the tan colors, maybe that nice kind of yellow color and just type his name in right there underneath. See back space. Well, that's, good enough. You know what his name is so charles good enough, and that is his handwriting. That's, his letter, that texas way too strong, and we can take the opacity down or change the color if we want. But my point is to get you to see how important journaling is and how you can incorporate it into your layouts, so it makes it more authentic. We actually want this behind him, so it's not on his face. Here we go. Um, it makes it more authentic because that's a real letter, something that he really wrote.
Class Materials
bonus material with purchase
bonus material with enrollment
Ratings and Reviews
Prairie Chicken
I found this an excellent course on the use of PSE--not just for scrape booking but for any use. And of course the scrape booking ideas and methodology was great. I enjoyed Michelle's approach very much, and also liked Karens.