Lessons
Day 1
1Day 1 Pre-Show
05:43 2PSE for Photographers and Scrapbookers
37:32 3Editing Photos in Photoshop Elements
45:20 4Favorite Features
39:30 5Typography
23:24 6Creating Textures
33:57 7Making Patterns
45:25More Typography and Simple Backgrounds
19:54 9Tools and Techniques
31:41 10Creating Layouts with Digikits
27:43 11Day 1 Wrap Up
01:28Day 2
12Day 2 Pre-Show
11:08 13Using Thumbnails, Templates & Masks
18:38 14Designing a 2 Page Spread
38:57 15Photo Composition 101
22:04 16Poster Creation
27:19 17Card Creation
37:18 18Custom Brush Creation
26:23 19Layout Creation
15:28 20Working Creatively with Brushes
38:01 21Social Cover Templates
45:56 22Create a 10 by 10 Layout
30:54 23Day 2 Wrap-Up
02:33 24Thanks + Credits
03:55Lesson Info
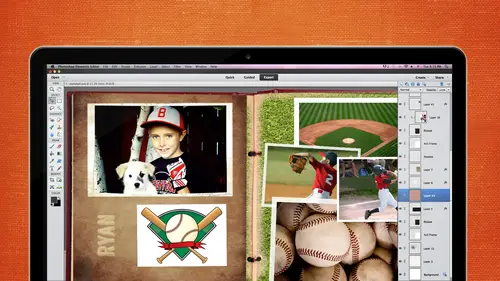
Making Patterns
patterns are super fun to make, too, though, and so we're going to start out with something really super simple. And this is just a very simple striped paper. And this is what we're going to do first when you start to make a pattern. Do you know much about patterns about making patterns? This okay, so we're going to start with something super small. I ask that question because we usually start with 12 12 papers. We're going to start with something that's unanswered by an inch by one inch by one inch to make our pattern. The things that kind of keep in mind when you're making designing your pattern is there are 12 inches in the 36 by 3600 scrap of paper, which is typically if you work in pixels or inches. You know it's sometimes hard to make that conversion in my mind cause I usually work in pixels, but 12 by 12 inches. We're going to start with the one by one. So if we have a one by one and we have one line in it and we flood fill a 12 by 12 paper, that means we're gonna have 12 lines,...
right? So if we want 24 lines, let's start with 1/ inch. So just keep that in mind when you're working with your papers are your patterns. I'm sorry, but this is a one by one. Let's start with the rial bold pattern. And again, I would start with a 50% gray. I think I will work. I think I will do it in black just because I think it might be easier for you to see. But if I were making this for myself, I would do it in 50% gray because then I could save it as a template and use it again. If you have used a no overlay of black overlay and a gray overlay, you know that when you use your blending modes, you're more likely to get more options when you're using a 50% grave in a black. So this is one inch. I'm going to ground my rectangular tool, and I'm just gonna draw out a line here, and we'll fill that with black and hit control de to de select it Now. I did this on its own layer because I want the background to be transparent. I want just the lines. You don't have to do it that way, but you're gonna have more versatility. If you do, you're gonna have aligned P and G overlay that you can use on anything. I want to make sure that lines right in the middle. So I will highlight both of those layers and use the marquee tool and come down to the very bottom. And it will have an ally in option here. So if I click center and middle, you saw that move over just slightly knowing No, that's right in the middle. I'll turn that white layer off and what we need to do next is to find the pattern that will come up to edit, define pattering and let's give it a name one inch stripe and click. OK, and now we can get rid of that. We don't need it anymore. Open a new folder, file new blank file. We'll grab a 12 by and then to get that pattern on our paper, we need to go up to file or I'm sorry, edit and fill layer, and that will open up our fill layer dialog box. You in this use content area. You have the option of foreground color, background, color, color or pattern, and we want pattern. And then in the drop down box below things are. All of the patterns are not all but some of the patterns that came as a default with Photoshopped elements. But the very last one here that doesn't look like a stripe. It really is a stripe. That's hours. Whatever pattern you create, it's going to be the very last one in that pattern. Ah, window. So if we click on that to make it active, click OK, and now we have 12 stripes on our paper and you see that I just did what I told you not to dio. I didn't make an extra layer, so those lines are on that background. So if I control Z to undo that, I make a new layer. And now if I fill those fill that layer with that same pattern that I know is already selected, I have my lines on a different layer. I can turn off that transparency and save that as a pattern to use for however many papers I want to use very simple, very using. So, um I actually have a smaller win here, but the concept is the same. I've gone down as far as 1/ into quarter inch, Getting really tiny, nice little lines. Um, let's make a more complicated one with brushes this time. Now, this is kind of a fun paper for a kids party or something like that. And this is what I started with. Are any of you familiar with the offset filter? Oh, good. It's so fun is really fun. And I'm going to keep this up here because it's gonna be easier for me to grab the colors from that. But this is a one by one. So we're gonna go to file blank and make a one by one here a new I actually made this particular paper by choosing the yellow background because I knew that I probably wouldn't do anything else with it. But in thinking about it afterwards, I thought it probably would be a really good idea to keep this transparent, as I did with the others, because you could go in and take that little pattern, run it through the black and white converter, and you would get varying levels of grey and it would be really easy than to layer it with a color, use a blending mode and get a really pretty paper. It would be a monotone paper or all the same, Hugh, but the variations of the color would be different where the dots are. So let's go ahead and start with, um, a new background for this yellow and just fill that background, make another background, and I'm going to start with this blue. I'd like to grab the brush to make my circle and see how big That's really super big. And I'm sure Michelle told you you could use your bracket keys to go up on big time. Okay, let's just put it down here for lips. Need toe. Sharpen that up a little bit. I want that to be really hard. Did she go over the brush panel with you? Perfect. Okay. I want that to be really nice. Clear anges and I'd like to know this is really, really important when you're using an offset filter. Whatever designed you're going to offset has to be exactly in the middle by offset. What I mean is, let me get this aligned right here. If we took and divided that blue dot and yellow back run into quarters. The top is this corner is gonna go down here, and this corner is gonna go down here. Why that's important is because that's going to make this pattern seamless. So there are not going to be any edges that don't match. We're starting with the one by one, but we're gonna flood fill a 12 by 12. But we want that pattern to be seen with. So there no marks in between that don't matched up perfect. Perfectly. And you'll see that when I use the offset filter. So I wanna offset just that blue. So we come up to, um, Layer, Let's see. I'm sorry it's not coming to me immediately filter other in an offense and important. The important thing to remember here is what size did you start with? Well, we know that one inch equals 300 pixels. We want to divide this in half, so we will divide 300 in half and get 150. So that's what we need to put in our horizontal in our vertical slots there. Now that's taken that and divided it and it doesn't look like it's even does it? Did I type it right? Filter can only have one layer selected filter. Other offset. I did make sure wraparound is checked as well. That needs to be checked, so it looks off to me. But it looks like it should be correct. So let's go ahead and see if it ISS. We'll grab purple, make another layer up there, and I want that brush to be a little bit smaller. So I use my bracket key to make it a little bit smaller, and I want to make sure that centered. So I'm going to highlight that one and the big yellow one because I don't want to touch the blue layers yet. I wouldn't want them out of place. Let's make sure that center it again, and that looks good. Let's make another layer and choose some red. You could brush a little bit smaller, and the only rule about this part is you can't go over the edge because if you go over the edge, that's gonna make that part of the brush not seamless, and let's grab some white and on a white layer. I'm gonna make that even a little bit smaller. And you can make your brushes bigger, smaller however you want to do it. That looks fine for now. No, I'd like to merge these four layers, so I will highlight them and I will merge them. And now I have one design that's going to be transparent. But I'm just for the sake of perp of easy looking today I'm gonna merge the yellow too, because that white wasn't very easy to see. Normally I wouldn't. I'd leave it separate. So now let's go ahead and define it and see what's up with that blue. Oh, just call it Stott. It's spelled I'll new blank file scrapbooking 12. I told paper, and at it, Phil Layer. And we know that pattern is going to be the very last one there. I'm nervous it's not gonna be seeing with now that looks really odd. It looks really different, but it is seamless. There's no pattern. That is, um off. You see, all the dots are matching, but it looks really odd. I'm honestly not sure why that blue Yeah, it is off. See how that blew us off? I'll have to go back and see what I did with that. But ah, I don't know. Maybe when I aligned it, I didn't get it perfectly aligned when I first started. Did anybody see anything I did wrong? That it should work? They don't work on the next one. I think maybe I just didn't get a line perfectly. And I guess that's good to know that that's what happens when you don't get it. Align perfectly question you. You're sort of not saving out, but care. Stephen from San Diego says, Do you save your patterns as J Pegs or as P and G's? They just want clarification on that. We're gonna talk about that in a little bit. And actually, a pattern file is a P A t file, okay. And and we will I will show you how to state that out. Well, let's see. We did that win. Do this one. Okay, this is what we're going to start with. Number one, the shape we're going to add some dots to it, and hopefully we'll come up with this pattern that looks like this. So I'm sure you knew that you can use you can make your patterns from your own little stripes. Whatever you want to dio, you can use brushes. And now we're gonna take a look at shapes in Photoshopped Elements. So, um, you get the shapes by clicking on the custom shaped tool, and they've given you a lot of different choices. If you come up here to shapes and click here, these are all different shapes that you can choose from. And I believe this was in the ornaments category, and it was this shape right here this close that out, and we'll start with the one by one on that. What's really fun about the shape tool is that you're given a lot of options to make things super easy for you. I'm going to create a new layer because I want that shape to be on its own layer, and I actually already had this up. I'll click on it again. That's how you get it. And in the box. On the right hand side, you can use it as unconstrained to find proportions to find size or fixed size. I want this to be a fixed size because it's going to take a lot of guesswork out for me. I know that this is 300 pixels by 300 pixels. And when you click on fixed size, you have the option to add what you want at the very bottom. Now. Actually, I think it's in inches, so we know it's one inch. Looks like I still have that in there. I was going to make it a 0.7, and I have that left in there from before. So all you have to do is click on a blank linger and that the Photoshopped puts it right there for you. You don't have to drag it out. You do need to simplify it. And Photoshopped elements has made it really super easy for us by just clicking that simplify button. And I think I'm gonna go back and change my color to black so you can see it. I probably use great otherwise already, and let's make sure that's in the center, and the way I do that again is by highlighting these clicking the selection tool because that will bring up the align options and clicking on center clicking on metal. And you saw it go down and over. And so I'm pretty confident that that's in the middle, and I'm going to turn off the white background. Let's go up to filter again with only one layer selected filter. Other off that and I forgot to Rast Arise it. So it's gonna ask me, Do you want me to simplify it for you? Because you forgot? Yes, I dio and my offset filter was already said at 1 50 from before. And that's perfect and it looks really good. Let's put a couple thoughts on their extra layer. Go back over to the brush and let's grab a small brush. Maybe I want a little bit bigger than that and just put some random dots around a couple. Big wins make you smaller winds and again, just make sure you avoid the edges, and now it's select both of those layers merged them together. Save that as our pattern going to define it as a pattern first, actually just called pattern to and open a new document a new 12 by and go back to edit Phil and I find that very last one. Remember, it's gonna be the last one there, and now we have a really nice paper. Part of the reason I really like using the off that filter is see how the border the edges around the paper are really nice. Has got half of that pattern there rather than And that really integrates the pattern into the paper rather than just having the pattern in little dots around you could have the all the little square part, like right here from here to here in here and dots around there. But it would look like it was just laying right there on the paper, But with the pattern around the edges, like that halfway, I think it looks really good. Looks like a real real piece of paper there. Did you have a question? Care? You're just scratching your eye. Sorry. Any questions? Beautiful. Meaning, uh, Michelle was talking about how great year your design I is. Uh, yeah. So I'm sure you draw a lot of inspiration from all around all around your world, right? I dio dio if you don't like this, if you don't like making patterns, If this isn't your thing again, you can go Google free patterns for photo shop. You can find them everywhere. Um, brush easy is a really good place that you can get free brushes and free patterns. There are a lot of places that particular one I mentioned. I mentioned that before because I'm going to show you one that I actually downloaded from there. And this was just a free pattern that I downloaded. I went on brush easy and just look through what they hade. Now, the way you get a pattern that you download, I'm gonna show you how to do that. Right now I just want to show you on my screen what it looks like. So this is a pattern file. It will say pattern or P A t on it. This particular one was a free one. It on Lee had that pattern. You don't know what it looks like. So that's when you get free things like that. Sometimes that's the down side of it. You don't have a terms of use. You don't know how the designer is allowing you to use it. But you can look that up online. You could make a sample papers and just keeping the file. So you know what that pattern is. But sometimes I just want you to know that that's what you'll see. Um, this I wanted to show you on Lee because I haven't made any pattern files myself to market or produce. But I usually include a pattern file in my styles folder. So I want you to see that if you sometimes you will buy things from designers, not just myself. And it might be another product. As I'm saying, this is a particular styles product. And so in this, when it has the J the JPEG images, it also has the styles pattern, which is with my intent. But I also include a pattern file for you if you want to use it. And how you might want to use that is to create a paper or background or something that would go with the style that I that you have purchased. So I think I wanted at this point to show you how to install pattern that you purchased. Actually, let's go back and get that weather when Okay, So to install a pattern, you will go to your preset manager that is under edit. So edit preset Manager, Have you visited the preset manager very much. Okay, Well, look at this a little bit more tomorrow when we talk about brushes, but for now, it always defaults to the open brushes in the down pointing arrow Here you. This is a home for your swatches, your radiance, your styles, your patterns in your effects. We want to look at patterns right now, so just scroll down and these air the patterns that photo shop has put in here for you. Um, if you see this little more over here and you click on that, you can see that photo shop has very nicely put in a whole bunch of textures here or patterns for you to use. So a lot of times you can just come here. If you're looking for something special, you want a nature pattern. Let's just say OK on that website, click the hand instead of bad. Well, those there are the nature patterns that they have. Photoshopped has put in there for you. Artist Surfaces air Really nice to these air. A lot of nice textures to start with. I think you were oxygenating, Vicky, how you started some of those. You can start with something like this and then add on to it and get some really nice designs that long as well. But what I want to do is load. Ah, pattern. And okay, let's add it. I'm so I was looking for load rather than add and in photo shop elements is add. So it's add, and I'm going to navigate to where my pattern file was. I happened to be in that folder. Just click on the pattern and here's the load button. And now those patterns that I had are loaded here. Just click done. And if you wanted, you could come open. Come over here and get a 12 by 12 or whatever size you wanted at it, Phil Layer. And now you're gonna have some options because all of those patterns are going to be in there. So let's just choose this pretty blue one, and your background is gonna be a blood filled with that leather background. So if you by chance purchased this as to use a style, you could make the paper or whatever you wanted and then use the style on a smaller element, which would be nice. So what if you've made all these really cool patterns and you want to save them? Don't close Photoshopped, because if you do, they're gonna be gone unless you've saved them. So let's let's go back and save them. Here's edit. Preset manager. Go back to your patterns and let's, um, reset. See, I think I couldn't reset thes. Okay and see, that's another thing with photo shop elements. Once you believe the pattern and you clicked on another pattern, the patterns that you've made are gone for that. So let's make one really fast. So when my one So it's a good thing to save them out as you go along. Well, just make another one really fast. That's kind of interesting. And this is to edit, um, define pattern, and this will be all belong. And let's just hide that and now at another layer and make a rectangle. I am not getting my rectangular sir selected very well in my okay. And let's define that as well. Oh, what am I missing here? I'm sorry. Yeah, yeah, because I'm flustered because I messed that up. Okay, so we want to save those. So now we want to go to edit preset manager and patterns. And there are those two patterns that we create in. So to create a pattern set, we want to select the ones that we want in that pattern set. Do you work with styles? Very often. So you know what? One A SL file could have 10 styles, innit? Patterns are the same. We want one pattern file and let's choose five. Let's just choose all five of these by hitting the 1st 1 to select it and hold down the shift key and click on the last one. It's gonna select everything in between. If you think you know what I really don't want that yellow. You can hold down your control key and click on it, and it will de select that one. So now we have four selected that we want to save. It's a pattern and we will say, Save set, and we will be offered the option to name it and to save it. So let's just save it. Honors Death top. Let's name it, um, sample pattern and it saved as a p A t. Don't change that and click save, and then you're done. So now if we go to our desktop, we'll see that p A. T file right here. And if we go back to elements and we want to load that we need to go back to the, um, preset manager. Go back to our patterns and we're going Teoh, either add or append. I found this confusing when I first was looking at it, and I had to figure out a way to remember it. And I'm going to talk a little bit more about this in brushes tomorrow. But basically append photo shop elements has made a pen to mean add to what's already here. And if we say add, it wipes out everything that's there and just adds what? You're what you've chosen to add, and that's important for a reason that will talk about tomorrow. So let's upend right now where go to our death top. Fine. Click on that pattern goto load, and now you see that it's there again. This with the original one that I made, and it's there again. If you decide for some reason that you don't want that pattern, you can delete it from here. It's still on your desktop because you saved it is a PST file or p a t file, but it's not in your preset manager. It just means is not handy for you to use right now, but the leading it from here doesn't do a thing to get rid of the file. You can very safely do that with anything that's in the preset manager, brushes or patterns. One other thing I wanted Teoh show you is that before we start making the our final piece 14 in preparation for tomorrow again, if this is not your thing and you want to buy patterns that are already made for you in the form of overlays, or P and G uh, patterns, you can do that as well. This is one, and I Why bring this up? Is because a lot of people say I see these overlays patterns, overlays in JPEG format and PNG format. What's the best? Which one should I get? They're two different animals. This particular one has no transparency. You can see that. I think you can see it has no transparency. It has a little gray, a little darker, great and some white. This is really easy to use. You can just flood fill a layer above it, which I've done on turned on the visibility here, and you can see I change the blending mode of that pink toe overlay and you get a beautiful paper in seconds. If you don't have the time to do all this make this pattern on overlay as a P J peg is great P and G's you can get these as PNG's two. This is a PNG. The gray is the pattern. The white is the background. So if I turn off the white, you see that's transparent and why these air really cool is because you have so much more versatility with, um, you can apply styles to them. You can clip papers to them you can colorize. Hm. You can put devils on them. You can use that, save it as a PSD like we did before, and put it as a texture in your paper. You're going to get like, a really nice and boss. Look, you know those of boss papers that you can get So these air kind of my favorite Onley because you can do so much with, um so those are two options for you. And now let's take a look at this final. Do it at here. You can also buy pattern files. This is one I purchased and they usually common, you know, like dispute, depending on the designer. But you could have 20 patterns in one product that you buy, and this is only this is pretty small. This is two inches by two inches. So I wanted to make a no overlay with this. And this is what I wanted to come up with just for the fun of it. Let's not offset this and let me show you what I mean by the difference between the edges and then not having the edges. So a new blank file 12 by and I need to define this as a pattern. I'm just gonna click, OK, I'm not gonna rename it and let's fill that background. It's going to be big, because, remember, with two by two, So we're going to get six. It's going to be big. It's not gonna be relate, pretty, but see how that's just sitting there, that that to me, isn't attractive. I want those edges on the other one. I want my just to be like this, because to me, that's more attractive. Actually, I did something else without, but you can see. When I'm I, I offset that and made been made it smaller in the middle, so we'll go ahead and do that. But I just wanted to show you what that looks like. So this is T. O. C. How big did I make that 1234567 cross? So I mean, it may be a little bit smaller. Let's just leave it as it is right now. And so that's two inches. So that's 600 pixels, right? So filter offset for other offset. And we're going to change that to by 300 and now it should be perfect. And actually, what I should have done was duplicate that beforehand because I want two of them. So we'll just go back and grab it again. Uh, it's already open. It's not gonna let me do that. So let's come over here to new duplicates. All right? Now I have two of them. We'll apply that offset filter again. And now let's drag this coffee over. And if I do control T, I will get those transform edges and I'm gonna bring that down a little bit. That looks pretty good. And I would like the that centered, so I'll do the centering trick. Whoops. I need to commit that. I guess by selecting those go back over to the marquee tool, let's make sure that that is in the center and in the middle. And now that's gonna be a perfect pattern. Add it to find pattern. I would call it pattern one close that, you know, Probably not a good idea to close it until you actually fill your paper just to make sure that it everything went smoothly. Delicious. Close it. New blank file. We're gonna go by a 12 by and at it. Phil, grab that last pattern there. And now we have this paper, but I actually wanted on its own layer controls. He is my best friend. You know, I really knew that I was, like, hooked on scrapbooking when I worked with several monitors, and one of them is by the very edge of my desk. And my husband walked by and he knocked it in my mind. Said Control Z, unlike Oh, no, I am indictable. It's funny. General life. Wait, I'm saying that Yeah, that was really odd. Okay, so now we have this pattern we have It is on its on lier like I was talking about before with these type of transparent patterns, you could clip papers to it. Whatever you want to dio one of the bonuses I think they get for the Watcher. The watchers air getting a paper pack that I put together for them. And they are papers that you can practice these techniques with. So I not sure this is one of them, but it there are papers like this that have a little bit of off color, not a lot. You can use this as a base point to do what you want to do with your patterns and textures and things that you're gonna be learning here. So I, um what Karen is referring to is when you click on R. S V. P, you actually get access to what we're calling the textured papers bundle and that comes with our sleeping for Thank you. Yeah. Yeah. Karen, can you just really quickly take your pattern that you just did and do something with it? I mean, put a color into it or something. I'm going to drag it over to this paper so we'll see if that helps. And if not, middle, do something else. with it with that. So I'm going to take this and drag it right over here. And remember, if I hit shift, it'll drop right smack in the middle, which is where I want it. Now. One of the the rules of the design or scrapbooking is your light, your eyes drawn to what's light. And so I want to maintain the lightness of the center of this paper. So I'm gonna pay attention to that when I play with the blending overlays on blending modes on this. And this is one time when black works really well. I tried this with gray and a blended a little too much with the paper. So sometimes I will do patterns in black. Sometimes if it doesn't work, I will flood fill it with gray. Do you know how to flood fill? Let me show you real quickly. If you f you hit, hold down control and you click on the thumbnail of the transparent pattern. It will select just those transparent patterns. And if you go to edit Phil selection, you can choose color. So let's choose, um, background. And now that's gonna fill that with white. So, um, if black doesn't work for you. Switch to Gray. But for this I'm leaving a black because I know great didn't work well and I'm going to come down to overlay and I don't like that. So just like what Michelle was talking about in her typography, if you click when she was saying Click on the font and squirrel through you can't with the Dow down, down, pointing your okey. You can do that here with blending most as well. So if I highlight that and I use my down pointing arrow, it's going to cycle through there. And you see, with black, I'm not getting much of that. Is something wrong here not getting much of a change at all? There we go with black. You don't get a lot of changes on this particular paper. I saw one there that I kind of liked, kind of like the soft light. It's still really harsh, and so what you can do very easily is just lower that opacity. And that's pretty nice. I kind of like that, and we'll use that as the base tomorrow. I'm not going to save it because I'm going to use that part of, um when you when you bring in other elements and things that might not be perfect. It looks good now, but with everything else that will bring in, and it might not be the best choice, so I'm not going to save it will bring it back tomorrow and look at it again. Um, let's turn that around, though. And let's put the background on top. I'm not sure if Michelle has covered clipping masks yet with you, has she? So if you you know, if you hold down your all key and hover in between those two layers, your cursor won't change his two circles. And if I click on that, it's bringing it back up to normal. Why? Why is that so light? I'm not really sure have to think about it. Let's add another layer of color here and undo that clipping mask that's at a yellow here. Anybody see with something I'm doing wrong? I don't understand why that's not showing through, thank you. I want to get them. I guess it just goes for everyone to use the might hear you. You are absolutely right. Thank you. So we conclude color to that, or we can clip that paper toe that I was looking at the paper thinking it was the wrong transparency, but ah, wrong capacity with the pattern instead. So thank you. So that's another thing that you can do with the transparency is love wise talking about before? So that's kind of what I have for you today. So do you have any questions at all about the patterns or textures? Or do you think about any Internet question that would you know? There is a clarification, though. Steven on San Diego says, Do you save the pattern paper overlay that was created when the pattern was added to a blank page? I probably would if I didn't want to recreate it again. If it's something you think, I'm never going to use this again. No problem. Or I know Michelle had talked about saving in segment to saving things as PSD so she could go back and grab them. Sometimes I'll do that as well. Great. So think about what you want to scan or photograph tonight so that you can have something handy to work with tomorrow, the Internet audience or bring your laptop and you can make a brush with that. I actually, um Do we have time for me to tell a quick story? Sure. We love we love story. Okay, tell the sperm. But I'll tell you today, Um, about 15 years ago, I inherited from my uncle ah stack of letters about this high that were written that were written by my great great grandfather in the 18 fifties. And they told his story about leaving California or leaving um, Missouri and coming to California to seek his fortune in the Gold Rush. And he was actually in Sacramento for about a year and did not make a fortune. So he left and went to Texas and, um, in the land, um, some land act he was able to grab about 500 are acres of land in Austin, Texas, and reading these stories, he they were stories from him, his family, his friends, you could tell his adventures and all the things he went through and his family members that didn't open with dead or alive. They were wondering if he had been killed by Indians. I mean, it was poignant, so it's really important not only to tell our stories, but to also right so that people can have our hand writing because one of the things that were going to do tomorrow and I didn't bring it, because I know we're gonna talk about it Tomorrow was on this last. Um, actually, I think it's tomorrow. I made a brush from his handwriting because I had one or two pictures, but that's all I had. And so I scanned Hiss. Oh, I think I saw it there. I scanned his handwriting. This is what we're gonna do tomorrow. That is actually a letter. If you can see the data there, it's September 18 87 and that is his actual handwriting. That why scan and made a brush, and so that's a way to make a really meaningful page with something that's that's very special.
Class Materials
bonus material with purchase
bonus material with enrollment
Ratings and Reviews
Prairie Chicken
I found this an excellent course on the use of PSE--not just for scrape booking but for any use. And of course the scrape booking ideas and methodology was great. I enjoyed Michelle's approach very much, and also liked Karens.