Lessons
One Light Outdoor Portrait
17:01 2Focus Umbrella Outdoor Portrait
09:49 3Outdoor Athlete Hero Image
10:17 4Cross Light Outdoor Portrait
04:37 5Edge Light Outdoor Action Image
10:21 6Clamshell Light Outdoor Portrait
17:50 7Mid-Air Basketball Action Poses
13:24 8Refine Mid-Air Basketball Action Image
06:44Dynamic Mid-Air Basketball Image
16:02 10Natural Light Indoor Portrait
12:18 11Action Image With Shadows
18:30 12Stroboscopic Action Image
21:11 13Backlit Indoor Portrait
07:39 14Environmental Portrait
06:11 15Incorporate Architecture Into a Portrait
09:30 16Mixed Light Athletic Portrait
10:12 17Cyclist Action Image
17:45 18Adding Motion to
09:47 19Environmental Light for Runner Action Image
17:19 20Add Haze to Runner Action Image
11:11 21Create Your Own Environment
14:50 22Swim Outdoor Portrait Poses
05:18 23Action Images in Water
11:40 24Freeze Motion in Water
06:45 25Selection Process: Basketball
23:49 26Camera Raw Post Production: Basketball
11:47 27Finalize Images in Photoshop CC: Basketball
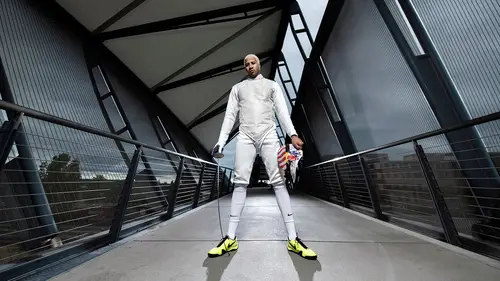
13:15 28Selection Process: Fencing
13:17 29Capture One Post Production: Fencing
07:05 30Finalize Images in Photoshop CC: Fencing
15:13 31Selection Process: Triathlete
13:43 32Camera Raw Post Production: Triathlete
07:47 33Finalize Images in Photoshop CC: Triathlete
27:42Lesson Info
One Light Outdoor Portrait
So we're at a middle school basketball court today on top of a roof in west Seattle. I'm really excited to be here today with the CreativeLive team and the Red Bull Photography crew. I think it's gonna be really fun. We have two amazing basketball players that we're gonna get to capture. We're gonna do some action, some lifestyle, some really simple approaches to lighting and how you can take one light and change it up and make it look like it's a couple different lights or adding drama by just taking a step to the right and then moving the light to the left. We're also gonna do some action with the athletes and make it so they don't have to work as hard by using a trampoline, and them jumping off that. We're gonna emphasize the action a little bit more by having them move their body, and direct them in ways where it looks a little bit more dynamic. Really create a mood with overpowering the sky and really making it dark and dramatic and really putting in what style we want to see in t...
he image. So now we're gonna do a really simple one light set up. We're gonna have Duree here, our basketball player, sit just right here. This is so we can get to know each other a little bit, and so I can show you how I would use one light in a couple different situations and really use it to change the mood of the photo. So this one big light is a pretty large octabank, and all I'm looking for right now is just fill for everywhere. I'm not really looking to shape it in any way, and as we go along, we'll move it a little bit and try to get a little bit more shadow on his face and reveal a little bit more of what I want to see in the photo. First, we're just gonna have Duree sit here, just right in the middle, just very casually. You can hold one or two of those balls, that's completely fine. I liked how we were doing it just before when you were just sitting there. So right now, we're just looking for more of a lifestyle-type shot to get things moving along, and I think with the mood of it, it's gonna be kind of going towards more dark 'cause we have sort of an overcast right now, and I think with his hooded sweatshirt, I think if he puts it up, I think it'll add a bit more to the dramatic effect to it. First, we're just gonna put this straight on him. We could lower it even. I'll do one with and without the light on, so I'll turn it off really fast, do a shot. A little bit more to your right there, Duree. There we go. (camera shutter clicks) Great, that was one without it. It's a little dark, so we're gonna add a pop of light now. Turn on our light again and put it down to here. We're currently at, for my shutter speed, I'm at 200th of a second, ISO 100, in 5.6. It's kind of just everything's in focus that's within him and a few feet behind because we really want to emphasize this cool metal cage-like structure that's holding up the basketball hoops. Let's see here. So we're gonna add that pop of light, (camera shutter clicks) and there we go. Now we got a little bit better exposure. I would even say we could bring it up a little bit more. The power is at 6.5. It's a 800-watt strobe, and we're bringing it up to seven. It's just a little bit, a half a stop higher than what we had before. We can also change my aperture a little bit or bring up my ISO, but I kinda wanna keep the ambient at the same level, so I'm not gonna change my shutter or my ISO right now. (camera shutter clicks) Kay, great. So now I have a nice looking photo where everything's just pretty lit, he's got a good skin tone, he doesn't really have any shadows around him because I'm blending in the ambient light with my strobe here. But we're gonna crank things up, and then we're gonna also move this around and give him a little bit more shape 'cause I like a lot of times where the light is not so direct and you're getting a more cinematic tone to the photo. 'Cause you're never gonna have light that just falls on you perfectly. Right now, I just want you to continue sitting there. You're being an awesome subject here. We're gonna move this light over to the left. Take a few sandbags. It's a little windy outside. When it's windy, you do wanna have sandbags 'cause they're very helpful, and these modifiers can get expensive. So we're gonna move it over here, guys, just at a three-quarter first, let's do a three-quarter. I'm gonna shoot from the exact same spot but right now, hopefully, with this big source, it's really gonna cover his left side still, but we're gonna get a little bit more shadow on this side. Yeah, you can leave your hood up and everything. Let's go ahead and drop one of the balls maybe. We're gonna keep most of this very similar so we can show a progression as we go, and then we'll sort of liven it up and give some different poses and movements to him a little bit later. So that's great. Alright, cool. So we still have the light pointed directly at him. Again, it's gonna be kind of a flat light coming at him. We're looking for, we're trying to shape the light a little differently and see how it falls off on his left side. (camera shutter clicks) There we go again. (camera shutter clicks) Perfect, one more. (camera shutter clicks) Look off to your right. Great. (camera shutter clicks) Kay, let me check that really fast. Great! Now, I'm gonna just step over a couple feet to my right, and now I'm gonna emphasize this angle a little bit more because I'm moving, and the light is already moved. Keep your face off that way. Great. Let's move the ball on the ground to the left side of your foot. Perfect. Right there is great. There you go. One, two, three, good. (camera shutter clicks) One second, let me check that out. Fantastic, so right now, the front of his face is very lit, but he's got a little bit of shadow on his left side, so it gives it a little bit more drama. I feel like I like to set a mood with each one of my pictures and find out what kind of story I wanna tell. If I want, say Duree here was a college player, and we were trying to tell a story about his life, and we wanna tell a little bit more than just a basketball player. But we obviously wanna incorporate that as much as possible. These are just ways you can emphasize that through lighting and through the surroundings and the environment. I'll go through a couple of 'em real fast. Very simple right now. So, we'll start with the unlit one, so it's unlit right here, we're just looking at, again, just a basic lighting with no light. Then we used a little pop, it gets a little color, but there's really no shadow. There's just a really light haze 'cause we're using a really big octabank. This one is right where we moved it off. You can't really see the differences until you zoom in on his face. You see the shadow gets a little deeper on his right but, because it's such a big source, it's still gonna fill that right side a little bit for now. But then we're gonna move over to the right-hand side and now is where we're gonna start seeing it a lot more. So you're still seeing his face lit up, and we're getting, you're still getting his face but we're getting that shadow on the side. If he was wearing, say, a red or a different color shirt, it might be a little more pronounced, but I think right now is good where we wanna be at. So now we're gonna move it even just a little bit more over and really make it very dramatic here. In terms of just keeping it all at the same level right now, we haven't moved one thing in terms of the lighting power, the exposure, the ISO, the shutter, anything at all. He's stayed in the exact same spot. And mostly, we're just playing around with light and seeing what looks best on him, as well. We're gonna shoot right from the middle where I was before. Great, and... (camera shutter clicks) Do one looking right here. Fantastic. (camera shutter clicks) Do one more, hold on... I'm gonna get a little lower so I keep (mumbles)... (camera shutter clicks) (camera shutter clicks) (camera shutter clicks) Good. Alright. So now I'm gonna move over to that right side again, and we're gonna try to emphasize, again, the shadow that's over on his left side. So keep your face right there. We wanna still get a good amount of light to show his face. We don't want him to be in complete darkness because we actually want to see him. He's the star of our show right now, and-- (laughs) He's being very modest. So we wanna be able to see him. Right now, usually, I would keep his face either straight or just slightly off towards me or looking towards the light so I can keep a majority of that light on his face. We'll try a couple of those. I'm gonna come at that angle over here. Let's see. Turn your face slightly straight, there you go. You could still kind of gaze over at me, great. Rest your left arm just a little bit on your leg. Yep, there you go. There you go. One, two, and three. (camera shutter clicks) Great, let's do one more here. One, two, and three. (camera shutter clicks) Let's check that out. Nice! It's very dark. You have a nice big shadow now. Both his eyes are filled with light. We do have a shadow coming down right around here. It gives it a really nice look. I think what we're gonna do is do a few more. We're gonna have him look at the light, and we're gonna have him look out straight. Let's do that first, great. And right now, because I'm at such an angle, I'm seeing-- When I was over in the middle, I see a nice symmetrical look, and I wanted him in the middle because I like to utilize the environment as much as possible when I'm trying to take a picture in order to make it have a different element to it that's interesting, besides just our star here. So I'm coming over here now, and I don't really like how his head comes in with the line behind, so I'm gonna move him a little bit to the right, just so we can get him a little bit more in this square. It'll feel a little bit better for the photo. Yeah, thank you guys, perfect. (camera shutter clicks) Kay. Two, three, great. (camera shutter clicks) One more. (camera shutter clicks) Great, now look over towards me more. (camera shutter clicks) Great. Now look at me completely. We're gonna do one just completely this way even though his face will be mostly in shadow. Let's see, that... Fantastic. So the right side of his face is very well lit, and his left side is almost in shadow. Right now, we're going to change it from our settings, which are, again, 200th of a second, 5.6, and 100 ISO. We're going to crank up and use high-speed sync so we can dim down this overcast look out here and try to get a more moody feel to it. So same positions and everything. I'm gonna bring up my shutter speed to 800th of a second, and we're going to move this up from-- From a seven to a nine. A seven to a nine. Yep, so we're gonna do seven to a nine. So we're going from a seven to a nine. Keep your face right there, do the exact same shot. (camera shutter clicks) Check this out really fast. We're a little dark still on him, so what we're gonna do now is lose the front baffle. I like to, a lot of times, use hard light when I'm shooting athletes, especially, and most of the time it's to emphasize muscles. It really shapes out arms, and it really helps give them more of a 3D-type look, so I'll end up using a lot of times hard and soft lighting together. And this is a similar version of that. And it also gives it a little bit more power. It's not much, but it gives it a little bit more. When you're using something like this without the baffle, it's gonna be a harder outline, but really out here it's not gonna matter because we really don't have something to shoot it against. If we were standing against a wall, you'd see a hard circle around it, but like this it's not gonna be that big of a deal. So we're gonna shoot it without that and see how it looks. Can you lower it just a little bit? Again, the lighting's still pretty straight on, and in a minute we're gonna raise it up and give it a lot more angle to it, as well. Can you turn it all the way up, or is that what it's at right now? (assistant answers in the background) Okay, so we're at a 10 on the lights. (camera shutter clicks) Take that shot. Oh yeah, that looks a little bit nicer. (camera shutter clicks) This is great. Look out straight once. Fantastic. (camera shutter clicks) Now look off towards the light one time. (camera shutter clicks) So three different versions here. Fantastic, okay! So right now, we have a really-- Our sky's getting a little deeper. It's very overcast, so it's gonna be just a gray tone to it, but if you had some really nice clouds it'll really build up a texture back there and really look gritty in the sky. Hopefully we can get it even darker. We're getting a nice shadow that's falling off the left side of Duree, and it's giving it, again, that cinematic look, like we're telling a story now with it. We're gonna change the direction of the light now. We haven't changed it really besides just moving the angle and moving my angle to create this. We're down to a little bit more dramatic sky like I wanted to, but we're gonna try to change it up by angling it a little bit more overhead and giving a little bit more shadow underneath his face and really sculpting it out. Let's go ahead, what do you have on underneath this, your sweatshirt? Just a shirt. You mind taking your sweatshirt off? Cool, great. So let's come over. We'll do one right here, we'll angle it down. I'm gonna stay in that same corner position away from it, and I'm just gonna come down here again. (camera shutter clicks) Great. So right now, in this case with athletes, I like to add shine to it, especially someone with a darker skin tone, it looks really great, again, with muscles and everything and sculpting it out. When you're taking off the diffusion, you get harder light on your subject, and it is gonna sculpt out muscles, and it is gonna make 'em look more dynamic and more 3D. Right now, we're gonna be using one of those, and maybe later on we're gonna be adding another one to really, really emphasize those. I'm gonna shoot that same shot. Can you pull the light back a little bit this way and just a little bit, yeah. One step over to your right, too. Thank you. A lot of times what I'm watching-- You've gotta watch shadows a little bit more when you're shooting with a harder surface as well because you're gonna throw a lot harder shadow. With a softer light, it's not gonna be so bad and you won't notice it as much. It'll kinda just fall off, but with this, you're gonna be able to see a lot more shadow on it so you really wanna pay attention to that shadow around the nose especially. Right now, I'm gonna take another test shot and make sure that it's not falling into a weird spot and really obstructing his face and making it look kinda off. So here we go, we're gonna try this shot again with the light over more so we can minimize that shadow. (camera shutter clicks) Great. Look out straight now. (camera shutter clicks) Fantastic. Can we bring the ball a little bit closer to your foot right there? Thanks. (camera shutter clicks) Perfect. Let's do one more. (camera shutter clicks) Okay, so now we have, I think, a nice shot. I like the blue shirt now. I think it brings him out just a little bit more and it mimics a little bit of that blue behind him but without blending in too much. I think I want to darken it even more. This light, because it's a giant octabox, it's not gonna really-- it takes a lot of power to fill it all up, so we're gonna switch it out with an umbrella, and the umbrella will intensify it a little bit more. But again, with intensifying it, you're gonna get harder shadows, which both help us, but we gotta watch out for that extra shadow on those faces when you're directing the light like that.
Ratings and Reviews
awynterphotos
Loved all the ideas and why he's positioned his athletes the way he did, and positioned the lighting. I met Dustin a few years ago at and NPAC conference. It's nice to see him doing these teaching videos. His work is very inspiring to me.
a Creativelive Student
Less talk and all action.. This is the best no mumbo jumbo talks and straight to practical work..
Alexandra Schaede
I really enjoyed the multiple exposure video, the pity is that they are no videos to talk about the post processing of this image.