Build & Shoot: Bokeh Shapes
Lesson 9 from: DIY Photography: Lens Attachments, Filters & Creative EffectsMike Hagen
Build & Shoot: Bokeh Shapes
Lesson 9 from: DIY Photography: Lens Attachments, Filters & Creative EffectsMike Hagen
Lessons
Class Introduction
02:19 2Build & Shoot: Soft Filters
11:20 3Build & Shoot: Star Filters
14:56 4Build & Shoot: Ethereal Filters
21:53 5Build & Shoot: Sunglasses Filters
14:55 6Build & Shoot: Half Double Exposure Filters
12:04 7Build & Shoot: Heavy Stop ND Filters
18:14 8Build & Shoot: Tilt and Shift Lenses
09:19Build & Shoot: Bokeh Shapes
20:32 10Build & Shoot: Coffee Cup Sleeve Lens Hood
05:51 11Build & Shoot: Body Cap Pinhole
17:16 12Build & Shoot: Mirror Under Lens
05:17 13Build & Shoot: Reversible 50mm Lens Mount
17:04 14Build & Shoot: Free-Lensing
10:23 15Build & Shoot: Fisheye Lens
20:14 16Build & Shoot: Bellows
08:46 17Build & Shoot: Toilet Roll Macro Lens
05:23 18Build & Shoot: PVC Extension Tube
06:49 19Build & Shoot: Rail System
18:45 20Build & Shoot: Macro Flash Brackets
25:54 21Build & Shoot: Field Macro Light Box
15:47 22Build & Shoot: Chip Can Macro Diffuser
07:07 23Photo Review
10:45Lesson Info
Build & Shoot: Bokeh Shapes
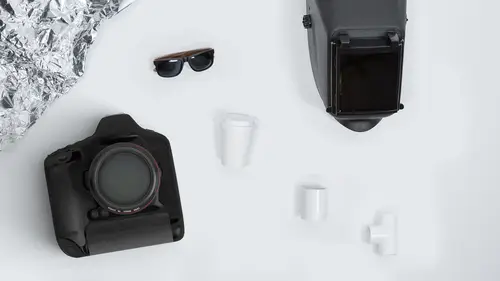
- [Mike] Well, this next one that I'm going to show is called DIY Bokeh Shapes. And within the last few weeks, there's been this funny thing on the internet about how do you pronounce the term bokeh. Is it bokay, buka, bookoo, bokeh. I call it bokeh. You spell it B-O-K-E-H. Bokeh is defined as the quality of the out-of-focus areas in your photo. So imagine you're shooting a portrait, the background typically is blurry, and the better the bokeh is, the more blurry the background is. Okay, so in that blurriness, in that background blurriness, you can actually, using these little paper cutouts I'm going to show you, you can create little patterns, like a star shape, like a heart shape, like a moon shape. And the way this is going to work is we're going to start with basically black paper and then we're going to end up by cutting little shapes into that paper. And when we take our portrait, we're going to put something shiny and bright behind the subject and those out-of-focus areas will g...
o into like a star pattern, or whatever shape that you want to produce. So, let me show you first of all how to build these little guys, and then we'll put them on the camera, and then we'll take some pictures with our beautiful model. And we'll let her choose what shape she'd like to be. All right, so to do this, I like using little razor blades, little X-Acto knives like this. So, we're going to end up using that. I usually have some card stock that I can cut on. And then you can see what we're after here. We're after some star shape. Currently, what I've got is I have heart, a star, and the moon shape, just like that. So, I'm going to make one, I'm going to make a lightning bolt one. And so, you can just freehand it or if you have a pen. Sometimes, you can write with a pen on the piece of paper and trace that. But for this, I'll just cut it quickly. How big should it be? Well, you don't want it too big because the smaller the shape is, the more defined that background will be. And if your shape is too big, the background will be just a blurry blob, which looks fine in a normal photograph, but it doesn't accomplish the effect that we're after. So, I've tried this with some shapes that were too big and I was not happy with the result. So in general, I just make them smaller. Okay, so there we go, there's our little lightning bolt. So we have a star, a moon, a lightning bolt, and a heart. And the crisper you can make the edges, the better the shape will end up being. So, I'll just point this out for the camera. My heart here, I didn't actually cut out very cleanly around the curved part, so I should probably do a better job with the heart. Like, I don't know, maybe this heart's slightly better. Pointed, defined edges help. Let me show another example here. And I'll bring in the scrapbookers. For those of you who do scrapbooking, you probably have these little punches, like this little star punch, and these punches work great. They actually worked fantastic. You just basically put the paper in. I'll do it on this one here. Put the paper in there and then you punch out the shape, and there you go, there's your bokeh shape. Cool. Try to get it in the middle of your paper unlike I just did. But this star, I actually tried the star. It's not defined enough, the edges aren't pointy enough, and the star is a little bit too big. I made the other bokeh shape a little bit smaller and a little bit more defined edges, and it worked out more better for the photograph. So then, the next thing is, you have to figure out a way to connect that bokeh shape to the camera. I just use Gaffer tape. It's that simple. Just use tape. You can even use Scotch tape, that works fine. And you can see, on some of these, I just have some Gaffer tape laying around on the edges. You want the size of the paper to be approximately about the size of the lens that you're using. And so, let's go over here to this one. So, what I'm going to do here is, I'm just going to put that on the front of the camera, and I already have my Gaffer tape pre-applied and you can see that it's about the same size as my lens, side to side. And then I'm just going to tape that on there like that and it's just going to sit. There we go. Okay, are you ready, Renata? - [Renata] I'm ready. - All right, so we're going to do a couple of shots here. Go ahead and stand over here with me. And we're going to have you stand actually a little bit over here, a little bit in front. And the reason why I'm moving her farther away from the background is the farther we go, the more the background blurs and the better the little shapes will be. So, I've got a really inexpensive solution. This is a survival blanket, okay? This is from whatever your favorite outdoor store was. This literally costs around a buck. And the reason why I chose it is because it has all of these little pinpoint kind of sparkly areas, right? I experimented earlier like yesterday or the day before and I just kind of mashed it all up, I crinkled it all up thinking that, "Oh, you know, if some star points are good, then a million star points are going to be better." But this ended up just being a blob mess. You couldn't actually see any of the shapes. So, I'm going to show you how this works. And then I'm going to show you another one using holiday lights, little pinpoint holiday lights, and we'll do that one next. You're going to see on this one, it's not going to be as clean as the holiday lights and I'll explain why that's the case in a minute. One of the issues we have is this is a gorgeous studio space. We call this the garage here at CreativeLive. But we've got these massive windows, these huge windows, and unfortunately, the big windows kind of make it so we don't get the little pinpoints of light. So a smaller light source out on this side might actually help. But you'll get the effect initially and then we'll go over to our 'nother location and we'll do the holiday lights and you'll really see what that looks like. All right, just to make sure I don't yank any cables, I'm going to move this back over to here, get this a little bit out of the way. Cool. And make sure I'm still connected. Yes, says the camera is connected. Now, for this one, auto focus is definitely an issue because you're cutting out a significant amount of light. All right, I'm just realizing I'm going to have to pull the table over. Okay, I think we're ready now. I'm going to have you come a little bit closer to me. A little closer. Okay, even come a little bit closer again, right there. All right. Yeah, I know. "Hey, how are you doing?" So, the reason why I'm doing this is because I want to use a big aperture. I want to use f/1.8. That's really important. So, big aperture. And you want the person or the subject that you're photographing to be fairly close to the lens, so that the background is pretty far away. All right, let's get all my camera settings correct. Oh, yeah, I'm still set up from that long exposure thing earlier. So, I'm going to go to aperture priority mode, f/1.8. Cool. And I'm just going to go to manual focus, because the camera probably won't auto focus through this. All right, so this is just a test shot, so you don't have to do too much. Ready? Here we go. Okay, let's see what that looks like. Okay. So like I say, these big honking windows behind it are making the shot a little bit difficult, but we start to pick up, just ever so slightly, we can start to pick up some of the little star shapes down here. So I'm going to move my camera around in a way that allows me to see some more of those star shapes. All right. Let's just see what we got here. Yeah, this is actually working good. Okay. So I'm going to try out of focus. Let's just see if it works. Yep. It's allowing me to focus. I'm going to come a little bit closer to you. That was too close. Come on, camera, focus. It's not auto-focusing. That's okay. Good. Okay. Here we go. One, two, three, and again. Nice. Okay. Let's see what happened on that photo. Oh, I think I bumped that with my chin. Okay. Good. It came through. All right. So we see those stars in the lower right. That's cool. But honestly, I think it would be cooler if we had stars all around her head. But we start to see some of the star shapes down here. All right. Well, let's go. Let's do the cooler picture. The reason why I showed that is because that actually does work a lot of times if your studio's darker and you have a small point of light, especially if maybe the light's coming off of the side. And it's a really inexpensive way to do the star shapes. All right, so let's go and we'll set up this one here. It's getting brighter in the studio, so it might be a little bit harder and a little more difficult to make this work, but we'll see. I think it'll be fine. So let me explain what I've got here. Go ahead and stand over here. What I've got is just Christmas lights, holiday lights, and it doesn't matter the type. They can be LEDs or incandescents. And I just wanted to create a nice spread of lights behind her. So you can see I've taped it out here on the crossbar. If you wanted to, you could literally just tape them onto your wall. That would work just fine. They don't have to be separate from the wall. You just want the nice backdrop. This is a fairly small string of lights. So if you're trying to do a portrait where the person is, like, a full length portrait, you may want to get more light. So it goes, like, all the way down to the floor. But for this one, what we're going to do is, I'm just going to shoot behind her torso and just doing a little quick experiment, see what that looks like. Can I have you move that way ever so slightly. Yup. Cool. More lights gives you a bigger backdrop allows you to shoot, have a little more creativity with your positioning. Oh, I just saw it and it looks good. Everyone's like, "Come on. Just show it to us." All right. Here we go. I'm going to go a little bit closer to you and a little bit off axis. Oh, that's nice. Ready? Cool. Nice. Fantastic. Good. Right on. Okay. Let's take a peek at those. Let's go full frame. Yeah. Pretty cool, huh? That is so cool. So again, it's not perfect because we're moving kind of fast here. We got the pole sticking out of her head. But you get the idea. The idea is you got to put a bunch of lights behind and a bunch of pinpoint lights. That's important. You don't want to use like big light bulbs, like big LEDs or screw-in type of things. I've seen these like these patio lights that you can do, that can stream from your patio, but the bulbs are kind of big. Those won't work for this, they have to be very small points of light. That's a pretty cool shot. In fact, I like it so much I'm going to try a little bit harder to get this pole away. Yeah. I'm going to have you move more this side. Yeah. Perfect. And I'll have you tilt this shoulder towards me. Cool. Yep. That's going to look nice. Let's do one with the lightning bolt after this, too, just because that could be fun. All right, come this way. Yup. Right on. Oh, yeah. That's really awesome. I should probably be doing this more with like a 85mm lens. A little more telephoto would actually give me more control over exactly the angles, but it'll work for now. Cool. Nice. Nice smile. All right. And let's do the lightning bolt. Yeah. That's cool. I like the looks of that. We've got a little bit of the survival blanket in there. There are a number of ways to attach this, and I just want to give you this other option here as I'm getting ready to tape this on. This little filter, it's not a filter, but it's designed to hold a neutral density filter. It's designed to hold this little bracket. And I found it actually works really well for these DIY Bokeh shapes. So this is a neutral density bracket holder and it screws on the front of the lens. But I find it works perfect for this because I can just tape on the Bokeh shapes to that rather than trying to do these little Gaffer tape attachments. Some other people I've seen on the internet, I do look at the internet, too. Some other people do this, and they cut the Bokeh shape in a perfect circle so that it fits inside the lens and literally, you just stick it in there and through friction, it'll just hold it in place. I actually didn't cut this one exactly right, but you get the idea. Off it goes. And then, there's a bunch of other designs out there that actually, you fold like this little paper envelope and you tape the envelope onto the front, and then you can put these little things in the envelope slot. That works, too. All right. Let me put my heart over there, and you're going to be Miss Lightning. I've never shot lightning Bokeh, so this will be a first for me. Oh, it fell down. Yeah. That'd be awesome. And always get a model who's tape savvy. And it doesn't have to be side to side, it can be top bottom, anything. Okay. That should work. Yeah. Okay. Let's see lightning. Cool. Walk this way ever so slightly. Yup. Good. Okay. Here we go. One, two, three. Focus on your eyes. One, two, three, and another one. One, two, three. Cool! Fun. Lightning bolt Bokeh shapes. - [Woman] It's the Harry Potter look. - Yeah, the Harry Potter look, cool. And then we can do hearts as well. The hearts are always fun, Valentine's, and "Hey, I love you, honey," those types of things, gifting for your significant other. So that's fun. Wouldn't it be cool to use rainbow lights? So you get lights, like Christmas lights, with a whole bunch of different colors or maybe a specific color, red, green. Yeah, all of that would be really great. Good thinking. Cool. - Mike, Can you just explain for people, this is from James, but how this is working, again? Okay. Good. Yeah. What's going on? Good question, James. What are we doing here? Let me get it out of the way of that camera, so you all can see this way and that way. So what's happening? Well, let's say I take a picture of her, without the Bokeh shape. So I'm close to her. Let's actually let me do that. So this will help answer James's question. I'm going to basically take the same photo. Come forward a little bit again. Yeah. Now, I'm just going to focus on her eye, and we'll take that shot. Okay. Cool. All right. So that's without a Bokeh shape, or that's without this thing in front of the lens. That's just round Bokeh. It's like what we're used to seeing. It's a common lens effect. So what we're doing is we're putting these little shapes in front and we're basically creating another aperture, or another thing that light goes through, which causes those little round things to turn into the shape that you cut into the paper. Into a teddy bear, into a smiley face, into the lightning bolt. Isn't it funny? Most people don't think this, but isn't funny you can get a normal looking photograph through a tiny little hole in front of the lens? And that's that's a mind bender for a lot of people. But it works, and it works well. So we're creating the Bokeh because we're focusing on her close and then the background is a long ways away. That's the first step. And then the second step is just having some shape that goes in front of there. - And another question is does it have to be with a 50mm or could you do it with other lenses? - Yeah. Do it, like I was just saying, with like an 85. If you have like an 85mm f/1.4 or f/1.8, that would work great. So the longer focal length lens gives me more working space. I was a little bit close to you and actually, she commented. She's like, "Oh, you're close." And so if you want to be farther away, use a longer lens. Also, if I can be farther away with a tighter angle of view, those lights in the background don't have to be as big. With my 50, you guys saw I kind of had to finesse the photograph. I had to get her on this side and kind of get over on that side so the lights come in. So longer lenses give you a little bit more flexibility in this case. One more point about the lens choice, this won't work as well at f/5.6. So if you have a kit lens, let's say, for example, like this, this is the Nikon 18 to 105, both Canon and Nikon and Fuji and all the other manufacturers, they have some type of kit lens. All of these kit lens is like have a maximum aperture of like f/4, maybe f/4.5, and then when they're zoomed out to telephoto, they go to f/5.6. You won't get as nice of a bokeh look at f/5.6 as you will at f/1.8 or f/1.4. So the cheapest way to make this happen is to get a fast 50. That's what this is, a 50mm f/1.8. And for around a hundred bucks, in most camera lines, you can get that lens even on the used market.
Class Materials
Bonus Materials with Purchase
Ratings and Reviews
a Creativelive Student
It's a fun course, with a lot of interesting ideas presented in a way to help spark the creative juices in anyone wanting to branch out and experiment with different ideas. Mike's presentation style is fun and easygoing - perfect for this type of discussion. If you're not afraid to color outside the lines and see where the road takes you, this is a very enjoyable bit of inspiration.
user-ee46bd
Love it!! Very creative and full of inspiration. Mike Hagen explains the different effects in a great way, he is precise yet easy-going so he makes learning fun. I recommend this class to all who wants to take their creative photography to the next level without spending money on expensive accessories.
Fotomaker
Mike has an easy-going, pleasant & fun personality. He explains things clearly. Rolls with whatever happens. And, he's very good about answering audience questions in an understandable, positively reinforcing and non-judgemental way (which can be rare for some established pro photographers...).