Build & Shoot: Mirror Under Lens
Lesson 12 from: DIY Photography: Lens Attachments, Filters & Creative EffectsMike Hagen
Build & Shoot: Mirror Under Lens
Lesson 12 from: DIY Photography: Lens Attachments, Filters & Creative EffectsMike Hagen
Lesson Info
12. Build & Shoot: Mirror Under Lens
Lessons
Class Introduction
02:19 2Build & Shoot: Soft Filters
11:20 3Build & Shoot: Star Filters
14:56 4Build & Shoot: Ethereal Filters
21:53 5Build & Shoot: Sunglasses Filters
14:55 6Build & Shoot: Half Double Exposure Filters
12:04 7Build & Shoot: Heavy Stop ND Filters
18:14 8Build & Shoot: Tilt and Shift Lenses
09:19Build & Shoot: Bokeh Shapes
20:32 10Build & Shoot: Coffee Cup Sleeve Lens Hood
05:51 11Build & Shoot: Body Cap Pinhole
17:16 12Build & Shoot: Mirror Under Lens
05:17 13Build & Shoot: Reversible 50mm Lens Mount
17:04 14Build & Shoot: Free-Lensing
10:23 15Build & Shoot: Fisheye Lens
20:14 16Build & Shoot: Bellows
08:46 17Build & Shoot: Toilet Roll Macro Lens
05:23 18Build & Shoot: PVC Extension Tube
06:49 19Build & Shoot: Rail System
18:45 20Build & Shoot: Macro Flash Brackets
25:54 21Build & Shoot: Field Macro Light Box
15:47 22Build & Shoot: Chip Can Macro Diffuser
07:07 23Photo Review
10:45Lesson Info
Build & Shoot: Mirror Under Lens
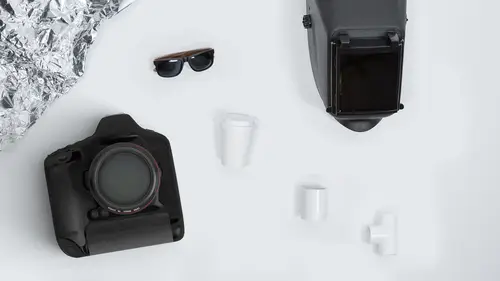
- [Instructor] Okay. This one's fun, and this is a nice, quick, easy one. We'll pull this out of the way. Yeah. Thank you for reminding me which one we're doing next. - [Kenna] No problem. - This one is just simple, easy, and fun, and it involves using a mirror. I just bought this mirror, literally, for $1.99 at the grocery store. What I'm going to do is I'm going to use the mirror on the underside as I take a portrait. So we're going to kind of get, like, this double exposure effect. So we'll do it on the underside, we'll do it on the side here, and it's just another interesting way to do photography, kind of a split image type of scenario. To do this though, I'm going to have to do a little bit of deconstruction. Actually, I'm going to do it over here on the table so I don't drop the mirror on the floor. That's never a good thing. Pull this off. There we go. Pull the mirror out. Oh, no. Did they use glue on this? Course, the other one I had, it just popped out right away. This one is...
glued in. And, of course, I left the other one at home, and I brought this one with me. That one just fell right out. Hey, guess what? I got this other mirror that is cracked and broke. Let's just use a broken mirror to do this just to show you don't even have to have the best product available. All right. This will fall right out. I know because it did before. All right. So there's the mirror. To do this, let's see. Which lens should I use? I think I'm going to use my 24-70 so I get a little bit more telephoto on this. Swap these out. No lens on there. And we'll just do tethered into Lightroom for this shot. Okay. And I think...yeah. Normally, I'd be handheld with this, but because we're all tethered up, I don't want to risk losing connection. All right. I'm going to aperture priority mode, and I'm setting my ISO back to lower level, maybe ISO 800. And I'm going to shoot at f/2.8, and I'm just going to do a quick test shot. Oh. You didn't tell me I still have my yucky filter lens on there. You're supposed to be paying attention. All right. Just a test shot making sure everything is going to come through okay. Yeah, that looks nice. I really like this space. The light is so fantastic. I'm going to have you move over this way so we get rid of that seam on the door. Yeah. Cool. All right. Let's see what we can do with some photos like this. So I'm just going to basically put the mirror down here. Cool. Go a little bit wider angle, pull the mirror in, and... Come on. I need that bigger mirror. That's all right. Okay. Here we go. There we go. So I'm moving a bigger mirror. I needed that bigger mirror to extend out forward, so I'm having to pull the mirror forward so I can actually get the reflection on her face. So it would have been really good here to have that larger mirror. Oh well.It's fun anyways. Yeah. Sorry I broke the mirror, guys. A smaller lens and a little bit more telephoto probably would have solved the problem, but you can see, generally, the effect that we're after, right, is pretty fun. And with a bigger mirror, something more like maybe a foot or larger, you have a lot of flexibility around that shape. You can put the mirror down low, kind of get, you know, the face from low or the mirror up high, mirror on the side, and you don't get your fat fingers in there with the bigger mirror either. So yeah. You can basically see the effect, and that's the effect that we're after. Cool. Yes, Kenna? - Well, Danny had put it in a comment earlier that welding glass also makes for a great mirror for reflection type shots and that's just something that was another thing to potentially try later, too. - Welding glass, fantastic. Basically, anything shiny and somewhat opaque. In fact, I was practicing this the other day with my cell phone. I left it over there, but your cell phone would work just fine for this. Basically, you take your cover off of the cell phone, and you're just using the shiny surface. That also works. Smaller camera and smaller lens would be more better for this scenario, so, like, if you have a little point and shoot camera. Or you could use your cell phone and then grab Renatta's cell phone and use a cell phone-on-cell phone type of photo with the mirror underneath. That could be fun as well.
Class Materials
Bonus Materials with Purchase
Ratings and Reviews
a Creativelive Student
It's a fun course, with a lot of interesting ideas presented in a way to help spark the creative juices in anyone wanting to branch out and experiment with different ideas. Mike's presentation style is fun and easygoing - perfect for this type of discussion. If you're not afraid to color outside the lines and see where the road takes you, this is a very enjoyable bit of inspiration.
user-ee46bd
Love it!! Very creative and full of inspiration. Mike Hagen explains the different effects in a great way, he is precise yet easy-going so he makes learning fun. I recommend this class to all who wants to take their creative photography to the next level without spending money on expensive accessories.
Fotomaker
Mike has an easy-going, pleasant & fun personality. He explains things clearly. Rolls with whatever happens. And, he's very good about answering audience questions in an understandable, positively reinforcing and non-judgemental way (which can be rare for some established pro photographers...).