Lessons
Lesson Info
Measurement
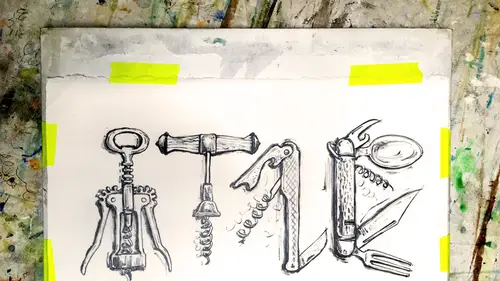
Here's your trophy. You're gonna look at it. You're say, huh? How do I draw that? I think I'm gonna use a to be pencil. Gonna show up a little bit better. Normally, I'd go for the H because I'm used to it. But don't you b four b show it better s. So the first thing you do is just, like block something in. You know how we just put something down trace around it. Just to get something on the paper is like, Okay, so I know it's got a circle up there and that Scott, a couple of arms and something goes down and there's a base. And I'm not sure what's going on with this circle in that circle, There's a There's a cylinder. I know. So I marked that out, and then there are some other kind of They're all right. I've got that blocked in. Now what? I definitely need to straighten something up, don't I? Okay, well, how do I send or something? And straighten it up. Now, if you're used to using illustrator photo shop, all of these online drawing tools, you say, Oh, well, you just drag, drag guide. Or...
maybe you hit, You know, click it to make it go to center. Um, we could do that to this analog way, so I mean, to use the edge of my finger, put it on the edge of the paper, get a little fuel for it because you don't want to get a paper cut on your finger. It feels like it's gonna be too sharp. I'm not eyeball where I think the center is. Fortunately, I have a clip right there. I'm like, OK, that's the center. I'm not gonna move my hand. Page over. Ready? Put that down. Oh, I was pretty close. Look at that. Was only that far off. So now I know where the center is. Right in between those two lines. Okay, Now I'm gonna look it. I'm not gonna trace this one. I'm really gonna measure it. So here we go. Ready? And see if we can measure of this. Have you ever seen people doing this? Ok, real artists, this is what they're doing. You have to lock your elbow. You have to lock your wrist. You have to sit still straight and keep your head in the same position. Because this is going to be your point of reference Measurement. This is your ruler. It's always stays the same. And it's like the one consistent thing. If you go like this and the next thing you measure, you go like this. You're not gonna get the same measurement cause you're using two different rulers. So So they're sitting straight. We're locking it. We're looking to this. We're going, I think my whole ruler from the top to the bottom. But when I close and I'm always closing the same I zbig So you can I kind of like, dig my fingernail into my pencil a little bit. So I've got a line. Now you have two choices. One is you can take that measurement and you can set it exactly down on your paper. And you can decide this is how tall my trophy is. Yes. Hey, held that up and I'm putting the top of it on the highest thing I see. And I'm putting the bottom mark on the very lowest thing. I see. I don't It doesn't matter if it's like the front thing or the back thing. And I make that mark my dog wife, pencil my fingernail in there. So I know that I put it on there. That is how big the trophy is that. I see. Okay, we have one measurement drawing from eyeballing. Something is really just all about measuring now, I would say Okay, how big is just this silver part? Do the same thing. I'm gonna think I'm gonna start on the back here and I'm gonna go to the front. Hold that there. Okay? I can set it down here if I want. And I could make a line or if you don't always want to draw things that are exactly the same Ties is your pencil. You may want to branch out a little bit. You this as a whole, and then you have to use, like, ratios. So I think my whole is going to be this big. And I'm looking at this. I think it kind of looks like quarters. Or doesn't it? So, as it turns out, let's see, that's how big the top of minus. So it's 12 there's or thirds so 2/3. If this is the height as a whole, what is 2/3 of that? I think it's gonna be maybe more like here? Yeah. The base of my trophy is going to be more like here. Look at that. I just eyeball that really pretty far off. I thought the base was down here, but actually, that base is very tall. So you're checking up on all your measurements? Okay. You don't need to leave all the extra lines. Okay, so I've got a center line, I've got the base of my trophy and I've got the top of my trophy. Okay, now, let's see. I think I want to dio just the round part. That's that's from here to here. OK, so if my whole trophies are big, just the round part, it's probably about that big. Okay, let's fix that up a little to race ones doesn't work. And what about just to this part of my trophy? Uh, let's see. Now you can start. Once you get some good basic ones down, you can start comparing if I know the inner bowl of my trophy is that same size. I put it down here, say, Oh, this measurement is just a little bit smaller than this measurement. So that's that big. That's that big. Okay, so that's the base of my trophy. Okay, I've got some good basics. Okay. I know this comes out like that, you know, that comes out like that. So then that must be there. If I wanted to, I could keep measuring. But I'm not that particular. I know that this comes actually, let's do a parallel line. Okay? So now I'm going to say the edge of this to the edge of that is that parallel. Hold it up straight. And then you can just kind of move it away from the trophy and look at it in relation to yourself into the world. Yeah, actually, that's pretty straight up and down. If the top of the trophy stuck out a lot more and the base was very small, I would have gone like this. Centers that Oh, look at that. That's an angle. And I could actually put my angle down, but in fact, mine's pretty straight. Okay, so I think this goes about that far, and then this I drew that really small, and actually, that was a mistake. That is pretty big because it has this extra big lump here like that. Okay. And let's just do one more measurement. Let's get how long the arm lore. Okay, that's about that big. What do I have already that I've measured? That's about that big. That's a little bit more than 2/3. So that was my 2/3. The arms were about that big. Wow, The arms, the trophy. There are a lot whiter than I thought they were just by doing my drawing, eyeballing they actually go out about that far. Okay, Now I'm going to just erase any of these ones I got really long. Okay, So that's your measuring tool in the analog world in the computer world, do you deep dragging guides and using your measuring tool. But we can dry guides here too. So remember how we centered this. Now we can also do that as many parallel lines is we want. Here's one. Here's one. I think I want the other side of the trophy to stick out as far as this side. So I'm turning around. Here's one and I want this handle to stick out as far as this one. Hey there. I'm gonna dio Hey there And then these ovals are another problem. These are called ellipses now. Ellipses are always kind of a problem for beginners because it's really hard to get what's the right angle. And it's also hard to measure them in relation to each other. So I'm gonna show you this is too advanced for you. Don't worry about it. I just want you to know that this exists when you look at something. This is your eye level. Your horizon is your eye level. Perspective on ellipses. If you held this up to your eye level, this will be totally flat. If you move it towards you are away from you these ellipses air going to change in this crazy perspective. So basically, the more you look down into something closer to a round circle, it is so yeah, like that. Okay, actually, that's upside down. Okay, so I'm gonna say my trophy, even though it's sitting on the table, I'm going to say this line across the top is pretty close to flat. Just because I wanted to be okay, erase everything else And then I know as I looked down on these things, all these ellipses are going to sequentially get a little bit whiter now. You don't have to worry about this There are so many good drawings that have totally wonky ellipses. So if you don't like doing this type of perspective, you don't have to do it. Okay? But I just thought I'd show you that it exists. This is one of those notes that you just kind of take some notes in the margins. If you want to come back to it later, check it out later, okay? And then now I've got things really lined up pretty well. So I'm just gonna fill in the rest of my drawing how I want to. Okay, Gypsies. There we go down there. Okay, so that's the basic. Got some pretty heavy lines. Now I can repeat everything we've just learned. If I want, go back, straighten up my lines as some shading make it look rounder. Follow that example where? You know, a cylinder that's a cylinder, Cohn, not to cone. That's just the basics of measuring and eyeballing it to draw from real life.
Class Materials
Bonus Materials with Purchase
Ratings and Reviews
Rhonda Bender
This class is about two hours long. Overall it is a friendly and accessible approach to introducing some basic drawing techniques and tools that is appropriate for those who are nervous about or just novice to drawing. It lets the student jump in by tracing a basic outline which is then detailed. Towards the end the instructor demonstrates a more advanced type of tracing using a tablet as a lightpad, and there is also helpful information on how to trace one's own work to transfer it to better paper or slightly alter the drawing to be larger/wider/etc. The middle portion has overview information on types of lines and methods of shading. These aren't super thorough examinations of those topics, but should be ample to complete the exercises and drawings included and recommended in the class. Likewise, the overview of drawing tools and papers is an overview, but strikes a good balance between overwhelming with too much information, and giving students enough info to know what tools they need for basic drawing and how to use them. There is a brief overview of how to use the sight size method to draw freehand more accurately. This is a subject that could easily be an entire class topic on its own. Some will find this enough info to get going, others might prefer expanded information and more details on this. The more complex subject of ellipses in perspective is touched on only briefly. (Perspective is also a complex subject that needs a whole class of its own, so this is understandable.) In contrast to some other reviewers, I did not have a lot of issues with the filming and camera angles. A lot of time was spent on the angle of looking at the drawing in action. However, it is clear that material was edited out from the live version. The edited version doesn't follow the drawing of every exercise through to its conclusion, and sometimes segments end or start abruptly.
Kelsy
I like it. it's not very in-depth but it gave me the courage to start drawing, and I had so much fun. Great for beginners.
a Creativelive Student
There was a lot of good information in this course: types of shading; analogue versions of digital tools like guidelines and centring. I had an ah-ha moment when Cleo talked about ellipses. That alone was worth the price of the course. I also loved the part about using a lightbox, as well as tracing and graphite papers as tools - but in a way that doesn't impinge on copyrights.