Replacing Tripod From Bottom Of Sphere
Lesson 7 from: Editing 360 Degree Photos in Photoshop & After EffectsChris Converse
Replacing Tripod From Bottom Of Sphere
Lesson 7 from: Editing 360 Degree Photos in Photoshop & After EffectsChris Converse
Lesson Info
7. Replacing Tripod From Bottom Of Sphere
Lessons
Class Introduction
01:43 2Software You'll Need
00:36 3A Brief Intro To After Effects
01:54 4Class Materials
00:56 5Isolating The Tripod Area
07:17 6Seamless Tripod Removal
02:04 7Replacing Tripod From Bottom Of Sphere
03:37 8Retouch And Reset The Panorama Center Point
03:39Lesson Info
Replacing Tripod From Bottom Of Sphere
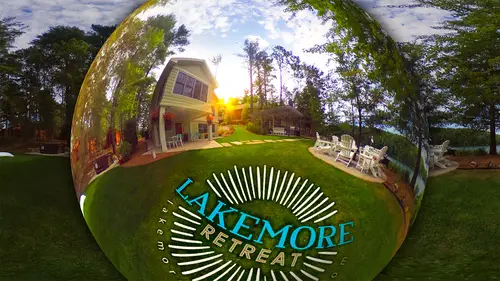
now that we've removed the tripod from the lake. More retreat tripod export Photoshop file. Let's go back to after effects. We're inside of the VR. Edit one composition. Let's come up to the file menu. Let's come down and choose import, then choose file in the exercise files. Let's go into folder B. Let's choose the lake more retreat export dot psd with our tripod removed. Let's click open. Not for the options here, we're going to choose footage. We do have the option to choose specific layers. Or if we come down to composition, we can actually bring in multiple layers at once inside of the after effects file. But instead let's come in here and just choose footage which will treat all of the layers of the Photoshop file as one individual graphic. Let's choose. Open And now open the project panel. Let's click and drag the tripod export and let's drag it right into our composition. And it should snap into place and not to see the effects of this edit. Let's come down to the VR output com...
position. Well, now see that that new artwork is being distorted and mapped into that unwrapped spherical panorama. Now, if you notice this composition in the timeline panel, there's a little effects icon here. If we come up to the effect controls we can see the VR converter effects being applied to this composition and there's a few things we can change inside of here. One nice feature under the reorient camera view gives us the ability to change the content of that Unwrapped spherical panorama. So for example, we can come in here and change the pan by changing the degrees and we can actually move or reorient the panorama. Now this is a great feature to have inside of here. However, we want to make that change inside of Photoshop because there's additional edits that we're gonna make additional retouching we want to do and we want to make sure that all of the items that we're gonna be retouching don't touch the edges. And if we make the change that we want to make now, this access panel, for example, will actually come over here and touch the edge. So again, we're going to make this change in Photoshop but I wanted you to know that this particular plug in allows us to make some of these changes inside of after effects, including rolling the unwrapped sphere on the Z axis or tilting it on the X axis. And so now that we have seamlessly replaced the tripod, we need to export this out to a brand new panorama. Now, just like before, if you're looking at the half screen resolution, you're going to need to use the render queue. And if you're looking at the full screen preview, you can use these save Spoto players. So if you're seeing a full resolution preview, you can go composition save frame as choose Photoshop layers. And if you're seeing the half resolution, like I'm seeing here, we're going to come up to say frame as then choose file. Then in the render queue, click on Photoshop, click on resize to make sure that we get the full size which is 3 5076 by 6 2088. Click OK then click the file name for output. Go to exercise files, let's go into retouching and in either case whether you're doing save as Photoshop layers or using the render queue, we're going to name this like more underscore retreat underscore modified dot PSD and then we'll click save and just like before if you use the save Photoshop layers, you'll get a series of layer groups inside of Photoshop layers panel. And if you use the render queue like I just did here, you'll get a single background layer inside of the layers panel. And again, since these are both full resolution exports, this isn't gonna affect the final project. And so now, with our modified spherical panorama, next, we can make further edits inside Photoshop.
Class Materials
Bonus Materials with Purchase
Ratings and Reviews
Rex Maximilian
In Lesson 8 I would highly recommend grouping the layers into a folder named "Components," then duplicate it and turn the duplicate into a smart layer. Then rename the smart layer "Composite," or something like that. Then turn off the group of layers leaving only the composite layer displayed. This way the files remains editable for future lawn/image cleaning. The way the instructor did it would delete all of the layers for potential future editing.