Creating Custom Brushes
Lesson 11 from: Essential Compositing Tips & Techniques In Photoshop 2021Jesús Ramirez
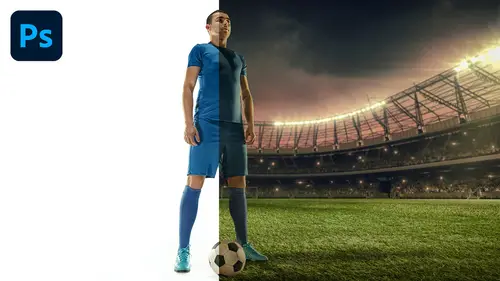
Creating Custom Brushes
Lesson 11 from: Essential Compositing Tips & Techniques In Photoshop 2021Jesús Ramirez
Lesson Info
11. Creating Custom Brushes
Lessons
Class Introduction
01:14 2The Importance Perspective
05:35 3Examples of Perspective in Compositing
08:56 4Creating Depth with Atmospheric Perspective
09:39 5Matching Brightness in a Composite
05:59 6Matching Saturation in a Composite
04:06 7Matching Ambient Color in a Composite
08:01 8Making Selections and Masks for Better Composites
11:06Lesson Info
Creating Custom Brushes
next, we're going to look at the importance of brushes in compositing. We looked at brushes a little earlier in the hair masking example, but I thought it would be useful to take a deeper look into brushes and also share with you some free resources. Things is a composite that I made several years ago. It's just a flattened layer, but we're going to use that to paint some mist and fog in this composite. And I also have this image of clouds. And what I'm gonna do is I'm gonna convert this image into a clouds or fog brush, and I'm going to do so by de saturating the image control shift. You on Windows Command shift you on the Mac. It is not necessary to the saturate the image, but I think that it makes it easier for you to see the process. Next. I'm going to press control. I on Windows Command I on the Mac to invert. This will make the clouds black, and that's what I want. If you remember from the earlier example, whatever is shown as black in our image will become the actual quote unquo...
te Inc in the brush. If we have white, it will be transparent. So my goal now is to make the background completely white and the clouds black. I'm gonna go into image adjustment levels. I'm gonna drag the white point to the left to make all the pixels that are this shade of gray or brighter, completely white. As you can see that there and then I'll drag this black point and drag it to the right to make the pixels that are this dark shade of gray or darker black. I'll press okay. Next, I'm going to select the lasso tool and I'm going to go into the feather menu and I'll type in 10 so I can have a feather of 10 pixels. In other words, this election that I'm gonna make with the lasso tool will not be sharp. It will be blurry, so I don't want any sharp edges. And I'm just going to click and drag and paint alongside these clouds. And I'm following the contours of the clouds so that I don't cut between them and create Seems so. I'm just looking for these areas that will make for a natural looking cloud. It's not going to be perfect, but That's okay. Once I have my selection active, I can right click and select in verse. Next I'm going to fill with White. White is my background color. So I'll press control backspace on Windows Command elite on the Mac, then a press control de commanded to de select. And this is my result. It looks like I can still make a few more adjustments to make the clouds a bit brighter so that we don't have this halo effect. So I'm gonna go into image adjustment levels, and I'm just gonna brighten up those areas like so and I think that this looks pretty good. If there's other imperfections in your mask, you can always paint with a brush tool. Make sure that you're using a soft brush with a hardness of zero, and you can paint with white. Make sure that white is your foreground color, and you can come in here and make any adjustments that you want. And, of course, you can recites your brush by tapping on the right or left bracket keys on your keyboard. Next, I'm gonna convert this into a brush, make sure that you don't have any black or dark pixels out in the corners. If you do, then you'll make a pretty large brush. But since we only have the black pixels on the center area, when I go into edit, define brush, preset notice that the brush presets and close is just those clouds. But if I had some black or even like great pixels here off on the side, I would have a larger brush. So make sure that your edges air completely white and it the only thing that is black or a shade of gray is here in the center, and you can then give your brush name. I'm gonna called mine clouds M press okay and notice that I have the brush tool active and immediately Photoshop selected that brush that I just created. If I make black my foreground color and I paint, you can see the result. Obviously, that doesn't look much like clouds, but we can make adjustments. If I click on this icon, I'll open up the brush settings and from the brush settings, I can adjust the brush, tip shape and other settings. First of all, I'm going to increase the spacing to create space between the different brush tips Then I'm going to go into the shape dynamics and I'm going to increase the size jitter so that the clouds repeat at different sizes. Then I'm going to increase the angle jitter all the way to 100% so that the clouds rotate as they repeat. Wow, I'm also gonna go into the scattering option and increase the scattering just a little bit and increase the count. Saw that I get more repetition like so and I think that this is looking pretty good. Maybe I'll go back into the brush ship and I just a little more spacing, and I think that this is gonna work. Great. Next, I'm gonna go back into my working document, and I can now paint in the mist or fog, and I can do so by simply making the foreground color White and I can create a new layer to work non destructively, and I can paint in my fog or mist like so. And of course, you can reduce the opacity and make any adjustments that you want. If you want to colorize this fog, all you need to do is create a new human saturation adjustment layer. Clip it to the layer below, enable the colorized option, reduce the lightness and then give it a color. So, for example, in this case, maybe we'll go for a yellowish tint and increase the saturation and adjusted accordingly. You can use this brush for anything. You could also add a layer mask and paint with black on the layer mask to hide parts of that fog or miss layer. Like so, just making it a little more realistic. And, of course, you can spend a lot more time fine tuning this layer to make it look more realistic. Before we move on, I want to show you one thing. If you go into this, drop down and then go into the gear icon and select, get more brushes, your browser will open up, and it will bring up this page from Adobe, where you can download over 1000 free brushes from Kulti Webster. These are dot a B R files that you can download and use in Photoshop fresco and other applications, thes air pixel based brushes, and the pact that I recommend for compositing is this one called concept. I'm going to click on download just so that you can see how this works. This is gonna open up this window and you can just save your concept dot a b R file. Click on Save and you can see it here, and I can just install it by clicking on it as soon as I click on it. Photoshop installed that pack. When I open up my brushes panel again, you will see that I have this new concept folder and from here you're going to find ah, lot of really cool brushes that you can use in your composites. Let me just click on a few so that you can see how they work. Create a new layer on top of all of that, and I'll just paint in these leaves. Actually, in this case is my work really well, if I select one of the green colors that we have here and then I can pain in some leaves in my composite like so. But there's Ah lot of different brushes, and there's actually some cloud brushes here that you can use on the search part. You can just type in cloud and you'll see that cows concept brushes clouds. There's several of them. You can click on one and try it out to see if you like it. I can create a new layer, and I'll make the foreground color white and I'll pain in those clouds. So it's very similar to what we create it. And I would definitely recommend that you download these free brushes air great and talking about trying out brushes that you like. There's also a hidden brushes inside of Photoshop. Let me show you how to get to those. Let me just clean up my panel here, and what I'm gonna do is go into window and make sure that my brushes panel is active. Then I'm gonna go into the fly out menu, and I'm going to go into legacy brushes. Then press OK and Photoshop will add a new group of brushes. These are the legacy brushes found an older versions of Photoshop. You can see them here. There's a lot more brushes that you can use, including some of my favorites. If you're going to the search part and type in grass, you'll see the dune grass brush, which I use ah lot. Let me create a new layer so you can see what that looks like you can use this to mask hair mask, grass and anything else in between. You can also use it to add details. Your composites, for example. In this case, I'm gonna use this blank layer and I'm going to go back into my brushes panel. I'm going to select a dark green and for the background color, I'll select a brighter green like so I can reduce my brush size and I can just paint in grass like so before and after. Obviously, you will need to do a better job color matching that section. But this is what that brush is useful for. You could also use it for selections. So in this case, if we wanted to remove the background from this image, the artificial intelligence will do a good job finding this election. But the for wouldn't show as well. So what you can do in a situation like this is actually used the same filter that we used earlier, the minimum filter to minimize that outline and maybe even go further. Maybe go three pixels inward. Press okay. And then you need to disable the color dynamics from that grass brush. The color dynamics is what was creating that transition between the foreground color and background color in the grass example. But we now want a solid color, so we need to disable the color dynamics, and what I'm going to do is just paint with white on that layer mask so that we can see some of that for, And I know it's difficult to see, so I'll create a new solid color fill layer, make it a dark gray, and bring that below my bare layer. And I can now paint with the brush tool on my mask, and you can see how I'm starting to create the illusion off for just by using this brush. I think I went a little too heavy handed with the for there, so I'll undo and reduce my brush size. But I think that you get the idea this will start looking more like for than actually trying to mask out the for. So make sure that you do that also another tip with brushes when you're working with the brush tool and let me just make a larger brush so that you can see what I'm gonna do here. And I'm also going to create a new layer, and I'm just gonna paint. So this is this is what that brush looks like, But watch what happens when I tap on the right arrow key on the keyboard. I start rotating the angle of my brush. See that? See how the angle rotates so you can use this to better mask out for hair, anything like that, or pain in grass for or hair. It's a great tool to use. And now I'm gonna tap on the left arrow key to rotate the other way. Notice that my brush is rotating, and if you haven't noticed already, there's a couple other places where you can rotate your brush from the brush settings. You can rotate it From this preview window. You can click and drag, and also from the Options bar. You have this angles input box that you can adjust, but I think that using the left and right arrow keys on the keyboard is the faster way to go. And sometimes you may need to flip the X axis so that the for or hair faces the other direction, depending on the composite that you're working with. So this is a really powerful brush has been in Photoshop forever. It's now under the legacy brushes, but I still use it a lot, and I would recommend that you bring back the legacy brushes and that you take advantage of this grass brush.
Class Materials
Bonus Materials with Purchase
Ratings and Reviews
David
This course teaches what you need to know about creating composites. As alway Jesus delivers in a clear, precise and fun way. You can just tell this guy has a great personality and he loves what he does. I greatly enjoyed the course and would strongly recommend it. A big thumbs up!!!
a Creativelive Student
One of the best courses I've done on CreativeLive and that's a high bar! An incredible mix of in depth guidance but also some simple photoshop tips along the way, I had so many 'wow' moments, learning things I had no idea you could do in Photoshop. Really a good pace too. Quite a short course but so many good lessons to revisit. Great work!
Jorge Perez-Martinez
I think this is a wonderful course. It goes into the key aspects that one needs to know to make a good composite. Jesus does not go into needles details and assumes a basic knowledge of photoshop; this make the course very manageable as far a its length. Highly recommended!