Lessons
Day 1
1Why Work Smart?
33:20 2End Results and Reverse Engineering
49:07 3Make Adobe Photoshop Your Own
52:11 4Customizing Presets
20:36 5Layer Masks
38:56 6Compositing Using "Place" Command
50:36 7Adjustment Layers
35:12Blend Modes & Adjustment Layer Presets
42:39Day 2
9Not-So-Obvious Smart Techniques
24:11 10Layer Comps & Shape Options
29:31 11Creating A Series Of Objects
23:04 12Group Layers
41:40 13Scaling Masks & Masking Text
20:29 14Clipping Masks
47:11 15Student Questions & Preset Buttons
38:15 16Smart Objects
45:37 17Smart Object Tips
32:19Day 3
18Smart Filters
42:35 19Clipping Masks & Smart Retouching
36:05 20Smart Object Templates
50:02 21Template Variables
16:30 22Adobe Camera Raw and Adobe Lightroom Smart Objects
38:18 23Adding Texture & Adobe Camera Raw Presets
36:55 24Adobe Lightroom Smart Objects
17:52 25Automation & Example Projects
43:46 26Batching & Audience Q&A
35:08Lesson Info
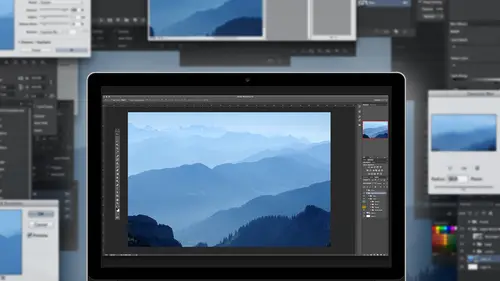
Adjustment Layers
All right, so is right at the very beginning and I, whenever I talk about non destructiveness, I usually start with that discussion of adjustment layers versus adjustment just because it's a fairly clear cut example of the difference between applying directly to a photograph and applying it. In a way. That's looks like the photograph is changing, but you still have the ability to affect and that's the big difference between regular adjustments. The's ones found under the adjustment menu and the adjustment layers by nature. Adjust layers are very non destructive because they just say whatever's below me, I will effect. But one of the reasons I deliberately did things in this order is that when you combine the power of adjustment layers with layer mass, things really come to life, because as soon as you add an adjustment layer, whatever would might be, it automatically has a layer mask attached to it. Now by default it's filled with white, which means affect the entire photograph because...
the principle is the same as a regular layer mask, white means reveal all so in this case, white means thie adjustment. There will equally affect everything across the board, but because that layer mask is there, that opens up a world of really interesting possibilities, and now you can say. I only want this just learned to affect that area you affect that one area by making a mask for it. So it's kind of builds on the same principle of black hides white shows, but now instead of saying for existing pixels were saying for the effect of an adjustment layer and it's also similar in that you can achieve this in a couple different ways in this case I added occurs adjustment layer and layer mask is white, which means nothing's happening if I knew going in that I wanted to effect this area for some reason, then when I added an adjustment layer, the mask is already created, so now whatever I do is only going to affect that one area. So even though this is not the world's most practical example of why it using a just player here's, what happens now? I've done that little bit of work if I decide this oval really needs to be somewhere else, I can of course move it because all I'm doing is moving the contents of the layer mask around. In this case, you don't really have to worry about the mask and the layer being linked because technically is really nothing on the layer it's just an adjustment being applied, so this element here on the mask is really just in this case a shape, so that means I can move it I could use a command like free transform command control t to adjust it in some way and I can affect it however I want, but ultimately it's still just an element on a mass so now let's that's exactly how I wanted that master look but I'm still not happy with the curves adjustment then I double click and up here in the properties panel it becomes the curves command so one of my common themes here is is any time you look and you don't see on ok button to click that's a good thing because that means by nature it's very flexible, so when I'm doing something on adjustment there, I can either decide make a selection first, then add the adjustment there and or I could say, you know what? Just add the adjustment and then I'll paint in the mask where I want so the other recurring theme and I almost hate to say this once again because it's it's that broken record concept but that will end up with if I want to. For example, in this example here I want to slightly tweaked the color of this glass of wine, but the key word there is slightly so how do I do that and make it easy to do? Well, my theory would be, well, let's start off by making a rough selection I'm not even remotely trying to be terribly accurate, I'm trying to be somewhat close and your reason for doing that is I wantto at least start off on ly seeing the color change in this one area, not the entire photograph, and then I go to an adjustment layer like hugh saturation initially everything set two zeros, that means nothing's happening, so if I were to stop right now, I would have there be no point because I have an adjustment not doing anything in a massive served no purpose, so there would be no point in that, but ultimately all I want to do is shift this color slightly, and I kind of I showed this little early and my quick example with the guy's shirt, but here's a more detailed explanation of it is I want to make sure I can see what I'm doing, so I'm going to temporarily change to some ridiculous color doesn't make sense because now that's going to help me paint on the mask more accurately if I just made a color shift that was teeny tiny could be so hard to tell a my getting it or not, but I reason I show this is I see that all the time where I'm helping someone individually or a corporate location, they're saying here's one thing I struggle with and they zoom in and they're trying to mask between red and a slightly different red I'm like well that's that's users making it more difficult why not temporarily make it purple or fluorescent green? They're like oh I'm like that's the beauty of adjusting layers is there by nature can be temporary so in this case I've changed it to blue and when I go closer I'm like e it looks horrible but that's ok because that was my intention was to get started but my whole point and making it this crazy color is now I can go back to my brush tool with the typical kind of settings and I just think black and white and just go in and just this back so now I'm just painting in now I wouldn't necessarily this is a little challenging because the nature of this photograph is that it's it's a depth of field things so the folks it's the back is a little hard to see but like imagine trying to do this just to slight different shades of yellow it would be so hard here as I'm working I'll deliberately make the mistakes you see what I mean if I was painting and I went like this you can clearly see ok that's bad I shouldn't have done that so I press x and get back and make it look better so I'm doing the same things I'm using the space bar to zip around I'm trying to make this look as realistic as I can given the fact that now I have blue wine which is not by nature a very realistic and sometimes it's hard to hear honestly it is a little hard to tell just because of the nature of the image, but I can kind of see I think and this is where I would take advantage of shortcuts that means zoom out to see what it looks like at that view because sometimes when you're zoomed in close it's almost also hard to tell doesn't look realistic so I kind of sit back and forth a bit like that, but again, let's pretend for the moment that we've got what looks like a pretty good representation now I would go back to the actual settings for this particular just miller and by the way, let me pause is say I'm using huge saturation as an example of this process, but this applies for any type of adjustment is it has the ability to overdo it some way another make it darker, brighter, different color temporarily so you can see what you're doing and then pull it back when you have a function with a bunch of settings like this one rather than try to pull this back, so was reset to zero if you just double click on the word it puts everything back to zero, so right now I have an adjustment layer is not making any change with the mask ready and waiting so once again if I just stop here all it means is if I ever do decide to change the color of this wine I'm set to go but what I would do instead of say well now let's see if I just make a very slight shift of color and be something like this as we zoom out and I hide this you can see it's a pretty noticeable difference when we're seeing it on and off like this but again imagine trying to mask that where there's such a subtle difference so that's why this I harp on it so much that concept of think end up with I want to end up with a slightly different color change but now I'm it's easy to do that because I made my life simpler by overdoing it first so that's one of the built in nice abilities of an adjustment layer is it automatically lets you do that and in this case it made sense to say well let's me at least narrow down the mask first by making a rough selection I mean if you can if you have a selection to all it makes a perfect selection even better but my thing is does I see people who again kind of obsessed over making it perfect right from the get go on like you know what you don't have to as long as the mask initially is pretty good then you can always tweak it as you go ok let's go back here all right so here's another example of exactly the same thing thank you for coming here we go okay so I want to on a photographic this there are parts where I thinking on the horse I might like part little too dark or I want a light another area so what I really want to do in fact is almost like for lack of a better word paint with light and dark so one of the ways to do that is use exactly the same principle start off by overdoing it and then come back and adjust it so I'm going to take in this case it curves could be any adjustment like exposure or levels or anything I'm mixing it up a little bit so with curves if I click here and lift up the darker parts of the horse are now getting later mom is everything's getting lighter including her in the sky and all these things I don't want so notice I didn't have to click ok, I just collapsed that panel to say leave that where it is for now in the layers panel I have the curves of justin lair with white layer mask because it's white it's affecting everything I don't want to affect everything that's going to affect certain areas so a very simple way to do this is to kind of take the other approach before at a layer mask, and I painted with black to hide things in this case. What if I did this? Take the layer mask? I'm going inverted, which is the quickest way to go from white to black commander control I and now I have a black layer mass, so I have a curves adjusting layer that's currently completely hidden right with miss over by take my brush tool check all my settings is kind of normal, everything else but I paint with white and effect think about what's happening here. I have this curves adjustment layer of this making everything brighter across the board across the whole image because I painted the mask with black it's completely hidden. Whenever I paint with white, I'll be revealing the effects of the adjustment there. So in effect, my paintbrush has just become the paint with the curves command brush, because there were I paint with white, I'll be lightning these areas and I'm deliberately just kind of going really quickly and not trying to be very accurate. But you get the idea that it's saying these areas now will be lighter and as you can imagine, I would do it just like this and keep it exactly that way because it looks fantastic and totally realistic. But it's exactly the same principle, I don't really want it to look like odd zebra type thing happening, but I wanted people to see where I was painting. Now that I've done that, I would do a couple of things the first one is, I'd say, well, I don't really want to be that bright, so now I pull it down so right away, more subtle difference, but the other thing is, and this is a cool function we haven't talked about yet here's my layer mass, justo weird bunch of little white brush strokes, but there are almost two definite even though I used a brush with a slave soft edge, they almost look too obvious. So one of the functions that we can do in here, which is really interesting, and I'm gonna take a sideways step for a moment and then come back to this. So hold how to say hold your horses, but that would be in a really bad hunt, so I won't say that, but hold your spot. So photo shopped for a long time has had this this command called feather or you can soften things and its selection based, so we'll come back to our horse in a second, but I want to fill you in on what's happening here normally, and photo shop if you make a selection and you decide you want the edges of that selection to be softer one of the ways to do that was called feathering or feather so it's one of the select menu issues modify feather and then what happens is it just gives you this dialog box that hasn't changed in the entire history of photo shop is just a number there's no preview it's entirely a guess seriously I mean you no one knows and they want to says they do is completely making it up because no one really knows what number and type in it's based on experimentation and previously doing things and just a guess and the problem with it is besides the fact you just kissing and let's say go forty five so first of all nothing happens I have to click ok now apparently I've done something but I can't really tell until I do some other step like phil that or copy it or do something to see the effect of the feathered et so let me just duplicate that and hide the background and say ok, I've got a little soft there john problem is what if it's too soft or not soft enough don't guess what start all over again because once you feather conflict ok there's no a version of like nondestructive let me change that feather until now and it's specifically with masking and it's fantastic because it changes the rules in this case, member I painted with a brush that I happened to spoken, I'll use that one, but now that I look at, I think I think I want those brushes to be a little softer edged, and if we look back at our mask, you know, there's our little brush strokes, so I suppose I could use like a blur filter because that would soften them a little bit let's, just try that to see, so we do god's and blur and I pick some number and that that kind of works, but here's, the one problem with this is tomorrow, we'll talk about smart filters became nervous tomorrow soon we'll talk about smart filters and their editable. The problem is, when you apply a filter to amass there's, you can't edit it, so if I decide later, I wish I hadn't blurred that much hoops, I have to start again, so that used to be the solution, and it was kind of like I'll have to live with that because there was no other possibility. Now there is thanks to this wonderful thing in the properties panel, this panel is so darn smart when I click on the adjustment layer, the properties panel shows me the adjustment layer when I click on the mask, the properties panel shows me functions to do with the mask, including feather but look it's a slider and when you slide it it doesn't have you click ok so it's nondestructive bettering so now instead of saying oh, well we'll have to live with x amount now you just drag it over here and this is what it's doing if I show you the mask so how much better is that that I could just say? I think I like that, but if I decide later I don't I just pull it back so this is like one of my colleagues go cold is undue on a slider because you're saying right about not like all or nothing it's like I think that no, maybe this and it's another a case where there's no ok button so you decide like to feather this much and in this case it means specifically the mask it doesn't help you when you're making a selection this is you've already made a selection now you want a feather it to make it softer that's the way I do it all the time now I usedto labor over, you know, make a selection go should be a feather of sixty one or eighty two I have no idea now it doesn't matter because I just go ahead and make the mask and then use this function so in this particular example I have this photograph going on and this is what it looks like right now very subtle difference, but that's okay, because I want that I want the ability go, what if I make it a little brighter and then see what that looks like? You see that? Definitely. When I first painted that you're I know you're all going really that's, what you're going to do is paint big stripes on your horse, but that's where I started because I knew that with this properties panel I could take it to the point where it would blend in much better and look better, but still in a way that allows me to print it and then go until though it looks I thought was a little brighter than that. So now I come back to this version and adjust both aspects of this theater, just mint and the mask by adjusting the feather of the mask. That's a wonderful thing, because now I can pull it all the way back to to really see what my brush strokes, where they are, what they look like. I wouldn't leave it that wakes, it just looks bad, but at least I have that option of kind of see. And this is another example of that reverse engineering thing is I could come back to this six months later you go how did I do that? And you okay, I see feathering if I pulled it back to zero ok, I see I did a bunch of basic brush strokes and then use the feather to help them blend in and I've used this for gosh so many different things where you're trying to say there's already like this photograph has nice highlights and shadows I want to accentuate them even more she make one adjustment layer that's dark and one that's light both mask is filled with black and then on the one layer you use this mass to accentuate the shadows and this mass to accentuate the highlights to me that's just a really interesting possibility say overall I love the look of this photo but on these rocks or this hill or that tree I wish there was a bit more shadow here. Well, now you can do that without a great effort. It just means you sort of think it out today and I would do one extra step if you had to adjust my ears I would call them something so that a quick glance you could remember this is the adjustment for darkening and this is the one for lightning and then just your painting with light in effect essence, you're doing hdr here in a sense, but what in it, in a way where you're it's not based in any way on the image? It's you decided control, I'm in pain clearly control, and it is probably in a way, as closer to when in the dark people dodging burn where there by hand going, I want this to be like for this to be darker is that in a much more interactive way? Okay, so that basic concept of macon adjustment paint on the mask and then tweak both again, I should write down some day a list of all the different ways I've used it, but I mean to me, it's it's, kind of like often the final touch where I've made global changes in light room, where cameron said, overall, I love the way this looks but detail wise, I want to pull out a little bit more here now light room camera both have adjustment brushes where you could in theory, do this kind of thing. Personally, I feel it's, much clunkier in light room and camera than this because while you can do it, maybe it's just me, but when I try it, I paint with a brush and then I watch it go wait, I'm almost finished catching up with you now and it's just it loses some of its appeal when I have to feel like I'm working so hard. So this concept again use a ton of different ways, and nothing makes me happier than when I open a file I worked on that I'm happy with when I just look at it visually and I see this on a just layer with a mask, and I know if I need to, I could just do a quick check and I would often see a feather that outlook there's already feathering their right away. I know I've got all these things I can adjust the adjustment here itself, the mask itself, like where I paint and also the feathering. Now the only kind of catch to it is once you've already feathered it and you start painting further, it may not look exactly the same does not using it in effect of different brush, so you have to kind of play with that little bit. But overall, just the fact that gives you that option to me is is pretty cool. Now let me show you building on that another variation on how I would use this kind of concept of a mass to give myself in effect, very often people take a photograph and do, like people hold everything's like a vignette effect where the outer edges are darker. The old days member used called a burnt burnt in edge is another name for it where you kind of takes your focus in the middle of the photograph by darkening the outer edges and this is the way we used to do it which was the old way which I wouldn't do anymore but just to show you how things have changed, how much easier you'd make a layer fill with black and then make a selection this is where the first road block occurred because then you'd have to go how much should I feather and it was always a I don't know so you used to crack me up because I watch people when they look at and go eighteen nine I'm like seriously like you just stared at it like somehow you interpreted though I think I need a yes baloney you just were a total gas you're trying to make it look like you really knew but you don't because you then you get this you know around as we don't really know until you hit delete and that's kind of interesting but really at this point the only thing that that I could change would be lower the opacity a bit to make it look less obvious but if I didn't like the edge of it base to have to start again and that's that I mean at the time that was like well I thought you the works but it was there was nothing about it other than it was on a layer that made it flexible instead now I use a very similar conference I just showed you I use curves and then initially dragged this edge down so far that eventually it looks like the layer is either filled with black or very very dark barely see some of the detail in there still and again I keep having this thing that they were gonna make unintentional bad horse ponds also say not to beat a dead horse but I'm not going to certainly keep it that dark but this is going to help me get to the effect that I want so in that first example I showed you I made a selection that I feathered and hit delete this is where you have to put your photo shopped thinking cap on for a second because in this case I have an adjustment layer that's making the photograph very dark what I want to do is only make the outer edges dark not the middle part it's hard to do that even though it's counterintuitive it when you first look at it visually in order to get rid of the black I have to fill with black on the mask right? Because a layer mask black highs the effect of the layer so is where does it sounds at first in this case I fill that selection with black like this so now I have what looks like kind of a black border because I'm getting a free screen refresh thing. I have a curves adjustment air that saying dark and everything, but then not the middle part. Okay, so it's close, but still doesn't have that nice soft edge look well, now this is where I would take full advantage of this feather, not just dragged this until I like the look of it may be like that. Now what I really like about this particular effect is that every single part of it is editable. I can change the curve itself, so let me double click on that brings back to the curb and say maybe there was a little too dark, so I start to lighten it up this way, or and they should all be and or and or I could click on the mask and say, well, maybe that feathering was a little bit too much or not enough so that's editable and even this the mask is ultimately a black rectangle that I created. So if it's the wrong size, I can hit free, transform and make it bigger or smaller and apply it that way. So every single part of this I can edit any way that I want, so that to me is a really nice benefit and in the category of working smarter by repurpose ing the fact that I've created this now is I can now use that in any other photograph because all you do is say let's, get rid of that layer it's like this here's my other photo I know and I'm deliberately taking two photos, which are not the same size just to make a point. All I do is I take this adjustment layer now photo shop has this function called dragon drop, which normally for most people means I have two photographs I dragged from photo ada photo be I'm using a method that adobes instituted for quite a while called tab document view so the on ly thing I see in my other document is that little tab right up there at the top, so somehow I have to drag and drop from this photo to the other photograph without seeing it now what some people would do is split their view and have two side by side photos that's you can do that but it's an unnecessary step this just takes a little getting used to I love this, but the first time induces people like what is going on? I can't stand it it's still drag and drop, but it should be really called drag wait drop because the problem is people don't wait they go like this, they go up sorry you know drag and drop why isn't it working you have to go like this and drag it up wait until the view switches and getting a weird refresh thing happening I'm not sure I think it's this mouse pose a thing that's miss is behaving here yeah something weird is going on uh see if I can not to be able to effectively show this drag and drop things so uh so I did what you dragged up to the tab you wait for the view to change to this document and then you dragged back down the document and let go they can see in this case clearly the size of the images was way off and normally that would be a bad thing because normally don't wantto size anything up in photoshopped but remember that mask is just a rectangle so sizing it up is not gonna have cause any harm so I do is hit free, transform and scale it up to fit this one hit enter looks pretty good and if I want to I can of course say on this photo maybe I wanted a little darker the lighter I love this ability to have these reusable effects that once I do them once I know by nature even they're not called anything other than a just layer the nature of justin layer is they can be repurposed into a different document just by dragging and dropping and then if need be it's like a preset, even though it's not called that I can still in this case say, willing to resize, it, could change the feathering. But it still quicker in my mind that starting from scratch every time question for you, sir, the width of that black bar can that can you change that on the fly? Well, you can, and could you stroke it somehow, and well, not really, but I don't need to, because ultimately, all that is is a black rectangle act. And if you watch closely, what what happens here when I hit free, transform, and start to scale it, and you see how, like the feathering is gone so temporarily, the feathering disappears to help you see the size, as soon as I hit enter, to say, that's, my new shape than the feathering comes back again, brilliant, so that's in effect in it's, almost like even though technically tow us, it looks like a border, really it's the middle rectangle, that's causing that border. So if you change the size of the rectangle, that's, what's, going to change, and the feathering amount at the two of them together is going to change the effect, but the fact that by nature this is just ready to be re used somewhere else? I love that fact that I can just and so this is what I was alluding to earlier, he said some people realize that make a fuller shop document this contains nothing but just malaria's with cool edges in them. I just go drink that in and tweak instead of each time going how to do that again and starting from scratch. It still didn't honest if you had to, it doesn't take that long, but you still have to go at a justin layer, make it darker at a shape filled with black feather. I mean, it doesn't take that long, but I'd much rather go drag drop tweet done because to me, that's a whole lot easier, and I'm showing you one version of this is you can hopefully imagine this applies a ton of different ways of doing things where you combine the flexible nature of the adjustment layer with a layer mass that now could be tweaked a little bit because of that nice little feather slider. Longtime photos abuses it's almost like, I guess it's like any kind of poppy where only the people that do that hobby would understand some little tweak, but I remember like jumping around the room like a happy that's when I saw feather on a slider and everyone else is like uh and then trying explain to rest my family the reason this is so good I've never mind take too long but I was just like you that is so awesome it was a simple little thing they change but someone realized why are we making this so hard? Why not have slider again? So I wanted to feather like this and do it visually instead of having to go eighty nine because I know that's the right number because you don't really know ever but even here I've done all this work and I go yeah their mind delete back to normal because remember of the nature of justin layers affecting whatever's below it in this case only one layer so by nature it said affect that one vote away if you decide this photograph would look good as a black and white I got a black and white I might pick one of my defaults that I have whatever it is made a preset for a particular type of printer because I found that on a particular printer try black and white. What I would have put for the mid tones was a little too dark, so I made a black and white preset for that printer but even this when you look at it ultimately still a color photograph it's just temporarily being made to look black and white as opposed to the's command anything else is going to say let me change that and you now I don't have any color anymore so even though you might have this moment time be convinced I definitely want to make this a black and white right now you do but what if someone comes back later and says, oh, you know that I just love the color version of actually key I'd much rather not get myself into that problem by doing this and we had a discussion at lunch about printing and often when you print things they don't quite match on your screen that's the other beauty of adjustment layers you do a test print you don't need a bit of a tweak adjusted now you're good to go if you used these commands you have to go undo undoing hopefully if you could and step backwards here it's just a tweet you just go in here and say I need to move that side orbit make another preset so that's kind of the a couple of big basic examples of using adjustment airs and that the theory of doing that you could fill in with any almost any type of adjustment or some have a very specific purpose they only do one thing but a lot of others are just like here's some commands liken tweak on if I wish to aiken ad adjustment layer or at a mask I should say paint on the mask not that I would ever do this because to me this is like I don't know I think it's day has gone but because someone always asks because almost elects to do it what if I want mostly black and white with a little a touch of color for my first advice is don't do it but if you really someone insists and you have a client is I really want that well is exact same theory black and white adjusting layer layer mask so right now the layer mask is white so therefore the entire photo is black and white if I want for reasons known only to someone that psa part should be in color, then I just need to paint with black on the layer mask and now look at that and that lovely I could see why someone would want to have the olives and color and everything else in black and white because it's so lovely so no different theories creating something that really looks bad but you could do it if you really want. So the greatest part about this is that anything is possible even aesthetically horrible things that no one likes any more you can do it if you really want to but now in all seriousness that's one of the great things about once you start to embrace these concepts off used adjustment layers there's so many possibilities from one concept like adjusting layer change the master black paint with white feather you can use that in a hundred different ways not maybe eighty I don't know but a lot because it's the same concept is supplied some different way uh, you create adjustment layer profiles for different printers that you have her you could I only did that because I knew in one particular instance I was doing a project with someone and I found every time you know, I put it on, I'm used to my particular printer that I've kind of created enough visual that I kind of a pretty good sense, so I adjusted it that way with your test crimes like, well, the mid tones were really dark for some reason on this printer. So bye playing, we discovered that if we moved a few sliders that that was a better result and said, you know, if they're going to keep putting on this printer might still make a preset for it and it wasn't anyway scientific. It was just visually that looks better, but but remember, every time, how did I do that now? This person when he knows in a print on that printer in black and white, starts with that preset because he knows it's already kind of don't want to say optimize because that makes it sound more technical than it really was, but it looks better right from the get go so but that's a good theory where you could certainly do that to say here's and justin layer for this end result, maybe you're putting out a lab somewhere, and you've discovered that after in a couple of test prints that it looks better if you tweak it a certain way, then you make a precept when you're sending files out to that lab, do your printing or whatever an ideal world I would think would be great if labs out there made available to you. Hey here's, a preset you can use with adjustments for our lab, but that that would be too hard because they don't know what other work you've done ahead of time, but at least from your own purpose, you could certainly do that. To me, a preset is a great timesaver. So whatever the motivation behind it, if it's I use this printer all the time versus I'm trying to make a border effect or whatever it might be, then they're all this different. You know examples of how you can make life a little simpler.
Class Materials
bonus material with purchase
Ratings and Reviews
a Creativelive Student
I enjoyed this class by Dave Cross. I like his method of teaching and found him very easy to follow and I learned lots of good tips on smart objects and working non destructively. I have just made the move from PS Elements to Photoshop CC 2014 so have lots to learn so I look forward to more from Dave in the future. Thanks Dave, I thoroughly enjoyed this class.
Roni Chas
DAVE CROSS IS AN EXCELLENT INSTRUCTOR. HE EXPLAINS TECHNIQUES SO THAT I CLEARLY UNDERSTAND WHAT HE IS DOING. I LOVE HIS TIPS, AND I LEARN SOMETHING EV!!ERY TIME I HEAR DAVE. I DID BUY THIS PROGRAM, I WANTED TO BE ABLE TO REVIEW IT AND GET IT ALL. I HAVE HEARD DAVE TEACH BEFORE AT NECCC CONFERENCE AND WAS SO HAPPY TO WATCH AND PURCHASE THIS COURSE. I CONSIDER MYSELF PROFICIENT IN PHOTOSHOP YET I CONTINUE TO LEARN NEW THINGS WATCHING DAVES PROGRAM! HUGE THANKS DAVE!!!
a Creativelive Student
Dave Cross is a wonderful instructor! He has a fantastic teaching style and has great mastery of his subjects!