Lessons
Day 1
1Why Work Smart?
33:20 2End Results and Reverse Engineering
49:07 3Make Adobe Photoshop Your Own
52:11 4Customizing Presets
20:36 5Layer Masks
38:56 6Compositing Using "Place" Command
50:36 7Adjustment Layers
35:12Blend Modes & Adjustment Layer Presets
42:39Day 2
9Not-So-Obvious Smart Techniques
24:11 10Layer Comps & Shape Options
29:31 11Creating A Series Of Objects
23:04 12Group Layers
41:40 13Scaling Masks & Masking Text
20:29 14Clipping Masks
47:11 15Student Questions & Preset Buttons
38:15 16Smart Objects
45:37 17Smart Object Tips
32:19Day 3
18Smart Filters
42:35 19Clipping Masks & Smart Retouching
36:05 20Smart Object Templates
50:02 21Template Variables
16:30 22Adobe Camera Raw and Adobe Lightroom Smart Objects
38:18 23Adding Texture & Adobe Camera Raw Presets
36:55 24Adobe Lightroom Smart Objects
17:52 25Automation & Example Projects
43:46 26Batching & Audience Q&A
35:08Lesson Info
Layer Masks
So in the history of photo shop, I would say there have been certain moments where something is introduced and you're like, ok, is going to change everything and certainly the first one for a long time foe shop uses was these new things called layers because it's, as hard as it is to imagine now and jim alluded this earlier used to open and it was like one background later, that was it, and they had one undo and the type tool couldn't edit I mean, there's so many things about actually remarkable anyone ever got anything accomplished in photo shop? So inversion three they introduced layers, I remember being like whole layers, and then shortly after that layer mass was just like, wait, what? I mean, that's just it's this to me if they said madobe said you were going to give you a million dollars, but you can't use layer mascot like sure, but I'd be really disappointed because I really want to use later mass, but I'm not stupid. I take the million dollars, but seriously layer master to me...
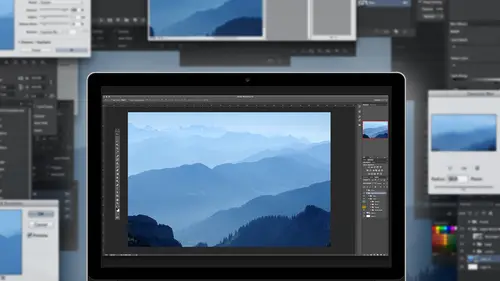
, one of the few talk about this whole non destructiveness, then layer mass would be if you look up on the dictionary nondestructive for another picture me going, and then they're right beside it would be a layer mask because layer mask is the first example, where many people where they really understand why this makes so much sense because we talked about already this morning, there's always multiple ways to do something in photos show, and very simply, if you wanted to combine a couple of layers together, you could just take your eraser and say, I'm going to erase this part, but a racing is about as destructive as you can possibly get, because once you use a race or delete, those pickles are gone, and if you are lucky enough to be able to undo, then you might be able to but it's all we also talked about before undue is very linear sonar to undo that the racing you did five steps ago, you have toe undo those other steps to you can't just jump backto the erase part and say, don't do that part where as a layer mask is one of these functions where any part along the way, when you do it, you can then three days later say, you know, keep everything else I've done, but let me adjust that back and to me that that's such an important aspect of how we work, let me show you an example here, I'm just going toe combine a couple of images here, and I'm gonna this part don't if you're writing notes, don't write this down this is the old bad way so don't do it this way I was trying to show you a comparison of how it works so I'm thinking I want to kind of blend these two photographs together now the good part was when I drag drag it drop when I brought in that other I was no no the past tense of to drag I drag it I drop it whatever I've got it automatically makes a layer for me and if I wanted tio there's certainly on a surface level there be nothing wrong with taking the eraser tool and picking a nice soft edge brush that's nice and big and starting to a race this top image so the bottom one shows through but just to make a point if I went a little bit too far I'd have to undo this right away because that was a brush stroke I just did with the eraser to say erase that part if I hide the background layer the everything else is gone when you see that transparent grid that means gone see through nothing so at this point I could actually undo because I just did it but let's imagine for a moment I continue working done fifteen other steps and then suddenly realize I wish I hadn't erased that part well guess what it's too late there's no command that let me just check and see if there's a on a race no, there's, no. Take away that thing I did five steps ago, command that's the whole point of this is functions like a race in a delete are permanent, and at that moment in time, you might be absolutely convinced that I just want to raise this little part. But if you don't do it perfectly or if you change your mind, I mean, take a step back and undo by the way, I'm just pressing there's a keyboard shortcut. This is one of the little quirky things the pro shop, technically photo shop doesn't have multiple undoes it has one undo and multiple step backwards, so when you're pressing a shortcut, you're pressing undo an answer, but it's a different shortcut to keep undoing. So just while I mentioned that, see how command or control z is undo, but a new redoing I was was back and forth. If I want to go back like, in this case, a couple of steps, I press this shortcut command option and z or control lt, which is step backwards through the things you've done so that confuses people because they're thinking I want multiple on news and you sort of have them, they're just not called that, so you can't just press the undo key. Multiple times this was go back forward backboard back forward nothing will happen. So what I'm doing there is stepping backwards so let's say I was even more accurate about this and I said ok let's go in here and zoom a little closer I'm gonna get a hard edge brush with the eraser so I could be really much more accurate here and a race right along this line this so that it looks like she's kind of standing behind him or whatever and I did that just by lower in the opacity so I could see what I was doing at first and then I could just erase this other part like this so even if I do that I mean it's it's still is going to look better because I took a little more carrot and still see it's not ideal but even here the problem still exists because then if I decide you know what actually I want to just move them up a bit. Well, the rest of them is gone because I erased it. So people some people going with the feeling like, well, I know exactly what I want to do and besides the fact that I would typically say yeah, bologna is what I was going to say you might at that moment in time think you know what you want to but what if ten minutes or you look at it go, maybe I should scale them down a bit now all that air racing is going to cause you great trouble. So in the grand scheme of things, doing anything that involves deleting or racing is just a bad idea because at a certain point, like I said, this was going to come back to haunt you or has the potential to so instead ah layer mask right away changes the rules. Now I have you remember already added a keyboard shortcut. Normally I would go to some button, but I already have a shortcut that just says add layer mask when you first add a layer mask for those people never seen it before is white and the world of masking white means don't do anything white really means is revealed all of that layer so that whole layer is currently visible because the layer mask is white, anyplace where I want to not have that part of the layer visible. I add black paint and I could do that by using a paintbrush or by making a selection and filling with black. That part is up to you, but as an example, I click on the layer mask and I've got my paintbrush and I don't want that brush, though I want the regular paintbrush and just so you see the difference here let's get a more typical brush all right so I start painting with black and as he did before it starts a racing are looking like it's our racing and I'm gonna deliberately make a bad mistake and cut things off that don't look very good but the difference is if you look really closely over here in the layers panel the entire layer is still there this big black blob is saying hide it it's not our racing or deleting it just saying make it not visible and because I had a soft edge brush on my paintbrush it made the edge kind of softener gradually faith had a hard edge brush you'd see a very definite edge to it so on the surface level it looks like the same kind of thing like I've removed pixels but the key difference is I haven't removed them I've just hidden them temporarily so if I decided for example to move them and then think well now it doesn't look right because there's too much of them I just go back to the layer mask and all you have to remember is black heights white shows or some people because they like to rhyme say white reveals black conceals I've never actually said that but that some people like that which ever make sense to you my philosophy is if you paint with the wrong color than it's the wrong one and you should switch to the other one so all I did was I pressed the letter x a switch between black and white. Now you can see that can repaint whatever party want that doesn't help the fact I've got a hard edge on just by the nature of the photo, but the point is, I have much more room to play because I could say, what happens if I move it over here? I could just repaint the mask so that's, the basic concept of layer mask is its hyde versus delete when something is deleted or a race it's gone. And worst of all, if you close and save, the document is definitely gone, because if the documents open least you have the potential ability to undo or use history or something. But once you've saved it and closed it all history is gone, so if pixels or erased there's no going back, you said you did you is x a short cut taxes a shortcut to down here, where you see the foreground background color instead of going over and click on it when I press exceed how is just swapping back and forth, okay, and we're going toe to toe in this session of maura about sort of shortcuts for using mass, but that's, one of the first ones, is so often to tweak it. You paying with blago too much white okay too much black and just kind of flop back and forth in addition to things like changing the size of the brush and this is just sort of the basics of a layer mass there are ways you can create a layer mass where more of the work is done for you but the key elements of a layer massacre this black hides white shows and gray use my favorite technical term is kinda that kind of shows in the kind of heights so if you want something to be semi see through you make sure you're painted gray now by having a soft edge brush that happened automatically because of the brush itself went from kind of hard to soft the beauty of one of the many beauties of layer mask is nothing about it is permanent I didn't have to click ok I didn't have to say apply is just how right leave it like right now got a little black blob on there that's making it look this way if I completely reorient the layers and suddenly the little black blob doesn't make sense I just re paint a different black and white so the beauty of it is it's you're never committed to like oh darn now I've done it and I can't change my mind you can and there's different places where layer mask appears and the concept is always the same black hides white shows grey's somewhere in the middle so when you know that you khun start to do some interesting things for example, I'm just going to fill this with white to get back to kind of square one what if I just wanted to very simply say make this layer gradually fade out so that would mean paying with black and then somehow gradually paint with white too, so it had this gradual kind of look and I'm deliberately ex century they were gradual to suggest there is a tool and photo shop called the grady and tool, and if I do a grady in't that goes from white to black shouldn't fade him out probably you can see by nature it's automatically making this layer mass that has this gradual blend and as I'm doing it, I can just keep repainting on and have to undo agnes school that didn't quite work. What about this? What about that? So all I'm doing is just experimenting, and each time I'm painting a different way that's kind, cool, different gray and that's exactly how I work and forced out, by the way is just I don't I have an idea in mind and then partway through him like that looks better now in this case I really like the way it's paid it out here, but I like to see more of her face so in our ongoing concept of nothing is ever permanent at this point I could say well let's just switch back b for the brush make sure white is my foreground color and paint over her face is to make sure that I that part is more visible and then it more gradually fades out. So even though the grady and tool initially started the look I wanted I can keep working on and say but on top of that and it's never change is always the same for you I think black is going to completely hide that area why it's going completely show in gray's somewhere in the middle so the darker grade is the more hidden it is the lighter gray, the less you know more visible it is this is what the layer mask looks like. So when I view the layer mask itself which will talk about in a second how I'm doing that not that you would typically I mean I guess you could look at this note look that beautiful I made a mess but it's more to analyze what's happening even way up here you can see there's very, very light gray so I knows by looking at that this whole part of the photograph is going to be slightly masked over here on the black part completely messed where I painted with white completely visible so at first, it's not a bad idea to kind of go look at the mask and see and kind of figure out ok, because it looks like that that's why the photograph looks this way pushing who hadn't wanted it quite so start could you have painted it with a light gray rather than the white? You could yeah, or I mean a very simple way to do it. And I didn't in this case, I wanted t o show the concept is with the paint brush, I could also lower the opacity of the brush instead of switching to great I could keep white, but then painting fifty percent white. So there by nature it's less obvious, which reminds thank you for that tweet the thought in my head that I meant to mention in the class section on short cuts, but I kind of got lost in a shuffle, but I want to tell you this because I know I've already done it and it's not visible, and to me this ranks right up there with really important shortcuts. Whoever figured this one out, they should get, like the nobel peace prize of photo shop because I don't know where on earth this came from. You know how every time in doing something like there's that opacity command up here and if I wanted to like change the fifty percent I'd have to go and drag this over well there's actually a little I don't want to say it's a hidden shortcut because it isn't really but it's not obvious can you see where my mouse is right over his eyeball theme of the houses I want to change the fifty percent capacity without having to go up there I just press the first number of the opacity I want so I want fifty percent I just go five announced fifty percent so on the fly you can change the opacity or pressure or whatever that setting is in that the tool you're using simply by pressing the first number so that way I didn't have to move my mouse or pen away from where I was working I just say I want seventy percent twenty percent sixty percent now this works because my current tool is the brush tool where it throws people off is if I had the move tool selected it would change the capacity of the layer which is also kind of cool but sometimes people get thrown off their like why didn't the brush changes because you happen to have a different function but that's a really nice shortcut because it means you can focus on what you're doing and on the fly just press a letter and it's it's mostly logical, you know, like ten. One for ten, two for twenty three for thirty the park that throws people off is to get back to one hundred press zero, which makes perfect sense, you know, zero for one hundred what's. Really? Where does he want? Zero opacity, which I don't know why you would on a brush, but if you do it's zero zero, so zero zero zero zero, four hundred makes perfect sense, right? That's one of those things where you have to do that a few times for it to make sense, but going back to your question that's rather than go to the color picker and pick gray, I would pick either black or white and just change the capacity, because that way, it's much easier on the fly. You can just either move a slide or oppressive number to change it, and in fact, it's a very common practice. I would say to deliberately pick a number like, say, thirty and if you paint thirty percent passing and go over each time it's building up more paint because you're one hundred percent of the total that's too much. So if you go a lower number, you could go more more there and kind of build it up that way. But again, the nice thing about it doesn't really matter because even here when I painted with pure white now I'm like I don't really like the way her face kind of transitions there I would press exper I switched to black and maybe go forty percent and just kind of start blending in a little so it's not quite so obvious and if you use a bigger brush it's you know much more gradual fact and that's that's what I love about this is that you never have to feel like now I've done it I have to commit to that because you don't if you're really hated you throw away they won't ask and start again because it's just another element in your layers panel is just sitting there waiting to be used now the one thing I do want to mention because years ago I realized one day that I kept saying paint with black on the layer mask and I think people were interpreting that as take your paintbrush and paint with black and that's not entirely correct because it's the addition of black paint that makes it happen so however you get it there if it's the paintbrush if it's the grady and tool if you, for example here's a very common way to do it temporarily hide the top layer used the quick selection tool to select his arm that's an example then come back here and on the layer mask go to the edit menu and shoes fill with black, so the net result is it's a ziff I took my paintbrush and painting with black but it's much more accurate so however you get the paint on there is doesn't matter as much as is it black? Is it? White is a great and I reason I bring that up because I notice once watching someone who painted half to the layer mass with black by hand, I thought or you could just go make a big selection will fill with black and that would be a lot quicker but that's one of the problems when people hear a phrase like paint with black, that doesn't actually mean to everyone in one of several different methods including the phil command or make a selection or use the grady and tool or the paint bucket lead anything is the act of whether the paint is black or white is what's making it happen okay, so that's kind of the basic principle of a layer mask one of things that it's an interesting function that is the way you use this function will depend entirely on what you're trying to do that will make better sense when I explain it so often when people say, for example, over here between the layer on the layer massey had there's like a little change symbol that means that by default by nature the layer and its mask are linked together so if you move one the other one moves with it which much of the time make sense sometimes it doesn't so when people say should I turn that on or off the real answer is it depends what are you trying to do so there's no clear cut yes you should always have it on notice having off it depends entirely on what you're doing in this case even though it makes no logical sense to our eyes I want to make it look like they're behind them which is just weird but you know you know what I mean so if I right now they're linked together so if I picked them up and move them that doesn't look so good because now there's a big hole in them so when you think about it in this case the mask should actually stay put so that's when I would unlinked them now if I move them see how it now looks more like I'm moving them behind but the reason I worded this way is you can't it's not always one way or the other sometimes it makes sense to have the mask move with the layer other times it makes sense to leave the mask where it is so part of our ongoing what I referred to is the checklist and photoshopped he's have to think about ok which way do I want to go and sometimes easy one as you try and go groups undo and then do the opposite so that's the beauty of having at least one undue with the keyboard shortcut is if you're not sure should I link the masking layer or not try it and if it looks bad than undo it and change it so in this case that makes better sense I still do a better job of painting the mask and you have to be careful because my case the mask isn't big enough so now we're things start happening but this is how you can start creating the illusion of things for example um another quick example here here's a little stock photo I wish I'd taken and kind of need and I want to make it look like there was some text on the wall behind the camera so I take my text tool in if this was a real example I would probably look for a precept that I had previously done but I'm not going to bother in this case and I typed something make it much bigger and let's just to make it obvious let's pick a different color now when I put it right here who's to say whether that looks like it's on the board or not but when I put it here it's pretty obvious that it's not because it's in front of this so in early days before layer mass, the solution would be we'd have to a race that part of the text well, the problem is you can't erase a text layer because by nature when it's text you can't paint on it, you can't erase it you can't apply filters to it, so there was a command called rast arise, which would allow you to turn the type into pixels, which you could then delete, which again, don't do this just to show you the difference if I go in here and choose rast arise type now they're just pixels now I could zoom in a bit and I'm again this is the don't forget this is the bad don't do it this way I just want to show you what's happening I would pick a hardage brush and I would go in and try and delete all the necessary parts like this and make it look but, you know, hopes I miss a little bit too even that right there I went too far there's not like switch it to black because I just a race, so I'd have to undo that whole thing and repainted but let's pretend it's perfect whose pretend and but the problem now is, you know, I look at him like, looks great and someone says looks right, can you just move it up a bit? No I can't but of course they don't want that answer like just move it up well the problem is of course if you move it up the rest of letters are gone or even simpler I love it but can you change the font no it's not type anymore and that always used to be the problem was rast arise that's why it's another one of those bad words because it was such a permanent function that you couldn't go backwards or if you didn't have to start all over again which I will do in this case I'll undo to the point where it's a type player so instead I use my little shortcut addle air mask and only difference is now I just get in I was probably too close but take my pain person I could also do from a selection again the same idea happens but did you see the difference is I'm just are racing like this don't try and be perfectly when you get the idea but here's the difference like I'm doing this partners on they realize oops I went a little too far unlike a race right have to undo the whole thing here's riot just swapped the colors pressing letter x because now I can just paint in that whole part that needs to be now assuming that looks great here's another example where would it make sense for the mass to stay linked or not in this case, I would say not because if I go to move, that doesn't make a lot sense, so if I unlinked them now, I can move it on out if the if I'm a bit too far, it'll start to give it away. So sometimes you have to intentionally create a bigger mass and you think you might need just to you give yourself that ability to say, what is it like over here? But even that's I mean that's, that's simple! I just click back on the mask and paint a whole bunch more black, so I hope you're seeing the recurring theme here that by using these techniques, even if you change your mind dramatically it's not like you're like, gosh darn it, I am unable to do that it's just like, ok, I might have to go back and do one more thing now, aiken, get myself a lot more room toe experiment with but what makes this a much better choice than a racing is I didn't have to rast arise, which means this is still editable type, so I'm not stuck by going, oh, well, I can't change it now. Now I can change to a different typeface or change the words or whatever I want because I didn't do any permanent thing like rast arising, so any time you're faced with creating something that involves multiple layers, the first place I would start thinking is how can I do this using layer mass because right away you're giving yourself a built in ability to keep changing your mind and not just now but six months from now as long as I say this as I psd think then when next time open and look just like this a type player with a mask attached to it and if I decide later on I wish I hadn't used that fun well ok change it or if I want to drive them to a different photograph and tweak it, I can do that too because it's just another element of this design tries like merge layers where you would only use it at the end or is there over time? Well, you know honestly that's one of those commands where at a certain point in the history of photo chef there was a need for it. I can't remember the last time I legitimately had to rast arise except to show people not to do it. This is stanley from in fact somewhere in here I think I'd check and see where I put this I didn't hear it is this is a little graphic I put together I call it the five forbidden fruits of photoshopped merger race flattened, delayed rast arise don't use any of those and your life will be better because all of these things are very permanent, you know if you delete something off a layer it's gone if you're asked arise you can't edit the type if you flatten you no longer have layers if you merge three layers into one then you don't have three separate layers and if you raise something of the same believes all of these things while they work are dangerous territory because at that moment in time it might make perfect sense you go, I'll just erase this quicker it might be a that time but you might regret it later when you come back you always wanna o you know and then you asked a very good question so why are they still there? Because it will be just like to take anything out but if it was me if I was the president toby, I would not be here I'd be in an island and somewhere I would consider keeping functions but I don't know maybe color code them like red as if to say be careful you can delete rast arise and merge but you're walking a tightrope without a net you know nothing wrong with it on one level but there is a lot wrong with it in the sense of if I want to all those things we talked about this morning repurpose and reverse engineer and all those things are completely out of the picture with ease because you have no evidence to say how did I do this? You know, merge is a good example people say yeah, well, sometimes I emerge layers why? Ah because my layers panel is getting very cluttered ok point taken but I still wouldn't do it that there are other alternates will talk about that reduce the clutter but keep the edit ability so if we'd had this conversation three or four years ago there would have points ok well, in this case you need to rest arise but honestly there's very few anymore where as a necessity there I can think of a couple where if you have you create your documents certain way you might kind of paint yourself into enough of a corner that that's the only option but when we talk later on about smart objects and smart filters that for me eliminated most of those things because now I can find other ways to do it where that's no longer I worry ok so let's look at that was a case where I just moved over a photograph and clicked on at a mask and started painting so that's method number one to create a layer mask is just manually start from nothing in this case I have stock art of a laptop and I want to make it look like a photograph is on the screen of that laptop so the only place I want the picture to appear is on the laptop nowhere else, and eventually I'd like it to follow the same kind of, you know, angles of the laptop. So in this particular case, I'm going to take one of my selection tools. This is a tool called the polygon a lasso tool, which allow me to just identify an area at first I'm going to be all I'm doing is clicking every time wanna change direction and make as for now, I'd like it to be incredibly accurate, but I can still tweak it that's the other advantage of a layer mask is at the moment that you created it, it will create a mask based on the work I've done up until this point, but even that could still be edited just like I showed you with the grady int or the grady in't did something, but I could still tweak it this kind of the same idea, but this is an automatic way to make a layer mask from your selection, so I leave this for a moment and let's close some of these other things too, like this is my version of removing clutters you don't need to see like multiple documents here and confusing matters, okay, so let's use this one this is the photo I want to make it look like it's on the monitor now, normally when I'm combining images together, I just use a method called dragon drop, which says drag this on to that one, but when you do that it ignores the selection completely and you have to do a manual process to create a mask. So this is a rare instance where actually version it's not copy and paste, but it's like copy and paste but it's better it's like super secret photoshopped paste? Not really, but so do select all I'm using the keyboard but of course I could use menus to do select all and then I jews copy, so I'm copying all the pixels within the selection. So is the entire photograph I come over this document now if I just chose pace, maybe the same is dragging and dropping of ignore this selection completely and just say new layer the end I wanted to make a new layer, but with a mask based on this election I've already made, so they have to do it in this specific order I have to like him it's easiest if you do it this way star with this election here copy the pixels from the other one and then you don't just do pace what you do is something called pay special it's, a special paste and it's called paste into with a very simple to member shortcut option shift command v our control, all shifty or just pick the one on the menu? Well, that's going to do is going to make a new layer, but see how automatically masted so it's already inside the confines of the laptop screen where I've made this election, if you look really closely, you may also notice that the layer and the mask or automatically unlinked because it's another case when you think about it, makes perfect sense for the mass to stay put because I wanted always to be that monitor shape, but I want to be able to move the image around, so if I take my move tool, you can see wherever I move it. I'm only seeing that part now it doesn't make sense yet because the monitor is angled and our photograph is straight on, but at least I'm already one step closer now I just use free transformed commander control t and with this command there's a nice little option where you can do things like rotate and then pick each individual corner normally when you free transform and you pick one corner, it affects both the horizontal and vertical at the same time, which in this case would be ok to a certain point, but then, like down here, it's starting toe cut off, so what you do is you get fairly as close as you can still starts to get cut off, then you hold down on the mac command, who knows control, and here you can actually adjust each individual corner into separately. So you match up the angles, and now I've got my little photo looking like it's sitting on my computer screen so that the steps involved were I could have dragged it over and then made a mask and then applied it. But it's, just simpler if you already have a defined area that you know you want a mask, make a selection first, choose paste into this is also great for things like you have another wise, nice photograph with a boring sky just one of those days where it's gray so select the sky, pick a nice photograph of this guy you haven't used paste into the mass school stayed put around the buildings or whatever, but you khun move the sky around and adjust how you want to be. But as I said before is as I looked more closely, I can see for example, let me get down here and see down here, I didn't do so good, so good a job on my selection, and I can see a bit too much black for my monitor well, not a huge deal, because if I went back to my lasso tool because I did it first kind of zoomed out just for the sake of speed, but here, for example, I just like just this little part. Now I have to think about this on my layer mask. I need to fill with either white or black to fix this, which should it be should be white because I want to show that part good job, everyone. Now I'm being a keyboard shortcut kind of person I'm as I have to stop and say this because I looked out and I see my background color is black I'm sorry, my four run color is black, my back from color is white, so there's keyboard shortcuts for both I want to fill with white so I could if I was being paid by the hour, choose edit phil and then pick white so that's the long I want to take more steps to do it way. I happen to know there's, a keyboard shortcut, which again bear with me with keyboard shortcuts because, well, some of them take a while to get used to, but the keyboard shortcut to fill with the background color is command, delete or controlled backspace. I know it's odd, but that's just the way it is if you do option delete or old backspace, it fills with four round color, so those air whatever your current four round back goes it just fills with those and again I'm just throwing random short counts out here that might not make sense as you're doing it but the more you do what it does because it just eliminates me having otherwise go edit phil changed the white click ok? So in this particular case the layer mask was initially created automatically through that paste into command but like anything conversation to do with a layer mask it's in no way finished because it's just black and white pixels so any time if you're looking at and go like in that case I noticed I wouldn't make a judgment based on the zoomed out view because I can't really tell so I would get closer and then look around using my little space bar shortcut to get the hand tools so I could probably tweet that a bit and down here that needs fixing now so you kind of it still might take a couple of steps but least you're eliminating some of the longer process of first in fact and no disrespect intended but I've watched people who kind of get the concept of layer mass but in their mind every time they use that they have to start from scratch by painting and they would sit there and take a paintbrush ago let me paint all this area in with black which also works but it's much much more painful and unnecessary so how you get the paint on their doesn't matter selection, phil grady and tool anything now this is actually show you another example, but I mentioned kind of in passing earlier that when we talked about levels, the adjustment versus levels adjustment layer and I kind of mentioned in passing I still use levels itself very rarely this would be a time where I might use levels if you're looking at a mask, you know, like it's pretty close, but he could be a little darker or lighter you apply levels directly to the mask, and that will affect act the look of it, which in this case won't make any sense but that's one of the rare times where I still want to adjust the pixels directly because it's a mask so if if all else fails, you can always tweet it sometimes, although more so in the previous examples they show you you want to look at the layer mass to kind of see how it looks to see if there's any maybe any glaring errors where you notice parts that should be white and are blacker vice she's made vice versa. Normally when you click on the layer mask it's just telling me now I'm working on the mask you want actually view the layer mask you have to hold down option or all and then click on the layer mask and that shows you this is what your mask actually looks like in this case, it's obviously a very plain jane, just the black and white mass, but if it was, as you'll see in a moment when we start doing more complicate things like people's hair, you will see a mass with all kinds of shades of white and gray and black, and to really see how you're doing it's not a bad idea to temporarily view the mask, the there's a lot of really useful things about layer mass, but there's one kind of dangerous thing that you have to be really paying attention to at first, because it's a different habit normally when we're working photo shop, you think to yourself least most people do which layer should I be working on? And you click on that layer to identify this lair I want to work on in this case now I have a little more to it because if I click on the layer getting closer again, see how there's a little kind of border around that thumbnail that means whatever I do next is affecting the layer if I want to paint on the layer mask have to click on it so now there's another choice to make, not just which layer of my on, but should I be on the layer or the mask and as before the answers will have depends what you want to do next. If you're trying to tweak the colors of the photograph, make sure you're on this layer or on the layer if you're trying to adjust the mass, then you make sure you click on the mass them now and that's one of those things that over time usually what happens people is they do it wrong, they forget, and then that reminds them yeah, I have to check that personally, I developed this habit of almost like a little checklist I'm going through in my head before I jump in and start doing something I make a quick glance and go, which one of those two should I be clicking on? And it will always the answer will depend entirely on what it is you're trying to do next. So, um, I wish there were more times where you could say always click on this first, but it really does depend on what you're doing. The good news is that layer mass are very flexible. I wish there was one more level of flexibility which there isn't yet, but maybe someday, but for the most part just by the nature of how you painted or how what color a shade of gray there is you can get to almost any result you want, I'll show you more examples as we go
Class Materials
bonus material with purchase
Ratings and Reviews
a Creativelive Student
I enjoyed this class by Dave Cross. I like his method of teaching and found him very easy to follow and I learned lots of good tips on smart objects and working non destructively. I have just made the move from PS Elements to Photoshop CC 2014 so have lots to learn so I look forward to more from Dave in the future. Thanks Dave, I thoroughly enjoyed this class.
Roni Chas
DAVE CROSS IS AN EXCELLENT INSTRUCTOR. HE EXPLAINS TECHNIQUES SO THAT I CLEARLY UNDERSTAND WHAT HE IS DOING. I LOVE HIS TIPS, AND I LEARN SOMETHING EV!!ERY TIME I HEAR DAVE. I DID BUY THIS PROGRAM, I WANTED TO BE ABLE TO REVIEW IT AND GET IT ALL. I HAVE HEARD DAVE TEACH BEFORE AT NECCC CONFERENCE AND WAS SO HAPPY TO WATCH AND PURCHASE THIS COURSE. I CONSIDER MYSELF PROFICIENT IN PHOTOSHOP YET I CONTINUE TO LEARN NEW THINGS WATCHING DAVES PROGRAM! HUGE THANKS DAVE!!!
a Creativelive Student
Dave Cross is a wonderful instructor! He has a fantastic teaching style and has great mastery of his subjects!