Creating a Soldered Cone
Lesson 9 from: Explorations in Metalsmithing: Hollow FabricationMegan Auman
Creating a Soldered Cone
Lesson 9 from: Explorations in Metalsmithing: Hollow FabricationMegan Auman
Lesson Info
9. Creating a Soldered Cone
Lessons
Prerequisite #1: Basic Metalsmithing Tools
18:08 2Prerequisite #2: Tools for Soldering
14:21 3Prerequisite #3: Soldering Basics
21:14 4Class Introduction
07:42 5Design Considerations: Making Paper Models and Thinking Three Dimensionally
14:40 6Creating Non-Soldered Forms: Bending and Folding
18:38 7Creating Non-Soldered Forms: Dapping and Sinking
17:19 8Pendant Preparation & Soldering Basic Forms
22:56Creating a Soldered Cone
06:29 10Hollow Fabricated Ring: Sizing and Making the Internal Ring Band
09:05 11Hollow Fabricated Ring: Making the External Shape
37:59 12Hollow Fabricated Ring: Constructing the Ring Part 1
22:05 13Hollow Fabricated Ring: Constructing the Ring Part 2
38:06 14Hollow Fabricated Ring: Finishing the Ring
04:18 15Variations on the Hollow Fabricated Ring
05:02 16Building a Locket
08:06 17Making a Tube Rivet Hinge
11:45 18Creating a Hinge & Clasp from Tubing: Part 1
14:26 19Creating a Hinge & Clasp from Tubing: Part 2
21:32 20Adding a Pin Back to a Hollow Fab Form
14:32 21Finishing Your Hollow Fabricated Jewelry
07:59 22Turning Your Hollow Fab Projects into a Cohesive Jewelry Line
07:54Lesson Info
Creating a Soldered Cone
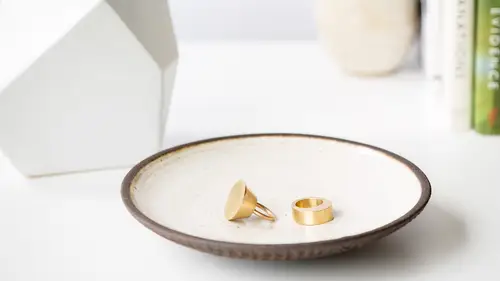
There is a way to get a true cone template. If we can kind of do maybe a top-down shot, I'm gonna do a little drawing for us. So there's a way to create a true cone template that actually gets you a real cone, as opposed to our funky little sample guy here. (laughs) Where we just sort of eye-balled it. There is a way to get a true cone. So I'm gonna show you guys how to do that and then how to kind of bend that around. So, what you're gonna want to do is start by sketching out your cone shape. And this is a case where you do want to draw to scale. So if you know you want it to be a certain proportion, I would actually get out my ruler and really, actually, draw this right. So that we're setting the right tone here. So I'll start by just drawing the profile. So this is the profile of the cone, the biggest or widest that I want it to be. So you can use this to make a full cone that comes up to a point or you can use it to make this truncated cone, like we've got here. If you're making a ...
truncated cone, we need to actually connect it up into the center point. So, I'm gonna follow this line here and I'm gonna follow this line here. So that I actually make the whole point of the cone. So we need this midpoint to do our measurement that comes next. So now the next thing that I'm gonna do, is I'm gonna measure each of these little lines here. So this one is-- let's call that-- we'll call that millimeters. And then this top one-- and I am doing this in millimeters-- perfect, that's 20-- quite frankly, because it's easier than dealing with 1/8 of an inch or 1/4 of an inch, right? These are really easy numbers to deal with. So what I'm gonna do now is I'm gonna take each of these numbers and I'm gonna multiply them by pi. So we're basically creating part of a circle. So I'm gonna do 33 times 1-4, so that is 103.6. I'm gonna do 20 times-- and that is 62.8. So now I've got the measurements for how long this has to go. So what we're gonna do is we actually need to draw the rest of, basically, a circle. So, this is really easy if you have a compass, and I don't have a compass. (laughs) So, we're gonna eye-ball it with our ruler here. So this one, we're calling that about 33. So what I'll do-- I'm gonna cheat just a little bit-- is I'm just gonna use this to kind of, basically, fudge a compass and draw a curve. Does that make sense what I'm doing here? Right, I'm using this as a make-shift compass. In my own studio, I would make way more marks so that I wasn't fudging this line or I would find something that matched the curve and go from there. But, in this case, we're just doing this really fast. So, it's like 51, 52 somewhere in there. So now I'll draw the next one to get the bottom side of my curve. And again, things I do much more carefully in my own studio, than I do when I have a room full of cameras pointed on me. So I'll draw that out. Now I'm gonna take these numbers that we got, the 103 and the 62.8. So on our bottom one, I'm just gonna measure around until I get to 103, oh look at that, I just barely drew it long enough. I'm gonna make that mark there. And then I'm gonna take my top one and go to my 62.8. So about 62. And then what I'll do, is connect that line. And so this area in here becomes my pattern. Makes sense? So I'm gonna ignore this part and just use this area. And then what you can do is take that, trace it draw it out on your metal and cut that out and you've got your piece of metal ready to turn into a cone. Make sense? Alright, so then, really quickly, let's go ahead and actually turn this, so I-- with a little bit more measuring at home-- (laughs) got one already cut out for us. So just like with our other things, we can decide if we want to bend this by hand or bend this on a mandrel. I think that this is thin enough, that I don't need to anneal it. This is probably 22 or 24 gauge, it's pretty thin brass. So I'm gonna go ahead and bend it, I might take it to my mandrel, but I think what I'm actually going to do instead, is just grab my parallel pliers here, something that's really not gonna mark my surface. And use those to bend around. Now, if I was smart, before I had done this, but I was just too excited, I would have taken these two ends to my sandpaper to get them nice and flat for fit. I was really too excited about bending it, so I didn't. So now we can learn from my mistake. And we're gonna talk later about doing circular shapes, where it doesn't really matter if it's a perfect circle when you bend it. In the case of this cone, I would recommend actually getting it pretty much the shape you want before you solder, unless you happen to magically have a mandrel in your studio that matches this. So, what we're gonna do is keep bending this around. I'm gonna file this to fit and then we can solder it. We'll actually come back and solder this a little bit later when we're working on our hollow fabbering. But now you know how to make the pattern. If you're like Megan, I want to make a ring just like that.
Class Materials
Bonus Materials
Bonus Materials with Purchase
Ratings and Reviews
user-d7f7ae
After watching Megan solder in this class, I felt like it was something I could take on. There's a lot of soldering in this class! But there's also a lot you can do without soldering that's covered. I have a better understanding of how jewelry is made from this class. I'm looking at things that I own and thinking that I now know how to recreate them!
Silvia Rossi
I liked this course, Megan explains a lot of things about techniques and materials and it's simple follow all the operations to create these types of rings. I think I'd purchase other classes of her.