Pendant Preparation & Soldering Basic Forms
Lesson 8 from: Explorations in Metalsmithing: Hollow FabricationMegan Auman
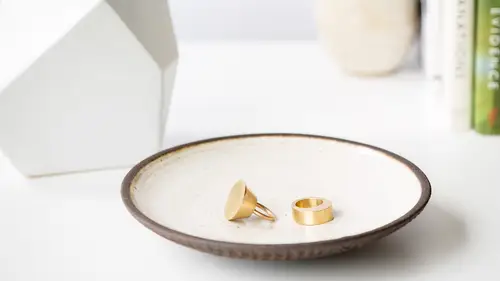
Pendant Preparation & Soldering Basic Forms
Lesson 8 from: Explorations in Metalsmithing: Hollow FabricationMegan Auman
Lessons
Prerequisite #1: Basic Metalsmithing Tools
18:08 2Prerequisite #2: Tools for Soldering
14:21 3Prerequisite #3: Soldering Basics
21:14 4Class Introduction
07:42 5Design Considerations: Making Paper Models and Thinking Three Dimensionally
14:40 6Creating Non-Soldered Forms: Bending and Folding
18:38 7Creating Non-Soldered Forms: Dapping and Sinking
17:19 8Pendant Preparation & Soldering Basic Forms
22:56Creating a Soldered Cone
06:29 10Hollow Fabricated Ring: Sizing and Making the Internal Ring Band
09:05 11Hollow Fabricated Ring: Making the External Shape
37:59 12Hollow Fabricated Ring: Constructing the Ring Part 1
22:05 13Hollow Fabricated Ring: Constructing the Ring Part 2
38:06 14Hollow Fabricated Ring: Finishing the Ring
04:18 15Variations on the Hollow Fabricated Ring
05:02 16Building a Locket
08:06 17Making a Tube Rivet Hinge
11:45 18Creating a Hinge & Clasp from Tubing: Part 1
14:26 19Creating a Hinge & Clasp from Tubing: Part 2
21:32 20Adding a Pin Back to a Hollow Fab Form
14:32 21Finishing Your Hollow Fabricated Jewelry
07:59 22Turning Your Hollow Fab Projects into a Cohesive Jewelry Line
07:54Lesson Info
Pendant Preparation & Soldering Basic Forms
So, now let's start to talk about actually putting something together. And so, the first thing that I wanna show you guys how to do is actually just how to put together two halves of a dome. Michelle's face is like yes, let's learn that! So, in order to do that, let me just pull out a couple more things here and we'll work through the process. So, the first thing that I'm gonna do with these guys is actually, I'm gonna go ahead and anneal them. Because I did not do that. So we'll go ahead and anneal a couple of circles really quick. The process hasn't changed. Sort of to reiterate, as you're forming the bowls, you really just go by your gut whether it's time for another anneal, correct? Yeah, so you'll start to tell pretty quickly if it's hard and the metal is not moving as you're hitting it. The more you do this, the more you'll start to get the feel of the metal. But generally, if you're using the dapping block, what I say is go with that rule of every time you change to the next...
size down, re-anneal first. Cool, and then, the longer you anneal, does it become more soft or is there a certain threshold that it hits. There is a certain threshold, so you never wanna let it get red hot. Because if you let it get red hot, what you're doing then is you're actually changing the molecular structure again. So it can actually harden or even cause it to crack. So you want a dull red, but you never want a bright red. And so that's definitely a time thing. Like if you kept the torch on, it would get to that bright red. Actually, turn the light back down. I'm gonna show you guys what you don't want. Cause sometimes I think that's just as instructive. I actually totally agree. So let's go ahead. So what I don't want to happen ... And so just 'cause I wanted to get us there faster, I even turned the torch up a little bit. What I don't want to see, see how now we're like glowing red. Yeah, we don't want that. That's not annealing, that's just overheating. So you don't wanna push it that far. This is a copper disc, so I can probably get away with that, truthfully. We're not gonna use that one. I can probably get away with it. You can bring the lights back up. But honestly, especially for things like silver, so bad for your metal. So that's where we don't wanna go. We wanna keep it that kind of dull red. Thank you. Sure. So I'm gonna dry these guys off here. And I'm just going to dap them in our little friend. So obviously if we're gonna try to make two halves we need to ... Let's put this back in here so it's a little vibration dampening. Clean this off. The first thing that we need to do is, of course, form these. So, I think this guy, yeah, just fits in that second one. So I'm just gonna go ahead and form both my halves. So it's important to know that for most dapping blocks, they don't make perfect spheres. So even if you were to like do a lot of courses and layers in this, you're not gonna get half of a sphere. So you're probably gonna get more so what could be described as like, a little pillow shape, or a little like, spaceship shape. Even if I were to keep going and do a couple of courses on this, it's probably never gonna get to a true half sphere. On this dapping block, you might get close. These are pretty deep circles. But just know it's gonna take you ... Like you're not gonna put this in here once, for sure, and get a sphere. So I'll start by dapping these. And one of the things now, that's really important because we're trying to put two things together, is that I have to pay attention to making sure my sizes are the same. So. I'm gonna hammer this guy in here. And I'm hitting with the side I didn't wanna hit on my mallet. That's what happens when you talk and work. So what I'm gonna start to do now, is actually hold these guys together and check to see if they're the same size. They clearly don't meet right now, we're gonna solve that problem in a second. But, if I look at this, I can say, okay, those are pretty much coming to the same size. I did not say this, but obviously, I cut them out the same size to begin with. But as we're dapping them, they may or may not come out to be the same size. So I just wanna check to make sure I haven't formed one more than I formed the other. Alright. So I think that looks pretty good. So then our next step, and really our most important step when we're trying to create a soldered form, is that our forms have to fit perfectly together. And so, to do that, we actually have to do a fair amount of sanding. So let me grab my sandpaper here. So for this I like to use a really aggressive grit sandpaper, this is 150. In jeweler land, that's aggressive. And then, I'm just gonna do this. If your shape is really bad and you have good control over your file, you can file this. But I find that most people, especially when they're just starting out, really don't have good control of their file. And they usually just make it worse. So I always think sandpaper on a flat surface is the easiest way to go. And what'll happen is as you do this, like you can see my edge is still funky, I still have some spots where it's clearly not sanded the whole way. So that means I have to come down here and sand this a little bit more. So, got a little bit more to do on that one. The other thing that you kind of wanna watch out for here, is if you're like really aggressive with your sanding, you're creating friction, which means you're creating heat. So your piece may actually get a little bit warm. And so, in that case, you could actually just switch to the other one and work on that one. And kind of jump back and forth between the two. Some people prefer to do this with wet sandpaper instead of dry. Either because they don't like the noise, or they think it goes a little bit faster. And you can certainly do that. Any of this black silicone carbide paper is usually defined as wet/dry paper. But I don't wanna deal with like a wet, messy piece of sandpaper. So we're gonna use it like this. Alright. Yes? What is your goal, is it a flat surface? Is that what you're looking for? Yes, so my goal is a flat surface and if I were to hold this together, what I shouldn't see are any gaps in my seam. So right now, even though I've gotten some of it flat, because I haven't worked my way back to that kind of funky edge, I've still got a little bit of gapping here. So I'm gonna do just a tiny little bit more sanding on this. If I were in my own studio, I would definitely go even a little bit further. But, I wanna at least get it close enough that I think we're gonna have a pretty good rate of success. So then the next thing that we have to think about once we've gotten this nice and flat, is that if I were to just go ahead and try to solder these forms together right now, it would not work. And the reason for that is that any time you have an enclosed form, you have to have a way for the air to escape. So when I start to heat this up, the inside is gonna get really, really hot, it's gonna produce gasses, and so those gasses are going to need a place to escape. If you don't give them a place to escape, what you actually will see is that it will just melt a hole in your piece, right? So we have to think about putting a hole in any hollow form that we're making. So if you were paying close attention to our sample ring here, you'll actually see that on the inner band, I have these five little holes. Yeah, so I don't know if anyone actually noticed that or not but they have these five little holes and that was for the air to escape. I did a little bit of cheating on this one and I just decided not to enclose the bottom, so I didn't have to worry about that. But any form needs some air escape holes. So you can either decide to put those in before or after forming. With something like this, where you're forming and it will stretch, I would put them in after the fact instead of before. I think with this ring, I wanna say, I also put them in after. But if you were putting them on a band like that, you could put them in before and then bend the band. You wouldn't have that much distortion. I think it's important to think about actually using them as decorative elements and not just thinking about them as, okay, like I have to stick a hole somewhere. So even though on this I wanted a really solid surface, so I just did them in here, I put five of them in a little pattern so that it looked a little bit intentional. Instead of just being like oh here's one hole punched in the middle of that. So in the case of this, what I might think about is, if I put kind of two holes, sort of lined up, that could actually give me a place right to thread a cord through so I could turn this into some kind of pendant, just by simply putting one hole on either side. So now in order to put those holes in, you can do two things. You can drill. So if you're going to drill this, what you wanna do is actually work from the inside so that it's supported, rather than drilling into open air. So I would go ahead and center punch this and then drill it that way. Because I wanna kind of keep things moving along, I am actually going to grab our friends the center-punch pliers. If I can figure out which tray I put them in. So I'm gonna grab our friends, the center-punch pliers here. I'm gonna put my safety glasses on and I'm just gonna punch two holes that way. Because it's faster than getting out our drill. But beware, this might distort your metal, just a little bit. So I'm just gonna punch two holes in there. So now I've got a place for any gasses to escape while I am soldering this. Alright, so now when we're thinking about ... And so actually I did deform it just a little. So what I'm gonna do here is come in and actually just give it a tiny little bit of sanding. So now, what I'll wanna do is put these together. Now when we're thinking about soldering, one of the things that you hopefully have gathered, either by watching other classes or watching our prereq, is we need to have our metal be clean and fit well. So in this case, I've been a little bit of a slacker and I haven't been pickling this. But, what's most important is the part that I'm actually trying to solder together. It's that that is clean. Right, and so by actually taking this on our sandpaper I killed two birds with one stone. I worked on our fit and I went ahead and got this clean. So now what I'm gonna do is, there's no way to kind of magically hold this together if I were trying to solder it without doing some kind of external way to keep it together. So what I'm gonna use ... Let's get some flammable stuff out of our way. Is a little bit of binding wire. So binding wire is just steel wire. You'll see it called binding wire in your jewelry supply places. And I'm just gonna cut a little bit of this off. Grab my pliers. And, I have no idea where the end is, oh there it is. I was just gonna cut a new end, but I found it. So I'm gonna grab this here. The most important thing to know with our binding wire is it's steel, so the reason it's steel, is that it melts at a much higher temperature so I don't have to worry about it melting on my metal. But it can't go in the pickle. Because it'll contaminate. I'm actually getting a little excited and this is what I always have a tendency to do. If I put the binding around here now, I can't get in here with my flux. So what I'm actually gonna do is take a step back, grab my flux, and go ahead and flux inside of this before I put my binding wire on. And so that's gonna make sure that there's enough flux on the seam where I need this to flow. Sometimes your flux brush gets hard and gunky when you don't wash it out after the last time you used it. So if you have not been paying attention to any of our other classes or you're just joining us, flux is toxic. You do not want this on your hands or your food or anything like that. So it's really important that you use this away from food, you keep it away from children and pets, and you wash your hands before you eat anything. I had multiple people yesterday, after we did our segment on soldering come up to me and be like, "Did you wash your hands before you ate those grapes?" And I was very grateful I had actually remembered. But I was grateful that people reminded me. So I've gone ahead and I have fluxed this and now I'm just twisting on some binding wire here. And I'm gonna actually do two layers of binding wire. Just because with one it can still move, it's a round form. So I'm just gonna go opposite directions here. Put some bi ... Oops see, that's exactly what happens when you only have one you accidentally push it off. So I'm gonna go ahead put this on here. And I'm just giving this a nice twist. I want it to be kind of nice and tight. So binding wire isn't gonna fix any of your fit problems. It's really about, it might push it down a little bit, but at the end of the day, you're binding wire is really just about keeping things in place while you're soldering. As opposed to like moving the metal or fixing any fit problems. So once we have our binding wire in place, then I'm gonna go ahead and set up on our annealing pan. And so now I fluxed to get the inside but now I'm gonna go ahead and flux around the rest of my seam from the outside. And this is one of those setups that's a little bit tricky in terms of solder placement. So what I might actually do is go right in my annealing pan and I think I'm gonna actually solder this in more than one step. I'm not gonna try to get the whole thing in one step. You certainly can, if that is your MO and you're like I really gotta, I don't wanna waste my time. But A, no one really wants to watch me place solder around this entire form. And B, you know, I don't wanna have to fight with gravity. So what I'm gonna do here is just ... If I can get my tweezers to cooperate, I'm just gonna do a section. And we're just gonna solder that. Can you reiterate that you'll do a section but if you were finishing this completely, you would do it ... I would do the whole thing. All the way around, okay. Yeah. And there are a couple of tricks to do this because obviously, like we're fighting with gravity here in terms of getting this solder all the way around. So one of the things that you can do is actually pre-flow the solder on one side. So what you could do is set the dome up on your board like this. It would obviously be flattened. Put your solder on, heat your solder up, melt it so that it's flowed over the surface, then stick it together like I just did here. That's a way to do it that's a little bit neater, a little less messy. And then you don't have to worry so much about fighting gravity. But soldering from the outside can work fine too. I am, as I often do, putting way too much solder on this. If you have been watching the last couple of classes, you know that I am a chronic over-solder placer and that that actually does not benefit us. Right, because now it's just gonna leave me a big soldery mess to clean up. But we're gonna make it work. Alright, so before I get my torch out here, I'm just gonna clean off my table a little bit. Get a couple of flammable things out of the way. So on something like this, I am just using whatever solder I happen to have cut up, which in this case was medium. I'm not too worried about it because there's only one solder seam. If I were doing this for real ... Look how good that picture is, that's really close. If I were doing this for real, I would probably use hard. I would also probably use a color match that's a little bit closer. So this is copper, I would maybe get some copper solder. Or even just like the bronze solder is gonna be closer in color than our silver solder. But I am literally just using this because hopefully it means you guys can see it a little bit better. So I'm gonna go one size smaller on our torch tip here. So I'm gonna go ahead and just use a number two. I think that three we were using to anneal is just a little aggressive. So the one thing that I didn't really think about, was that I put the air hole the opposite of where I just placed on my solder. And then I shoved it in the pumice. Does anyone see how that could create a potential problem? Right, because I just literally covered up the place for the air to escape. So I'm gonna go ahead and actually set this up on here. I think it should ... Yep, my binding wire will keep it in place. So this way now the air can actually escape instead of having a bunch of pumice stone to block it in. Things that are important to think about right? Alright, we can go ahead and turn off the lights. Alright, so now I'm just gonna, again, really slowly heat this guy up. Because I wanna make sure that my flux is gonna dry slowly instead of sending my solder pieces flying all over the planet. But if that happens, I do have my flux, my solder pieces, and my tweezers handy. In case I need to put anything back. So once this is starting to dry, now I'm gonna come in here. And I'm just trying to keep this nice and balanced. Heating both sides so that I'm actually getting it in there. And I may run into a bit of a problem in my laziness, about not actually cleaning this. But hopefully we can still at least get our solder to flow into our seam here. So there we go, you see our solder kinda flowed in there. It's in our seam. You can see how, once again, having used way too much solder I have some spots, but I did sort of fight my urge here and you can see this is what we really want. Right, we don't want all this solder here, we want it to lay just nicely in this seam. That's actually what we're going for, not our big, messy globs of solder. So you wanna be a little bit careful when you're quenching a hollow form. Because it's hot, there's gas in the middle, and there's only like one spot for this to escape, so we're just gonna like, kind of keep ourselves away and kind of slowly quench that. But we definitely wanna quench it. And we wanna make sure that we take our binding wire off before we put it in the pickle. So I'm gonna do that before I throw it in. And depending on how you've done this, you may find it just comes off, or you may need to actually get your wire cutters out and cut it. And occasionally it will stick to your solder. You can see I just kinda popped it off. If you need to you can grab your pliers and give it a little twist. So now I can go ahead and take this form ... Because I didn't do the whole seam, I would pickle this and go back and do the rest. But for now we'll just pickle it and move on. So any questions about that? Hazel Clappum would like to know, can you leave a tiny hole in the edge to be soldered for air release? You can. I mean you can honestly put a hole anywhere. But I think when you do that, it looks a little unintentional, it looks a little sloppy. So I think you're better off actually thinking about how to put a hole somewhere that fits in your design, rather than just leaving a little spot where you didn't file it all flat. Great, thank you. Alright, any other questions about that? Yeah? Do you quench it just because it's faster? Like if you were doing a bunch of things, could you just let them cool? Or is that part of the process? No, that's a really good question. So you don't actually need to quench after you've soldered. But you never wanna put it in the pickle red hot and you obviously never wanna put it in the pickle with binding wire on it. In my own studio, for some ridiculous reason, I have no quench water next to my pickle, I just have pickle. So usually what I'll do is just let it air cool, come back, take the binding wire off, and put it in the pickle. So yeah, you don't have to quench. And some people say if you don't quench it doesn't get as soft. Because when you solder, a lot of times you end up annealing it. I don't really know that that's the case. So I honestly, usually for speed, I just quench. But you wouldn't have to.
Class Materials
Bonus Materials
Bonus Materials with Purchase
Ratings and Reviews
user-d7f7ae
After watching Megan solder in this class, I felt like it was something I could take on. There's a lot of soldering in this class! But there's also a lot you can do without soldering that's covered. I have a better understanding of how jewelry is made from this class. I'm looking at things that I own and thinking that I now know how to recreate them!
Silvia Rossi
I liked this course, Megan explains a lot of things about techniques and materials and it's simple follow all the operations to create these types of rings. I think I'd purchase other classes of her.