Lessons
Day 1
1Introduction to Fashion Flair
16:58 2Essentials of Fashion Flair
22:00 3Integrating Fashion Elements
44:15 4Beauty Light
57:17 51940s Glamour Lighting
32:55 6Low Contrast Lensflare
29:05 7General Q&A
20:16Fashion Boudoir
22:55 9Photographing Men
39:16 10Styled Shoot: Steampunk
15:45 11Image Review
19:24 12Finding Inspiration
40:56 13Storytelling Shoot: Message in a Bottle
18:59 14Fashion Flair Techniques
11:39 15Fashion Flair Business Tips
16:57 16Natural Light Bridal Fashion Shoot
37:38 17Creative In-Camera Techniques Shoot: Sisters in the Forest
08:48 181950s Alley Shoot: Direct Sunlight & Open Shade
25:10 191950s Alley Shoot: Posing for Couples
16:19 201950s Alley Shoot: Lens Flare Tools and Q&A
12:44 211950s Alley Shoot: Vintage Car Exterior Part 1
15:46 221950s Alley Shoot: Vintage Car Interior
16:49 231950s Alley Shoot: Vintage Car Exterior Part 2
20:25 24Image Review 2
12:47 25Student Shoot Ideas
25:01 26Student Shoot: Ice Queen
16:34 27Student Shoot: Sea of Bottles
12:14 28Student Shoot: Warrior of Light
14:44 29Fashion Retouching Techniques
28:38 30Retouching Student Images, Part 1
19:53 31Student Shoot: Crying Words
14:58 32Student Shoot: Boudoir Ballerina
20:33 33Student Shoot: Mother and Daughter
20:58 34Retouching Student Images, Part 2
30:50 35Creative Retouching Techniques
15:17 36Shoot: Painting with Light
13:54Day 2
Day 3
Lesson Info
Retouching Student Images, Part 1
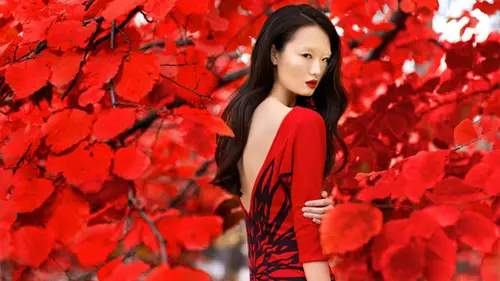
I'm going to zoom in and just take a look and I'm going to open up in photo shop and show you a few things that I might do to it um to kind of perfect it so let me open image so usually where I start is in adobe camera raw most of the things that I'm worried about at that point is going to be the exposure and the white balance in the black point and just kind of global adjustments so I'm gonna duplicate the background and I want to zoom in and take a look at skin detail that I would want to fix um you have a dead pixel or trunk of dead pixels passionate people just yeah just you know, check and see if it's common in in all of your photos um let me just clean that out because it's we don't want that there okay? Um all right? So looking around her skin you know I would want to get rid of big spots like that. Um for here, maybe I would use the patch tool to get rid of this in the center I would go to clone and switch to lighten to fill in those creases under the eyes so I would go to mayb...
e sixty five let's kind of just clone underneath the eye and fill that in so so far kind of filling things in but maintaining texture um here it's still a little dark under the eyes I might fill in just a little there and then again underneath her eye so I'm just making it really pure and smooth and I might click around without light and clone um, same thing over here. Can I kind of feel that in a little bit fill in those shadows good. So I would go around and do that for a bit. I would also get rid of some of these, uh, there's in places where some of this glitter on the nose is that right there I would use my spot healing brush to maybe get rid of a few of those just kind of clean it up. All right, so the next thing I would you spot healing or patch tool to get rid of straight hairs that I don't want there. Uh and when I see the over here, this is what worries me about patch to tool and clone, and they're apache tool and spot healing is sometimes this might be a little contrast to seem white feel the sea it you kind of cannon off, you can too much and I would fill in and clone in this get rid of this kind of red spot over here, okay, so those are some general okay things that it would dio stepping back a little bit um the next thing I think you would want to do for your creative effect is probably pull out some of that red skin tone, so I'm going to go over to my adjustment brush my half moon cookie click on it and in this instance I'm going to go to hugh saturation we'll see if that works goodhue saturation and underwear serious says master there if you click on master it's allowing you to look at and adjust each different colored channel so my red's my yellow's, my greens within my blue magenta so let's select read and what I can do is I can de saturate the red so I can pull out the reds and so I could make it so it gets much more pale if that's the effect that I liked so I could do kind of before and after where I think it's particularly useful is first well maybe want to keep the brown in her eyes which is fine so what you could do is you could mask that out so I will take my brush and paint black let's pump that up a little so I can bring back the color in your eyes but where it's really important was down here underneath your chin because I think that was distracting to the whole cool ice queen feel eso again here's kind of before after so far so that's pretty good um something else that I might want to do is I don't know if you want to add a little bit of a cooler blue tone to it I'm going to go over split toning probably in light room, but one thing that I've done is if I go to the half from cooking again and open up another few saturation um there's you have the ability to adjust the hue of the entire picture and another button is called color eyes when you hit colorize it makes the entire picture all within one spectrum of color and so if I drag this towards blues okay, you don't have to do blue what you do you can drag it towards blue and then back off you're a passage so how much that effect is being applied so I can kind of just pull back here and if I think it's two black blue on the face I could get rid of it, but what it will do is you watch the hands or what kind of icy so I can get rid of this effect may be right here on the face, but it was still want me to have kind of blue tones to the picture, so so far we have something kind of like this it's getting kind of icy blue um I'm going to go over real quick the makeup job that the woman did was a great job I'm just going to show you what you might do it after the fact you wanted to adjust makeup in photo shop so let's say that you wanted the eyes, the blue on the ice cream or blue maybe to do yes, no maybe well, let's just say that you do and I'm gonna take it a little extreme. We're going to talk about blend bodes um and I want to show you later a variety of ways to adjust blend modes, but here, when I'm going to do, is it going to create a new layer and to create a new layer there's a button to the left of the trash can that'll create, I'll click on that and it creates a blank letter there's nothing in it I'm going to go down with my paintbrush and pick a color of blue so let's just grab for now I can adjust it later let's just grab a blue like that. What I want to do is I'm going to paint the blue on the skin and it's going to look not correct, okay, it's just kind of starting points, we're gonna paint the blue on the skin, okay, so this is where blend modes coming to play, you can back off a pass ity but it still looks like it was just painted on there what you would want to do is right here to the left of a passage where says normal those are your blend modes for your layers, not your brushes the blended for the brushes in the top left your blend ones fear lair and what you're doing is you're saying how does this layer interact with layers below it? So I can say any one of those things typically for adding makeup in adjusting makeup in photoshopped you want softly hard light hors overlay which is down here overlay soft later hard like that's what I found tends to work best couple tips for adding makeup in photo shop let's say that you had like almost no makeup at all and you want to add makeup you still can my tip though, is that you at least have a texture. So for example, if you want to change the color of a girl's lips I could make someone slips any color I want but I can't take a gloss or a shimmer so if you know that you want shimmer have them just put a neutral color shimmer and you can change the color later or if you want glittery eyes at least put you know a solid color glitter and you can always change that after the fact so it's the same thing here she already has texture so it looks great so if I switched to overlay see how it changed it. So now I don't change your pass, idiot, actually, just start interacting with that layer below it. And what it's doing is it's picking up the highlight and shadow detail and interacting with the color. Now this, of course, is way too much. So what? I d'oh is a back off a pass ity and you come back off however much you know, deem necessary and you can always go in in a race. So maybe I think it's too much on the right eye because it was in shadow, so I can kind of go back in and erase a little bit. Um but to see kind of before and after, I can paint the makeup on. I don't think anybody would know that it's fake unless you have a sharp line um and how I get rid of that is you, khun blur it. There is a blur tool. You could use that or if I want you to goshen blur, which is filter blur causing blur and I can change the pixel blur and so I could make it so it's a really soft edge. So assistant like this kind of before and after seo got softer, so he's okay, and so I could do this to lips. And this is also how it changed I color a lot of time, so if you decided that you wanted to change your eyes, I see blue. Well, it doesn't work as well with brown, because it's darker esso I might do kind of the huge saturation adjustment, but if I back up here, um, so you kind of before, after I think that's closer to what you wanted, um, and I would go in and do additional maybe image, gnomic portraiture or two additional cloning where I'm just perfecting anyplace where its looks a little too dark, or you can see some colors, maybe I'd soups right, clarence here, maybe I'd kind of fill in that shadow. Okay, maybe I say feel like this is a little too textured would feel that in a little bit, I'd go in and clone out these smooth that up clown underneath the chin. And so all, most of what I do is just get rid of any place where you see kind of red showing through or two dark of a texture, because it's kind of a high key, brightly colored image. Um, do you have any questions over there on that and what we're doing here? I did have a question from caitlin from rochester, new york, who who says on location are in the studio do you pay attention to your history rams I have a fashion teacher who's obsessed with the idea of using your history um in the studio and obviously that wouldn't work for a photo like this that's a satyr lunch right uh so it's important to understand what your history graham means um and understand if your pictures correctly representing the photo and if that's what you want the reason that your your fashion teacher has a problem with this is because if you're shooting catalog and not paying attention to your history ram and you blow it a highlight on a white shirt well the clients are going to happen it's going to be white shirt the same thing to it if you overexpose even if you're shooting raw if you have to pull the exposure back down sometimes you have a color shift and so this is where the whole problem comes into uh to be honest, I don't pay attention mostly for a lot of my like editorial work because I'm just trying to get a good photo um and it might be really over exposed with lens flare and so my instagram would tell me I have everything over here on the right hand corner would like two little dots on the left so I d'oh pay attention when it is important otherwise I just ignore it I'm often breaking the rules that is kind of pulling general color out to get that effect kind of before and after and I think that's closer to what you want something I might do to is they might drag I'm creating a little give it a little more contrast just a little bit because sometimes it gives it a little bit punch to the photo kind of depends and I do something like that uh maybe I do like her eyes brown like I feel like my instinct for, like, a typical ice cream pictures to go with blue but I think it works here, so I'm going to say that image in case you want the layers to take a look at later say that all right? And I'm going to pick when a samantha's images randomly to take a look at here um let's see, we go, dear um I know you like to those there's also another one that would be good for kind of demonstration purposes. Let's, take a look. I looked at these for like, ten seconds. Um lest shoes see this in no slip down I'm gonna flip c maybe something like that that's a really nice um so let's say that seventy to thirty three slits open this up, the's r j pegs I recommend everybody shoot raw at all times that's a tip that I have because I can pull a lot more detail and have a lot more control over image you're raw if you think of it your rock is like your negative whereas you're j peg is your print can't I mean you could re scan the print if you want to do adjustments but you only had what information was in the print for than that negative you can push it and pull it in pull a lot more information out of it um all right. So something that I would do to this photograph there's really not too much to do to it because it's low contrast it's soft it's not supposed to be a crisp in in focus image um I would get rid of this over here I would photoshopped that out because when I'm looking at the shot I think it's distracting and it's this kind of random dark spot in the left hand side so I would just clone that out and you could try cloning on lytton uh that might work so we switch to light and and just kind of filled us in and so I like light and in controlling those those blend mode because it will help me really controlled my brush so let's switch you can use content aware fill it would probably work in that instance but I'm not going to go over that too much um I would also fix her armpit because I feel like this picture is really soft and whimsical and then there's like an armpit the same I don't like carpets really don't like armpits not my thing uh so I fixed the armpit this is one instance again maybe the late and would work at sea so work's pretty well that's why I love these won mo's because it really controls it may be a feeling just a little bit over here good. Okay, so that fills it in there kind of move around the picture um and just you know that's not in sharp focus but honestly one hundred percent I mean this it's okay for this picture it's totally fine is meant to be soft so I'm going to come over here we fill in a little bit under the eyes um a couple things I might recommend as well, you know it's okay say fill that in without, you know, maybe moving a little bit more a couple of things I might recommend with this picture is something that I do often on and this doesn't mean it fits your style but I play with vibrance um and vibrance is like smart saturation so when you saturate image let's say you have a picture that is fields and our forest in the fall of bright red trees with red leaves and they're like really super saturated and then you have kind of some dull yellow trees if you pump up saturation on that the red goes out a gamut it goes on fire loses detail scene that just like bright red no detail um and then the yellows also get more saturated vibrant. However, when you pump up vibrant, it will leave those reds alone because their closest being saturated and just take the dollar tones and pump them up in saturation so I like to play with that a lot maybe you have a color that photograph it's all about color so I want all those colors of pathos I pub why drag saturation? It just all goes really saturated, but if I drugged vibrant, it just makes it a little richer, okay, this picture I want to do the opposite er I am going to de vibrance I'm going to pull out vibrance in the skin I think that gives you often or kind of soft pastel e look so I'm going to click here and I'm going to go to vibrance and I'm going to pull out vibrance little bit let's, let me show you kind of the field we're going to get so it's our state more dreamy um and one of the things I've noticed is when you pull up vibrance, you often need to increase your contrast plenty vibrant for some reason makes things look really flat uh, so I'm going tio go to my half moon cookie goto levels and just and a little bit more pop to the picture. So eventually what those two layers did? I think it looks a little more dreamy. Looks a little a little like here we go before after think it it's looking better. So I'm often doing that because I think it gives you the dream here. Look, and you can go really, really extreme with that. So I think that's looking better? Um, something else if I want you to be looking more at her faith to control the viewer's eye, I can select the face and add a little bit of contrast to the face just a little bit. Uh, this is a really subtle picture. So everything that I do need to be subtle, but your eye goes to the highest area of contrast in the picture. So right now I look a lot at her chest because you have those crisp leaves there and that's where I go is because it's I hire of contrast so I'm wait, select your face. I'm gonna feather it, which means it's just going to soften the edges. So it's not, you know, the fact just in a tight circle on when a feather it out so close out soft and I'm going to go back to my levels and notice how there's, you know, there's? No black point there's not quite a white point. Um, I'm going to drag it just a little bit of a black point and a little bit more of a white point, not too much see a little bit and so let's see how that works. So I feel like it makes you look at the face a little bit more because a little area of contrast and so everything I'm doing I'm saying, okay, maybe it's a little too dark under the neck, so I'll kind of erased that affect their butt, and then maybe I'll look at her nose and say, ok, I think you know, the nose got a little hot, so I can of course not a race. I am painting black on my lame ass to get rid of the effect just on the nose a little. So for me, it just brings your eye in a little bit. A couple other things looking at this picture that I know I would dio I would come under here, and I would clean up underneath the neck. Here, I would kind of fill in, um, some of these wrinkles and we're going to talk about liquefy after the break I would liquefy down her shoulder to give her softer curve and I what I could do real quick is they condemn what without explaining because we are going to get into it later but what I would do is um I think that people carry a lot of tension in their neck and their shoulders and the longer the neck you have um the more elegant the individual looks and the more slender they look so I think that I would try to kind of liquefied down here down here a little bit on we'll talk about this tool a little bit more and you can use to make hair bigger and all these different things let me just take a look and show you why doesn't I liquefy all the time on beauty and fashion images but also on portrait so I feel this makes a kind of more elegant line um then before I'm going to add a little bit of color cast and then we're going to wrap for lunch I think just about right now so let me just add member how did the hugh saturation of blue to her image um I think you said you liked pinks right so I could do that same color eyes and find something that's kind of in the pink spectrum maybe something over here and then do the same thing where I back off and it gives me a little bit of pink. So let me to show you this image before and after a quick. So it makes it a lot more dreamy and soft.
Class Materials
bonus material with purchase
Ratings and Reviews
John Yee
I have watched at least half a dozen Creative Live courses and this was definitely one of the most interesting and informative of them. Lindsay showed her wealth of knowledge in lighting, posing, post processing and marketing. I was truly impressed with her level of comfort in each field. She tackled different situations and questions with ease. I really liked the course layout as well. She shot her own themed shoots and explained them. Then she helped each student with their own very different styled shoots. It looked like a lot of fun and a great way to learn too. Then at the end Lindsay had a fun little light painting session. WELL DONE LINDSAY AND CREATIVE LIVE!!! ;-)
Allan Burch
I'm an artist and amateur photographer who has long been interested in the subject of fashion photography and how to incorporate it into my art. Lindsay impressed me with her depth of knowledge and her comprehensive and selfless method of presentation. Showing before and afters to illustrate technical differences was particularly helpful to me, as was seeing her explain the importance of concept and story. Posing, glowing skin, and lens flare techniques were also a treat to witness and learn from her. Her passion for the subject is tangible, and left me more excited about the potential for my own work. The sheer volume of information Lindsay shares in this workshop is tremendous, from idea to the shoot to post-production, and certainly worth the investment I made in my career. Thanks to Lindsay and thanks to Creative Live.
Darci
I thought Lindsay was totally amazing:) She has inspired me. I want to attend more of her workshops. She was a great teacher. I want to learn more from her. I would love to attend one of her intensives, but I will have to wait til next year:( I am just starting out and she has given me many ideas. I cannot say enough good about her. I would love to see Lindsay back:)
Student Work
Related Classes
Portrait Photography