Lessons
Lesson Info
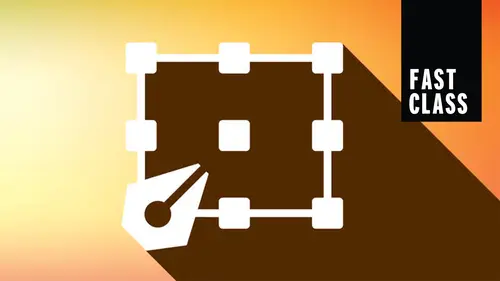
Grids & Alignment
this particular lesson, we're gonna show you how to use grids and guides and set up your custom guides. Which illustrator has a really cool way of doing custom guides. We're gonna show you smart guides, which we're gonna be absolutely fantastic for Alignment and spacing. We're gonna show you kind of some of the ins and outs of setting these things up and how it could be really useful. And a couple kind of not so useful kind of annoying things that we're gonna work around here. But we're gonna start our document up and one of the things I've gone and I've turned on my overall grid and under the view menu. This is where we can turn on and turn off our grid right here. There's are high grid that's gonna be command. Apostrophe is gonna turn on and turn off that grid. Now, one of the things about this grid that I want to make sure that we understand really well is how these things air divided. This could look really confusing. One of the things I wanna do is make sure that's just set up in ...
a way that makes a lot of sense. The default here is everything is set up in inches and trying to go ahead and divide things into eight sections is really confusing. So in my properties panel, I'm going to go on. I'm gonna change this all over two millimeters here because millimeters, we're gonna work so much better. Increments of 10 makes life so much easier. Now you'll notice when I change those properties here. My grid didn't change. Well, I can change my overall preferences from my units either in my properties panel or in my preferences here, going to units and setting this up so that I could go ahead and make this all millimeters. Now I'm gonna go to my grids and my guide here because this is gonna be really important on how I set this up. So setting this up two millimeters, I work much better in increments of 10 than trying to figure out how to divide things into sections of eight makes no sense whatsoever. So what I want to do is I want to set up my guides here, and I can choose a custom color for any of my guides here so I can see how this is going toe work and I choose any color that I want. And I have, like, a plethora of color choices. And I can choose lines or dots so that I can have lines like you see here or a dotted line here. And what I'm gonna do is I'm going to do a grid line every 10 millimeters with subdivisions of 10, which is going to basically mean I'm gonna have heavy lines every 10 millimeters, and then every millimeter, I will have kind of the lighter lines here. I can have the grids in back so that they're not on top of my artwork right there. And then I can actually show the pixel grid. When I zoom in really big above 600% I'm gonna click. OK, so this is my grid structure now, and you'll notice if you count here. You can't really see the mall. I'm gonna zoom in here, and now you can see that this is actually 10 millimeters right there. Exactly. Now, why do we use a grid structure? I use a grid structure for a lot of things, especially building my icons and my infographics, because then I'm not guessing at the size of things. I do have my smart guides, but smart guides air on Lee as good as how much you pay attention to them using a grid structure like this. Setting this up is really nice and easy to use, but you have to be able to use the grid structure fully just by turning the grid on doesn't help you at all. You'll notice when I try to draw something, it doesn't snap to the grid by default. In fact, trying to get that right there in the grid is really tricky. So under the view menu, just because you turn your grid on, I need to snap to the grid. Now you'll also notice that snapped a point is turned on here and snap. The point is one of these things that frustrates people a whole lot. So I'm gonna turn off my snap to grid. I'm gonna hide my grid, and I'm going to talk about snap two point right now because this is something that people get really frustrated with. Here's what snapped two point as snap. The point is something that's on, and here's what it does. If I were taking a shape or a line or anything, and I begin to move this around with her in my selection tool or my direct selection tool, and I move something. The snap two point wants Thio always go ahead, and it basically has a memory. So you may have used Illustrator where you're trying to move something just a little bit and it doesn't want to move because it want to keep snapping to that point exactly, because it remembers that point. That's the snap two point. So sometimes it's like, No, I just want to move this a little bit, but I can't get it far enough off because I keep having that little magnetic snap right there. You can set that if I go and I move this over here and then I come back, you'll notice how it doesn't remember because it on Lee remembers the last point. So it's just so frustrating when you're trying to move something just a little bit and it won't do it because it's kind of that magnetic snap. Two things Turn off your snap two point or move the point and let go and then come back to it and it won't remember the last point or go under your illustrator preferences Here, go into your grids and guides right here. I'm sorry, your selection and anchor here and you can go in and you can set your tolerance of how close your snap is going to be. So all these different things that can work. It's one of those things that, as you get really, really fine into working with this stuff, that little snap two point could be a royal pain. Now, if you're gonna use a grid structure, the snap, the point isn't a big deal because it's gonna snap to the grid no matter what. So I'm gonna go back under view when I'm gonna turn on my grid here. Just because I turned the grid on doesn't mean I'm actually snapping to the grid, so I have to do both. So command apostrophe and shift command apostrophe are gonna be turned the grid on and snap to the grid. Once I snap to the grid, everything snaps to the grid. I can't not snap to the grid and you're like, Well, why wouldn't I use this all the time? Because there's certain things, like when you're doing an arc or circle where it doesn't actually conform to the snap point of the grid. And you're like, Well, why doesn't it do that? And it's like, Well, because when we get an angle or something, I may not want that to be in that particular location. So with my snap to grid turned on, I have the ability now to draw anything that I want Thio. And the benefit of this is is that I can create if I want to draw something else exactly the same. I don't need to duplicate it. I could go on and I can draw something, and it's gonna be exactly the same as my other shape that I've drawn. Now, couple of the problems with the grid here, one of them is you'll notice. Okay, I've got my shapes. But why is this not snapping to the grid? It ISS I'm gonna go into outlined mode and you see that my shape is snapping to the grid. One misconception that people have is that you're snapping the stroke to the grid. No, the stroke is one of these oddball things that it doesn't equate into the measurement of the overall object. So this is 20 millimeters by 20 millimeters. Okay, it's the bounding box that that's it's that size from edge of stroked edge of stroke. Who knows what it ISS? Normally we add stroke weight in points. We don't add it. Millimeters. If we did, add it millimeters, which I could definitely change here in my preferences into my units. And I start adding doing a stroke and millimeters right here and I say, Okay, my stroke right here is going to be one millimeter. It still doesn't go ahead and snap to the grid. And you're like, Well, why we're using millimeters? Because when we add a stroke toe an object here, the default is it always adds it from the center of our stroke. A one millimeter stroke really is a half a millimeter outside the box, half millimeter inside the box. And now, when I look at this, of course, it doesn't look like it's snapping to the grid. No, because of the stroke alignment. So if I go into my stroke panel and I go to my stroke alignment, I can always have it inside here, and if I have it in millimeters, I can have a 1 to 3 millimeters stroke and it looks like the stroke is snapping to the grid. It isn't. I'm just using the same measurements. Now. This is like, Well, why wouldn't I just go ahead and use this so that it always snaps to the inside? It sounds like a fantastic idea, and it iss just a long as you use close shapes. Because if I draw a line here, it's great. I don't even have to hold down ship. It snapped. Shift. It snaps to it. And I do a line. A line doesn't have anything that allows me to align the stroke inside or outside because what's inside or outside of the line, it's down the middle of the line. So when I draw this here and I were tow line this up, say I move this over here and I'm gonna rotate this. Actually, I'm just going to redraw it here, and I draw a line over here, and it's like, Okay, that's not at the top. And it's like, Well, if I go into my preview, yes, they are. You could see that line is exactly at the top off my shape, but they don't line up well, they do, but they just don't appear to line up. So it's like, Well, that's frustrating, right? So now all of a sudden, that great idea that I thought of having the stroke inside my container so that it also snaps to the grid structure makes a lot of sense. Well, now it doesn't because when I try to align something up with a shape in a line, of course the appearance of it is going to go ahead in the line up with the width of the stroke and not the actual bounding box or the shape. So it's kind of something that you have to be very cognizant of when you're going in and creating your artwork. It's great to be able to go ahead and do this because it's so nice and easy to be able to go in and work with transforming and editing the shapes. Perfect thing here is going in, and using the with shaped tool are sorry the curvature tool. If I click with a curvature tool here in a non grid format, this is going to snap or is not going to snap anywhere. I could go wherever I want, Thio But if I'm using the curvature tool and I would like to go ahead and create something like this, the curvature tool is great because I can use this and I can create total symmetry by going and moving those dots so you can go ahead and snap and you can count those going right to where I want them. So if I wanted to have something like this, this would be great. I create this heart and then I decided I'm gonna rotate it this way. And now I get all kind of weirdness here. It's like, Okay, Wow, You know, it doesn't snap to this. Why doesn't it snapped at this point? Why aren't these here? Well, here's what happens with curves on a grid structure. The initial points will snap to it. But points along the curve won't necessarily snap. If I go in and I use a curve here and I draw, I can draw the curve beautifully And those initial point snap right to the curve. You can see an outline mode. It fits that curve perfectly. But if I then use my with shaped tool here and I want to curve this a little bit right here. This is always going to snap to a point here, and I may not want that. I may want this in the middle. It's like, No, I don't want it to snap here. I wanted here. Absolutely. Now we have to turn off our snap to grid. If I wanted balance this right in the middle of this grid so I could go ahead and turn that off under the view, I can turn off my snap to grid. Even though the grid is still visible, it doesn't mean that it's actually snapping to it just because it's on. In this case, I'm going to go ahead and get this and make sure that this works so that it fits right in the middle of my object. Here's another interesting thing. I'm gonna turn my snap to grid back on. I'm gonna draw container right here. Let me just do it this way. And I'm now going to go in and get rid of this point. So I haven't open grid I then want to go ahead and draw a line from here to here, put it together and you notice that when I do this it's like, Okay, these don't connect like I want them to connect. And it's like, No, because the way the lines you're done. And I may want to come in and move this point down here and create some kind of interesting shape right there. Okay, So I have that. And if I create another line here may be coming over here and create a line over there to kind of create an interesting shape. What I'm doing is I'm just kind of creating this kind of free form where I can join them together like self. I could then take these shapes and use my joint command, which we showed you in the other videos do join and then join those together here. I'm gonna leave this open, and I look at this and I'm just like, Okay, you know, I've created this kind of cool shape with the grid, but I'm not digging this whole thing here where it's like, Oh, my gosh. You know, this doesn't look like it lines up with here, so Well, how do I move that point up? Do I take my direct selection tool and kind of eyeball it and move it all the way up here. Well, I can't because I snap to the grid. What could turn the grid off and make sure that I get that right up there. But cool feature. I'm gonna go over to my stroke panel here, and we have three different caps. We've got the normal. But, cap, we've got the round cap right here, and that's not what I want. But we also have the projected cap and on in cases just like this. This is the projected cap. This is works awesome for the projected cap. Specifically, when you're doing things on the grid, check that out. When I use the projected cap here, you'll see that the stroke, actually then goes around the entire end. And it may not seem something that you're like. Oh, jeez. You know, I never thought about that. They're it. ISS. So now it looks like the stroke lines up with it here, even though I'm using the grid structure. Mm. There's all these little tweaks that you could go ahead and dio. Here's one other little thing to that we had talked about with the stroke. But this is kind of relevant in creating this little icon here in the stroke panel. I can also go in, and I don't want to use my corner widgets around these corners. I can actually go when Aiken round the stroke itself. Now, rounding the stroke has nothing to do with rounding the shape. If you had no stroke, this feature would do nothing. I want to round the corners of the stroke these air not corners, by the way, because they're not connected to anything. But if I wanted to round the corners of the stroke itself, not the shape, just the stroke. That's what I can do in the stroke panel here. So really interesting little tidbits going in here and using this Now, I cannot set my stroke to be inside or outside because this is not a closed shape. So when I draw something like this, the path is always going to be centered on, or the stroke is gonna be centered on the path equal portions on the left, in the right hand side. So I love using the grid structure because you can create so many things space. So maney things out here. You wanna put circles along here is great. You get perfect circles. And then you can space them out every amount and then just do command d and you know, I may be creating something and look at that. I mean, it's just, like, so cool to be able to go in and land these exactly where you need them to be on duplicate them. If I can select the whole thing here. There we go. Come on. It's like those Hold down the option key, duplicate them. Look at that. That's spacing is absolutely awesome. And now, if I wanted to create some type of colander or some type of texture right here that shapes perfect going through and doing that, I absolutely love it. Amazing. Now you'll find out that the grid structure can be very frustrating because it is very exacting. And not everything that you do with the grid structure is exactly what you wanted to dio. It's great for corners. It's great for centering, but it's not great for angles or things that are gonna end like this where you have points that are gonna end. They're gonna be open. Just got to keep that in mind because we will turn on and turn off to snap to grid quite often to get those things to be where we want them to be. Once we turn the snap to grid back on, it's not gonna snap everything back to the grid unless you click on that point and snap it back to the grid structure. Then it's like a magnet, and it has to snap to the grid. If you have your snap to grid turned on so other interesting things with this, I'm gonna turn off my grid structure right now. So I'm gonna hide the grid. And even if I hide the grid and my snap the grids turned on, it will still snap to the grid while I'm drawing. Even if the grids off. So keep that in mind. Okay? Just because it's hidden doesn't mean that if you can't get to that grid now, if I wanna have a little bit more loose snapping, I could go ahead and use guides, but I need my rulers turned on. So over here in my properties panel, I can turn on my rulers or just do command are the rulers pop up on the top on the left hand side and my guides come from my rulers. If I would like to do manual guides on the page here, I could just simply pull them down. And with those guides selected, I could go into my properties panel. And I can place those guides exactly where I want them to be and land them right there. Now, the one interesting thing with guides is that they're totally selectable. So if I go in and I click on the guide, I can move it. I can delete it and get rid of that guide if I want to. The guide is gonna be active. When they're highlighted in blue. I could just simply click right over them. One of the frustrating things is that if I select content on here, I can select the guide as well. And then I'm moving my guide and my content. It's like I don't like that. So under the view menu, what you can do under your guides here is you can lock your guides, which means once you draw them on your page here, it's going to lock them and you can't move them, which probably makes a lot of sense. Or you can create all your guides on one layer, so you can just simply lock that layer if you want to. Now, pulling your guides from the rulers is really simple. You put them wherever you want. Thio. And there on the page there. If you go up, Thio your rulers here and you want to change your units of measurement, you could do that as well. If you don't wanna be working in millimeters at this point, you can do it in your preferences here. If you have a lot of guides on your page, you can always go under guides here and say Clear the guides is gonna get rid of them all, whether they're locked or not. But here's the feature that I absolutely love. This is cool. I've created this icon. Okay, I have no idea what these angles are right here. But what I would love to do is I would love to go ahead and create a guide so that I can actually create other things at this angle. And if I take this shape right here and I'm just gonna actually select us, I'm gonna copy and paste this shape right here to get this angle. I don't know what this angle is. I could go and look at it over here, but I'm gonna turn anything into a guide. So if I have a line or something on the page, I can actually turn this into a guide, something that I haven't seen any other application being able to dio. So if I'd like to turn this into the guide, I can go ahead and just get that line going to the view menu under guides. And I could go ahead and choose make guides, and it actually turns this into a guide right there. So it took whatever line that waas and it turns it into a guide. So if I wanted to create other items that were at that angle, I could take that shape right here and I could rotate this and I could go in, and I could snap it to that guide right there to make sure that I was doing something at the same angle. Now, this is just a random guide. I can take anything. So if I draw a line on my page here like this and I want to turn this into a guide, I can take anything and turn this into a guide right away, going under view guides and say make guides. And now that's a guide right there, Anywhere on my page. This is great for creating intersecting guides here to be able to then rotate your artwork and do that anything can be turned into a guide. You want shapes right there? Sure. Take that shape. Turn it into a guide. Anything that you draw on there, you can make into a guide. Whatever the length of that line is, there it is. Works really good. I haven't used that very often. But, boy, when you need to use that, it is very nice to be ableto have that ability to go in and turn anything. Any object, any shape, any line directly into a guide. Now, guides from your rulers here. We used to use these all the time because as we were drawing shapes and putting these things together, it was very important to get things to be lined up. Well, now we've got smart guides when smart guides are turned on by default here under the guides under smart guides here, wherever it is. Yeah, there it is. Smart guides. Um smart guides air. Great. You'll notice that when we've been drawing these shapes or moving them around, we see all these little things flashing all around. Let's see, Make sure they're Riggio. You see all these things flashing and little spacing, arrows and things like that. Smart guides are fantastic. And here's why. Smart guides are so incredibly awesome. Smart guides take any object that you have, and it tries to go ahead and relate that object to any other object on the page. So top bottom left, right or center. When I'm moving these around, it tries to snap thio the top bottom left, right or center of any other object. And as you see these moving around, you see the little purple lasers coming out here and the lasers will actually stop. So you know exactly what you're referencing Whatever point you're referencing right there. So if I'm dragging this up here and I come and I'm trying to line this up right there, I'm gonna go in here and I can line these things up and I get the center intersecting here. But smart guides go beyond just alignment. Smart guides are also going to tell you when you're selecting a path when you're selecting a corner using your direct selection tool when you've got the center of something, when you're landing in the center of something, the end of the path, the corner, whatever, it's really truly fantastic. So if I'm going in and I'm drawing a shape here, smart guides also allow me to know when I'm starting at that exact location to. So if I would like to create another container this size without having my grid turned on, I can simply take my tool and you can see right there I'm starting at the same point. And as I begin to draw all of a sudden I can then draw and I'm going Teoh be able to then land those points and make sure that those were going to be right along the same edge right there, which is really cool. I now could draw that the same height when I'm moving things around. Of course, they're always going to try to snap to everything else if I want to move these things and I want to move them, in fact, I'm going to duplicate this shape right here. I'm gonna hold down my option key and duplicate. You'll notice that the center point here kind of gives my little magnet because the smart guides are going to try to restrain the movement so that I can see that I'm moving this directly in line with this. I can hold down my shift key when I do this. Don't go ahead and get that right there and give it constraint or else I can pay attention to just to constrain right there. Now here's another amazing thing. I'm starting to space thes out. So I'm dragging these out. And all of a sudden, in between the spaces, I get this little reference point showing me that the space between the first and the second object now matches the space between the second and the third object. And it's like, Wow, that's amazing. So not only can I go ahead and duplicate these items in the exact same plane, but I also don't have to worry about that spacing. I mean, it's really hard to not, you know, space thes things correctly. There's no getting it close. Either the smart guides work or the smart guides don't so taking any of this content here and moving it around and having it snapped to any other place, lighting these things up on top of each other right there. There's right in the middle. You can see the word intersect comes up center of the point that I'm moving intersects with the center of the point. I'm putting it on right there. It's right in the center. How can I not do that? I mean, it's very hard to not be able to snap that right to it. This is smart guides. They're just absolutely fantastic. They do get annoying because every time you move something around, it's always trying to reference the top bottom left, right, center of everything, absolutely everything, which can be quite frustrating. But it's also one of those things where you're doing your alignment. It is just absolutely golden, and especially when you're copying things or your spacing things out, you could grab everything, and you could just space everything right out here and get everything. Thio space right, outline right up, you know, line right up under there Now that's perfectly aligned with that. I can copy these, and I can perfectly align those with those right up there and It's like, Oh, my gosh, This is amazing. Take that. Align everything right there. Make sure I selected all first and begin to move. There it is. Yep. Line it up with a side right there. I'm gonna line that up here at the center. Come on. Is not lining up with center because those aren't a line to the center. There we go. It's funky. Didn't know which one to go ahead on the line, Thio. Now the spacing is the same. Really cool alignment. Now we also have the align features in here under the window menu. We have our line functions. We also have our align functions to in our properties. Panelas Well, And this, of course, you got to go into your little cheese grater to get a little dot, dot, dot to get all of your alignment here. We're just gonna bring us all up now. Normally, when you call a pure align panel here, it doesn't show everything. I don't know why you got to go to your cheese grater and show all the options. Now, when we're talking about a line and distribute items here, people get really confused about what a line and distribute ISS because these shapes kind of look the same. Aligning the objects means you have to arm or objects, and they could be groups of objects to. They don't have to be singular objects, but aligning things to the left, centered, right, top centered or bottom. How does that work to arm or objects? I align them to the left. Everything aligns to the left that makes sense, aligning things to the middle. Sure, So if I've got my objects here, select them both, align them to the middle vertically, aligned them to the middle horizontally. Why are my shape shifting? Because it's kind of like averaging them together. And it's like, No, no, no, no. I wanted the box to stay in the same place here. It's like I don't want these things to be moving. I want this to go ahead and move and not this. But when I do this, it's like, Okay, they're kind of averaging them together, and it's like, Well, I didn't want both of them to move or is the one staying in the same place? The other one moving here is what a key object ISS. When I go in and I select multiple shapes right here. What is my key object? My key object is the one that once I select everything I touch on, I get the thicker blue line. That's the one that we're going to align to. So I didn't want my box to move. I wanted it to stay there, select both tap on the box there and then I move everything. Now the box stays in the same place because that is my key object. Those air, all the things that are going Thio align the box is going to stay in the same place I aligned everything else. That's key because it's the key object. But it's also extremely important. The distribute objects is really interesting because the distribute objects here confuse people to no end and for good reason because they don't understand exactly what's going on the distribute objects here. I'm going Thio use a different example here. I'm gonna take these three shapes, but I'm going thio make one of these smaller right here and I'm gonna take these shapes right here. And what I'm going to dio is I'm going to distribute the shapes here. In fact, I'm gonna make three different sizes here, so we can really see the dramatic difference. When I use the distribute feature, I want to distribute spacing between the centers. So I click on the distribute and what I get is I get identical spacing between the center of the first one to the center of the second and the center of the second to the center of the third. However, people look at this and they're like, Well, that isn't right because the spacing between them isn't what I want. That's not what you clicked. You clicked the distribute objects here are always going to go ahead, and they're going to distribute from the centers of the object. That's awesome if all the objects of the same size, because the center is going to be in the exact same location reference wise when they're different sizes. That center point. I mean, if I draw a distance from the center point to here. To here, that distance is identical from the center point. From here to here, it's exactly the same. But that's not what I wanted. And as I tell people, if that's not what you want, don't do it. Here's how we go ahead and work with us, and this is where it gets frustrating. This is where I go to distribute spacing. Now, by normally you don't see the distribute spacing. So you're just stuck with this And you're like, OK, this congee totally frustrating. You have to click on the cheese grater to get the more options on. The frustration doesn't stop. So you're like, Okay, I want to distribute the spacing between them. So I go ahead and I click on that and it's like, Awesome. It puts that right between there. And that's exactly what I want. How this works is if I take my shapes, I'm gonna add a couple more shapes here so we can see this. We can see how this works right here. What you dio is you put your first object where you want it to be. You put your last object where you want it to be. I call this fence posting because you put the fence posts at the end and then it's going to go ahead. And it's going to equally distribute the spacing between the shapes. There's nothing to do with the centers, so it does take into account the different sizes. The first one doesn't move. The last one doesn't move. But now the spacing in between each one is going to be exactly the same. Different than having the centers measured. This is the space between. But what happens if I want a specific size, a specific distance between all of them? Then I go over here and I click on this field that I can't click on. And it's like, Why can I not get to this field? And the reason why is because we get little tool. Hint. But nobody reads, Okay, it says blah, blah, blab, blab, blab, blab, blab around. It's like, Why can't I click on this? Forget about the point that it actually tells you in order to specify the value is what you have to do is you have to go on. You have to go over here too little drop down menu, and you have to align to a key object. That key object is whatever object is there that you want to start the alignment at. Well, I want to start the alignment here, and I want all of them to be aligned from this key object If you do not set the key object, you do not get the field to enter it in, which is exactly what the tool hint says. But again, who reads so I've selected my objects. I've chose a line to my key object to see my little key in there. The key object is anyone that you touch after you've selected all of your objects. Now I say Okay, I want them 10 millimeters apart and I hit return and nothing happens. And you're like how frustrating it is because once you put the value in, then you have to go back in and you have to press the horizontal distribute spacing after you put the value in because you're like now I want it to happen. I know it gets very confusing. Still, you have to select the key object. You select the key object choice, Then you have to select the key object. Then you have to put in the spacing. And then after you put in the spacing, you then have to click and make that spacing apply. In order for that to actually work. Mhm. There you go. So the distribute spacing is different than distribute objects distribute objects. If they're all the same size, it's going to look the same. If they're different sizes, different shapes, then the distribute spacing. But you have to choose the line to the key object and then choose your key object. Put your spacing in and then apply your spacing in order to make it work. It can be frustrating, but you can also get really good results. Now, on the other hand, you can simply put those two together and then you can take any of your shapes as you go through here and just simply move them. And as you move them, you can snap right to those shapes right there and all of a sudden it snaps to those shapes. And there you go. There's your spacing as well. Sometimes people like to do that. People get a little bit confused when it comes to the alignment of things here. If I use my align left feature with all of these, is gonna take everything in pilot right on top of itself because it's gonna line all of them left, which is kind of cool. If I want to do that, I can align these all to the top. If I line these all to the right or all to the centers, it puts them all in that way. I can align them to the center's that way and you notice how they shifted right there. It's because they don't have my key object. Which one do I want to keep in that initial place? Because it kind of averages them all out. Well, even when I select them, I can say, Okay, this is the one where I want to align to the center. All of them will now shift down to the center of that object. So the align is kind of interesting. Yeah, it's a little bit challenging, but between using the grid and the snap to the grid using our manual guides that we could go ahead and create any direction, any size, any shape that we want works. Ah, whole works really good, theologian. Mint and the spacing as well as my smart guides for so many purposes. Um, smart guides are gonna be absolutely great. There's a lot of things that weaken dio and you know, a line and make thes absolutely perfect. Now, speaking of perfect, we do have this one thing called pixel perfect. And we have this thing called snap to Pixel. Now, why would we do something like this? Snap to pixel. Well, if you're creating anything in Illustrator, there's gonna be ultimately end up using for the web here. I'm gonna create a new document here, and I'm gonna set this up for the web and we're gonna see what snapped a pixel actually means. So I set this up a new document. It doesn't look any different than what we have with the normal document here, but I'm gonna go in. I'm gonna draw a shape in here, and I'm going to up the stroke so we can see what's going on here. And this is what we have now because I set this up as a Web document here and I have my snapped a pixel turned on. Here's what happens if I don't have my snap to pixel turned on. When I go in and I draw a shape here, I can get kind of blurry edges. All right, now we know that illustrator doesn't have blurry edges because it's all pixels, but I could get a little bit of a blurry edge in here. What? I'm actually viewing this. So what I want to do is I want to see my pixel preview up in the view menu here, and pixel preview is gonna show me exactly what this is going to look like on screen. Now, this is ultimately what I wanted to look like on screen because something like this, it's like, Oh, that's gonna look terrible. It's like, Yeah, now watch this. If I go in and I simply draw a shape like this, it's like, Oh, you know, I drew it here and it looks awesome. Cream clean, crisp edges. And this kind of gives us were little blurry effect. Exactly, because very much like snapping to the grid. Making something pixel perfect is making sure that you're not creating a shape that's going to be like 27 a third pixels. Because if you know anything about Photoshop or anything about the Web, you don't display a portion of a pixel. It kind of goes in, and it kind of gives you that blurry, soft kind of anti alias edge. Well, when I'm doing something and my sole intention, it's a great, beautiful icons for the Web. The last thing I want to dio is make everything really fuzzy. That's horrible. I don't want to do that. So turning on the snap, the pixel very much like snap to grid prevents that from happening. Now, when I go in and I draw a shape there, I can never go ahead and draw a shape that is going to be at a half a pixel. Okay? And it's going to snap to those pixels right there. You can kind of see little snaps as they go. I can't make something 27 a half pixels. So whenever I draw any type of shape whatsoever here, it's going to go ahead. It's gonna make it pixel perfect. Now, you look at this circle on, you're like, Okay, so how do I make the circle pixel perfect? Well, folks, pixels or squares, and there's no amount of squares that will ever make a perfect circle. So when you draw something that's going to be pixel perfect, this is pixel perfect. And I zoom in. You can see this. What you're seeing is you're seeing squares trying to make up a curve. Okay, So even though this is not a smooth as you think it's going to be. It's going to display as best as it possibly can on the Web. So Pixel Perfect is something that actually does use a grid. It uses the pixel based grid, so keep in mind. So when you do do angles, you do curves here. It doesn't look exactly the way you want it to look because we are based in. We set our document up to be in Web mode, and we also have our view turned on to make a pixel preview with our pixel preview turned off. You're like, Wow, that looks great. But that's not how it's gonna look on the Web. We need to see what it looks like here. So keep in mind, anything that isn't horizontal or vertical is going to go ahead, and it's going to give you what's called this anti alias effect, which is this smoothing right here? Don't panic, okay? Because we have curves on the web all the time. It's just that when you make it pixel perfect, your icons of your logos are going to turn out and display much better, because really, when you're looking at it, on the Web. It size. You're not going to see this. This has happened ever since Photoshop came around, and ever since the Web was there, it's there. So no need to panic. Just keep in mind if you're creating these icons for the Web, make it pixel perfect under the view menu and turned on your pixel preview here so that you get something that's going to be the best possible results. It is a different type of grid. It just happens to be a pixel grid, but it's a grid nonetheless. So I hope you found this helpful a lot of cool challenges in here, but also a lot of helpful things to go ahead and make artwork that's going to be very consistent, consistent spacing. And if you do anything for the Web, make that pixel perfect as well. So good stuff. Stay tuned for more
Class Materials
Bonus Materials with Purchase
Ratings and Reviews
Student Work
Related Classes
Adobe Illustrator