Lessons
Fine Art Compositing: Class Introduction
07:36 2Why Composite ?
14:51 3Logic Checklist
24:10 4Shooting for Composite
08:12 5Changing Backgrounds and Light
04:18 6Practical Ways of Lighting for Composite
13:29 7Compositing Simple Swaps and Group Shots in Photoshop
09:16 8Lighting in Photoshop
17:26Lesson Info
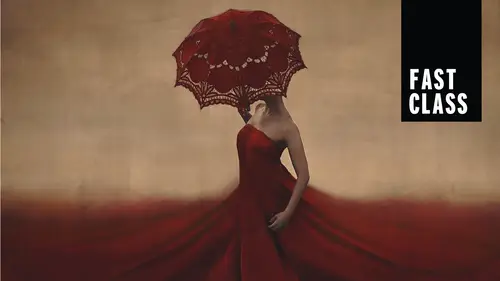
Editing Levitation Shoot
I'm going to open all of them up in a photo shop. I'm going to select all in camera raw. I don't see anything that I need to fix in camera raw right now. So I'm going to open those images up. And she was a really good sport about this. She posed beautifully. Um, and she pretty instinctively understood what to dio. I had not spoken to her at all about this process. I just said, I hope you can bend and that you don't have back problems. And she said yes. So that was all I really asked for. And so what really impressed me was that we did this pose, and she, you know, she hit it beautifully. But then when I asked her to do this arm, she instinctively raised the other arm. And that's the kind of thing that it's so important. If she had left that arm down, then she would have been blocking the light on her hand. And we want as much consistency as possible. So even when it seems totally irrelevant, like, why would I ever need her to hold that pose? I still just ask my models to just hold it a...
s long as they can, even if some other little part is changing and I find that they don't mind doing it, it's pretty simple. Unless there in some crazy weird position. So this was our blank shot. And I do have to say that we did a pretty good job with that. I don't think too much is moving in between the shots. So first thing that I want to do is I'm not gonna worry about the arm yet. I'm just gonna chop her arm off right now. I might leave the the cap of the sleeve and then cut in through here, but first thing that I want to do is just put this image or main shot on top of our plate. The only time, pretty much ever that I will suggest doing this is with a levitation image or when you need to use your blank shot. So in this case, it doesn't make a lot of sense to move our blank shot on top of the main shot. Despite the fact that I've been saying start with the main shot. Because if I do that, then I would simply need to rearrange the order of my layers. Because when you think about how we're going to complete this levitation image, I need to have my subject Who is balancing on the stool on this layer with my blank shot down here. So that way, when I erase the stool, the background shows through. So if I do that and I have it the other way around, I'm just gonna have to rearrange my layers. So it makes more sense to use my move tool and move the image of my subject on top of our blank shot here. And this is good, because this allows us to see if it matches up or not. So now when I go, I'm just gonna zoom in to see some detail here. So now when we take a look at what's happening and I lower the opacity on that layer, we can see what moved and what didn't. I am very impressed. Very. You get a cookie? Yeah. True. And I made myself sick off of them. Okay, so I'm going to back off here. I'm just going to zoom out so we can see the whole entire thing and assess what needs to happen before I start anything in photo shop, I have this moment of assessment where I pull back and I say, What are all the little details that need? Teoh Either be rid of or changed in the picture. And I do that because of how many times I've not done that. And Meston image up where, like, I have legitimately left a hand in a picture until the final layer was done. And that is a very frustrating thing to Dio. I've done it where I have a little foot sticking out over here actually printed an image with a foot in it before, and it's like, You know, all we need to do is be a little bit more careful. But I'm not a very careful person. I'm learning, so I know I'll just circle what we need. I know that this needs to go. I know that this stool needs to go. Let's see anything else that you see the think that's it in terms of what needs to be erased. But now I'm thinking about what needs to be changed. So I need Teoh. I think, perhaps recreate the skirt in a really nice flow, so I might do that by starting here and then creating sort of like a rounded edge coming this direction to get rid of all of that. So I will obviously be erasing that hand so that could be included. But then I'll probably draw just through here to create a nice curve and sort of in done her waist there. And if ever I feel like I've cut too much, I can always pop it back out with the warp tool or the liquefy tool or something like that. But in this case, I think it might work out pretty nicely. And I really like that her skirt will be curving in this direction because then it makes sense that our skirts flying up because everything is sweeping the motion, this direction. So that's what I'm going to get rid of in this picture. Um, yeah, I think that'll be good. So let's go ahead and start that process of just erasing the stool, making sure everything looks good. So, creator layer mask on this layer with a brush on black, we are going to take the opacity up, and I'm just gonna right click to make sure the hardness is down take that size down. Yeah, 300 or so pixels is good. And now I can start to erase, So I'm just going to erase my hands. So we've gotten rid of that. So that's check number one. And now we need to start erasing the stool. So right now, I'm OK with a fuzzy brush because I want to start erasing this portion of the image right through here. But when I get in and I start to cut off her hand and go along her dress and create a new shape, that is when I'm definitely going to need a harder brush. And if we don't understand the distinction between a hard brush and a soft brush than the composite will fall apart. The hard brush is necessary because my subject is more or less and focus. Therefore, I'm cutting against something and focus, which means I need the hardness to match that. Ah, sharpness of the dress. So for right now, though, I can start to erase, will. See, this is the moment of truth. I'm just so impressed. I can't believe it. How? I mean, this is great. Now what I'm doing is I am actually erasing the shadow through here so you can see if I take a step back. There is natural shading happening, and that's coming from our subject. But I am erasing it, and this is a decision that we have to make for ourselves here. In terms of do we erase the whole shadow and re create it from scratch? Or do we try to mimic the shadow that was already there? Now, in this case, I'm going to say that I'm gonna mimic the shadow. I'm going to keep this and I'm going to draw in more shadow happening through this direction here because the dresses cutting that in half. So the dresses separating one shadow from another and the problem, if it isn't, is that now we have to try to lasso or draw in darkness while it's slightly overlapping the other shadow, which means that that other shadow could get too dark in that one spot, and you might have a little bit of a hard time blending it. I love every once in a while, just everything, the whole entire shadow, because that means that I can do it from scratch, which means that nobody has a reference point. So if I have to recreate 1/2 of the shadow and I don't do a good enough job than what am I going to dio? I mean, everybody's going to see that there was an inconsistency there, so I worry about that in a moment. But first, let's try to work with the arm here, so I'm going to make my brush smaller with the left square bracket. But I also need to play with that hardness year, So I'm gonna go ahead and take that up. Probably 70 80% range, something like that, and we'll see if that's too hard or not hard enough. Take that brush size down just a little bit more, and I don't know if I'm going to be using this sleeve at all, but I'm leaving the sleeve for two reasons. One is because the hair is overlapping the sleeve. So instead of erasing it up around the hair or cutting it off in some weird way, I'm just going to leave it to maintain the hair as well as toe have sort of an exit point for her new arm to come through so I can just line up her new arm, which is in this shot with the sleeve that's already there and blend up the sleeve. So now I can blend one sleeve into another sleeve, and that will make it a little bit more of a smooth transition. Not like that. All right, so now I'm going to cut the handoff, and I'm just going to go wherever I need to go here for that, I'm gonna follow along a line where there's a natural shadow happening. At some point, I'm probably gonna cut that off because I think it's coming in, right? Maybe like that. Okay. Sorry. I couldn't talk because very concentrated there. All right, so I think maybe I want to keep a little bit more. I'm gonna actually come out this way cause I don't like it's too too sharp, too. Too much there. So let's go ahead and fix that. I'm gonna make my brush a little bit bigger, and I'm just gonna pull some of this back in. I just flip toe white. So it's nice and simple. You can see that I'm really digging in here because her hand was there. So that's something that I'm definitely going to end up fixing leader. But at the moment, I'm going to say it's all right for right now. So let's see how much go away hand. Let's see how much I can get away with erasing through here and then how we can fix that leader. A really good way of blending a skirt like this is to actually take the hardness and down a little bit. So right through here it it's a bit too sharp for me, especially for how much the skirt is blurring in some places. So I'm going to take my hardness down in the 50 range 50% and I'm going to bring some of this back, but at a much softer hardness. That way we have some more believable motion blur happening here, and we don't have a really sharp cut out because having a cutout is Oh, I don't like it. I'm just going to erase the rest through here. Continue. Continue to get rid of that stool because we still have a floating hand. I realize we have no arm, and something that we can also try to fill in her waist again is to go in with that new arm that we're putting on to see if some of that attach is into her waist. So let's just take a step back, because I'm not going to move on to another portion until I take a look at what's happening here. So what's happening is she looks a little bit weird because she doesn't have an arm, obviously. But if we lister zoom in on, we're focusing on this area right here. So if we zoom in here and we start to toggle this image on enough, we can see what is happening. So OK, Russ is distorting a little bit. We're just making him a little bit wider in some places, but we're all threading a little bit of shadow, so I think it kind of makes up for it. So she's popping in there. The store just jumped right out really, really nicely. And now I'm going to just blend this area here. So what happened down here was that I went in with that harder brush along the skirt, and then I continued to erase into the shadow, but I left it there. So this is the problem with erasing something with ah hard edged brush. The issue is that if I don't make the brush really soft than you see exactly where you were racing. So by taking the size up and the hardness down, I can erase much softer through here. And then you don't really see that there was ever an eraser happening through that area. So that looks a little bit nicer now. Alright, so I've got that going on. I think it's good I'm going to actually try to save this one because I get a little bit worried about these things from time to time. Okay? And now I'm going to find the arm. So the arm is a pretty simple paste on there because we're just using the lasso tool, and I'm going to select more than I think that I need, because I would much rather blend the dress than having to cut her arm out. Although I'm not against doing that, I'm just going to see what's necessary. We'll get some of that brick just right along there. And don't copy that, and I will paste it. Okay. I think her arms really gonna do us good in this instance. So I'm going to move her and match her up. I guess we can go from the boobs because we don't want to have two sets of them in this picture, and, uh, that would be an awful thing to do, so I'm going to just line her up now. I can see if I lower this opacity and zoom in a little bit more. The things that I'm paying attention to here are this edge. You can kind of see that edge of her body from the underneath layer. That's right here. I can see where that is through this image so I can see that this needs to come up and I can see the crook of her arm would be if I put that there, then where her arm ends here is actually touching the fabric. So that means that now her arm is just covering up that Indian that we had, so I don't need to worry about replacing it in any way. We have her arm coming over here, and this doesn't match up exactly. But that's okay. So let's see how this blends as it iss taking that opacity up. And this is just a guessing game. So I don't know, some secret that somebody else doesn't know. I'm just seeing what matches and what doesn't and seeing how that works. So again, at 100% capacity, I am going in with my brush, and I'm just going to start to race really softly at first all around and see what we can do. So all right, her sleeves up there. And that's where we're hitting a problem right now. The fact that the sleeve in this Lee aren't really matching up. So there are two things we could do. First, we can move her arm up a little bit to make that match, maybe moving in there and then see what we can do about warping. Maybe we can work that arm that's leave down or that arm up or something like that. But let's see how this goes. So first I'm going to start to blend a little bit more with my brush. We'll go right in there, make sure that's gonna work. Okay, Now, this is gonna be an area that I need to cut because I took some of the dress off from that area and I'm gonna make my brush life smaller just to start to get in these little detail areas. Now, this is a question of how much I'm going to a race. So here the chest is looking pretty good, but I don't see a point in erasing all of that that I just erased because now we're showing that there is a problem here where her arm waas are is now is a little bit brighter than where it used to be. So I'm gonna take away that brush, and I'm actually just gonna leave this shading that was there to begin with from this extra arm. So let's go in here and we're gonna work with blending the dress through this area. This is the spot where it's not quite blending because we have seems or what's like all pleats coming down from her arm and then some moving out this way. So to fix that, I'm going to lower the opacity of my brush to about 50% make it a little bit bigger, and I'm gonna bring back some of that dress at a lower opacity, and then I'm going to erase some more at a lower opacity. So now I'm at 23% opacity that I'm just going to continue to blend that way where I am allowing one piece of fabric to blend right into another piece of fabric. Now what I'm doing here is I'm following the shadows because, like we've been saying light and shadow, that's the most important thing here. So if there is a shadow from a pleat coming down this way, then I wanted to blend into another shadow, going this way so that it actually looks like it's all matching up. I'm going to keep erasing very lightly because erasing a lightly that's that's what's going to allow us to blend one thing into another. If we always go in with that really, really hard or I should say hi opacity brush than all you have. The option of doing is putting one solid image next to another instead of really letting the mix together. So what I'm doing is I have the underneath layer and then I'm saying OK, these pixels will only be gone 50%. That way we see both layers through and they mesh. Now here is a little bit of a problem because we need to make sure that we allow the skirt to come right up against the hand. So I'll take that opacity up, make my brush a little bit smaller, and I'll just make sure to brush that right in there. And now we have this area where I need to erase, but I need to pay really good attention to the hardness of my brush. So we'll go in and we will erase right along that oboe just like that. There we go. Okay. There. Oh, that almost too much. We'll take it away. Okay, so now we have this arm, and this is our problem area. Still. And that arm was moved a little bit. So this white background is now on top of the black. So let's fix that first. Before we do, anything else will just paint right along there and again. This is fabric, so I can always just cut it off if I don't like it, or if I need Teoh sort of cut in there. And this is our problem. We have a see through portion. I'm really zoomed in, but we have a see through portion of this dress with a white background instead of black. So we have a couple options. We can cut it off because we're lazy or we can change it because we want to make it absolutely perfect. Depending on my mood, I would do either one, but I'm going to select it just like this. Were that sort of black line right here. I'm going to start that over where that black line is happening in the background, just gonna trace it and in select this area. Of course, I'll feather that because I always want a really soft transition. So taking that feather slider up just a little bit, I'm at 67 pixels, and now I can click on the actual layer. So that's her arm that's doing that. You can click on the actual layer, and now I can go into image adjustments, replace color. And when I do that, I'm going to select the white, make sure that I don't have too much, and then I can take the lightness down on that and always play with that fuzziness, just to include more or less. So I've taken that down, and now that will blend pretty nicely. Looks like there's some darkness behind the fabric instead of light, where there's a transition there and I still need to fix this sleeve. So I need to see what is the most logical thing to have happen here. Do I want a warp her arm up to him on a warp? This sleeve down What needs to happen? So I'm gonna go out and play with her arm first. So let's click on the layer with her arm and I'm going into at it. Transform, Warp. I'm just going to start to play with that arm a little bit, and I don't want to stretch it too much like I don't I don't wanna go like that and then have it look like her arm was at some weird perspective, but I think this will be pretty good. I'm just paying attention to the edge of the stress right over here. Oh, that looks nice. So now the sleeve is coming down like a little cap there. I'll say okay to that. Some more blending could happen here. And this is where I would use that blending at a low opacity with my brush. So I'll move right in here. Take that brush, take the opacity down, and I'm going pretty low in the 30% range, and now I'm not on my layer mask. Now I will start to erase some in there, and it's so subtle. It's so hard to even see what I'm erasing in there. But it is going to make a difference now. One thing that I notice here is that this area here seems flat earth in this area. Can you guys kind of see that like her arms pushing the fabric out there? But not here? I don't like that. I would probably want to fix that despite the fact that if I've zoomed out just a little bit, you probably wouldn't see it. But I want to make sure that it's perfect. So I'm going to go ahead and make some adjustments here. And those adjustments are going to be what we talked about with the Dodge and Burn Tool. Remember how I was saying that with Dodge and burn? I tend to use it to enhance light and shadow to create a three D effect. That's what I want to do here. I want to focus on her initial sleeve. That's on our layer one, and I want to start to dodge and burn to create more of, ah, sort of In dent or wait, what's the opposite of indent? Okay, a ridge I was gonna say out. Done. So I'm glad that you said that. Yeah. Good. Okay, so let's click on the Dodge Tool and I'm going to say I'm going to say shadows for this one as faras the range goes because this is pretty dark. What's happening in here? This is definitely a mid tone, so we might hit both of them, but on our layer here, let's just start to play with that dodge tool. Make this a little bit brighter through here. There we go and its goods ratting some light to her hair. But I'm glad that we're adding lightened their because her arm, if it really was there, would not be creating a crease in the fabric. There would be running over her arm. So I'm going to make sure that we have that lighting consistency so that I don't know if that was too much or not. But let's just take a step back with her brush and you can see how there was that big shadow there. And now we're kind of filling that in a little bit so that her arm fits. We're going to do the same thing now just to keep the amount of light consistent on the arm layer that we just added just right in there just a little bit because I think that maybe we'll just keep the light flowing in the same way. There we go. I don't even know if I did anything. Oh, it didn't accept with it on the layer. There we go. How did something? Yeah. Okay, so we've just added some light to that area, and now her arm looks like it might have come from that portion. We're not. We can judge me, leader, and then I will come in and just take a look at this little part that I missed here. So I have to erase that from the layer with the arm. And this is gonna be a really, really quick fix by making the brush smaller and a little bit harder. And I like to zoom in a lot on my images, so you'll see me do that from time to time. Just zoom in really, really far to make sure that everything is going to flow. Oh, no. You come back. Oh, no. Huh? Oh, no. What? OK, here. Oh, I'm on the Dodge Tool. You know, this is good. I think this is a good life lesson, right? Like, you know, when you're trying to erase something and it won't work, it's probably the Dodge Tool. At least that's what I'm gonna go with. No, I think I just undid everything. I'm just That's fine. We can dodge that. Whatever. Okay, so now I'm on the brush tour, and now we're gonna do the same thing except on the correct tool. So I am taking my size down, okay? Taking my capacity up. And am I still doing it? Oh, I'm still doing it wrong because I'm on the wrong layer, and now it's fine. Okay, there we go. All right. So we've got her arm added on, I would say fairly successfully. I believe it, at least in its covering up for a little problem area, which I'm very, very grateful for. This is really bothering me right there. Here. This little shadow. That's definitely something that I would consider fixing. Now. How do you fix something that's black? I mean, it looks like we painted black Well, I would probably replace it with part of the dress. I would either replace it with a part that already exists here, or I would actually go find that dress groups. I went the wrong way, I suppose. Where's our dress? Not that dress actress. And what I know is that I didn't use this part of the dress. So if I were to take this portion, just copy it and paste it and replace this area with that portion of the dress. Then I won't have the same pattern repeated at any point. So I'm not taking from the same part of the dress that we already see. So use my lasso tool and just select a big chunk there. Guess we don't want the stool in that because that would defeat the purpose altogether. And a copy it and I will paste it face. There we go. Now, the reason why I did this instead of cloning is because I am not a fan of that thing. That happens when you clone the same thing over and over again. And then you see that thing all the time. I don't know why I'm saying it like that But so I'm going to use this instead. And I really like this method because even though this doesn't fit exactly as it is, I took it from a portion of the dress that will match and it will match because I took it from the edge of the dress, which means that we have that natural light fall off happening on the corner here on this edge. So that means that I can recreate the edge of this dress, just follow following along this little crease. And if I need to, I can warp it just to make it curve a little bit into place. So let's go ahead and do that. First. I'm lining up this piece of light strip here where it sort of billows along with this one, and now I'm going to lower that opacity so I can see where it needs to go. I don't really want this to go straight up. I wanted to curve a little bit, so I'm going to when the opacity is down so I can see what's happening. I want to warp this so edit, transform, warp. And now I want to sort of pull this edge in a little bit and let's go up here and start to pull this side over like that. So now we can kind of see these creases they're curving in. Instead of going straight, I will say, OK, so now we take that a Prasetyo off, we can see the difference there, and the difference is from that to that. So now all of the fabric in this area is curving, and that's exactly what I want to see. So now I can create a layer mask with our brush tool on black at 100% opacity, and take that size up quite a bit so we can do a nice, big, softer racer and the hardness down. I'm going to start to erase splendid ing this in right through there. Okay, Now, this is where you need to go in with a little bit of a harder brush. And I need to do that because I'm going against the dress here as well as along the arm. So we'll take that hardness up and the size down and maybe even a little bit more hardness than that in a 60% range. Okay. And we'll bring some back where we erased a little bit too much and go back to Black where we can erase it through there. Okay, so now we have a new portion of the dress which I really like a lot more because I really just felt like that weird patch of Blackwood's not gonna work for us. The only thing that I noticed now is that this piece of fabric is a little bit too bright now, right down there. So you see how it was fading and it was a little bit darker. I just want to fix that really quickly by selecting on my layer, choosing the lasso tool and just selecting where I feel it could be a little bit brighter. I mean darker through there. So I'm going to right click Refine Edge. I'm gonna feather just 70 pixels. That looks good for this. And now I want to make it darker. So I'm just gonna quickly do that with the curve. And why don't we go ahead with an adjustment layer curve? So in our curve, And now I can do that from the mid tones, and that would probably work just fine for this area. But again, if you wanted to make it a more even exposure loss. You could always go from the highlights. And then I want to pin that just to that segment of the dress. Maybe a little bit brighter. Think that looks better? So now that is just allowing that segment to blend a little bit. It's adding a little bit of shadow to that portion. So if you're thinking that I'm being really way too detail oriented right now, which is probably what you're thinking, um it just makes such a huge difference, especially when going to print and creating every little bit of believability. So I always want to make absolutely certain that I'm doing that. Okay, so let's create the shadow now. I can already see that I've made a mistake here because I have this little what What I know is a brush dot from something. So I like to toggle my layers on and off just to see what is doing that there it ISS. So I need to go in on my layer mask, my brush tool. Just gonna take that hardness down. So it's really fuzzy and figure out how to paint that back in so there we go. Got that taken care of. And now I want to start creating my shadow. Now, the great thing about the shadow is that we see separation in her legs in the shadow that creates believability. What does not create believe ability is if you try to draw a shadow of her legs and it looks like this and then like that, because shadows don't typically do that. The problem of shadows is that they blend so easily into one another. And the darkness changes very gradually that we have to be so soft with our shadows and delicate with how we deal with them. So I'm going to start drawing in our shadow. And this is what we talked about yesterday. A little bit about shadows and how if the subject is moving away from the thing that the shadows being projected onto, so if her head is further away from the floor than her feet, then this shadow might not be a dark or as harsh as the shadow right underneath her. That means that the shadow right here that we start to draw is going to be a little bit harsher than the shadow over here that we start to draw. So let's do this in two parts first will draw the whole shadow and make that darker. Then we'll select this area again and make that just a little bit darker. That way, we're creating more of a dark spot right underneath her dress, as opposed to underneath her arm and head. So I'm going to zoom in just to see what we're doing here. Make sure that it's gonna look all right. I know I'm actually gonna come a little bit to a point at the end of the shadow and then move it back out right over here. ID rather overlap the dress than not select enough and have gone like this. Because then we're gonna have a white part in between there. And we don't want that. Even if we go right along the dress, the moment that we feather that it's going to create a little bit of a gap in there, and you're going to see a little white strip where you didn't make it dark enough in that little portion. So let's do that. We need to show you what that would look like if we didn't select enough. And this is our shadow. Okay, so we'll refine edge on this shadow. Take that feather up. Okay, so you can see it happening here. When we take that feather up, you can see that there's a sort of white line right there. Can you guys see that? And that's because that will not be as dark as the rest of our selection. So that is why I don't want to do that. And so I'm going to just refine the shadow. My point that in a little bit. And now I'm going to select more than I need, knowing that I can use a layer mask to erase it where I don't want it. Or I can pin it to a layer if that works better for us. So I'm going to create it just from right here among layer one. That means that my adjustment layer is going to then pop up right above that. So if it pops up right above then I don't have to worry about it affecting any other layer, which it wouldn't because the layers are further up in our frame. But, you know, best to kind of find the layer that you actually wanted to be on and stick to that layer, some creating a curves I didn't even unfettered that, did I? Did I end up following that? No. Okay, let's do that. So I'm going to feather that instead of just drawing it in. Go back up to my last so right click and refine edge, and we'll do this two ways. We'll do it the painting way where we can just paint, blackened and see how that looks. And we'll do it this way as well. So we'll take that feather up. And the feather of this selection depends very greatly on what our shadow already looked like. So before I do that, let's go back and just take a quick gander at this shadow. Can you guys see how right here is a little bit sharper than right here? The spread of the shadow is getting fading and fading as it gets toward the edges more than right here, and that has to do with how close your object is to the plane where the shadow is. That means that this dress is flowing and it's not quite touching the floor, whereas her legs were so. I want to match the shadow to this portion right here in terms of fuzziness. So I'm gonna keep that in mind. Just generally refined edge. I won't take that feather slider up. I think that looks pretty good. I think that's a pretty good match in terms of how much that's fading. So we'll say, OK, and then I'm going to go into my curves adjustment layer and I'm gonna pull from the highlights here. Oh, well, it's just There we go. I've never done that before, All right? So let's go ahead and make that a little bit darker, all right, so we're making the shadow darker, and that makes sense. It makes sense that it's a little bit lighter than over here because the fabric in the bodies moving away, and we're going to make this portion a little bit darker on its own. So I'm not worried about that yet, unconcerned with how the overall shadow it looks in terms of darkness. So that's good. I'll say okay to that. But now this got a little bit too dark and the dress I don't mind going a little bit darker, but I certainly do mind it right under here so you can see what that did in that area. Just went a little bit too dark. So let's go in with the brush tool and it will say 100% opacity. Make sure hardness is down. And I'm just going Teoh, erase that from that area there. Okay, so we've got that erased. And now let's draw one more shadow with our lasso tool just through here. Now you'll notice that I did something a little weird there, which is I went to a point, and I'm going to appoint because that's how shadows work. Largely I wouldn't just want to draw big box around this area because that would mean that the shadow would just instead of spreading evenly, it would just stop on the line instead of fading up into the rest of the shadow. So I'm going to draw the shadow like that and right click. Same process, refine edge. Take that feather up and I don't know, we'll see a little bit less than before. So I'm going to say that in the 20 pixel range, maybe upper teens. I'm a 22 pixels and now I'm going to create another curve and make that just a little bit darker through there. Okay? And now again, I'm going to use that layer mask to get rid of the shadow where we don't want it. So now I'm going to zoom out, and we have a pretty good looking shadow going through there. I like it. I mean, it makes sense. It just continues on the same line that the other one did. And we can always go back to our original image just to check it, which was away. I didn't bring it in, So never mind. Let me go find it. Which is? Over here. Over here. No, over here. Third it is okay, so we can see that because we had a stool. We had this big blob of a shadow over here. We had a lot going on in that instance. So we're just following the line that she naturally made and continuing it out. But the darkness looks OK. The shape of it, I think, is looking all right. I might play with the shape a little bit more, maybe wide in it, out through here. But generally I think that that's about where I wanna be with that
Class Materials
Bonus Materials with Purchase