Considerations for On-Camera Flash
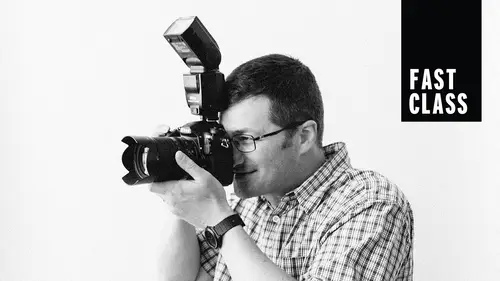
Lesson 13 from: FAST CLASS: How to Shoot with your First FlashMike Hagen
Considerations for On-Camera Flash
Lesson 13 from: FAST CLASS: How to Shoot with your First FlashMike Hagen
Lessons
Class Introduction: How to Shoot with your First Flash
05:59 2Defining Flash Photography
09:08 3Camera Setup: Metering
03:48 4Camera Setup: Exposure Mode
04:27 5Camera Setup: Flash Synchronization
06:26 6Camera Setup: Shutter Speed
04:46 7Camera Setup: Aperture
06:31 8Camera Setup: White Balance
09:20Lesson Info
Considerations for On-Camera Flash
Well, let's get into now on camera flash. We're going to take some photos of our fabulous model, Andre. He's gonna come up here, and, uh and, uh, actually, Andre, wouldn't you Come on set, We'll introduce you, and then you can be on set while I'm talking through some of this Mr had Andre? Yeah, Cool. So this is fairly low key. He's just gonna hang out here for a while. I'm going to be shooting. Some test shots were tethered today, So you all Bill be able to see the photos that I create in real time again. This is on camera flash. And so I want to start out with a little bit of philosophy, and then I want to show you what not to do. I already told Andre the first photos I take of him are going to be horrible. Okay, They're not portfolio photos. You don't want to put it on your website. Please don't. If you do, don't put my name next to them. I talked about that, and then we're gonna just get better. I'm not sure how we can take great photos using on camera flash, but we're bringing refl...
ectors and light domes and we're gonna play with lots of toys. Cool already. So let's talk about considerations for on camera flash do. This is something I want you to do. I want you to bounce, bounce, bounce and I want you to defuse. Defuse. Defuse. Okay. Always think that How can I bounce this light? How can I diffuse the light? How can I make the lights softer? How can I make it look like? Even though I have on camera flash, How can I make it look like the light came from somewhere else? You know, how can I send the light over here? So that reflects on the Andre there. See that? Or how can I send the light up? Or maybe up and down? How can I set up this little studio where I've got maybe, like a clam shell type of look and it's light, light and just a soft and gentle Okay, never shoot direct flash. In fact, in just a second here, I'm going to show you what that looks like. It's kind of a deer in headlights. Look, It's shiny skin oily. You know I made It's very unflattering. I often think that this looks like those old 19 seventies rock n roll magazine photographs. You know, just see. See this guy smoking a cigarette and he's lounging on the couch. And just like, Pau, like this grab shot, maybe there's a time and place for that. But that was back then. And this is now. And you don't want your daughter to look like that. Trust me. So? So on camera flash, bounce, diffuse, and then try to figure out a way to send it off. Send it off to a reflector. Send it off. The ceiling Are ceilings here in the studio are a little bit too high for this to work ceilings here. Probably 18 20 feet high. But in your house, you could sure do that. Definitely. You could bounce off the ceilings in your house. So let me show you a photo. You ready for this? It's gonna hurt, but, uh, we're gonna take photo. All right. So before I do this, I want to just again walk you through the details of setting up the camera. Where do all your flash settings begin? In the camera. So let's do that together. Okay. So I'll start here with aperture and shutter speed. I mean, again, I'm gonna be in manual exposure mode, so Oh, I don't know if the cameras in the room want to see that someone to go to. My aperture is f and I mentioned I'm shooting with the kit lens. This is the little Nikon 18 to 105 That's an inexpensive lens, pretty similar to what most people have. So f 56 is going to kind of be my limit as I zoom in and out. Next is my shutter speed. So what shutter speed should I use if I want to exclude all the ambient light in the studio? Hi, I high shutter speed. Yeah, exactly. This camera I know will synchronize up to a 2/50 of a second, so I'm going to set a 2/50 of a second. Okay, 2 50 right there. Cool. I s o I didn't talk about I so before, but typically for for these little flashes, you want your I suppose to be a little bit higher. I'm talking 400. I'm talking 800. It's a great place to be for small strobe flash photography. You start getting down I s 0 200 or 100 now you're flashes working really hard. The problems with the hardworking flash are it doesn't recycle quickly. So, like when you're trying to photograph, let's see your daughter or your pet Chihuahua. And it's like moving around in all active. You want, like, picture, picture, picture, picture. Well, with low I s o. Sometimes the flashes can't recharge quickly enough. And you miss photographs. So again, 400. 800. So I'm gonna do that. I'm gonna set my I s o and set that for 400. Now, let me take a picture at eso. 400 f 56 at a 2/50. Usually take a picture with no flash. Okay, any guesses What this will look like? Okay, let's Ah, let's go to the tethered view. All right, I got his eyes closed, but it's so dark that we can't even really tell, right. We'll take it up with your eyes open. All right, there we go. Nice. Okay. So how do I get this really dark studio? Look, with the just the person illuminated but the studio dark. Well, this is basically how you do that. See, This is the first part of my exposure. Remember? I was telling you every photo with flash service to exposures, the ambient light exposure, the flash exposure. Okay, so there's the ambient light exposure. What would I do if I wanted to make the all the background? If I want to make that go all black, all dark. What would my options be reused? The aperture. And what's the other one? Aiken dio I s O so I can reduce my eyes. So So let me do that. I'm gonna keep my app Richard F 56 But I'm going to reduce my I S o and I'm gonna bring that down toe. I s o let's go all the way down a 100. I know. I told you not to go there, but I'm gonna go there just to show you what happens. Okay, So getting the same picture here that I so 100 and now he should just be completely, almost completely dark. And I think that did that get us completely dark, Almost completely dark. Yeah. Good. So now I met a place where I can start controlling all the light on the scene and since this is really an instructional class, let's go the other way. I want to challenge you all. How would I get a lot of ambient light into the photograph? You're right. I s o a little bit bigger. Aperture Hirai s. So maybe a little bit longer. Shutter speed. Okay, so I'm gonna do that. I'm going to increase my eyes. So here and I go, I s o back to 400. And rather than shooting in a 2/50 I'm gonna shoot at 1/60. Why? I don't know. I just choose it. I'm just choosing it just to see what happens here. Okay, so now we're at a 1/60 of a second at eso 400. And if you're paying attention closely, you know, on your own cameras, you'll be able to see your exposure line, and you can just see on that exposure line. Oh, it says I'm about a middle brightness exposure. Now we're gonna get lots of houselights. Lots of ambient light. All right, so this one this is going to count, cause you will actually see your face. Okay. Much brighter. Still not really bright, but you can see now we're bringing in more of the house lights. Cool. And if I want even Moorhouse lights again higher. I s o longer shutter speed. Okay, so for this first picture, let's set it up like we're shooting in a really dark room, and we're just We just have flash, okay? So again, I'm keep challenging. You all All right? So I want the room to be really dark. That's a fast shutter speed. Okay, so I gotta increase my shutter speed. I'm gonna go back up to a 2/50 and that will actually cut out much of the house light. Cool to 50th. And just to remind everyone what that photo looks like with no flash, there we go. Now, the next thing I'm gonna do is I'm gonna start shooting with the flash, Okay? So let's add the flash. So, for this, I think I'm going to start in t TL mode. Just t t l and just show you guys what the camera would typically do. Just kind of out of the box. Okay, so I push the mode button and I pushed mode again and I go to t t l and I push. OK, and I'm in T T l. And my exposure is at 0.0 pickle. And here we go on camera flash, and we take it. 123 See what that looks like? Uh ha ha. You've seen that photo before because you've taken that photo before, right? Oh, my gosh. Well, it's not a horrible photo. I mean, it's a good shot of Andre. I guess. So. It's It's exposed. Well, right, It's actually exposed fairly well. Let me go to full screen so you can see it. Um, what are the problems? Well, Shadow, you've all seen that before. The shadow right behind him. And it's even worse, right? If I go like vertical orientation, Right, So we'll take that shot. Nice. And look at the shadow coming off the side. Hey, you want taken that shot before too? Uh, you see, on camera flash it. Really? It just hurts. It is painful. Get a little tiny little catch light in the eye with shins A little bit. Skin's a little bit shiny. Um, just not so great. So we can do better. We can always do better. So this is what not to do. But I like the exposure. Okay, I think the exposures greats a good starting point. But we're gonna do better with softening the blow. That's the whole goal here is to soften the blow also. Hey, Andre, would you do something for me? Would you stand next to the wall, just stand next to the wall? So yeah, that's perfect. So I'm gonna take a shot like this with under next to the wall. Okay, then come out this way. Yeah, about right there. Perfect. And we'll take that shot. Okay. In grab a seat again. Thank you. And just want to show you the difference between you know how close to the wall. How what the shadow does when you're close to the wall. You know, when you're close, the shadow is very defined. It's a hard shadow. Okay? And when you're farther away from the wall in the shadow drops down a little bit in the shadows. Softer. But it's almost impossible to not get a shadow when you're shooting like this, Really? Because there's only one way the light can go, and that's to him and right back into the lens. So I'm gonna show you how to manage the shadow in a little bit. But one of the key tips is make sure your subjects probably five feet to eight feet away from the wall, and that week, sometimes you get the shadow to fall away. I'll show you how we do that by bouncing the light off to the edge.
Class Materials
Bonus Materials with Purchase
Ratings and Reviews
a Creativelive Student
Great fast-class! Mike Hagen got straight to the point and made it super easy to understand!
user-182390
Great course very informative and so easy to understand.
Craig
The class covers exactly what you would expect. Very good basic information about how to set-up and operate a flash on any camera. Mike was extremely personable and communicated very well.