Processing Black and White Images
Lesson 13 from: FAST CLASS: Incredible Engagement PhotographyPye Jirsa
Processing Black and White Images
Lesson 13 from: FAST CLASS: Incredible Engagement PhotographyPye Jirsa
Lessons
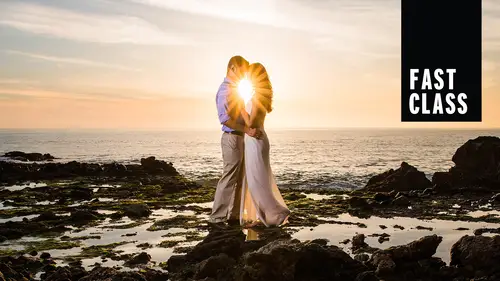
FAST CLASS: Incredible Engagement Photography
08:03 2Posing Guidance for Him
08:08 3Posing Guidance for Her
08:50 4Foundational Posing
04:59 5Posing Touch Points
04:44 6Couples Body Language
05:19 7Posing Three Point Check
05:12 8Posing Tips with Demo
06:51Mood Board Tips
05:36 10Camera Settings Quick Overview
18:21 11Seeing the Light
17:22 12High Speed Sync vs ND
04:17 13Processing Black and White Images
05:09 14Editing Using Presets
11:37 15Outdoor Engagement Location Scouting
10:42 16Using Photo Mechanic to Cull
08:44 17Culled Edits in Lightroom
13:01 18Natural Flash/Bounce
03:52Lesson Info
Processing Black and White Images
So what we would typically do is on an image like this. We would just apply soft skin. And that just kind of softens up the skin. Love. It's the exact same adjustments that we just went through. And we're actually including There's in the bonus section. We include some of our most used presets, So signature color are soft skin signature, black and white and are soft, black and whites. They're all included. So signature color has a little more of a poppy. Look to it. Signature black and white. I wanted to show this because this is really cool. Let's do this. I'm gonna create one more virtual copy. Recent this elected. I'm gonna do this if you like. It makes me look better. All right. Okay. Lets reset this out. And an impressive e. So this is like rooms basic black and white conversion. And if I just compare those two, um, you want to process your black and white? I know some people I didn't know this was a thing, but then I learned that a lot of people like to just black and white the i...
mage and actually not process it as a black and white, but there's a huge difference in a process. Black and white versus just a regular leg room converted black and white. And you're seeing that like, is this a little blurry on? It's like still loading on my side, Might. There we go. Perfect. So let me show you what How we would typically process a black and white photo because we're going to go a little bit further in terms of like, we can add more contrast, add more blacks, make it a little bit more punchy and so forth. We're gonna basically create a preset. Let me ggo back to the develop module. Does this not make me look like a professional when I use one finger? I think it does. Okay, lets reset, then a lot. So black and white converted. Great. So what we're gonna do here is we're gonna do kind of a similar thing where we kind of pull down, actually, don't want these guys see this. By the way, if we pull down the highlights against, remember how we said if you pull down too much on highlights, it makes skin tones look funky. That's all. We didn't pull down our highlights we actually pulled down on the whites. So if we pull down anything, it was just to bring the whites down closer to those. Okay, we're gonna add our shadows at our blacks. I'm gonna pump up the exposure a little bit. I'm gonna bring back the clarity a little bit, just kind of softening up. And if you want to, one of my favorite tricks is Turn on. Ah, press J to turn your highlight alert. So Jay will actually turn on this little alert up in the top, right? You actually see in your image what's clipped on what's blown so we can know exactly where we're losing detail. So I'm gonna bring it up a little bit in the exposure. I'm gonna put a radio filter over this in that little section, and we're just gonna make it a 0.5 burn. Okay, So pressing J to turn that off, then turning off my radio filter. And this is the trick here. If you go down to the HSE cell like room does this funky black and white mix by default. But it's designed for general image usage like this is a black and white makes. That's designed for overall images. If we want to tweak this for portraiture, what we usually like to do is if I hold down alter option, I can reset this. And by the way, we didn't tweet that, right? So that that's the actual black and white mix that light room takes into when you click V. If you turn that off in the preferences, it won't do that. So just a heads up. Okay, I'm gonna press reset what I like if you notice here to see how it shifts, the reds and the oranges down aren't reds and oranges and yellows aren't those all skin tones. So are we not darkening our skin tones by letting it do this to our images? Now, if you had a nature shot, that might look cool because it kind of pulls down the yellows and oranges and all that kind of stuff, and it makes it look more vivid and dramatic. But in a portrait, it'll actually dim down your tones of your skin. So instead, if you just you can just keep it simple and just knock these out, taking even back to zero and you see how her skin livened up again. Do you see how like it just kind of brought it back? So that's something to be aware of, generally with our black and white mix. So if I show you guys again, this is the one that's in the present. So if I show you this, you see how flattering that is, like on the on the skin tones like it keeps it bright and flattering. Look at the So this is the black line mix. I don't know if it's like two bright in years. It's a little brighter myself. Tweak it to my side. Okay, so look at this. This is what our black and white mixes doing for portraiture plus five plus plus if you need to adjust that you can. But that gives the skin tones in your black and whites a little bit of a kick. Makes him look puppy cool, sharpening settings. Everything else stays the same. And then this is the ah. So if we went back to the when was this one? Let's see. Yeah, that's the So if I just go, I'm gonna press. Tab has removed both panels, and if you want to compare the converted black and white. This is our conversion versus light arms conversion to black and white. There's a really big difference there, and I know a lot of people, especially online people might be asking, like, What do you do about bright skin tones in that kind of stuff? You know, with portrait, if you keep the skin tones up a little bit higher than they generally should be? I'm not saying to blow them out. I'm saying to keep them bright. It's gonna look much more flattering in just in general, it looks a lot better.
Class Materials
Bonus Materials with Purchase
Ratings and Reviews
user-975fc7
Man, Pye just covered EVERYTHING! I love the complete process explanation of Photo Mechanic to Lightroom.
Mal Brown
Student Work
Related Classes
Portrait Photography