Lessons
Lesson Info
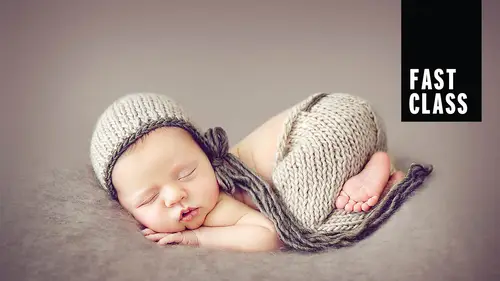
Newborn Shoot: Posing on a Bean Bag, Part 2
I like to hold the babies in this particular position and if I was trying to settle them, this is how I would hold them and rock them back and forth because it's easy for me to put them down and if I have a baby that's continually wanting to be fed, that's not necessarily hungry, I would never hold it in my arms and rock them sort of that way because that's in a position that they used to being fed in. Yeah, she is out to it. Okay, so ideally with this, this particular, if we continue to work with Hunter, I would have bought her around to the front, but I'm going to put taylor down into that position that I would have continued to flow with and because she's going onto her tummy with her arms up, I'm just going to move my fingers onto her and just gently roll her in my hand so it's easy to put her down. Yeah, okay, so I want her legs to come out the back here. If it was a baby that really wanted to keep the legs up underneath, dumb, I would continue into that particular pose, but she's...
kind of relaxed here. So I'm going to push her legs out the back and just gently roll her, Oh, she's doing it for me, roll her onto her tummy by folding their legs up underneath them. It sort of stops them from kicking out. So what I did was I just lifted and pulled that elbow through and her arms are already up into place, so it's perfect so you can see with that safety reason and having them on the bag without needing a spotter. Um I'm here, I'm right here, she's in the middle of the bag, it's nice and weld in the middle, she can't topple out, but if their legs aren't tucked in up underneath them, they can launch themselves forward from this position. So it's a really good idea to always be in front of them if their legs aren't tucked up in. Now, if you have a look in that brown basket next year and pick out a little cream hat that's got a little lacey. Yes, that one, I would love to use that, we're gonna put a bonnet on her and this is by a company, this particular hat by a company called Monkey muumuu and her props her net profits are absolutely adorable, so I'm gonna get down nice and low with her, I want to put the beanie on before I left her into position, but I just want to pull her hands out first. So just using my fingers to gently lift her head there and pull that hand out, she's got one hand down lower than the other. There we go, she's gonna have a stretch and while she's stretching, I'm going to position her hands so when they move, move with them. Okay, so we're gonna tie this little bonnet in underneath her chin, It's so cute. Now, I often get a lot of comments on photos about how I should um mentioned that, oh hang on, I get a lot of comments on photos about the size of babies heads and People don't realize that the baby's head equates to 25% of their body weight at birth. So they are actually bigger than than than you know than any other part of their body except for the spine obviously. But so it is quite heavy and it's quite large so I'm just gonna I'm not lifting her but I'm just putting a little prop in here underneath just to support her head. Well well I tie up the bonnet so all of these little things that I'm doing it to keep her settled, keep her comfortable, keep her sleeping and keep her supported the whole time. So she's not changing her position drastically because I'm guiding her back down into position with my hands. So I've still got my hand on her head, I'm gonna slide my other hand in underneath the blanket to take the weight of the head and keep her in position, jesus, jesus. Now I'm going to gently lift her with my props that's important with this one when you're bringing them forward like that to give them enough height in there to lift them up and to also support their elbows. We're gonna do slight little adjustments here to get her comfortable into this position, she keeps going back into the other position, so she's obviously more comfortable there, we'll see where we can get it to so we can bring her face to the front. So I'm just pulling her elbow forward. I've got my fingers at the fingers at the back of her elbow and I'm just gonna turn her head and rest it up on that back arm. And when I'm lifting the head it's important not to put your fingers or any pressure on the actual top of their skull where it's open. The bones aren't aren't together yet or on the temples but the bones on the side of the head quite quite strong. So that's where I tend to to let the weight of the the head go on my fingers, position my fingers here the way that the head is on there, look at those lips so we're gradually getting there. I'm going to pull these little fingers out here. I don't know whether you can see, I'm just going to use my finger just to pull them out. Oh she's she's she's suspicious. All right. I stopped talking, sorry, I was concentrating so she just did another stretch and pull herself back into that comfortable position that she likes and what I'm aiming to do here is get all those fingers visible and to bring her little head around a little bit more yeah. Mhm. I have my finger under her chin to stop her from pulling it down if I was hurting her or pushing her into an uncomfortable position, she'd let me know.
Class Materials
Bonus Materials with Purchase
Ratings and Reviews
Student Work
Related Classes
Newborn Photography