Color Management
Lesson 5 from: FAST CLASS: Skin 101: Lighting, Retouching, and Understanding SkinLindsay Adler
Color Management
Lesson 5 from: FAST CLASS: Skin 101: Lighting, Retouching, and Understanding SkinLindsay Adler
Lessons
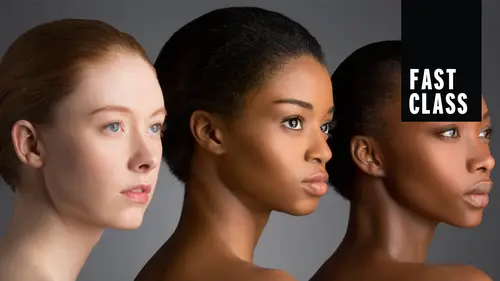
Skin Essentials: White Balance
16:02 2Skin Essentials: Mixed Lighting, Color Contamination
15:42 3Camera Settings: Files
04:53 4Camera Settings: Color Spaces
15:10 5Color Management
11:03 6Exposure
06:21 7Shoot: Quality of Light
08:43 8Direction of Light
02:14Lesson Info
Color Management
the whole idea behind color management is that we have color consistency, You don't want to be changing your color spaces and basically you want all of your devices looking at this one colour the same, You don't want it shifting. So if there is a known value, this red is a particular RGB, it should look that particular RGB no matter where you're looking at it in your system, whether it's going to be in the print or it's going to be in your monitor or captured by your camera. So for color management, I'm gonna, we're gonna go more in depth. I'll tell you the basics use white balance and have some way to calibrate your monitor. If you don't listen to anything else, just have a way to calibrate your monitor for sure and make sure you captured accurate white balance and camera. And that's a good place to start if you went ahead and you've got all those settings right, that I told you in the last segment so that you have the same color spaces and the same bit depth going throughout your wor...
kflow. That's pretty good. So, here's what it is, calibration essentials. You start with calibrating your camera, you actually can build camera profiles and do custom calibrations. We're not going to get into that. It's not something that I do myself, but you do need to at minimum calibrate by having a white balance. So that's your capture, I've captured something that is correct color. Then the next part is you need to have a calibrated monitor. I'm gonna show you a little bit about that and we will bring out a sample program. Another thing that you could do working with your file to make sure it's being represented accurately is also using a color checker to make sure all of the colors are correct, not just the color cast. And then taking a look at how it's going to look in your output. So let's just get into the monitor part. Right? So for monitor, how manager calibration works is if you know a red is a certain color, you need that color to be represented accurately on your screen. So how the calibration calibration systems work is you take a little sensor and you put it on the screen and it flashes of color that it knows its value. It already knows what it's supposed to look like and and uh in RGB and it flashes through a whole bunch of different swatches and the sensor is reading it and at the end what it does is it makes a it makes a profile and so it will shift the monitor and change the color so that those swatches are being correctly represented. So, can I have it right? Yeah, it's buried right there. Perfect. Okay, so this one is the data colour spider four. All right. And so it says all it looks like and it is insanely simple. I love it. All you do is you put it on the back of your monitor, you download the software and then you hit run and it will flash a red and it will flash green. It flashes all these different colour tones. It takes I think takes about five minutes. It's very very short. And then what it does is it just it makes a profile. You don't have to do anything from there. It sets that up as your your monitors profile. So now all the colors are going to be correct. So here's a couple of things that you might want to look at if you're looking for the brands. These are the industry standards. I have used all of these um Right now what I had is the data color spider for that's what I was uh calibrating my monitor on my laptop with X ray also has the color monkey in the I one display pro the color monkey has a bunch of different products. So if you look at it in your eyes, glaze over because there's so many different ones really. If you're just getting started in the basics of having a calibrated system um All you're really looking for is the ability to calibrate your monitor. The more advanced systems say the I. One display pro lets you calibrate your monitor, your printer, your camera, a scanner, a projector. And so for most of us that's not necessarily applicable. You can even go ahead and create custom profiles for um your printer which are called I. C. C. Profiles. But so you can have a profile for a particular particular printer with a particular type of paper. Most of us don't do that ourselves. So just look for whatever gives you this Couple $100 or less. Um So let's talk about monitors. All right so we're gonna calibrate our monitor to get the color to look right But not all monitors are the same. In fact there are some really really crappy monitors but if you don't know what you're looking for how do you know what to get? I'm gonna give you a couple of tips for some good monitors on the market right now of course whenever you're looking to do this you might want to do your own research. Um You definitely want an HD monitor. You're looking for a monitor. The monitor that advertises color accuracy not a gaming monitor. So certain monitors are advertised for people playing video games computer games whatever it may be. Um And they're often more saturated and have faster refresh times and it's not accurate color. It might look great but it's not actually what your image. What true colors or images have Look for. A color range one billion plus is awesome if you can achieve that. Um So you read that in the specs the higher the bit depth the better the bit depth is the exact same thing as we were looking at looking at before. Some monitors have six. Some have ate some have 10. Higher the bit depth you can get the better and um look for something called an I. P. S. Monitor, it just gives you more accurate color. This is what kind of high end rita Cher's would be re touching on just the type of monitor. So looking at these, these are a couple monitors that have been rated. I checked them like five or six different sources and these are monitors that came up over and over again of being good quality. Of course monitors is one of those things that you do get what you pay for. Generally the more expensive is better and the industry standard if you go to any rental house and you are renting a monitor in a digital tech system, they all have eyes owes. These are these are the monitors intended for showing as much color as possible as accurate as possible but these aren't going to be monitors that you want to use to like also check your emails is going to be like for a dedicated editing system so you might want to take a screen grab of this or write some of these down if you're looking for a better monitor and this is an example of what this system looks like. Um okay, have a couple more things Photoshop settings. Um we talked about setting up your workspace. I talked about color calibration. Okay, so for color calibration again, we talked about this before. You do want to make sure you set up your workspace all the way through um when you have a file that you are going ahead and for example, taking from pro photo too, S R G B. You're taking from a massive color space down to something really, really small your computer and your Photoshop needs to know what to do with that information and it basically crams it in and it fits it into that color space but it does so in a couple of different ways and there's something that you'll see here called rendering intent in rendering intent changes how the information is crammed in. I can get very fancy and explain exactly what it does. Basically what you want to do is preview both and see which looks better. That's it there. So that the two that you would ever care about upset back the two that you would ever care about would be relative color metric and perceptual. So in that little so I'll go back again. It says it right here. Okay, there's a couple places where you're going to see this. Um you would see this if you are printing your own files, you will see this if you are converting to a profile and you're going to see this when your proofing colours. I'll talk about that in a minute but you really just want to test out and see which one works best. Um the perceptual usually looks more natural to the eye and is less apt to have color banding but you will see some shift. Sometimes it's a shift in color. Sometimes it's a shift in exposure by the way that it forces all that color information in. Because basically what it does is it takes all that color information, It crams it in there and everything moves around to make space. So because all the other colors move around to make space for it. Um Actually I'm going the opposite way, me back that up. Perceptual does the same thing. The perceptual takes all that information when it crams it in. It keeps everything relative to each other and so it will look like, okay, we're gonna have smooth and smooth, no banding, but there will be color shifts because everything stayed kind of similar relative color metric. It doesn't have color shift, but you can get banding because it crammed information in there and didn't exactly have a place to put it. It doesn't exactly matter. But you just need to check it. So, I wanted to show you this this file right here. Um I took this portrait. There's no crazy colors in this, right? You wouldn't think there would be a huge difference between rendering intent telling it what to do with that extra color. So this is perceptual and this is relative color metric. Perceptual relative color metrics. So there was a change in contrast and in the color just a little bit of the color. So what you want to do to figure out which one you actually want is you want to do something called soft proofing. Soft proofing is your way to see how your file is going to look. The very last part is we started off and said okay we have our camera calibration getting our white balance. We've got our monitor. We went ahead and we got our little our little um spider um calibrate. Er we've got a better monitors. We've got the color good in the beginning we've got the color good in the middle. How do you make sure the color looks good in the end file and end print. So in Photoshop and in light room you have the way to do some have the way to do something called soft proofing. So you have the ability to see what the file will look like. Either if you convert it from pro photo to S. RGb you can see what that change is going to look like. And also if you take that photo and you print it on a certain type of printer and paper without going into it basically every printer and um every printer and paper have a profile. It's called an I. C. C. Profile. And what you can do is you can see if you're going to use that printer and paper what's going to happen to your colors. It lets you see that right in Photoshop. So you can have an idea what shifts you're getting and then you can make changes appropriately.
Class Materials
Bonus Materials with Purchase
Ratings and Reviews
Student Work
Related Classes
Portrait Photography