Lessons
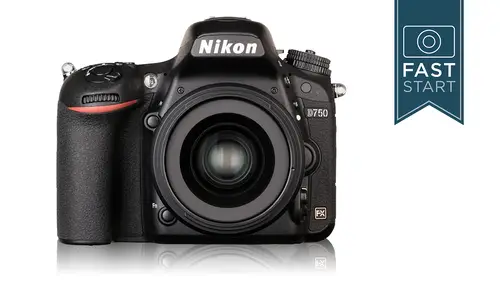
Intro and Overview of Nikon D750
21:23 2Basic Controls of the Nikon D750
03:29 3Top Controls of the Nikon D750
23:35 4Back Controls of the Nikon D750
49:43 5Left Side of the Nikon D750
09:13 6Nikon D750 Auto and Manual Focus
11:06 7Sides, Front, and Bottom of the Nikon D750
12:47 8Lenses and Accessories for the Nikon D750
11:36Lesson Info
Top Controls of the Nikon D750
So let's get started with the top deck in particular, we've talked about the on off. It is also a light switch, so if you flip it over all the way to the edge, you'll flip on the light, which will light up the lcd and the camera so that you can see it in low light conditions, and that is known as the control panel, which gives you various bits of information about how you are shooting and just a quick little trivia note on nikon. This is the first camera from nyc on that I know of that has thie so inherently listed on the control panel. You can list it in many of the other cameras, but you have to tweak something in the control panel to make it work, and then you can't see how many frames your your shooting s o this is the first one that actually just put it up there, which is kind of nice now it also has a little different shape, too it's a little bit thinner, and I will mention one of the factors that I do like about this camera. One of the changes indifference is from previous nikon...
cameras is this is one of the finished cameras on on record from nikon when it comes to the thickness of the body at it's finished point, and that has an effect because when you reach your hand into the grip here, you're able to get your fingers a little bit further in there and you're able to have a better grip on this camera and so they've made some changes with the new fifty five hundred and the new d a ten and so they have a little bit deeper well that you can get your fingers into and so this has one of the better grips on it of recent nikon camera so that's one of the changes that has kind of taken place because of that one of the things you will notice in the control panel in the bottom right hand corner in the brackets is the remaining number of shots it'll show you anywhere from one to nine hundred ninety nine images left and if it has more than a thousand it'll probably at a case off it says one point two k that's one point two thousand or twelve hundred shots that are remaining in their mentioned on the shutter release it activates the camera kicks it back into the shooting mode when you press halfway down that is what auto focus is and sets the meeting going on the camera and so press halfway down to focus halfway down to meter all the way down to fire the shutter we will see some ways that you can customize this if you would like to do something called back button focusing for instance over on the left hand side of camera is the mode dial. This controls the shutter speeds and apertures, as well as potentially other settings and there's a lot of control's going on here, so let's dive a little bit deeper into this particular feature, and if you want to follow along in your camera, you can turn it over to the auto mode. So the autumn otis we mentioned earlier on is thief fully automated simple mode. The camera is going to set shutter speeds, apertures it's going to determine your eyes so focusing and a variety of other things in this camera, and my bet is, after spending as much money as you have on your camera and even this class, you're probably not the type of person who wants to use the camera in the full auto mode. You want to get more out of it. This is the mode that I think most d seventy seven, fifty users are likely going to put their camera, and when they hand it to somebody else to take their picture, if you're going to hand it to a family relative who doesn't know about photography, this is where you can put it on, they're not gonna be able to mess up your settings, and they're going to get good, simple basic pictures, but it just doesn't allow you a lot of creative control and that's why I'm not a big fan of it. One of the things that I am the least him out enthused about this particular mode is that when you do press down on the shutter release, the flash pops up whenever it thinks it needs light. Now the camera can determine whether it's light or dark, but it cannot determine how close your subject is and whether a built in flash would help that or not. I think that's much better a decision that you should be on your own and so that's. One of the reasons I don't recommend you is in the auto mode. The next mowed down, which is flash off, is a full auto mode. The only difference is, is that the flash doesn't pop up in this case, and in fact you can't even pop the flash up, which is a little bit irritating if you I happen to want to put the flash up so it's fairly limited where I would see this mode being used, I could see if you're gonna hand the camera to a friend to take pictures in a museum that doesn't allow flash photography, you know that they wouldn't have the camera confiscated while they're walking around taking pictures. But for most of you you're going to want to dive in and make a lot more control changes on your camera so I really don't recommend either one of these moments but that's what they do the scene mod scene mode and you know what we're gonna do we're going to jump to the effects mode because these both kind of are under the same type of thing this is where the camera allows you to dive in and the way that you dive in is put it in the scene mode put it in the effects mode and then start turning the command I'll you may need to press halfway down on the shutter release two can activate your camera and on the back of your camera you will see the pictures come up and let me do a little shot for our behind the scenes camera here and if we want to get a shot of the back of this camera as I turn this you'll see all the different little pictures and so these air automated modes that nikon has tweaked the camera to take pictures as best it can in that particular type of situation so if you're going to shoot pictures of food they've optimized what cheddar speed and aperture you would want to use and a variety of other settings in the camera now something too be very aware of about these modes and that is the camera is not doing anything that you can't do on your own with the camera so there is no special modes and special things that the camera is doing that you aren't allowed to do on your own and in my opinion most of these modes don't go far enough so the scene modes our kind of handy if you're going to hand the camera to somebody else who you want them to shoot a particular type of photo but once you get to know photography, you're going to be able to outsmart the camera now when it comes to the effect modes these modes are a little different this is what I would call photoshopping a camera this is where the camera is going to take an image and they're gonna tweak it and they're going to make it look funny and these are going to be stored a jpeg images and have fun enjoy this is a great way to to goof around with your friends I wouldn't want to take serious pictures here that you want to get a nice clean images from because they are doing well photoshopping the camera and they're doing some kind of goofy things and so it's it's kind of a place for goofing around not a place that I imagine a lot of you are going to be spending a tremendous amount of time so let's get over to the good stuff here so as we move over to p p stands for program and the program is that the camera will set shutter speeds and apertures on your camera and nothing else. So if you want to jump in and change focusing or s o or white balance, you are free to do so if you want to pop up the flash because you think it's appropriate, you can do it. And so this is really the simplest mode that I would recommend most d seven, fifty users use their camera, and so if I had this camera and you know somebody said, hey, john, we've got to take a picture of the birthday cake quick, get a shot! I'd probably threw it in the programme mode so that I could just whip up a quick, easy basic shot and so it sze nice and simple in that mode. Now the program what's written into the program here is that the camera doesn't want you to have a shutter speed too slow it's trying to get you up to a sixtieth of a second is where generally wants to be so if you're working on a tripod and you're able to work with any shutter speed you want, this is not the mode that I would want to be in because it's not going to be really optimized for that type of situation now while it is in the program. But if you turn the back dial on the camera, the main command, I'll you will engage something called flexible program, and this is where the camera maintains even exposure no matter where your camera is at, but well, allow you to change both shutter speeds and apertures with one fell swoop of the dial in the back, and if you want more depth of field or you want faster shutter speed or vice versa, you're going to be able to kind of flip all those around and still be in a safe environment as far as getting a safe middle exposure and so that's a great way of making a quick change. For instance, you're doing travel photography, you're walking down the street, you don't know your next shot throw it in the programme mode means that you can just lift the camera and shoot any time you want, and you're going to get a proper exposure no matter what it is, and if you want to adjust it to kind of give it a little better settings, you'll be able to do that very, very quickly. One thing to note about nikon and I don't know why, and it drives me batty and it will drive you batty is you'll be in this and be trying to doing the program mode and some of you right now we're probably having the problem you're turning the dial and you're like it doesn't do anything and nothing's moving well, what happens is that there's a range that you can go through all right, you go from range here, tio here, and once you get to the end, nikon will continue to let you turn the dial and go kind of on a theoretical clea further further further end of it and you might be could click, click, click and nothing's happened so you gotta click the other direction to eventually get back in the range. And so right now nothing is happening on my camera, so I'm going to start clicking back the other direction, and once I clicked back enough, I get back within the range that I could move back and forth and so hopefully that solves that little dilemma if from anyone from nikon is listening, please let me know why you do this and it doesn't just end there, you just let people go off into infinity and then they come back to the range. I don't understand this because it just makes no sense at all but that's what's going on, and now you can avoid that so one of the things you want to be paying attention to is the shutter speeds and the apertures and you'll be billed to see that in the viewfinder display so this viewfinder displays what you see when you put your eye up to the viewfinder press halfway down on the shutter release and on the bottom row things that you're going to be looking at from left to right you'll be looking at your shutter speed and then your aperture information will be a light meter it'll show you your s o and then how many images you have left on the far right we're going to go through in detail, but this is just a little preview of what you're looking at, so you should be able to do the program shift as you are the flexible program as you hold the camera up to your eye next up s have stands for shutter priority the back dial is your main dial for controlling shutter speeds, so if you put your camera in the s mode, you will be able to select any of the shutter speeds and the camera will select the appropriate aperture and this next part is really important if it can. And so one of the things is like right now if I choose a shutter speed of four thousandth of a second here in the studio it's not quite bright enough for me to be able to shoot at four thousandth of a second, so the f two point eight on this camera is blinking at me and it blinks at me in the viewfinder as well, which is an indication that I don't have enough light the camera will allow you to shoot a picture, but it is going to be a black picture or a very dark picture, and so what you need to do is you need to adjust the shutter speed to a slower shutter speed until the f number stops blinking. That means that you're len's now has the appropriate aperture for working under that sort of lighting conditions and so the shutter priority mode can be kind of handy in certain situations where you do want a very specific shutter speed, but you do need to be careful about overexposing and under exposing because there are a lot of shutter speeds that you can choose from and not nearly as many apertures that are going to match up with it. So I am not a huge fan of the shutter priority mode let's move on to a fur aperture priority we're now going to move to the sub command I'll in the front of the camera the apertures air always control in the front of the camera shutter speeds are controlled in the back now you have control of the aperture and in virtually every case that you will ever find yourself, you will be able to go through the entire range of apertures and the camera will have an appropriate cheddar speed because there are so many shutter speeds to choose from, so we don't have the same problem that we did with shutter priority. It is conceivable that have that problem, but just the range of light is not that great, and there are so many shutter speeds to accommodate those different ranges of light that you don't have this problem in the aperture party mountain. So average, your priority is my favorite mode for just kind of walking around, not sure what the next shot I'm going to shoot if I'm going to throw the camera in my bag, and I don't know what my next subject is, aperture priority is probably where my camera has had finally let's get to manual, and this is where you get to select shutter speeds and apertures yourself, so shutter speeds remain on the back of the camera apertures remain being controlled by the front dial on the camera. What you'll be doing is now you'll be using the light meter in the viewfinder to determine if you have a correct exposure, so adjust your shutter speeds, adjust her apertures until your light meter is zeroed out or the indicator is just below the zero meaning a middle exposure. Now some subjects are a little bit brighter, some subjects a little bit darker. I talk a lot about that in my maur photography classes rather than camera classes but in general starting with it at the zero is a good starting point for manual photography I like using manual as much as I can because when I shoot from one shot the next I know exactly the results I'm going to get and they're not going to be changing from shot to shot so if I'm shooting a particular subject that is not changing in light I'm going to keep it in manual exposure the final modes on here you won and you two are user customizable settings and so the camera allows you to favorites you might say and what you can do is you can set the camera up however you like it aperture priority spot metering eso thirty two hundred or shutter priority matrix metering motor drive turned on high there's a lot of different combinations that you can have set on the camera and then you can go into the menu system and you can say memorized these settings for you one for you too and then when you flip it to these it automatically switches all those features over this could be really handy for situation like a landscape photographer who also likes to shoot birds in flight and if you're shooting landscapes you'll know that there's a lot of different settings from shooting action of birds in flight and so it might take you five or six or seven control points changing going from one to the next in this case you can have it both programmed in and you can do it with just one turn of the mod ill very quickly moving from one to the other. So throughout this class I'm going to give you some shortcuts because I know a lot of you are watching this on a recorded video and you're able to stop and move around and go change things right away and I know some of you want to make these changes right now so for instance on this, if you wanted to customize your you one or you to program, you dive into your menu system under the tool section which is the wrench and you go into the setup menu called save user setting and you can go in and you can program or you can clear out the settings that aaron you one or youtube so as we go through this class, I'm going to give you the shortcut because I know some of you want to stop the stop the recording and just jump in and make those changes right now but if you don't want to do it not to worry we're going to end up going by that and doing it eventually later on in the class so back to the top of the camera and that's the mod ill what else do we have going on up here next up right next to the shutter release is the exposure compensation dial so what you'll do here is you'll press the button hold it down while you turn the back dial and what this does is it adjust the exposure by making it a little bit brighter or a little bit darker now this is mainly going to be used with aperture shutter priority and program and what it's doing is it's letting the camera go in and adjust either your shutter speeds or your apertures depending on the mod to let in a little bit more light now you khun technically use this in the manual mode and what it's doing is it's essentially just fooling the light meter it's telling the light meter to read everything over exposed or underexposed which some people may find handy but I think it's a little bit awkward so I think most cases it's probably most useful in something like the aperture priority more mode or the programme mode but it's a great way of checking your image is saying that it's needs to feel a bit lighter a little bit darker this is a quick and easy way to do that for a few pictures in many cases next up this funny little five point button on the top of the camera is indicating the media ring system on the camera this camera has four meeting systems one that is brand new the center waited meeting system is thie traditional system that was on cameras throughout the sixties and seventies and eighties and not too many people use anymore but can be handy from time to time. Photographers wanted something a little bit more accurate so spot meters came around and that was kind of a nice feature to have but the matrix metering is where most people keep their camera set out this is a multi segment metering system it measures like in a variety of areas over the entire scene. It looks at that bright areas the darkest areas and has a very good algorithm system that actually looks at some of the color that's in the images well uses three d information in order to come up with a good exposure for the entire scene and this is where a lot of photographers can leave their camera pretty much all the time and get good exposures. Now the new meeting system in this camera is called highlight waited metarie and this is not a spot metering despite the fact that they use a spot meter in the display and the icon for it. This is looking at the entire scene and what it's trying to do is it's trying to protect the highlights. This might work very well. For instance, if you had somebody on stage under a spotlight and you wanted to make sure that the white clothes that they were wearing were not blown out highlights this camera sets the exposure whatever it needs to be so as not to overexpose whatever highlights air in the scene, and so I don't know that this is a great mode for general purpose photography it's more of a special purpose, and you'll have to see in your photography where and when that might be helpful. Most of the time, the matrix metering will get the job done quite well, but if you find that you're getting some blown out highlights where you don't want them, then you might try the highlight waiting highlight waited metering system as your second best option. Next up on the camera is that little orange button, and that is your movie record button, and we're going to talk more about movie recording when we get to the whole movie in live view section on the camera. But for those of you who have no interest in shooting movies, one of the neat things is in the custom menu. You can go in and reassign this button to some other control. One of the controls I like has been able to change the so makes theis so a little bit easier to change, being able to do it with one hand rather than two hands, and so we'll be able to go in and customize this when we get to the custom menu later in the class. There's a little mark kind of on the back right hand side about where the focal plane is in some unusual technical uh setups you may need to measure where the focal plane is and if you needed to measure for macro photography or cinema photography that's where the focal plane is we'll talk more about the flashes as we get into the other section but we do have a hot shoe on the top of the camera where we can mount other nikon flashes so let's talk for a quick moment about those other nikon flashes the camera does have a built in flash so I wouldn't recommend the very low and flash is probably the first one that I would recommend is the s p five hundred this is go sell for around two hundred fifty dollars in one of the interesting aspects of it is that it does have a a hot light on it it's got a video light be honest with you it's not very powerful so you've got to be pretty close to your subject for it to work but is a kind of intermediate level flash it's not bad it gives you a fair bit more power than the built in flash and gives you the ability to bounce as well. The sb seven hundred would be probably the first flash that I would recommend most people look at for getting for additional power inside the house, for instance going to give you more power than five hundred gives you the ability to bounce against a white ceiling or walls does have a diffuser built into it and a few more features that one's going to sell for around three hundred thirty dollars. If you're going to be doing a lot of event photography where you're shooting a lot of flash photos like a wedding photographer, the nine ten is nigh cons top of the line flash going to be a bit more powerful than the seven hundred and is also going to offer special effects modes that you can go in and do some kind of very creative nighttime type work on it. It also has some access reports so you can plug in additional power, so if you are shooting a lot and you go through batteries very, very quickly, it'll make life a little bit easier for the heavy shooting photographer with any of these flash is one of the things I recommend is an sc twenty eight cord. This is a remote, remote tl cord that allows you to have the camera and flash about three feet apart, yet maintain full communication and it does so without any delay, and this is one of the ways that you can put your camera on a flash bracket so that you can keep your camera vertically. Which is going to get you a better quality light than by just mounting the flash straight on the camera, lots of different wireless accessories. One of the things that you can do with the built in flash that we'll talk a little bit more about is that you can trigger external flashes. Now, if you use the internal flash, it has to see the other flashes because it communicates with light. This wireless commander does so using a different system that is not direct light. And so, if you do have a little bit more demanding wireless needs, and you have multiple sb nine tens or seven hundred's thatyou using remotely, you could get the s u eight hundred mount that on the camera to trigger those off camera flashes.
Class Materials
bonus material with purchase
Ratings and Reviews
a Creativelive Student
I am so glad I bought this class. I upgraded from a D5000 to the D750 about 2 weeks ago. This class help so much in teaching all the ins and outs that I never would have known by just trying to study the owners manual. I feel much more confident with my camera now. Thank you John and Creative Live. If anyone is trying to decide whether to buy this or not, I say YES do, it's a great help.
jessicasummerford
This class was well worth the money. If you invest in such a great camera, you are clearly invested in your craft. The best way to enhance that investment is to learn the camera top to bottom so you can use it to its full potential. Thank you John, this was so helpful! Now it is time to get out there and practice!
Robert Coates
Excellent educator! And fabulous print out guides! Having a D750 for three years, this course did not fall on deaf ears all this time later. This course put confidence back in my hands at the controls of this fabulous camera! Highly recommended.
Student Work
Related Classes
Camera Guides