Lessons
Class Overview
27:05 2Top Deck
33:02 3Top Deck and Back Side
22:29 4Back Side
21:11 5Motion Picture Mode
15:59 6Camera Sides and Bottom Deck
20:10 7Lenses
11:06 8Displays
15:35Lesson Info
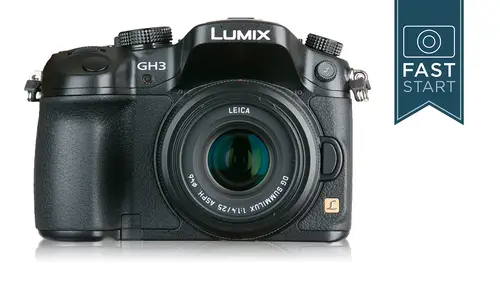
Top Deck and Back Side
All right, let's continue our tour around the top of the camera next up is the exposure compensation button in here and so when you hit this you're going toe get a little graph on screen that's going to go from minus five two plus five and this is going to allow you to make your picture brighter or darker in modes like aperture priority shudder priority and program and if you want you can pre pro or re program I should say the dials on your camera so that you don't even need to press this button for instance in aperture priority you would normally change the aperture on the top of the camera well, one of the other dialled can become an immediate exposure compensation now a lot of people don't like this because it's a little too easy to bump the camera and change it, but it is a way for a more advanced user to have quick access to making their pictures lighter or darker. So as a visual example when you set the camera up in a aperture priority shudder priority or program though the camer...
a is figuring out the correct amount of light if you think the camera is incorrect and it can certainly be incorrect in many instances you khun dial it down to a minus setting to make your picture darker or to a plus setting to make it brighter now it's pretty extreme having a plus and minus five on this it's pretty rare to go beyond one little loan too, but it does have a very wide variety of exposure compensation hdr shooter might like this, but there is also a bracketing mode that works automatically and a little bit faster that you might be interested in that we're going to talk about when we get into the menu city so that is the exposure compensation all right, next up we're in trouble now this is the function number but function but number one so this is one of the buttons that could be reprogrammed for something else, and if you want to do that, you can jump into the custom menu page six of eight to the function button setting and you can re program what this does, but what this does to start with is it turns the cameras wifi system on so hold on everybody, we're going to do a wifi demo here, so I do need to grab my phone because I'm going to try to see if I can activate my phone and connected with the camera here. And so what we're gonna do first off is we're going to press the function one button and it does take a moment of time for it to kind of turn on and hook up so let's hit this so we can see that we're getting a please wait okay, so we've got a new connection here let me do a little back a little bit of information back on the kino, then we'll go back to the camera so with the wifi system in order to make this work you are going to need to download to your phone if you want to use your phone as a remote viewing device, which is the most popular reason people are using this, the panasonic lou mix link noses available from google play or the app store, so download that to your smartphone and when you do that you're gonna be able to do a number of different things. We're going to try remote operation you could do image viewing just of pictures that are on your phone. You could download images from your camera to your phone so that you can facebook them and send them out and just have them on your phone. You can also use it as a gps link so that you can send information from your phone's gps system to the images. Now it will also work with in other ways that we're not going to use and explain all of these different systems, but you can have it hooked up to your computer with a wifi system so you can download straight to a computer you could upload to a web service you can hook up to panasonic's photo funds studio or you could be a part of their lou mix cloud where you can upload your images there which you can then forward on to facebook if you have an appropriate tv with a d l in a which is digital living network alliance system on it you can send your images remotely wireless to a tv for a slide show and of course you can send your images to a printer wirelessly so here's what we're going to do in just a moment well actually already pressed the function one wifi button there's a little blue light that comes on that lets you know that you are in the wifi mode next up we're going to go in and we're going to select making a new connection on the camera and selecting what we want to do what sort of function do we want to do? And we're going to try remote shooting in a live demo here and we're going to note the password and then we're going over to the phone and we're going to choose the gh three and the wifi settings and we're going to open up the limits limits link and we're going to see how many terrible things happened when this goes on ok? So on the camera we pressed the function one button for wifi we're going to go with a brand new connection so I'm going to hit this and we have the choices and we're going to go with remote shooting. I'm going to hit set, I could use the touch screen, but I'm going to hit the set, but in here and notice the password. This is kind of a unique password it generated right now. So now I need to go to my phone. I'm going to turn my phone on hope I don't get any calls right now, and I'm going to go into the settings and I'm going to look for my wife, I system and it's going to pull up our creative live audience, which is nice, but I'm not going to be part of that. Here it is the g h three. So that's, the one that I'm going to go for it's going to take a moment while it's kind of confirming and checking, and I see something is connecting up. All right, so I got the check mark. Things are working pretty good start smartphone applications, so I need to go and close out of this go to my wifi connections, open up the loom ix link and it looks like it's working it may take a moment to connect that's good information there, and we're looking at playback stuff let's go toe live control down here, and now we can see a live view of what's going on and so what I want to do is I want to get a picture of me and russ and so what I'm going to dio is I'm gonna take the camera and I'm gonna point it up here at the front I don't have a zoom lands and I'm gonna flip the screen out so that we can see this over here exactly the same view and what I'm gonna do is I'm gonna break all the rules and creative live and I'm gonna walk up I am out of camera you can't see me so no so here we are and rest and I can see what we're doing over here you know I think I want to be on this side because I could see the framing so much better here there you go all right that's even better and so now we can take a picture right here like that and let's look at the camera there we go and so we'll take a couple pictures so that you can see on the camera what it looks like now there is a slight delay now here's one of the things that I think is is kind of weird is that you can start video recording here but you can't stop it but what you can't dio and I'll show this on screen is let's go into the menu setting and where is this recording settings recording time so what I'm gonna do is I'm going to set a record time of let's go with ten seconds. Okay, ten seconds that looks good. Let's go backto life control and I'm going to start video recording right now. Okay? So it's recording right now I'm gonna leave over here, walk back to the sea later and it should be recording the light is blinking and I think it just turned off and so what I'm gonna do is I'm going to hit playback on the camera now and I am going to play back what? We just did a play back so it's not perfect it be nice to be able to stop recording but you khun set remotely from the phone how long you want record or you can come back to the camera and hit the record button to turn it off now as a further demo here what we can do is we can go back into the playback mode. Okay camera operation in progress let's that's because I hit something on the camera let's to due to what's going on here we are in okay, I hit the playback mode. I was stuck in the playback mode on the camera okay, so you can see the phone you can see what's going on on the camera we can go back into the playback mode and we can see images that I have taken in here and if we want to look more closely at him actually that was taken before class let's see if we can find the ones that we took no let's see those wind where are these other ones let's see, what did we just take their we took these in here so here's the image that we just talk you can zoom in to take a look at it and if you want to hold in on it and you can drag it over, we can save it to our smartphone and it's downloading it now from the camera to the phone takes a few seconds and now what I'm going to do is I'm going to close out of the loo mix link I'm going to go back to my camera, I'm going to jump into my photos and there is my photo completely independent from the camera that I have now downloaded to my phone. Now I can do whatever I want to do with it from my phone and so I would love to go into all of the wifi features, but I think that's kind of the main ones that I think people want to see how it actually works on the camera so you can view from here I will warn you that it does kind of put a heavy toll on the batteries and so if you want to leave it in a remote location for a long period of time, you might want to look at getting the vertical grip which has two batteries on it so that it will stay powered up for a long period of time but it is additional power consumption on both the camera and the phone and so you do need to be a little bit careful about batteries that it'll work for quite a while but just be aware of that when you are using it and so that's a little bit on wife I don't know if there's any questions specifically on wifi there's one from suresh who says that the wifi connection seemed to disable after a few minutes on the camera is their duration uh of the connection is there a way to extend that? Yes let me refer back to my menu setting here I believe that we will be able to change yes the shut down time how quickly the camera powers down and so if you do want to leave it on for longer than to say five minutes you can do that by changing the power settings and if you're not sure where that is we'll get there in the class great sounds fantastic ok, so that is the wifi button and I'm going to go ahead and press the wifi button too terminate the connection here terminate the wifi connection yes we're done with that section and it's clearing out of it little symbol on it, and then we're back to regular shooting. Excellent. Ok, so that was a little bit of wifi for you. Next up, you'll notice right next to the function button. Is this little now it's kind of slightly raised? It does not painted, but it's the image plane. If you are very particular about you're focusing, you have a very shallow depth of field you may need to measure from your subject to the camera and that's the distance, the location at where the sensor is, where you would need to measure for certain types of technical or very shallow depth of field focusing that you would be doing all right. What else do we have on the camera? We have a flash unit, a built in flash unit. One thing to note that is different about this camera than a lot of other cameras is that the flash will not pop up whatever it just thinks it needs it. Even in the most automated modes, you do have to press the flash button to pop the flash up, which I think is as it should be because flashes a what should be a very conscious decision about do I need it in this particular case is it appropriate and my sitting in the top of the footballs stadium it's not going to do any good reaching down on the floor and so this is something that's only going to be good for us subjects that are very close in front of you now the camera also does have a hot shoe the photograph of it here has a hot you cover on it which you can quickly take out to mount additional flash units for those not familiar with flash that much it has a very limited distance flash will only be good at subjects that are a given distance in from you so we're going to able to photograph the penguins in front of us but it's not going to illuminate the mountains in the background very limited distance it is most useful I think with people photography that are right in front of you so no flash versus adding a little bit of phil flash and we call it fill flash because we're filling in the shadows with a little bit of extra light is often a good way of getting a good portrait photograph and can be very helpful on bright sunny days when there is a strong contrast and so if you're trying to eliminate some shadows that are close to the camera it can do is be a very effective job at that. You know beyond just basic flash, the camera has a number of more sophisticated flash modes that you can turn on or off red eye reduction, for instance, will help reduce red eye. I'm not a big fan of it because it does delay the timing of the shelter by about a second to two seconds, so you sometimes miss moments. Phil flashes when the flash would fire and you normal, and it normally win it because it's bright enough outside slow sink allows you to use a slow shutter speed rear curtain sink synchronizes the flash with closing of the second curtain. This allows you to photograph subjects that are moving, and it appears that there are streaks coming out from behind them rather than in front of them, which is match with a front curtain sink. And then finally, you can hook this camera to multiple flashes for a wireless off camera multi strobe system. So if you really want to get much better light, getting multiple lights and different locations, getting it off the camera is going to improve the quality of your portrait by quite a bit. Now, how do you get in and change all these moments where you're going to have to dive into the menu, setting into the flash options setting where you will see all of these and we will talk a bit more about them? When we get into the menu settings, one other footnote at this point is that the top flash synchronization speed on this camera is one one sixtieth of a second. So if you do have the flash up, if you have an additional flash put on the camera, you will realize that the top shutter speed that you can get two is one one sixteenth of a second. Now panasonic does make a number of external flashes the little f fell to twenty is not really that valuable with this camera, because this camera does have a built in flash and this one, I'll be it is a little bit more powerful, but not a lot more powerful. Probably the main one that you would want to get with. This camera is the f l three sixty l, and this one offers you a number of nice features. First off, it's a lot more powerful than the built in flash it's about three times as powerful. The head bounces and swivels, so you're able to bounce it off of low white ceilings as well as walls. It has it also an l e d l e delight in the middle of it, and this is something that you can use with video now it's not the most beautiful light with video and it is not very effective over a very large rage, but for subjects that are pretty close in front of you, if you were going to be, say, working eh wedding, for instance, in a dark reception hall, it would help illuminate the faces of people that are pretty close in front of you. This also is there flash that has wireless control, so if you did want to have the in camera flash trigger an external flash, this is the flash would want to get. They do make a hiring unit as far as power, and this is about fifty percent more power than the three sixty the f l five hundred, and that would give you the most power but does not give you the wireless capability. The two twenty sells for around one hundred thirty bucks. The three hundred sixty l sells for two hundred sixty dollars, and the more powerful flashes going to sell also for about two hundred sixty dollars. So there's a bit of a tradeoff whether power or wireless features are more important to you on either side of the hot you are stereo microphones so that you get at least pretty good sound in camera. I know all your video buffs out there that one of the most important things for shooting good video is getting really good audio, which means you're going to want to get a microphone off the camera, I'll talk about little bit more about those in the next section where we plug them in over on the left side of the camera. We have the drive mode. This controls what happens when you press down on the shutter release its I love these tactile controls like this, and we have a number of options. We just have four on the dial, but they could be controlled quite a bit when you jump into the menu city. For the most part, I would leave the camera in the single shot mode for basic photography. The continuous mode can be customized from shooting low, medium or high numbers of pictures, too, for six frames per second or super high at twenty frames a second. Now you can get in to do this at the record burst rate option in the menu setting, and I have had generally pretty poor performance from these marylise cameras when shooting action. So I decided to test this camera this last weekend on some high speed action, so I was using the six frames per second and I was actually testing more the focusing here than I was the motor drive and the camera was holding focus on these runners, which were running at a very fast pace at six frames per second. And so I was pretty pleased with this and that's why I say that I think this one might make a very good wildlife photography camera. Now, the high speed of six frames per second simply isn't enough for certain types of activities, and this camera has a super high speed option. Now, when this fires, it really moves quickly, and it is recording in a small j peg setting and in this particular case, it's two thousand three hundred thirty six pixels by one thousand seven hundred fifty two, which is enough resolution to make a decent eight by ten so if you have something that takes place very, very quickly, this camera can fire extremely fast. Now, when it is doing this, it is using and electronic shutter curtain that's one of the ways it enables it to do it so fast and, you know, I'm going to set this up in a little live demo here and just I'll turn around so everyone can see what I'm doing on the camera, and so I'm going to go in first off, I'm going to turn it into the continuous mode on the top of the camera and I'm going to have to go back to the burst setting, which is on page two of six weren and two first rate, we're going to go into super high speed. And I'm just going to kind of hold my microphone up close to it and you'll hear hopefully twenty frames a second. Now I have the elektronik shutter sound turned on, and I'll try this again, and we're just filling up that hard drive with small little pictures. And so if you have something that happens very, very quickly, this is one of the fasting fastest acting cameras that records individual still frames like this twenty frames a second, it's it's pretty cool. First, as I say, some types of activity, all right, next up on the list is bracketing and so let's talk a little bit about bracketing you can go in and you can control this with thie auto bracketing feature in the men you know what this is for is it's very similar to exposure compensation that we talked about before what's going on here is that the camera is shooting a normal picture, a darker picture and a lighter picture, but it's doing it automatically very quickly, much more quickly than you or I could do those physical settings ourselves on the camera. Now what's nice about this camera is that it's very, very customizable. You can shoot three, five or seven frames in the siri's, and so this is quite popular with people shooting high dynamic range photography, hdr you could set the camera on in hdr mode, it shoots seven frames over a wide range of exposures, and then they would combine all of those pictures into one single exposure. So you, khun, shoot this, as they say anywhere in three, five or seven frame brackets, you can choose the increments between the shots to be at a very small one third of a stop two thirds or of one stop value. This is something that you're going to use an app it your priority shutter, priority or program, not something that everybody uses on a regular basis, but, well, well used by some landscape photographers. That's for sure final little section in this one is the self timer. The self timer has three different basic options. You can set it up to the traditional ten second self timer. You could do a ten second self timer that takes three images that way. If somebody blinks or you could try smiling and maybe there's going to be one shot that's best among the three. You can also use it as a two second self timer, which works quite well for anybody using a tripod that doesn't have a cable release with them, and that enables them to fire the shutter, get their hands off the camera so that there is no vibration when the actual picture is being taken. And so for quick settings on the top of the camera, with lots of customized settings as we dive into the menu cities.
Class Materials
bonus material with purchase
Ratings and Reviews
Birkeytique
For the time being, this may be the best way to learn more about other Panasonic models. There is very little good material on the FZ1000. This shows much of the dial and other functions. It is out of date as the current model is a DMC-GH4. I reviewed all the material available free; there are many features on my camera that are different. Johne Greengo is a phenomenal teacher! The best, clearest, most thorough and most motivating I have ever experienced. I am currently taking the Fundamentals of Photography, learned so much so far; bought the course. These "Fast Starts" are great and were mentioned in the class. Hope your camera is covered here.
Edris
waw, I could not ask for better explanation, nor better teacher in my hole life. Thank you john for your great class. I 'll say no more!!!!!!!!!!!!!!!!!!!!!!!!!!
Joanne Catapano
John is a great ! I learn so much from his classes, he has away of communicating that makes you feel like you're sitting in class live with him. The classes are so informative that each time I review them I keep learning more. I have the Lumix FZ1000, there is little out there. I found this class very helpful. John you are the best, keep the classes coming.
Student Work
Related Classes
Camera Guides