Import File Types into InDesign
Lesson 13 from: File Formats Explained: Everything You Need to KnowJason Hoppe
Import File Types into InDesign
Lesson 13 from: File Formats Explained: Everything You Need to KnowJason Hoppe
Lessons
Class Introduction
01:43 2History of File Formats
14:12 3History of Web Formats
10:36 4Options to Save Files for Web
05:00 5Save Files as JPEG
13:19 6Save Files as GIF or PNG
18:06 7Options for Scalable Vector Graphics
09:35 8Save Files for Print
11:35Lesson Info
Import File Types into InDesign
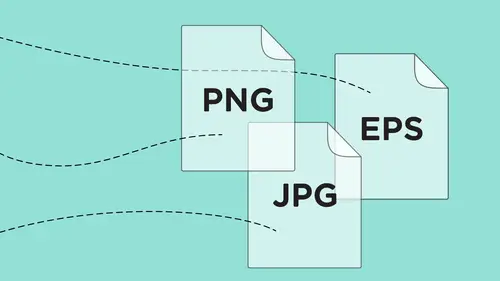
One of the other things I had talked about is being able to import a InDesign file into InDesign. No I can import any PDF into here. I know one of the things that people have seen before, and this is something that I teach in the InDesign class, but somebody gives you a PDF, and it's a multiple-page PDF, and you have to go and you have to import this PDF into InDesign. And you can import virtually everything into InDesign, but not SVG. So if I take a file, and I decide okay I want to import this. Somebody sent this to me, and they sent this multiple-page PDF. I go into the file menu and choose place in InDesign, and I want to place this PDF. So I find the PDF. I click open. And I place it, and it's like, "Yeah, but that's not the page that I want. This is a multiple-page PDF." So how do I get to that page in that PDF? People are like, "Oh not a problem. Open it up in Acrobat. Take all the pages apart. Save each and every page separately and your page numbers and then just bring in that...
page." No. You can. But that's crazy. So if you ever have a multiple-page PDF, and you'd like to get to a specific page, of if you have an Illustrator file, and you want to get to a specific artboard, this is how you do it. You go under file place in InDesign, and you wanna click on your options. And if you have a multiple artboard PDF, or you have a multiple-page PDF, or multiple artboard PhotoShop file, and you wanna get to a certain one go under file place, show your options, I'm gonna show your import options when you're bringing in these files. When you do that a multiple-page PDF or a multiple artboard file, will allow you to actually access any individual artboard or file. So here's my multiple-page PDF. I know it is because the client told me. I choose my show import options, and I click open, and now I get the preview that says, "Oh here you can go in and scroll through the PDF to find which page you really want." And if this was a layered PDF too, I could go to the specific page, turn on and turn off layers. Maybe somebody has headers and footers on this PDF that I don't want. I can turn those off. Import it in. And there on page two is what I want. I Click ok, and I bring it in. There's my PDF. If I have a multiple-artboard file, I can certainly do that as well. Here was the multiple-page PDF that I had created. This is what I created in Illustrator. Multiple artboards. So I saved as a PDF so I could go into full-screen mode in Acrobat, but there's multiple slides in here, like 18 of them. So I want to get to slide number 12, or artboard number 12. Again, options. Show the import options. It's a PDF file, so I click open. And now it says, "Okay, which artboard do you want to bring in? And how do you want to bring that in?" so I can go ahead and I can say, "Oh yeah it was file number, page number 12 that I wanted. That was the slide that I needed or the artboard that I needed." And I could bring that in as well. Now if I had saved this with layers in this PDF, I would be able to go in and I had specifically saved the background as a different layer, I could actually turn that off, bringing it in. So it's like all this compatibility how it really comes together. So in this case I've got page number, or artboard number 12 of my file, and I can click OK and bring that right in, like so. There's my file. It's great. Works really well. You can see how that works. Now, somebody gives you an InDesign file, and you want to import an InDesign file into InDesign. Don't even have to save it as a PDF anymore. You can actually go and take your InDesign file and literally import your InDesign file into Indesign without even having to save it as anything else. Simple as this. Go in the file menu and choose place. There's my InDesign file. I can take that. I can click open, and it says, "Okay, which page do you wanna have?" And it's like, "Oh I definitely want this page right there. There's my page." Looks just like a PDF doesn't it? Kind of acts like one, but it goes in and there's my InDesign file right there. This is page number four of a previous InDesign file. Pretty cool. Much better suited if you're working in an environment where you have all of these files on the save server, like in an office of something. So you have a presentation, and you just want a page from the presentation, you don't want to open it up, find the fonts, link the graphics, everything else, but you just want a quick little screenshot of. And it's like okay, here's what the page looks like. Throw a quick little border around there, and of course everything's made better with bacon and drop shadows. So you throw a drop shadow on there as well, and it's like okay. You do a quick little presentation, and it's like, I just grabbed a page from an InDesign file, put it right in there, everything looks good. So with an InDesign file I can import an InDesign file, PNGs, GIFs, JPEGs, all that other stuff into InDesign without any problem. Now because we save images as JPEGs we get a lot of JPEGs that we can use in InDesign as well. Absolutely, JPEG is probably one of the most universal formats that we use for any type of images. And if you ever go to an stock photo house, you're going to find that almost everything is done as a JPEG, which is fine. However, JPEGs, whenever you save them, you always lose a little bit of information. Always. It's not truly noticeable, but if you're going in and you're ever doing any type of photography the last thing you want to do is ever save a photograph as a JPEG, unless you are specifically saving it for the web. If you're a photographer, and you want to get the best quality out of your photos, don't ever save it as a JPEG for print purposes. Keep it as a PhotoShop file format so you can bring it right in and place it without any JPEG compression. Because no matter what you do whenever you save a file as a JPEG here, even if I just go under file save as a JPEG, and I save this file, I get the ability to go in here and say, oh, you know I want maximum quality. It's gonna be awesome. Maximum quality is the best JPEG will give you. It does not mean the best quality overall. The best quality overall is going to be the file that you got right from your camera. That's what you wanna have. So people use JPEGs all the time for print, and unless you look really close, you're not gonna see. But even a maximum-quality JPEG is still going to give you a bit of compression and a bit of degradation. So you want the best files for print? Don't ever save it as a JPEG. Taking a JPEG and saving it back as a PhotoShop filed does not make it any better. As the saying goes, "You can't cut something longer. You can only cut it shorter." Once you save it as a JPEG the damage has been done. Even though it wears the maximum quality, that's the best that JPEG can give you. So save it as a PhotoShop file, if you want to use it as print. JPEG for display on the web. Now here's the one interesting thing that you can do with an image as a TIF file. I don't use TIF files anymore because PhotoShop files work fine. JPEGs for the web. If I'm gonna import anything into InDesign as an image, I'm gonna save it as a PhotoShop file. But, some people are like, "What about a TIF? A TIF works fine." TIF works just fine. If I were to go in and save this as a TIF file, it's gonna display and print very well. It's not gonna give me any compression lines either. And it works just fine. You can use a TIF. There's nothing wrong with using a TIF. I just keep it as a PhotoShop file because then I can have all my PhotoShop editing capabilities, and any transparency that I have in my PhotoShop file I can retain if it's a PhotoShop file. The transparency will exist in a TIF file, but it will not display when I bring it into InDesign or into Illustrator. While it's there in the file, it doesn't actually show or print that way. But there is one unique thing that you can do with a TIF that you can't do with any other file out there. And if you have a grayscale TIF, right here, even though you should never just go in and convert it to grayscale, as any photographer tell you, use the special grayscale mode blending, or the adjustment layer. Anyway, if I had a grayscale TIF file, this is the one cool thing you can do. Here's my grayscale TIF, only works with a grayscale, only works with TIF. That's it. So grayscale TIF file. I'm gonna save this as a TIF, call it grayscale, so I can remember what it is. TIF file right there. Click save. It asks you how you want to compress it. And you can compress the file to make it slightly smaller, but this is nondamaging, or non lossy compression right there. If you save a TIF with JPEG compression it will go ahead and it will reduce the quality of the file, and you probably have trouble placing it. So in all honesty, just don't go in and compress a TIF file. You can. This won't be an issue though. So here's my grayscale image. If I take my grascale TIF file, and I place it into InDesign, and there it is. There's my TIF file, and I place it into InDesign. This is the one cool thing that I can do. I can take my container and I can apply a color to my container, and this is the one time where a TIF will actually show the transparency, so anything that is not solid black will become translucent. So I didn't have to go into PhotoShop and put the color in the background to get that translucent, but I can go in and I can select my actual image inside here and you'll notice when I select my image, the image is colored black because it's a grayscale image, shades of gray. But I can go in here, and I can actually apply a color to get what you can kind of call a pseudo duotone, or what we would call a half duotone kind of look, or I can actually swap out the values of the color in the TIF file for a different color. You wanna use something in the background or you want something screened back, this is the one time where a TIF file actually works great. I didn't have to worry about transparency at all. Anything that's white is gonna be completely transparent. Any shades of gray become translucent, and I have the ability to very quickly and easily apply a color to any of the fill pixels, and then my container can have another color in the background only with a TIF file. So, kind of a cool method to do. We used to use this a lot back in the days, but now with PhotoShop you've got all these cool filters and everything else. Who wants a monotone image with a colored background? It was so 1984. So, pretty cool thing that we can do with a TIF file, and only with a TIF file. One other thing with a TIF file as well. If you have a file with multiple layers here, and you do save this as a TIF file, not that you probably should, you can save layers inside a TIF file, but you don't have accessibility to them in InDesign. So, just one of those trade-offs.
Class Materials
Bonus Materials with Purchase
Bonus Materials with RSVP
Ratings and Reviews
E Ahn
His makes it very easy to understand with clear, articulate, systematic approach. Great voice and effective delivery. I tried to understand this subject many times and it has never been clear until I heard this lecture.
Rebecca Chapman
I love Jason's style and approachability! I love how he explains things and starts right from the beginning. Highly recommend.
Khadijah Abdul Nabi
Amazing amount of industry relevant and practical information! Great delivery.