Lessons
Class Introduction
13:12 2Why Strobes & Film?
05:09 3Using Sync Speed
10:21 4How To Avoid Ghosting
05:45 5Equipment Overview
04:12 6How To Use Your Camera With Strobes?
06:27 7Triggers & Receivers
03:39 8How To Set Up A Light Meter & Strobe Unit
08:03Demo: Equipment Set Up
07:59 10Create A Natural Light Look
10:05 11Light Modifiers
09:39 12Catchlight In The Eyes
08:41 13Metering Overview
03:40 14Meter With Strobe For Color Film
22:44 15Meter With Strobe For Black & White Film
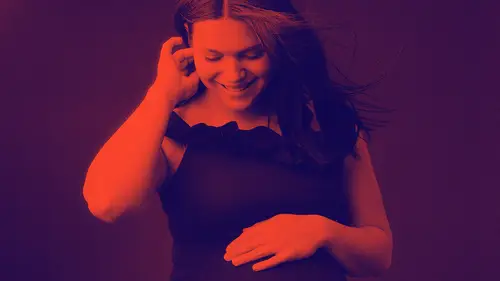
26:00 1645 Degree Light Placement
09:01 1790 Degree Light Placement
15:01 18Backlight Placement
04:13 19Feathering Light
08:07 20Lighting For Groups
25:44 21Speedlights with Film
08:42 22TTL Vs Manual Mode
09:21 23Gear For Location Film Photography
03:26 24Set Up On Location
04:08 25Know Your Film Lab
16:21 26How To Find The Right Lab
14:47Lesson Info
90 Degree Light Placement
So then there's this 90-degree light, and I do this a lot with babies, and get another amazing Photoshop illustration there. But with 90-degree light, it just is what it sounds like. So, this would be more like window light if it were right there and you were just, had somebody right here at the side. And with this kinda light you're gonna get, it's more split light, so you're gonna have highlights, and you're gonna have a more dramatic shadow here. This is something that I will do with babies. Little baby. This, by the way, is at Ilford Pan F 50 ISO film that I've talked about, that is just the smooth grain. It's so pretty. But anyway, you can see the light right there in that catch light. You can really tell that, that catch light, that light is right on the side. And this is really fun just for drama. It just has a little bit brighter. You're gonna get deeper shadows here, which can be really nice. I do it a lot with babies if I'm laying them on a black backdrop. It's great when the...
y're sleeping. I'll also do it this way where I'll have it here, and I'll bring it down again because I'm working with the baby. And I'll put baby this time head pointing directly to the light. And that's about kind of a photo. And when you do this, this is actually called butterfly lighting. So all of this lighting, by the way, has specific terms. I mean 45-degree and 90-degree is how I think about it in my brain, because that's how my brain works, but all of this has some official terms. But this kinda light, when that light is coming right from the head, and working down like that, first, she get those catch lights right there at 12 o'clock in the eye. But also get this little shadow, just a slight shadow under the nose, and they call that butterfly light because it looks like a little butterfly. And that's one way where u can tell that the light is right here, which is fun. I'll do this a lot where I'll just have people, particularly men, I do this with men where you just have them face the light directly. You can move people around. You can play around with this, which makes it really kind of fun. And again, there's that butterfly light where the strobe is right up there at the top of the head. So that's how I use that light. And this would be a situation, again, with the baby where light is down here, and we're like that. Now, when I'm using this kind of light with people, you have to watch what your light is doing on people's skin. So, this is our beautiful model we had at our model shoot. She was in her 20s. she's flawless, she's gorgeous. But like everybody, she has some texture in her face. We all have texture in our face, some of us more than others, (laughs) as we age. And how you have a person's skin or face facing a light can either accentuate that, that texture, or it can smooth it out. So, these are both completely untouched images. These are straight skins that I got in from Richard Photo Lab. And you can see with here, when she's facing the light, how her skin is so much smoother. It looks smoother, because that light is coming in, and it's filling in all that, any texture, or bumps, or anything that she would have on her face, and you can't see it. Whereas here, when she turned her face away from the light, now the light is hitting here, and it's kinda skimming across the top of her head, and it's creating shadows where those bumps are. And this is really important. I like to talk about this, especially when we're talking about 90-degree light, because sometimes it's fun to create drama with your light. And so, you would want more of a split light situation, something where you have real highlights on one side, real darks on one side, especially with black or white or whatever. But you really have to think of your subject and what it's doing to their skin. I'll use this kind of lighting in a maternity photo, for example, because I want the drama. I want to carve out that belly a little bit, or move her. But you have to be really careful with that real dramatic light with women. I work with a lot of new moms who just had babies, and they might be really, really, tired, (laughs) and might not be feeling their best, and I always wanna make sure that the light I'm using is making them look glowy, and soft, and pretty. I don't want to ever accentuate wrinkles, or eye bags, or anything like that. And so, your light placement then become really important in that respect. Yes? I was wondering if we might be able to use one of our audience members and see that happen. Yes, absolutely. What a good idea. With this 90-degrees. So with the 90-degree. My question is about where did you take the photo because, in respect to the babies? Oh yeah. That's a great question. Because the baby is, he's looking at somebody, where the mother is. Please explain. Yeah, absolutely. Why don't I answer your question. Let me show you what I would do, and then let me demonstrate what some of this looks like. So the question was, once you have your baby, I'm showing you where it is, where would I stand with my camera, which is a great question. So if I had my baby down here, let's move baby here, and let me just put this little makeshift baby stand here. So let's say I wanted to go back and do that. So I have baby sleeping here, and I want a little bit of highlight here, and I want drama here. To get that kind of sleeping baby, I'm just gonna grab my camera. So, for that kind of an image, I would be here. I always, always, always put a strap around my neck when I'm working with a baby, always always, especially if you have a baby on the ground, and you're at all standing over, which I do all the time. I always wear the strap around my neck. These cameras are heavy, and god for bid, you were to drop something on a baby. That actually like gives me chills. It freaks me out. So, always wear your strap and don't put your classes on your head, because you don't wanna drop glasses on a baby either. When I shoot, I shoot with a shooting apron. It has these great pockets. But so, yes, so then I would just be here, and come down right over, over the top. If I wanted to turn the baby, and do some butterfly lighting, is that what you're talking about, to get those really beautiful catch lights? Whenever I move the baby, I take my camera strap off, like I'm just doing it automatically because I do it so much, but I don't wan hurt Betty either. And then baby here. And in that situation then, I'm here, and I'm down at the baby this way. Like that. So that's how you do it. And, like I said, I like to keep my light down low when I'm working with babies on the ground, but not on the ground touching. So, I want that big chunky catch light that I get with my window light. And so, and I want that really to be seen at the top of the eye, so I bring my light up a little bit. So about the bottom of my light is about even with whatever surface I have the baby laying on. So if baby is on the bed, have it equal to that, and then it will come up here, and we get that really pretty catch light. If I have... Where is my siblings picture? So, if I have a brother, sister, baby on the man, and have... Let's sit her up. Sitting up. Dododo! See, isn't she so handy? Because she can sit her by herself. (laughs) She's the best baby ever. Then I would have that at a 45, and I would just bring it up a little tiny bit. Here. And then I would be here. Down here like this. Would that help? Yeah. Did I look? (laughs) That was really great. Yeah, but let's do that. Let's look at the way different light plays on a person's face. Because I think it's really important. With 90-degree light, I always call this man light, because I wouldn't necessarily ever light a lady like this, but I feel like with lighting like this, that's going to be a little more dramatic. It looks good on men. Like it's this unfair thing that happens as we age where men look better, and their wrinkles look really good on them, and their gray hair looks really good on them. So, who's a volunteer? Who wants to by my volunteer? Do you wan come up because you're a man, our bro thug? (laughs) All right, great. Where would you like me? WelL, let's stand you here. You have great skin. Thank you You have not a single bump or line on you at all. So, why don't you stand there? So, if I were lighting him, if he were in my studio, first of all, with a light at 90 degrees like this, I would bring it up. Because with the light like this, where he's kind of in the middle of it, you're gonna be getting light coming up from this bottom part here. And so, this is going to accidentally light that bottom half of his face, which isn't gonna look great. And if you look in really close, you can even see that in his catch lights. So, first thing I would do is I would make sure I'd bring my light up like here ish. And then I like to angle my light down just a tiny, tiny bit. So I would be here. Now let me look at you. Get my photographer eyes on. Come over here. So when I'm looking at him now, what I'm looking for with my light is I'm looking for it to make sure that I have a catch light where I want it to be, which when you look right here, I can see it right here at the top of his eye. So I'm making sure I'm getting that. I'm getting my light here, coming from here. It's still coming from the top down, which you want with light, which is why we have the catch light we wanted, but I also have a much deeper shadow here, and we would see it more. We know we're in studio. We have studio lighting. So that's going on there, but I would see it much more if we that we were just in my studio and we are here, versus if I were to move this then to 45-degree angle. So we still have a nice catch light there, but now it's much chunkier. I can see more of it because it's covering more of his eyes that comes across. Lights still coming from above and down, the way we want it to, but it's more even across here, and our shadow is a little bit smaller over here versus that. And then as far as where I would stand, do it with the Rolleiflex. It's really too bad I'm not taking this picture because the light is really good. (laughs) The stand. I would just be right in front of him here. Yeah, it looks good with that wall behind you. It would be nice. (mumbles) Yeah. Thank you. So basically, I'm in one or two of those positions. I'm either right at the or right to the side with a 90-degree, and then I can play with that. I can walk around. I can see where I want the light to fall. It's amazing how much variety you can get with just living Your light in one or two positions and moving your body and changing. Yeah, so, I just wanted to point out this again. So, here, it's super smooth. We have these pretty shadows, and then it has some nice drama in it, but we do pick up all this texture in her face with moving, getting that light kinda sweeping across her face.
Class Materials
Bonus Materials with Purchase
Ratings and Reviews
a Creativelive Student
Wow! with a lot of online stuff out there one can become rather overcome with too much information, however, the way Sandra presents her courses is just perfect! Her honest and simple and easy to understand approach was just what I needed. Not once did I think she was just going through the motions, she really loves what she does and it shows. To be able to rewatch and rewatch was also a key for me. Since I have dyslexia I have to take things one half step at a. time. After completion of the class I had a new found confidence when using strobes. A must have.
Micah Hewett Images
Out of all the classes I own on Creative Live, Strobe Lighting with Sandra is my FAVORITE! She is an incredibly kind and gifted teacher. She explains everything on a simple level and then gradually build to more complex issues. I am 100% happy with this course. Thank you Sandra!!
Gabby de Janasz
Sandra Coan is a lighting genius! I loved watching her high-energy and super informative class. I learned way more about studio lighting than I ever thought was possible. I'd definitely recommend this class to literally any person in photography, not just studio photographers. Thanks Sandra!!
Student Work
Related Classes
Lighting