Lesson Info
21. Dual System Sound and Audio Analysis
Lessons
Day 1
1Introduction
18:02 2Key Terms
27:06 3System Configuration and RAID Storage
19:22 4Q&A with Creating an Efficient Workflow
19:36 5Interface and Media Management
31:02 6Importing Media Part 1
30:40 7Importing Media Part 2
11:58Ratings and Keywords
32:21 9Reviewing Clips for Edit
25:13 10Importing Clips
19:26 11Editing an Interview Demo
33:20 12Replace Edit and Timeline Index
32:50 13Compound Clips and Auditions
18:27Day 2
14Editing Review
13:34 15Trimming Part 1
28:43 16Trimming Part 2
39:03 17How We Hear
21:51 18Audio Key Terms with Q&A
12:14 19Audio Basics, Meters, and Inspector
31:01 20Audio Q&A
08:55 21Dual System Sound and Audio Analysis
28:58 22Multicam Editing Part 1
27:08 23Multicam Editing Part 2
15:02 24Transitions Part 1
23:27 25Transitions Part 2
24:06 26Formatting and Animating Titles
30:18Day 3
27Additional Effects
12:36 28Editing and Trimming Review
11:58 29Changing Speed of a Clip
31:31 30Inspector Effects
36:35 31The Effects Browsers and Generators
19:37 32Blend Modes
17:10 33Effects Q&A
13:58 34Simple Effects
16:52 35Intro to Color Correction
18:20 36Video Scopes
19:25 37Color Correcting for Video
20:28 38Color Correcting Skintone
23:11 39Color Correction Q&A
08:54 40Audio Effects Part 1
26:20 41Audio Effects Part 2
23:08 42Exporting and Sharing
21:28Lesson Info
Dual System Sound and Audio Analysis
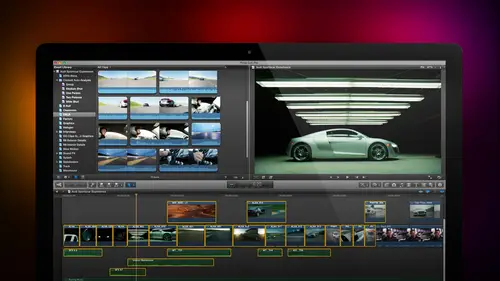
What I want to do is I want to concentrate on two pieces of audio that we haven't yet dealt with. One is how we synchronize what's called double system sound. And the other is audio analysis, which is remember one of those those check boxes that when you import a clip, you can have it go. Three audio analysis check boxes. I want to show you how we find out what those are. So let's just, um give me a second to reset. Okay? What I have here is I've got a picture of me and I've recording this on a, um, the equivalent of a DSLR camera. It isn't, but we're gonna pretend that it is because of DSLR is one of the examples where the camera itself makes beautiful pictures. But the audio is just horrific because the the microphone on a DSLR camera is not worthy of the name on a separate unit. In this case, this is a zoom HN four. I recorded the audio track. So let's take a listen first to the video and hear what it sounds like from the point of view of the camera. Mike, almost all cameras can rec...
ord great looking pictures, but not all cameras can record great looking sound. That's where the process of double system recording comes in. OK, look at where my audio levels are really, really soft. Why? Because the counters about seven feet away from a and it's picking it up on the counter. Mike, there's seven feet of distance between where my voice is and where the camera is. Of course, it's going to be soft. It's just too far away. I'm holding this microphone, but this microphone does not plug into the camera. It's plugged into the zoom H four n, and it sounds like this. Be careful, guys. It's gonna be a lot louder. Almost all cameras can record great looking pictures, but not all cameras can record great looking sound. That's where the process of double system recording comes in. Notice how much richer, how much fuller, how much tighter and how much less noise there is in the zoom sound. Keep listening. Double system recording means that we record the audio on one device and we record the picture on a separate device and listen to the camera. MIC system recording comes in double system recording means that we record the audio on one device on, we record a picture on a separate device. Now there's no comparison. I don't have picture with the sound, so I can't use the video from the sound. Clip on the sound with the picture clip is terrible, but notice that there's both that there is sound on both clips. This is the ideal way for sinking, because when their sound on both clips all you have to do is to select the video clip any audio clip that have the matching audio. The clips don't start at the same time, but they do have matching audio, in which case you then go up to clip and you select synchronized clips. What final cut does is it compares the audio track in the video clip with the audio track in the audio clip, and it creates what's called a synchronized clip weaken ups. We can edit that to the timeline. Let's just open the project here. We can edit that to the timeline, the letter E, and when I play this back notice it's in sync because I used a clapper slate. I didn't show it to you before. Almost all cameras can record great looking pictures, but not all cameras can record great looking sound that now we've got a little bit of hollowness. They're a little bit of its not necessarily echo, but it's not a tightest When I was listening to this clip before, and that's because I'm listening toe both pieces of audio at the same time and nurse face cancellation. So what I need to do once I get these clips synchronized as we need to take advantage of the multi channel work that we did earlier? Select the clip, Go to the inspector, twirled down towards his channel configuration and notice there's the clip in the storyline. That's the camera clip and the connected audio clip. I'm gonna turn the storyline audio off, and now when I play it, almost all cameras can record great looking pictures. But not all cameras can recoups. And now, when I'm adjusting it, I'm adjusting the level of the connected clip zoom H for and let's pull that up so we can actually hear what's going on. Almost all cameras can record great looking pictures, but not all cameras can record great looking sound that now the mike Mike that I'm using is one of the mikes that I love a lot. It's a Shure sm 58. It's a wonderful hand, Mike. It's designed for singers. You get right on top of the mike and scream. It's a very, very tight mike, and it needs to be within a couple inches of your face to be able to pick up the audio. But because it's a tight mike, it ignores all the environmental sound. I don't get any sense of where I am. So to fill that in, I just happen to have some bird song here, and we'll just add some tweeting birds underneath, and we'll sort of feel this in to make it sound like I'm outside. Almost all cameras can record great looking pictures, but not all cameras can record great looking sound. That's what the process of double system. So all right, maybe the birds a little bit too loud and a little bit too much in your face. But the concept is by getting really clean, tight sound. We can then make the environment sound whatever we want by adding the sound effects of birds chirping or traffic going by, or whatever else the key is, once you have the clips synchronized, then you need to turn off the channel that you don't want to listen to, because otherwise the 2 to 2 channels the one that's on the camera and the one it's recorded separately are gonna fight with each other. And it's gonna make your audio, which could be clean, very, very hollow. So that's that's double systems. You had a question. So when you do the synchronization on the audio clip and the video clip together, you did it up in the browser. The question I have is. Could you actually do that on the timeline? Because, for example, let's say you have many libraries and you're sinking between Ah, video clip in one library and an audio clip, another library and finding those two and getting them corralled into the same place where you can grab him and thank him up becomes somewhat of a challenge. So actually, doing on the timeline makes a lot of sense to me. It does and think about this. What must be true for Clemson for Don't put them like down your back on the what must be true for clip synchronization, toe work you have sound both on the Yes and that What happens if I don't have audio on the camera? I can't sink the way we just shown. We have to have a plan B to synchronize the audio in the video. Don't I? Correct. So how do we sink a clip when I don't have audio on the picture that answers both your question and the broader question of what happens if I forgot to record audio on the counter. So let's just delete the clips in the timeline, and we're gonna edit this clip down video only and just type the letter e up. I can't do that. No, I can't do that. We're gonna type the letter e admitted to clip down to the timeline. Then I'm gonna grab my audio clips, select that, make sure that I'm editing both audio and video and type the letter e. And now I've got both clips. Although both of them are stuck in a primary storyline. I'm gonna grab the audio clip and dragon underneath the video clip. Still with me so far. Okay. My hands have not yet left my wrist shift Z to expand what we want to do. I've got the skimmer turned on. Do you see any kind of visual indication that we could use that would allow me to find the exact same matching point on the video as well as the audio? Well, the strategy here is as when the slate comes. So, lap I'd put a mark on the video. When I hear the slate slap on the audio, I put a mark on the audio line, those two walks up and then hopefully today, right? So that's exactly what we're gonna do here. I'm gonna zoom in just a little bit. I'm gonna turn off the skimmer because it's driving me completely nuts. I'm going to use the left arrow or the right arrow key to move one frame at a time. And I'm gonna find that moment in time where the slight is not moving. It's moving there. It's not moving there. I don't have to set a marker, but it makes my life a whole lot easier. If I dio and Phillips, you remember the keyboard shortcut to set a marker? I am. Yes, The man is a genius. Does it make a difference if the audio clip is selected or if the video clip is selected? No, no, it doesn't. But in the case of the audio clip, look here again. Philip, you're on the hook. Do you see anything in the audio that might indicate that point in time where a clapper sleight is clapping down? I think it would be the peak, the little peek right there. So I select the clip. Now how do I move a clip, left or right in the timeline, you just grab it scrolling over. I could grab it and drag it, but it's way too imprecise. Period moves it. One frame to the right comma moves it. One frame to the left shift period moves 10 frames to the right shift. Comma moves frames to the left, and I just figure out a way to align that peak. So the peak is immediately underneath the put lay ahead. This is why I don't need the marker, but the markers helpful in case they become separated. So what I've just done is I've now got video on Lee with no audio in sync with the audio. Let's take a listen perfect, So I now have a sink clip, but there's no relationship between the two. These air not locked together in any way, shape or form. So we take advantage of something that we learned about yesterday. Select the audio and the video. Go up to the file menu, go to new compound clip and we'll just call this sink Larry, and we're gonna store inside the double system event. And now I've got a compound clip, which I can trim the way that I would trim any other clip. So when I play out, almost all cameras can record great looking pictures. But not all cameras can record. Is that not cool? I use a common sink point, a clapper slate on. I use that even though there was zero audio in the video, I've sink it inside the timeline, and I married the clips together. Using a compound clip at Thistle is great when you have people that air doing the great thing, which is slating. If they don't slate, then it's looking for environmental cues of some. Or you're looking for your looking at lips to see when a pee comes out or a P is the easiest to read because that's an explosive. Even so, you're moving the audio in the video using comma and period until you find some common sink point or a door slam or a you know, a hand clap or something that gives you a visual cue that matches with an audio cue. Then you're aligning the two clips, and you marry them together by turning them into a compound clip. Select the audio, and you can select up to 24 tracks of audio that can link or sync to one track of video. Now, in this particular case, a compound clip can select have more than one video track, but you would have whatever you want to build into the compound. Clip is selected. Okay, still with me. So the answer to your question is weaken sink inside the time line as long as we have some sort of sink reference like a clapper slate, and we then marry them into a single clip is a compound clip, but it's a manual. Operations opposed Teoh software operation that does it for us automatically, right? Auto magic is when you have audio on both clips that matches even though the levels are different and you have to do it in a browser. Perfect. Okay, thank you. I want to talk about one other feature, and that is when I load this clip into the timeline. Whether it's in the timeline of the browser, I'll work with the browser clip, but I'll put it in the timeline just so we can look at it. Remember when we imported a clip? We had these checked boxes down here. Whoa. Analyze and fix audio problems, separate mono and group stereo audio and remove silent channels. I recommend that we check all of these when you are importing a clip, but the one that we really haven't talked about is analyzing and fixing auto problems. This basically is creating dual channel mono out of the stereo clip, and this is removing channels that are not used on the camera. This one there's a debate about in my mind. I wrote about this in my newsletter last week because I've never gotten this toe work, and other people have written in saying they have gotten it to work. But I check it because it doesn't do any harm. And for some people that does work. Separating mono and group stereo audio is is a useful technique because it separates your stereo pair when it isn't hysteria. Parent automatically makes it dual channel mono. But what is analyzed and fix audio problems mean what what final cut is doing is automatically invisibly to you during the import process. It's looking at your audio clips for three problems. One audio levels that are inaccurate generally too low, sometimes too loud, too much noise or hump. I know Ed and Philip because you guys work with professional grade Cruz and people that you work with know what they're doing all the time that you never have problems with audio recorded on set. And Philip, I know you don't cause you're doing your own audio and you never make mistakes. But I have discovered that I work with a lot of new people that are eager to health and excited to help but clueless about what they're doing. And they feel that the best way to run microphone cables is keep it clean and needs. They run the microphone cable right next to the power cable, generally for about 600 feet, and I end up with a C home, which is louder than a talent inside my audio causing untold amounts of grief and the enthusiastic but somewhat ill informed audio assistant to walk with a limp for many months thereafter. So I need to be able to remove things like noise and hum. Now there's two ways that we can do that one. We can do it automatically and to weaken do it manually. For right now, I want to talk about automatic removal. If I select this clip and go over to the inspector and go to the audio tab notice. Inside the audio tab, there is an option called audio enhancements under audio enhancements. There's a choice called audio analysis, and it's giving me a warning saying, Hey, there's a problem with this clip. Click the right pointing arrow, and this opens up the audio enhancements section right up here, which consists of loudness, background, noise removal and hum removal. Loudness to turn it on. Notice that there is a dark gray rectangle here to enable loudness, which is basically applying a limiter filter to enable loudness. You check that so tacit blue square, and it automatically increases the levels by whatever you drag the amount slider for and makes the clip sound louder. So here it is without loudness to me to see. Where am I? Click here. We'll do it in the timeline so we can track it and we'll turn loudness off. Almost all cameras can record great looking pictures, but not all cameras can record. Great looking. OK, notice that my levels air around negative 20 not re allowed. Let me just kick this analysis in which had happened automatically if that analysis check boxes checked and noticed that it's now saying Congratulations. I've made the levels louder. Let's hear the difference. That's where the process of double system recording comes in. Double sister recording. This is a really useful technique. Member of Jim. We had the question before the segment of what happens at the beginning. What happens beginning to segment. What happens if my audio is too faint to soft and raising the black over and 12 db doesn't solve the problem? Select the clip. Go to the audio tab, go to audio enhancements and turn loudness on. And it goes from this to this on. We record a picture on a separate device. This makes production easy because we get a break. Now, The good news about this is that you've got control over how much gain is is added in by the amount slider. Now it'll also make your background noise louder as well. So there's always a trade off how loud you want it to be. But this slider will allow you to adjust it. I'm not exactly sure what the definition of uniformity is. The basic feeling with audio filters is dragon in both directions. See if you like it one way more than another and leave it the way you like. But that's what loudness does. I want to skip background noise removal for a second and come back to hum removal. If you have hum, you need to tell Final cut, whether it's 60 cycle hum, which means North America or Japan, or if it's 50 cycle home, which is over here, which is the rest of the world. So if it's not North America or Japan moves to the time you will be working with 50 cycle current and 60 cycle current. You have to set the base frequency because otherwise it doesn't know how to remove it. Then you turn that on by clicking home removal. And if there was home and the clip. Watch this. I haven't done this before, Jim. One of things that I've learned is you should always do demos for the first time without rehearsing, because that way both you and the audience air surprised when the thing actually works. So let's just apply a clip that has some hum in it. So I haven't worked with this before. Let's just hit the delete key audio with hum bomb, bomb bomb. I will do that. All right, see if you can hear the hum while we're standing behind the scenes of the apple. Could you hear the hum? I mean, it may have been a little bit subtle, but could you hear it? Okay, all right, so let's select the clip. Let's go up to the Inspector and will go to see Work says audio audio enhancements. Go to the right, And it says, we've noticed there's a little bit of home here, so let's click hum removal and make sure it's set to 60 cycle, cause I recorded this in Las Vegas and play it. Oh, hush. There's no video frames that we dropped. All right, all right, all right. So I put a piece of video and I haven't done it wasn't gonna talk about this till tomorrow, but we'll just talk about it now. We'll add some blobs and noticed this orange bar here. The Orange bar indicates that we have toe render the effect and the video is just there because it was lonely. While we're standing behind the scenes of the apple booth here it and maybe obviously recorded a few years ago. Now I'm gonna turn the hum removal off. And as I walk around this show which has got home, not turn it on, what 100,000 people I see Final cut. Just about everywhere. Is that not cool? This is a really simple technique that you can use to remove. Hum. Simply select the clip, go to the inspector, go to the audio enhancements in turn on home removal, and be sure to set the frequency to whatever you needed to be removed. Okay, Now there's the third choice, which is background noise. Let's go back to this and listen to listen. The amount of noise in the background better turn home removal on. Listen, the amount of noise in the background while we're standing. I'm at the NDB trade show. This is done about eight years ago, and I was recording on the trade show floor with a 1,000,000 people surrounding the apple booth. This is before Apple opened retail stores. I want to remove some of the background noise, so I'm gonna click on background noise removal. The amount of noise that you remove is based upon the amount slider. There's no way none that you can remove noise without running the risk of damaging the voice. So what you want to do here is you don't want to take the noise out because it's gonna make the voice way to frat. Fragile, generally an underwater blur. Billy Sound. You just want to reduce the noise so that the dialogue is intelligible without losing all the background. If you need to lose the background, sound re record the voice. That's why a D R takes forever costs A fortune is difficult to do. This is why it's much easier to concentrate on getting good noise, good audio in production because getting good audio in postproduction is time consuming and painful. But we can improve it. So here's with it out. While we're standing behind the scenes of the apple. Okay, now let's turn it on. See what it sounds like. Just that the default setting booth here it and maybe and as I walk around this show, which has got what now? My voice has gotten thinner, but the background noises all disappeared. So let's just decrease the amount that we're removing 100,000 people. I see final touches about every Where are you ever surprised by the the intense reaction? So what we're doing here is using this slider. Teoh vary the amount of background noise, so my voice sounds as rich as possible as non blur billy as possible. And the background noise decreases to the point that you're able to hear the dialogue while we're standing behind the scenes of the apple booth here at N A. B. And as I walk around this show, which has got about 100,000 people, I see final touches, and this is one of the things where you just have to dial it in, and it's always a tradeoff. You can never make the background noise totally be gone, because it's gonna make your voice sound blur, Billy, And yet you wanna have the noise be reduced. So you always want to think of background noise, not its removal, but as reduction. I want to decrease the level. So that's that's what audio analysis is. It allows us to remove home, reduce noise and boost levels, do many questions before I totally changed the subject. Yes, sir. We definitely have a handful of questions about plural eyes. So not sure if you wanna jump into that. Uh, yes, I'll answer real quick because it's not relevant audio but is relevant to multi camera. We're about to bridge that, so go ahead. OK, so does Larry use red giant plural eyes to help with sinking the video and audio, and then does sink clips replace our need for the external software? Plural eyes? No. Yes, yes, sometimes and know Hows that have Good Plural Eyes is 1/3 party tool published by Red Giant Software is developed by a company called Singular Software, which is Vancouver based, and he sold it to Red Giant about a year ago. What paralyzes specifically designed to do as opposed to do allies but paralyzes specifically designed to synchronize clips for multi camera editing when you don't have easy sync between the cameras or when one of the camera stops recording. And so you've got brakes between the shots in a multi cam shot, which is not a good thing, paralyzes magical in the ability to synchronize clips. Because what it's doing is it's comparing the audio tracks on each of the cameras with all the other audio tracks and all the other cameras. And rather than matching on time code or matching on clapper slates, it's matching based upon the audio wave forms, which is a really powerful technique. Takes some serious horsepower to be able to do, because otherwise it'll take a long time. But it requires audio on all of your clips to be able to synchronise. We can't use plural eyes if there's no audio on one of the camera clips because it's synchronizing based on audio. So if you were to record, say, a DSLR camera and failed to turn the camera, Maikon paralyzed won't help you to sink the audio with that camera because it needs to have audio on all the different components that your synchronizing. So I used plural eyes and have worked with it for several years and recommended to many people. I used plural eyes because it enables me to create multi cam clips when one of the cameras no multi cam clips, stopped and started. I haven't told this story before, but I'll share it with you. I, um, the first television station I worked with was in Missoula, Montana, and I was still very young and learning a great deal. But the thing I loved about the Montana television stations and I got to do everything I was shooting news film. I was on camera doing news reporting. I was behind the scenes directing the news. Andi, everything in between and from there I moved Teoh Station in Baltimore, and there was focusing principally on being a staff director is supposed to running around and shooting. But in those days, it was long enough ago that the documentary Crude The News was still shooting film as opposed to shooting video, and I've always wanted to shoot film. I've shot one film in my life. My own mother did not like it, but my life has been video, but I wanted to shoot film just because I could. And so I went. I went to the documentary unit and I said, Guys, is there anything I can do to shoot film for one of your documentaries? They said, Well, it just so happens that we've got backstage passes for the Temptations, which, for those of you who are younger than a certain age, is a massively popular boy group that huge one direction in size and scope, and we have a backstage pass. You can take a film camera backstage and do a piece of four minute piece on the Temptations concert at a large venue in Baltimore. I was thrilled because one I liked the music and number two gave me a chance toe to shoot film that I wanted to do, and I went nuts. I was taken pictures and I was shooting shots and and it was teh in my head. This thing was incredible, perfectly focused, perfectly framed, and it proved to be perfectly unusable. And I'm still embarrassed this day because I wasn't bright enough to know that what you do when you're shooting a single camera musical event is you gotta put the camera down and you record the entire song, and then you go back later and you shoot B roll to illustrate the guys talking of the feet, dancing or whatever. I never recorded an entire song. So the cameras. Five seconds of this piece of music. Five seconds of that piece of music, five seconds. It was unedited herbal. There was nothing they could. They gave me abuse for that for three years because I never remembered toe lay down the master shot, which is the entire song, and to go back later and do B roll. Plural Eyes is designed to solve that problem by synchronizing all those different individual shots of where I stopped and started the camera. Synchronized those shots into a timeline so you can edit it. So I ever since then I've been a very big fan of master shots. I do master shots all the time and go back and add the B roll later. So plural eyes is really good for multi cam, which is what we're gonna talk about next, but only valuable provided you got audio on all the video and all the audio clips to be able to do sink Jim. Anything else? Yeah, just a couple more. Larry l production would like to know in the audio analysis menu are the loudness sliders essentially doing the job of a compressor? A better way to think of it is they're doing job of a limiter, which is a more It's amore, um, restricted form of a compressor. Great. And Jason John would like to know. I'm sorry. Andre would like to know. Can you sink MAWR videos and audios at the same time, like 10 videos and 10 audience? Or do you have to sink them all one by one, You have to sink them one by one if the audio doesn't match if the audio matches. If, for instance, I have 10 cameras and ah recording off the audio mixing board. So I've got a stereo pair coming off the audio mixing board of a complete mix of the group, and I'm shooting it on 10 cameras. There's audio on 10 cameras because the audio matches across all those clips. Aiken sink all 10 clips, plus the audio all at the same time. If I have 10 audio clips which are not related, video clips which are not related, except that the audio and video of a single camera relates to a single audio clip, then you have to synchronize those one at a time because the way that it's looking, it's just looking for the audio to match as it matches from the video to the audio.
Class Materials
bonus material with purchase
Ratings and Reviews
a Creativelive Student
Absolutely one of the best & easy to follow teaching / learning sessions for this product. Larry has a great approach & insight into delivering a wealth of information from his years of experience that budding video engineers will certainly benefit from with a product that is powerful & great to use. I'm enjoying the journey to better understand & use this great product, expanding my experience in producing awesome video presentations. Great work Larry, & also huge fan of creativelive Keep up the great work you all do to assist budding producers in mastering their skills. Noel Blake Melbourne Australia
plb42
Final Cut Pro with Larry Jordan has been of enormous help to me just stating in FCPX. Larry has a unique way of getting the message on the basics across in an easy to understand manner. I have not yet looked at the entire course as I am practicing the steps as I go through the course. Many programs of FCP are not presented in the easy to follow manner thatL array does so well. I am 100% delighted with my purchase. I am in Sydney, Australia, and, due to the time difference it is impractical to view courses live. So I had to purchase on trust which in this case was a good choice. It would be good if Creative Live could perhaps rerun programs so overseas folks could view them at a convenient time. The courses still need to be purchased as I find it best to run it on another monitor and put what is taught into practice. Well done and thanks for the special offer in July.
a Creativelive Student
Attending this class was really a life-changing experience. Larry is a wonderful teacher and clearly on top of the program and methodology, and the way he structured the course, did frequent reviews and constant technique reminders (naming keyboard shortcuts as he did them, for example) really added a lot to the presentation. The depth of the class was very much appreciated, and his command of a complex subject showed that it was possible. I have wanted to understand FCP for several years and have only gotten the beginnings of a handle on it in the last 6 months or so. This class was an exponential knowledge upload and I hope will allow me to do lots of things I've only wondered about. I thought Jim was a good foil for Larry and did a nice job keeping things together, even when there was a technical problem. The value for me of being able to sit through the class before deciding to purchase was huge, and I am very much looking forward to reviewing the videos as questions come up. The class was very thorough and I didn't feel anything was being left out. Thank you so much for making it available.
Student Work
Related Classes
Final Cut Pro X