Lesson Info
30. Inspector Effects
Lessons
Day 1
1Introduction
18:02 2Key Terms
27:06 3System Configuration and RAID Storage
19:22 4Q&A with Creating an Efficient Workflow
19:36 5Interface and Media Management
31:02 6Importing Media Part 1
30:40 7Importing Media Part 2
11:58Ratings and Keywords
32:21 9Reviewing Clips for Edit
25:13 10Importing Clips
19:26 11Editing an Interview Demo
33:20 12Replace Edit and Timeline Index
32:50 13Compound Clips and Auditions
18:27Day 2
14Editing Review
13:34 15Trimming Part 1
28:43 16Trimming Part 2
39:03 17How We Hear
21:51 18Audio Key Terms with Q&A
12:14 19Audio Basics, Meters, and Inspector
31:01 20Audio Q&A
08:55 21Dual System Sound and Audio Analysis
28:58 22Multicam Editing Part 1
27:08 23Multicam Editing Part 2
15:02 24Transitions Part 1
23:27 25Transitions Part 2
24:06 26Formatting and Animating Titles
30:18Day 3
27Additional Effects
12:36 28Editing and Trimming Review
11:58 29Changing Speed of a Clip
31:31 30Inspector Effects
36:35 31The Effects Browsers and Generators
19:37 32Blend Modes
17:10 33Effects Q&A
13:58 34Simple Effects
16:52 35Intro to Color Correction
18:20 36Video Scopes
19:25 37Color Correcting for Video
20:28 38Color Correcting Skintone
23:11 39Color Correction Q&A
08:54 40Audio Effects Part 1
26:20 41Audio Effects Part 2
23:08 42Exporting and Sharing
21:28Lesson Info
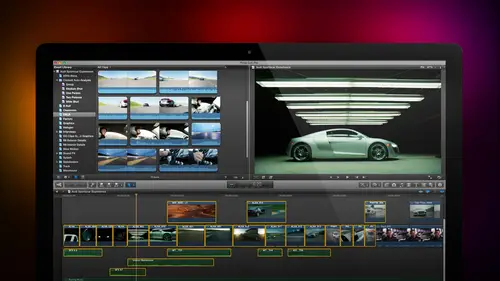
Inspector Effects
We'll pull in our grand teton barn that looks good we'll pull in a sunset clip that looks good let's pull in a mountain clip it's a blue clipper pulling a green clip that looks fine so we've got a we're going to leave these files in place again. This is not gonna last very far, so we'll just leave it in place normally I would recommend copping it in okay, we've talked about the fact that the re time menu allows us to change the speed of clips there's a lot of stuff we can do there's a lot of cool effects I'm just sort of introducing the concepts of variable speed constant speed fit to fill still frames that stuff but there's even more cool things, especially for sports high school sports is an instant rewind and instant replay fun to play with makes you giggle no small children were injured in the making of that effect we've talked also about the inspector the inspector is where we make changes so let's take a look at a few inspector effects one of which is oh I need a doctor sir clip ...
dr cerf right there double click and let's pull in uh teaching has probably got a close up is perfect and we'll set an end the letter I will set out the letter o and will create a new project command and and we'll call this inspector effects and I'll just put my project in with the media because I'm gonna have a couple projects remembered the event is just a folder that stores stuff, and so we're going to create a folder that holds everything the letter e there's dr cerf shift z to get him to fill out for time and I want to add this wonderful hawaiian vacation that he's talking about we're going to set in for the waterfalls will set out for the waterfalls type the letter q and there is the hawaiian vacation that dr surface talking about and look at this oh, we have a problem doctor surface of four by three aspect ratio waterfall sixteen by nine what I need is I need tohave the waterfall have the same aspect ratio is dr cerf so I don't see his tie and his forehead hiding underneath the waterfall, so select the waterfall and go to the inspector under video tab. We're gonna be exploring all of these settings, but on the video tab let's solve this one first it's in a category called spatial con form the default setting is fit. What if it does is it takes the entire image and scales that upper down so the entire image every pixel fits inside the frame phil and largest the picture so that there's no blanks at the top of the bottom notice how I've zoomed in to the waterfall by losing some pixels on the sides, I've zoomed into the waterfall so that now I don't see dr surf it all. This is a really fast way to convert an image which is in the wrong aspect ratio for by three to fit inside a sixteen by nine space or a sixteen by nine image widescreen to fit inside of four by three space select the clip go to special con form if you're a still photographer doing moves on the stills what's called pan and scan or ken burns effects you set the special con form to none this displays the image at its full hundred percent size you can see that this is a really big image it's nineteen twenty ten eighty that's been put into a very small project and now I can do all kinds of moves around zooms pans, tilts up and down reframed the image so the setting special con form toe none allows you to then change the framing. The formatting of that image will talk more about that in just a minute. So we're going to comeback to maura of these effects but let me show you another let's go to this this is michael this is michael shaw's dog michael shot this with a cannon sixty d he shot a handheld which you can probably tell because the back wall is bouncing all over the place hand held with standard f is not a problem because the image size itself was solo resolution in such a small size that no motion sickness occurs. But as resolution increases, the ice starts to get fooled into thinking it's looking at reality and justice people get seasick on cruise ships they also could get seasick watching handheld video so as resolution increases it is critical that you not hand hold a camera because it will cause motion sickness on the part of your audience, which means we need to smooth this out so that it becomes more stable maybe not like a tripod but at least stable enough not to have the audience throw up all over the tv set there's a really neat set of features inside final cup that makes that possible all effects are applied to the clip select the clip, go to the inspector keyboard shortcut is command for and scroll down until you find a section called stabilization to turn on and effect you click this little square here stabilisation gets turned on turning it off you unchecked the blue so turn it on and we have two types of stable three types of stabilization automatic inertia and smooth camp smooth cameras with final cut seven as well this final contents initial release inertia cam showed up with the town one release an automatic automatically selects between them I'm going to go with smooth camp earner shit cam would also work an automatic means final cuts going to select but smooth countess a good choice and notice that there's three settings translation smoothing rotation smoothing and scale smoothing translation smoothing will speak well. Smooth the image as it's moving horizontally or vertically. If the picture moves to the right, then what final cut does is it takes the entire frame and moves it to the left the exact same amount. So everything seems to be holding still cause the pictures moving this way and the frame is moving that way they cancel each other out if the picture moves up, final cut moves the frame down by the same amount. So the image seems tto hang around in the same spot, but what happens is edges of black appear around the images. It's being shifted from one side to the other to solve that final cut zooms in on the image enough that there's no black edges that are visible to give the illusion of being stabilized. The more you stabilize, the more it has to zoom in. And depending upon the resolution which you shot, the more you zoom in the mohr blurry your image make it so your goal and stabilizing is to stabilize enough so your audience doesn't get sick yet not stabilized so much that we zoom into the picture, it loses focus translation smoothing sick ails the x and a y horse on one vertical rotation is rotation on the z axis I generally turned that off slide it all the way to left sliding it left turns out ofthe scale smoothing smoothes out of jerky zoom don't need to scale that I'm going to turn that off so sliding a slider all the way to the left turns off that setting translation smoothing I want to keep on so select the clip and let's take a look this is without and this is with see the difference this is look it's not on a tripod there's still a little bit of handheld ness to it but nobody's going to get sick watching it look at how much more stable that images then when we look at it hand held see the difference well there's another issue and this one showed up we start to shoot with dslr camera it's called the rolling shutter issue watch what happens when you do a very fast pan or a very fast tilt with a dslr camera watch as I start to pant watch how the top of the image is going to shift before the bottom of the image starts moving I'm using the right arrow key it's my fault the bottom shifts left before the top starts moving see that shift and then as I quickly panned, look at the trash cans and look att time out due to do don't look it would be useful if I turned rolling shutter correction off all right never rehearsed jim never worse watch how the bottom shifts there see how it whoa see how the bottom shifts as the pan starts and that's because on a dslr when the light comes in the way lenses work, the images actually turned upside down so the top of the image is actually at the bottom of the center and electrons are stripped off the sensor starting at the top edge and then the electrons were pulled off from the sensor till it reaches the bottom edge that pulling the electrons off the sensor depending upon the type of sensor takes a finite amount of time. If you're locked down on the shot, he'll never notice the fact that sensor is not being discharged the same time but for many effects where you're doing a fast pandora fast help what happens is stuff leans notice how the garbage cans are leaning the light post is leaning because the bottom is being stripped off before the top the electrons are which means that the pan is going during the electron discharge which means the top of the image is not at the exact same time as the bottom of the image but it's a smooth slam because the entire sensors being discharged smoothly a supposed toe interlaced fields so we have to sort of compensate the bottom of the picture different than the top that's what rolling shutter correction does and all you have to do is in the inspector. Turn on rolling shutter watched the picture in to one wolf tara it's, now straight. This is before that's after this is called jelly shuttered called rolling shutter it's, caused by dslr cameras that are panning or tilting too fast. You're going to just the amount of the correction by clicking on low or extra high. I in the stuff that I do medium is almost always the best choice. It's the default setting. All you have to do to compensate for rolling shutters on dslr cameras is to turn the effect on. Is that not cool? I like that. All right, let's, take a look at something else. Let us take a look at, uh, we want to create picture and picture effect. This is a traditional effect where, uh, somebody is talking and we wanna have another picture. Uh, all right. Here's, the story here. What does a mountain lake think about in its idle time? Well, it thinks about being a dynamic hawaiian waterfall is what it thinks about it wants to not just sort of sit there doing nothing. It wants to go places, so we wanna have our mountainside retreat dreaming about becoming a hawaiian waterfall makes sense to me, I think there's a story there, somebody could write about that, but the problem is in order for me to see two pictures at the same time, we have to change one of the main rules inside final cut and that rule is whenever one clip is above another clip, the top clip is always one hundred percent full screen, always one hundred percent opaque, which means the on ly way that I can see the blue clip below the green clip is for the green clip to not be one hundred percent full size or not be one hundred percent opaque. Well, we'll talk about it see in the next section for now, I want to talk about picture and picture let's just make this clip smaller so we can zoom in just a bit, shift z to get stuff to fit and the switches instantaneous as I move from one image to the next it's a cut to the higher layer. Well, we don't know how to change the clip in the timeline because we can't all we can do it said it clips the timeline. We make changes either in the viewer or the inspector let's do the easy way first let's hide the browser control command one and noticed the square down here in the low left corner of the viewer when you click on the arrow next to it, we have three controls that could be turned on in a viewer transformed controls, crop controls and distort controls. We're going to be going through all three of them in the next twenty minutes transform allows us to change the size or the position of a clip when I select transform this icon now goes blue from grey we get a done button on top right corner and some key frame controls in the top left corner and the image itself is bounded by blue boxes. If I grab one of the blue boxes and I click hold and drag, I can now make the top selected picture smaller I can make it smaller asymmetrically by grabbing one of the blue buttons in the middle of the side or I can make it symmetrical by grabbing one of the corner boxes if you look really, really closely and I'll zoom in so you can see it noticed there's a blue dot in every corner plus a blue dot in the middle of every side the blue dots in the corners do symmetric scaling the blue dots on the side do asymmetric scaling to move the picture click hold on drag anywhere in the centre of the picture I don't recommend dragging on the white dot we'll talk more about that in just a second, but if I wanted to put my my picture say, down here the lake is dreaming of being a waterfall. I just have to click inside the image in dragon this blue dot allows me to rotate the image, and I can grab the blue dot and rotate the waterfall so they flow uphill. It's an australian waterfall or they flow downhill, so hawaiian waterfall water falls don't really flow up in australia. I don't want to have all kinds of emails. I'm just trying to make a small, funny joke, because otherwise people fall asleep anyway. If you hold the shift key down and grab this notice, I could drag it out notice the line has gone yellow means I'm constraining the movement to forty five degree angles, so holding the shift key down allows me to constrain movement so that I have it be perfectly horse on alert, perfectly vertical and that's it when I play this without having to do anything else. There's my waterfall, there's my lake, dreaming of a waterfall and that's it. I can select the opening do command t dua dissolve, cue the waterfall, the waterfall is there and we can do a fade out of the un command tea, and now we have the lake dreaming blissfully of turning itself into a waterfall and it goes back to being a mountain lake. That's what picture and picture is a picture in picture is stacking one or more pictures on top of the image? Well, it's just stack one more picture on here to prove that we can let's find a golden sunset type the letter I typed the letter o type the letter q dragged the sun set over to here and let's make this smaller so we can see all of our tracks at the same time and grab the edge of this notice this icon right here this is the icon for snapping snapping has two keyboard shortcut the letter end because skimming and snapping both start within us we couldn't use us for both and his traditional in final cut what snapping does is notice that as I I've got snapping on as I grabbed the play head and drag near the edge of a cliff it's snaps to the edge of a cliff if snapping us off I can drag and it doesn't snap at the edge of a clipped snapping is wonderful when you're doing effect and you're doing editing and it's miserable when you're trimming. So when you're trimming clips turned snapping off click this icon or types the letter n and when you're doing affection added in clips, the timeline turned snapping on skimming letter s and snapping the letter n and they're both controlled in the top of the timeline let's just turn snapping on turn snapping on and notice that now my grand canyon sunset is one hundred percent full screen hundred percent opaque and sitting on top and blocking all the clips below it we click the transform button to turn it on and now I've got sunset appear stacking order determines foreground if I grab the waterfall clip noticed that the waterfall is now on top of my grab grand canyon grand canyon is now on top so I have anyone I'm done sizing all this clique that done button this is how we create a picture in picture were able to scale the picture using the transform settings interviewer except bernard is not happy bernard is sitting on the couch worried he says larry I do not do mouse driven effects work I am a precision editor I do precision editor stuff I wanna have precise control over exactly where that image is placed none of this moving around in a viewer now be pam be kind by guess and by golly I want to know that this is scaled the forty percent while the easy thing is we can do that by selecting the clip and going to the inspector remember the keyboard shortcut is command for and see this transform option right here this is designed for people that want control which is every director that I've ever met the transform setting allows me to precisely determine by pixels or percentages remember that preference set we talked about yesterday exactly where it's going to be placed horizontally. One of things I really like about final cut and one of things I really don't like about premier is that final cut defines zero zero point as the dead center of an image, which for video makes sense because now I can move left by moving negative numbers, move right by moving positive numbers anyway to move a clip, I can now enter the number I'm going to say fur, set this to three hundred, just click it, type it or type it and say minus three hundred or I can click, hold and drag on the number to change the clip horizontally, and I can look at what it is. I can also click hold on drag to change this vertically or type in the position that I want to have the number to achieve. Rotation it's a negative number moves left positive numbers move right negative numbers move up positive numbers unless they change that, they keep changing this. In final cut seven negative was up and final cut ten negative is down they decided to follow the cartesian geography coordinates sonny way up, move positive numbers noticed the numbers getting higher down moose negative numbers I have to learn all knew arithmetic and then rotation. You'll never guess what rotation does you are so quick and then scale I can say I want to have this scale to exactly fifty percent or I want to have it scaled to exactly thirty five percent. I want to have it rotated exactly thirty degrees. What bernard needs in terms of precision is totally doable inside the transform settings inside the inspector. Now we can animate this and we'll talk more about that a little bit later because I really have to get a couple of other things covered. But just as we talked about key frames inside audio, a key frame is a point of change during playback. We use key frames in the transfer, all right, all right, I'll show you how this works because I can't stand jim pouting when he can't learn how to do in effect, hide the clip. The letter v makes a clip visible or invisible the letter viv clip is still there it's just not hanging out anymore and I'm going to grab this clip. Turn on transform, grab it down, drag it to here, go to the switch, turn on show action safe and title safe because there's no reason to start to put affection if you're not paying attention toe action entitle safe, I frame everything text and graphics, so they're at or in action safety outer rectangle turned the switch click it on what I want to do is I wanna have this piece of video fly in from the right hand side and then drop down so the way that you work with animated effects that I found works the best is you always create the finished look first, once the finished look has done, it becomes really easy to create key frames to transition into or out of that look, so I wanna have the fly in started to beginning the clip, and I want it finished by there, and I want to have a flyout starting about here and fly out over the edge of the end of the cliff, select the clip, go up to the transformed manu and notice that when I'm in the transform menu, as I moved to these different elements, notice that grey diamond that shows up you can see it right there. See that grey diamond when the diamond is gray, there is no key frame at the position of the play head when I click it notice the diamond goes gold there's, now a key frame at the position of the play head. So I've now said a key frame for the clip to be right where it is I'm going to find a spot where I wanted to disappear, I want to start moving there, create another key frame now I have determined that from key frame thiss first key frames that I said to the second cue frame that I set that clip is not going to change position I'm going to go to the very first part of clip finding where the shot starts right there and click a new key frame all right gonna go one more clip past it and click a new keefe uh does not like me we'll go to frames in click a key frame and drag this horse on lee so it goes all the way over off the screen fact, I'll go up to the fifth manu and fit this to twelve and a half percent and I can now see the outer boundary. This gray area represents the element of the image that's outside the frame that's going to be this's my picture but this is like what adobe no all this page maker called the paste board the area work area around the frame and now we'll go over to here go all the way over to the end find a spot where last shot is create under transform created key frame change the exposition we're going to do grab the y position have it go down and now as we play this well q back shift command efs whoa there it is coming in and what with jericho's going out let's do that again, our mountain stream plays on soon it will come in there it is we have a bush because otherwise if you don't have a wish nobody wants to watch your video and so we've now animated using the transform command animated that little picture and picture we have as many pictures pictures as we want jim dr art bark has been with us for all three days wants to know can you add a border or a soft edge to the picture in the picture yes next section great thank you soft edge yes border yes and drop shadow yes um okay one more thing let's do something else the transform setting which is this first option allows us to change the size the position and the rotation of a clip the second setting called krop allows us to do something different so let's just command khalid everything and let's work with our little house on the prairie we'll create this to be seven twenty p on dh click okay shift g will make this a little bit bigger just so people can see what's going on and runs twenty seconds that's too long let's make a run about this long okay if I wanted to change the size of this or moving around I'd work with the transform setting but I want to crop the image so when I select crop I have several choices that occur and let's go back up and we can control that from the viewer or we can control it from the transform setting. I'm going to control this from the transform setting because for some reason I'm not seeing my on screen effects let's just take a look here. Yeah, okay, we'll do this from the inspector we're going to hide, transform and show crop aiken do trims crops and ken burns if I select trim and grab the left edge, notice that here I now have blue boxes I'm going to grab this box right here and drag in when I click done noticed that I've reduced the size of my picture let's put the waterfall below it's just so we can see what's uh so work notice that I've made the edges of my little house on the prairie transparent I've cropped it of the image itself has been reduced this is called trimming I'm not scaling the picture it's not changing size of making the edges transparent and I clicked out it I'm done if I go back to crop these air the onscreen controls I was looking for this is the second this is cropping what cropping allows me to do is to scale the picture so that I am going to take I wantto have just that part of the picture fill the frame when I click done notice that the image itself is enlarged so that it fills the frame and I see more of the barn and much less of that grass around it. I'm going to reset the crops we can see. This is where we were. And that's where we are cropping allows me to select a portion of the frame and zoom into it. The last part of the frame, the last part of cropping, is a new effect that has been discussed a lot, but it's new for final cut it's called the ken burns effect on what that is is when I click ken burns. Two screens show up let's, just try and make this bigger so you can see what's going on two screens show up the green represents the starting image. The red represents the ending image I want to start. I'm going to switch this so click the switch button. I want to start full screen this's the switch button right up here. So I just switched the position of the green and the red and I want to end up zooming into this portion of the barn. So we're going to do a little bit of a ken burns move, so we start full screen will talk about them coming out of the front door, the barn just before the actress comes out of it too tight, come back out now. This is not the same resuming with the lens this's a digital zoom so we're going to end up with some image degradation but it'll work for what we're looking at here look at it starts slowly it zooms in it then comes in for a subtle landing and parks the ken burns move always accelerates and decelerates. If you want to do a ken burns move without the acceleration, then what you do this school that showed up with the ten one release you turn on cropping, turn on cropping and click inside one of the ken burns rectangles ease in and ease out means that slowly speeds up and slowly slows down ease in means that slowly speeds up he's out means that slowly slows down and linear means it's a straight line. So now when I click done notice how nowthe speed is consistent across the entire duration of the clip there are strong debates on both sides. Some people think linear is too mechanical to to um artificial and they liked the organic nature of ease in and ease out where it has a sense of a camera operator running the camera where they get start slow and speed up and slow down again. Other people feel that the easy knees out is more organic and they like that well in the past we were locked into just easy and he's out and bar fights broke out you don't need to argue anymore. You can pick the one you want, so we could say I want the acceleration, click done that applies the settings and then hit the space bar, and it does this nice ease in and lands gently. The thing you have to keep in mind about the ken burns effect is that it runs the entire duration of the clip. If you need to go faster or slower, you need to change the duration of the clip. The other way we can do this is using key frames and key framing under transform key frames. The scale the position commands, just like we did, is that little things. If he didn't and sip it out, we would do the same thing. Your stuff. We would apply key frames to adjust its size and its position totally doable, and in the past it was the only option. We had to be able to get a linear move for a can burns effect. When you are doing can burns effects on stills, it is essential, essential that you said special con form to none because you want to be able to take advantage of the full size of the still that's created. Also, it's important to remember that final cut is a video editor. It is not a still senator in photoshopped you create images which are tens of thousands of pixels on aside for doing the side of a bus or a gigantic poster or ah high resolution magazine at final cut is designed for video editing where high resolution is considered for thousand pixels on the side I mean jim doesn't even touch an image of it's less than ten thousand pixels it's not worthy of being art directed final cuts going to choke so don't load quadrillion megapixel images into final cut try to keep your still images if you're doing a still image montage to five thousand pixels on a side or smaller because final cut is a video editor designed to add it thousands of frames sequentially as opposed to photo shop which is designed to added one image which could be gigantic and size so keep the size pixels say five thousand pixels on a side or less that's not a hard requirement it's just life is so much better when your images are not really really big let's take this shot there's another choice called distort it's also part of the inspector I click distort and now let's just hide our images what distort allows me to do is to do what's called corner pinning I'm going to grab this and drag it up to here I'm going to drag this and drag it over to here gonna grab this corner drag it to hear crowds this corner drag it up to there and what I've just done is I've now got this video playing on the side of a truck driving down the highway, or I have the video playing let's go to its smaller size, I have the video playing on a skyscraper that I'm looking at or it's playing on a road that stretching out into the distance, the distort tool allows me to do all kinds of weird, shape based effects tohave video look like it's playing on a building the side of a moving truck on the street. You see these in commercials all the time where a person's face is turning and smiling except the face is stuck on the side of a building. We also use blend modes, which we'll talk about in the next segment to make the texture of the building show through the video of the person's face. What we've done in this segment is we have looked at a variety of different effects. We started with a review of editing, reviewing clips, editing clips, trimming clips because that's, really the heart and soul of why you use the video editor, then because it's time to just take a deep breath and have a good time, we're going to spend all of today looking at effects in the way that we started was changing the speed of a clip, this involves a still frame hold frame constant speed changes to fit to fill that a variable speed change. All of which gives us the chance tto emphasize different things in a piece of video most of the time fast motion is comedic most the time slow motion is politic most of time freeze frames allow us to put a text clip up to say, look at how fast the skier is going or how fast the runner is running. Then we looked at a nen tyre lee different category of effects called inspector effects inspector effects are applied toe every clip you don't have to do anything, you don't have to add anything, they're just they're ready for you to work. Inspector effects include the transform command, the crop command distort, rolling shutter image stabilization and one that we haven't talked about yet that we are going to spend a lot of time with in the next segment, which is opacity and, more importantly, blend moz. We'll be looking at the power those provide and effects in the next section as we continue our exploration of still images layered photoshopped images and mohr effects that you can shake a stick at its all effects all day and jim is yours great! How about a question before we go out, you got it great, this one is from b who says can cropping be used to create a close up from a video when shooting an interview with just one camera, it would be nice to be able to crop occasionally for a close up. No, you would not use cropping for that, but you can do what you want to do. So, for instance, let's, just really quickly show you this let's say, with dr cerf let's, say, with r r our house on the prairie house on the prairie, a shot it's a ten, eighty clips, so I shot of higher resolution. I'm putting this into a seven twenty piece sequence with the clip selected. You go up to the inspector, go down too special con form, and you set it to none notice that now I'm seeing the image at one hundred percent size as you want to create a close up, you go to the transform menu, click shows you can see it, and as I adjust scale, I khun say let's, go back to a wide shot, or go to a close up and just change the horizontal and the vertical position to get the framing thatyou want based upon the scaling that you need now an important point notice here, the scale is indicating the percentage of the image you will have image, quality loss if you scale larger than one hundred percent. So you want to be really, really careful not to scale in too far, because thie image gets blurry lines, get stair stepping, that kind of thing. So if you shoot higher resolution, which is what bernard and I were talking about, and then you set the special con form to none, and then you adjust the size of the close up using scale. You do exactly what you want to do. Wonderful. Thank you, sir. You're welcome. So I have a request and about some about some keyboard shark. It before we go out, wasn't for you. I would never remember command for toggles, the inspector open and closed control, the control, a toggles, the display of the video and audio timeline animation controls, shifty, displaced, transform tools and a viewer shift. C displaced the crop tools and a viewer option d displays to distort tools in the viewer option kay creates a key frame at the position of the play head. An option semi colon and option apostrophe jumps to the previous on the next key frame.
Class Materials
bonus material with purchase
Ratings and Reviews
a Creativelive Student
Absolutely one of the best & easy to follow teaching / learning sessions for this product. Larry has a great approach & insight into delivering a wealth of information from his years of experience that budding video engineers will certainly benefit from with a product that is powerful & great to use. I'm enjoying the journey to better understand & use this great product, expanding my experience in producing awesome video presentations. Great work Larry, & also huge fan of creativelive Keep up the great work you all do to assist budding producers in mastering their skills. Noel Blake Melbourne Australia
plb42
Final Cut Pro with Larry Jordan has been of enormous help to me just stating in FCPX. Larry has a unique way of getting the message on the basics across in an easy to understand manner. I have not yet looked at the entire course as I am practicing the steps as I go through the course. Many programs of FCP are not presented in the easy to follow manner thatL array does so well. I am 100% delighted with my purchase. I am in Sydney, Australia, and, due to the time difference it is impractical to view courses live. So I had to purchase on trust which in this case was a good choice. It would be good if Creative Live could perhaps rerun programs so overseas folks could view them at a convenient time. The courses still need to be purchased as I find it best to run it on another monitor and put what is taught into practice. Well done and thanks for the special offer in July.
a Creativelive Student
Attending this class was really a life-changing experience. Larry is a wonderful teacher and clearly on top of the program and methodology, and the way he structured the course, did frequent reviews and constant technique reminders (naming keyboard shortcuts as he did them, for example) really added a lot to the presentation. The depth of the class was very much appreciated, and his command of a complex subject showed that it was possible. I have wanted to understand FCP for several years and have only gotten the beginnings of a handle on it in the last 6 months or so. This class was an exponential knowledge upload and I hope will allow me to do lots of things I've only wondered about. I thought Jim was a good foil for Larry and did a nice job keeping things together, even when there was a technical problem. The value for me of being able to sit through the class before deciding to purchase was huge, and I am very much looking forward to reviewing the videos as questions come up. The class was very thorough and I didn't feel anything was being left out. Thank you so much for making it available.
Student Work
Related Classes
Final Cut Pro X