Lesson Info
34. Multi Camera Editing: Audio
Lessons
Class Introduction
12:34 2Exploring Final Cut Pro X: Navigating the Interface
32:32 3Exploring Final Cut Pro X: Project Timeline
18:23 4Exploring Final Cut Pro X: Basic Editing
16:07 5Refining Your Edit Introduction
15:15 6Refining Your Edit: Trimming
37:06 7Refining Your Edit: J and L Cuts
09:00 8Refining Your Edit: Roll and Overwrite Edits
06:25Refining Your Edit: Slip and Slide Edits
03:51 10Refining Your Edit: Auditions
09:27 11Setting Up a Project From Scratch
17:03 12Setting Up a Project: Importing Media
35:52 13Setting Up a Project: Keywords and Smart Collections
21:07 14Working with Audio
13:56 15Working with Audio: Syncing
23:40 16Working with Audio: Mixing
21:28 17Working with Photos and Graphics
09:55 18Working with Photos and Graphics: Scaling and Positioning
14:05 19Working with Photos and Graphics: Ken Burns Effect
15:17 20Working with Photos and Graphics: Animating with Keyframes
15:51 21Filters and Transitions Introduction
03:04 22Filters and Transitions: Applying Transitions
18:13 23Filters and Transitions: Applying Filters
14:23 24Titles and Generators: Lower Thirds
11:43 25Titles and Generators: Titles
05:40 26Titles and Generators: Backgrounds
11:46 27Advanced Skills: Color Correction
38:35 28Advanced Skills: Speed Changes
15:48 29Advanced Skills: Stabilization
05:53 30Advanced Skills: Green Screen
13:11 31Multi Camera Editing
06:04 32Multi Camera Editing: Organizing Your Media
08:54 33Multi Camera Editing: Creating a Clip
07:12 34Multi Camera Editing: Audio
09:25 35Multi Camera Editing: Working with 4K Footage
06:56 36Finalizing, Exporting and Archiving: Final Checks and Tweaks
04:34 37Finalizing, Exporting and Archiving: Exporting Final Project
25:46 38Finalizing, Exporting and Archiving:Cleaning House and Archiving
15:22 39Bootcamp QnA
14:53Lesson Info
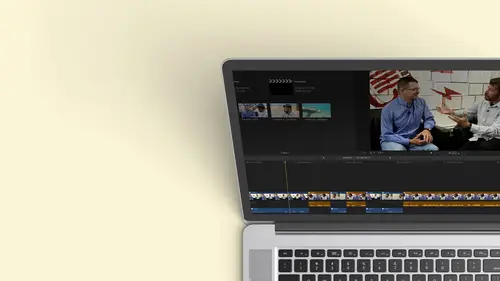
Multi Camera Editing: Audio
Let's look at a couple of other situations. Let's look at what if, Um, I had separate audio. And also, let's take a peek at the four K stuff to see how that works. 11. It's actually Ah, pretty cool little trick. So I'm gonna go back here and we have audio for the interview. Go ahead. Close my angle, Viewer. For the time being, just to give me a little more real estate. Okay, Hide angle shift. Command seven. And open this up a little bit. Now. One of things I, uh, I didn't talk about is that you saw me rearranging the workspace, and I did talk a little bit about you Can save a preference for any workspace. There's some default ones. So the default ones are for organizing color fax. I might have touched on it a little bit if I want to just reset it back to that. I can click command zero. It just kind of is a great get me back to where I want to be. Commands their resets, my workspace. I confined everything. So I'm doing that. And I know these are the audio files that I want to work with.
How about music? Yeah, everybody. Music. And these air long I've recorded, like, 89 minutes with the clips are only gonna be like 20 seconds. And we were situated on top of this nonsense with, like, little houses in one house we would sleep in one house needs and one. So this is the part of the where she's talking about when she goes to Italy. And if I want to know beforehand if I needed to make sure this audio was good as long as I selected in the inspector, I can make sure that it's been analyzed. It did increase the loudness. I'm gonna remove some of the noise. Now we're ready to start sinking. So I know this is part of the Italy story. I'm gonna go ahead and drop that onto Italy because that now puts the keyword of Italy on my way form. And if I click on to Italy, if I actually dropped it right, this should be everything I need for the Italy footage. Multiple angles. So take a quick Listen. Is this the right story? Need my professor from Zulia? Right? There we go. That's one you would invite some of her best student because that's good. Fight some of her best. So this is a different part of the story. So it's these three angles are working command. Click the three video angles, and this is something you need to be careful of. This will bite you. I want to think everything together. I had marked and just grabbed one little sound bite of here. Previously. If I leave this this way when I create the multi cam clip, this will only use that very small part when it makes the multi cam. So it'll be just nothing a slug black the beginning and afterwards and be like, what happened to my angle? Okay, if that happens, first of all, you bang your head going. What's going on for about 1/2 hour now you know that's the signal. Ideally, before you do it, Option X clears it, or, if you know there's only a few sections you want. Select that. But if you've already created the angle, if you double click on the multi cam we saw at the very beginning, you step inside and you can see all the angles. Well, you can see that it's only using a little part. And because the media is there, you can grab the edge and stretch your back out so you might have built it already and go. I don't want to do this again. You step inside this matter Fact, let me intentionally make this mistake so you can see how to fix it. So I'm picking that and I'm adding my audio, Some command clicking at four areas. I'm going to say new multi cam clip. We're going to call it three camera interview. I think if I put interview on it as a multi camp, it should go into my smart collection. I'm gonna hit, okay? I don't want that to be four K, because I'm mixing stuff. Here it. Okay, let's hope now it's taking a long time because this story is only about 20 seconds, because I, you know, I trimmed it, but my audio was nine minutes. I let it roll for nine minutes on that phone, so it has to find out the right place. So, as you see, I I only had a stall for about 15 seconds. It's very, very fast. So now I have this. If I open up my close this window here and I opened up my angle viewer and I start skimming through this, you'll notice. First of all, there's so much missing because of the audio. I'm gonna actually delete everything from down here. We're gonna just work with the same timeline. If I threw this in just so you can see I'm gonna hit the e key for the A pendant. Most of this is just the audio, and I don't see anything. As a matter of fact, there is where she started to tell that story. Okay, here's my little piece. So I'm gonna go ahead and I'm going to do a option. Left bracket cut off everything. The head fast forward to J. K L. That's probably the end of the story. She's still talking that we go and I go ahead. Option. Right bracket now shift Z. I could see the whole thing, and I can start seeing where she's talking. But that's the one frame that kind of just comes and goes. Okay, double click to step inside. There's all my elements, and I can see in some cases that my video is not that long. And I have to figure out where that one is. What? There it is. It's so small. I could barely see it. Okay, so it could literally be a frame. How can I make that longer? Well, I can try hitting. Try grabbing the edge. Try zooming in. There we go. I get enough of it. And now I can start grabbing a piece, just stretching it out. So you don't want to have to do this. But if you did make the mistake, that's how you can fix it. Okay? Stretch it all out now. A couple other things, Perhaps I don't like the water off the clips. Maybe I want that wide shot to be camera one. Just like it. That way I can change the order on the far right side by grabbing any of these and bringing them up and down so I can switch my angles once I've stepped inside of my multi cam clip. So now that's gonna be angle one. If I want this actually grabbed the wrong one, I want that to be one. There we go. And then this all this other already. So now I'm good to go. Okay. Here's my audio. I don't want my audio on one. I want that down. So I'm just gonna bring that down. So I've reorganized it exactly the way I want. I don't have to do any trimming here, because when I step back out of it, that's just the chunk that I have in my timeline. Okay? Two elements to talk to each other. Now we're ready to start switching. I want to make sure that I'm using the good audio. So as a couple ways I can do this. I can either hold down the option key, switched audio, and then click because I hold down the option cause I don't want to cut. And now the good audio is over here. And did you notice I got to hit the right button to do that? Hold that down option. Click on that. What would I probably dio I could do that, but most likely I'd right click on it. I choose active angle and I just choose my audio that way. So now my audio is nice and clean on the bottom. I go over here, I said, I'm just going to switch video. I'll go ahead. I'll hit play on one house. We would I've done my cut. This camera ran out of battery, so it stopped. But I still was able to go and it just switched the video. And I have this nice, clean audio, and that's really very cool. The other thing to keep in mind is that let's say I really was doing an interview and I had a mic on me and she had a mike on her so I could want to switch audio when I cut back and forth between the two people. Well, a beautiful thing. And this is what one of the lovely things about final cotton I'm gonna zoom in a little bit. Here is Let's suppose I needed to do a split added because I was talking and she was talking and I want both mikes to be live, but I want to make sure that, like I don't cut off one person, the other one, because I wasn't being picked up. It's really easy to Dio. All I have to do is separate the audio from the video. We saw that earlier, So let's imagine this is me. This is her, and I could go ahead, Grab this. Now, this is longer. You can hear me talking. You can hear her answering. I didn't have to do anything tricky, and I don't have to worry about overlap. We learned in the audio. If I wanted to be smooth, I could go ahead, grab that little fader bar. I could go ahead and fade that in. I gotta make this little bit taller. But that's one of the really cool things about working with multi m. It is that easy. I'd like to say it's harder and give you a lot more complex instruction, but it is that easy.
Class Materials
Bonus Materials with Purchase
Ratings and Reviews
a Creativelive Student
Wonderful. This is the first time I've seen any of Abba's classes, and he's a great teacher. I've been watching the live sessions for the past few days and have picked up a ton of great tips that will indeed speed up my workflow in FCPX. He's a great teacher, and does a wonderful job of setting people at ease, ie. where he says things like, 'there's no trick questions', and times where he will click on something wrong, then he'll go back and show his mistake (pointing out his minor mistakes are actually a beneficial lesson). In all, wonderful wonderful wonderful. Thank you!
Lara
Fantastic teacher. I enjoyed every video, super worth it. I've been reluctant to jump into FCP X since it got upgraded from FCP. Now I feel confident to work with it again. Seems pretty self explanatory, but I am glad I watched the course. Abba covers pretty much everything you need to know. I also loved his personality, made me want to learn more each day.
Alan Pole
Absolutely brilliant. Abba gets to the point, is clear, organized and articulate, and lays it all out in a manner that quickly brings your confidence level from zero to hero. Highly recommend this to any photographer who wants to blog, build ads, or include video in their offering. I feel like an amazing new world has been provided to me. Thank you!