Lesson Info
32. Multi Camera Editing: Organizing Your Media
Lessons
Class Introduction
12:34 2Exploring Final Cut Pro X: Navigating the Interface
32:32 3Exploring Final Cut Pro X: Project Timeline
18:23 4Exploring Final Cut Pro X: Basic Editing
16:07 5Refining Your Edit Introduction
15:15 6Refining Your Edit: Trimming
37:06 7Refining Your Edit: J and L Cuts
09:00 8Refining Your Edit: Roll and Overwrite Edits
06:25Refining Your Edit: Slip and Slide Edits
03:51 10Refining Your Edit: Auditions
09:27 11Setting Up a Project From Scratch
17:03 12Setting Up a Project: Importing Media
35:52 13Setting Up a Project: Keywords and Smart Collections
21:07 14Working with Audio
13:56 15Working with Audio: Syncing
23:40 16Working with Audio: Mixing
21:28 17Working with Photos and Graphics
09:55 18Working with Photos and Graphics: Scaling and Positioning
14:05 19Working with Photos and Graphics: Ken Burns Effect
15:17 20Working with Photos and Graphics: Animating with Keyframes
15:51 21Filters and Transitions Introduction
03:04 22Filters and Transitions: Applying Transitions
18:13 23Filters and Transitions: Applying Filters
14:23 24Titles and Generators: Lower Thirds
11:43 25Titles and Generators: Titles
05:40 26Titles and Generators: Backgrounds
11:46 27Advanced Skills: Color Correction
38:35 28Advanced Skills: Speed Changes
15:48 29Advanced Skills: Stabilization
05:53 30Advanced Skills: Green Screen
13:11 31Multi Camera Editing
06:04 32Multi Camera Editing: Organizing Your Media
08:54 33Multi Camera Editing: Creating a Clip
07:12 34Multi Camera Editing: Audio
09:25 35Multi Camera Editing: Working with 4K Footage
06:56 36Finalizing, Exporting and Archiving: Final Checks and Tweaks
04:34 37Finalizing, Exporting and Archiving: Exporting Final Project
25:46 38Finalizing, Exporting and Archiving:Cleaning House and Archiving
15:22 39Bootcamp QnA
14:53Lesson Info
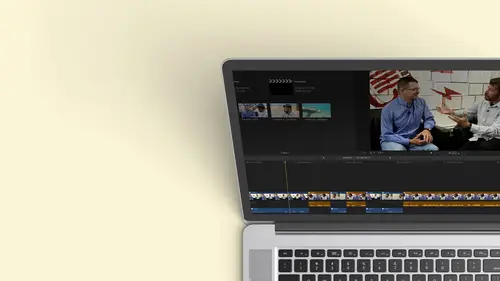
Multi Camera Editing: Organizing Your Media
So I broke this down to unique stories when I was cutting it together just cause I wanted to isolate it. So I said, OK, here's the section where she's talking about, um the Hello, who? Here's who I am. Here is one of my first ballet lesson. Here's one about the fact I play piano are teached other teachers because I didn't want to have this whole big long thing, so it helps me organize it. So if you are doing a multi camp, you don't want to a modicum of everything. You want to do it into digestible chunks. Okay. Uh, not that you can't. You could have up to 64 different cameras that you can sink together. You could probably do 64 cameras that are each running an hours worth of footage. That's a lot of media. That's a lot of sinking. You can do it, but just make the decisions before you get started. Sometimes it is easiest to cameras. So what I would normally do. And I'm gonna get rid of this image on the right for a second. I'm just gonna close this out, get a lot of real estate here. I'...
m gonna pick my three angles Now if you notice. I did break this up with my all the interview stuff, but then this one where she's talking about Italy. Uh, I'm gonna go over here to the dancer. We'll just keep it simple. So there's two angles where she's talking about dancing, playing the piano and dancing or taking another instrument and jumping off. And this was a huge culture, so that's 11 And I felt like a dancer had to be very quiet, so it's being worried that I would be too loud, so these have actually pretty good audio. But so if I have two cameras with good audio, I'll just select them. All right, click on them. And one of the options from the drop down is create a new multi cam clip and I'll get this dialog box. You want to give it a name, so I would definitely name it for the section she's talking about. So this was from the dance stories. All said, Name it Dan story, multi cam. We're gonna put it going to go into the event that usually they came out of, but I could put it in any one of my events. Ignore starting kind, trying code. Ignore this. Most of the time, all you really need to do is check. Use audio from synchronization and hit OK, what it's going to dio. It's gonna use the size and frame rate of the clips to determine what the sequences and just use the audio. However, I do want to show you a little bit what's under the hood, just so you have a sense for what it's doing. So I clicked on use custom. So when you think things together, there's a lot of different ways that you can sink things and also how it assembles. So if I wanted to, if I had the metadata, I could go into each one of these clips and named the camera. If the name didn't come through, I could say what angle it was because okay, this is angle one. This is angle to, and if you have multiple cameras and you start and stop them, so angle one starts and stops a lot, you could still sink them together. But you want final cut to know this is all from the same angle, so it will basically put it in the same storyline as the other angle. Ones stand with angle to send with angle three. So that's the reason you might want to do it the most of time. It's pretty intuitive, and then how do you want to synchronize them? And it's gonna go automatic. But I want to talk a little bit about some of the things that we used to do, and some of the things it does so automatic is probably want to leave that. But if you're shooting with professional cameras, there's something on them called timecode, where it literally puts a time stamp that's fixed. And usually it's a running clock for time of day on the 24 hour clock. So if you shoot five from cameras, this used to be a way that we could sink them up because everything was like timed jam the time code to like an atomic clock. And that way you could sink things up, and that was the only way to do things. Now there's more flexibility. Most people don't have that luxury, but sometimes you know if you don't have audio in a camera, if you have time could that's how you would do it a lot of times it can reference content created. So if the date of the cameras set that metadata is usually put into the video file. So it was okay. I'm gonna put anything that was done within these five minute range or whatever There. Probably likely I'm going to start using that as a reference for sinking. Okay, Started the first clip, so maybe you don't have the other two things, but you go ahead and you know each clip you put like an endpoint before you make the multi cam, and it uses that as a guide. And then finally you can put a marker a marker hit the M key at the same spot. Maybe you did a clapboard, and when the clap would come down, you put a marker. And what happens? His final cut will then reference those markers to start the synchronization. And then finally, you have audio. Now, the reason I went down this list is that when it's on automatic final cuts, pretty smart, it actually uses all of these. So if it looks at your footage and it sees timecode, it may use that as a reference to get going. If it doesn't seem timecode, it may look at the time and date stamp on the camera to kind of get things aligned. Now, of course, your cameras may not be perfectly set to the exact same times, but if it can get a close, it can then use the audio to refine it. And that's what it does. It actually uses some of this stuff if it's available to get things close, and then it can very quickly sink things up by the audio away form. And that's actually pretty clever on the same thing. So if you have, ah, a bunch of footage that's not sinking really well and you're using automatic, I may go in and put markers in at roughly the same time. I'm looking at the video say okay, there was the clapboard. Or maybe you know there's a flash of a camera and I can put a marker there. So what final cut will do is it will line up all those markers and then listen for the audio and make sure that everything is perfectly in sync. So you're helping it, OK, but generally as long as you have relatively okay, audio on all your cameras. It will line it up if for some reason it misses and you do a sink and suddenly like three out of four are good. The other ones, like, way off, throw a couple markers in and it'll it'll get there. So things to keep in mind for the most part, automatic. The other thing you might want to do is it's going to base it on the clips, and I had some four K clips here, so it's gonna try to do a four K, but I don't necessarily want that. I really wanted to 10. 80 p because that's my sequence. And I don't wanna have to worry about if I mixed smaller footage with bigger foot, so I'm actually change that. I'm going to switch it to 10 80 p. That's standard high def. Okay, and then everything else you don't have to worry about. So let's go ahead and I'm gonna hit, okay? It's gonna do. It's magic, and it created a brand new clip. There it is. It's called dance story that says multi cam. Now, if you start making a lot of multi cam clips and want to be able to find them. What I like to do is I like to create a smart collection for multi camp. In a sense, you just to new smart collection. You can get your dialog box, which should be hiding here somewhere. And then I would simply go with the smart collection. All I did was double click on it at a parameter type, and I would say, Multi cam. And if I really wanted to be refined to my editing, maybe I have dozens or hundreds of them. I might do multi Cam, and then maybe I'll go ahead and I'll use a keyword And there's no like you words all and check them all. But I'm gonna keep the one that says Dance studio. Maybe we go and then our interview. There we go to interview and there we go. There's my multi cam with the dance. Okay, so they didn't have a key. But if I wanted to, I could make one and throw the key word on so I can find it very easily. Now let's take a look at that clip that was created. Gonna go ahead and it's open upper sequence, and if I double click this. Here are the two clips that it tried to sync up. One of them was a lot longer and one was shorter, but it didn't matter because it just aligned them as they needed to bay. So if I go ahead and play this there was in America at Maryland. You Sally Nice. Eight years old. I can very easily switch number one, see which one I have. So this is what's inside of that. Remember, we opened up a clipping color correction and stepped inside. So what it's doing when it creates a multi him, it creates a clip. But actually all the other clips are inside that, and any audio is also inside that, so that.
Class Materials
Bonus Materials with Purchase
Ratings and Reviews
a Creativelive Student
Wonderful. This is the first time I've seen any of Abba's classes, and he's a great teacher. I've been watching the live sessions for the past few days and have picked up a ton of great tips that will indeed speed up my workflow in FCPX. He's a great teacher, and does a wonderful job of setting people at ease, ie. where he says things like, 'there's no trick questions', and times where he will click on something wrong, then he'll go back and show his mistake (pointing out his minor mistakes are actually a beneficial lesson). In all, wonderful wonderful wonderful. Thank you!
Lara
Fantastic teacher. I enjoyed every video, super worth it. I've been reluctant to jump into FCP X since it got upgraded from FCP. Now I feel confident to work with it again. Seems pretty self explanatory, but I am glad I watched the course. Abba covers pretty much everything you need to know. I also loved his personality, made me want to learn more each day.
Alan Pole
Absolutely brilliant. Abba gets to the point, is clear, organized and articulate, and lays it all out in a manner that quickly brings your confidence level from zero to hero. Highly recommend this to any photographer who wants to blog, build ads, or include video in their offering. I feel like an amazing new world has been provided to me. Thank you!