Lessons
Class Introduction
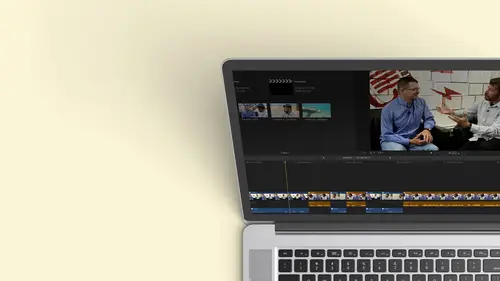
12:34 2Exploring Final Cut Pro X: Navigating the Interface
32:32 3Exploring Final Cut Pro X: Project Timeline
18:23 4Exploring Final Cut Pro X: Basic Editing
16:07 5Refining Your Edit Introduction
15:15 6Refining Your Edit: Trimming
37:06 7Refining Your Edit: J and L Cuts
09:00 8Refining Your Edit: Roll and Overwrite Edits
06:25Refining Your Edit: Slip and Slide Edits
03:51 10Refining Your Edit: Auditions
09:27 11Setting Up a Project From Scratch
17:03 12Setting Up a Project: Importing Media
35:52 13Setting Up a Project: Keywords and Smart Collections
21:07 14Working with Audio
13:56 15Working with Audio: Syncing
23:40 16Working with Audio: Mixing
21:28 17Working with Photos and Graphics
09:55 18Working with Photos and Graphics: Scaling and Positioning
14:05 19Working with Photos and Graphics: Ken Burns Effect
15:17 20Working with Photos and Graphics: Animating with Keyframes
15:51 21Filters and Transitions Introduction
03:04 22Filters and Transitions: Applying Transitions
18:13 23Filters and Transitions: Applying Filters
14:23 24Titles and Generators: Lower Thirds
11:43 25Titles and Generators: Titles
05:40 26Titles and Generators: Backgrounds
11:46 27Advanced Skills: Color Correction
38:35 28Advanced Skills: Speed Changes
15:48 29Advanced Skills: Stabilization
05:53 30Advanced Skills: Green Screen
13:11 31Multi Camera Editing
06:04 32Multi Camera Editing: Organizing Your Media
08:54 33Multi Camera Editing: Creating a Clip
07:12 34Multi Camera Editing: Audio
09:25 35Multi Camera Editing: Working with 4K Footage
06:56 36Finalizing, Exporting and Archiving: Final Checks and Tweaks
04:34 37Finalizing, Exporting and Archiving: Exporting Final Project
25:46 38Finalizing, Exporting and Archiving:Cleaning House and Archiving
15:22 39Bootcamp QnA
14:53Lesson Info
Refining Your Edit Introduction
Now we're gonna bring clips in. We're going to expand upon the trimming model that we introduced yesterday. We're going to talk about some different types of specific tremendous ripple role slip and slide at its These are words that make no sense to some folks who've never edited before. But by the end you'll have a sense of why you would do and what is. A ripple ended on a flipping a slide so that some exciting stuff that you can wait for the next few minutes Jay and Al cuts again more jargon for those who haven't ever edited. And for those who have edited, they're going. Wow, I can do JNL cuts. Replace that. It's swapping out a clip. Secondary storylines. A very unique feature, very unique, a unique they don't need for redundancy here. I'm gonna trim my own presentation, Do a little ripple, rippled the lead of that very and storylines. They allow you to do things editing that other editing applications cannot dio. And then we're going to talk about something called auditions and I'll...
leave that as mysterious because maybe each of you get toe come up and pretend you're me, or maybe not. So let's go ahead, house, Um, fun, get a little bit deeper and go ahead and work more with Anna, our dancer. So we kind of finished off yesterday we threw three clips in. We did a little trimming eso that her action would be nice and smooth. Let's just play that to kind of get a running start to see how our show is beginning, and then we'll start doing some additional editing. So I'm gonna jump to the beginning of my sequence. I need to make sure that the sequences active, And then if you have a full keyboard, you can hit the home key to go to the beginning. If you're working on a laptop in, A lot of people are doing that now. There is no home key, but you can hit the function key on the left arrow key, and that will take you to the beginning of your sequence. And just by the way, if you hit the right arrow key, it would take you to the ends of very easy to navigate. And while we're talking about navigation, if you use the up and down arrows, it will step you between each of the edit points, and that's what we're gonna do right now. See, I'm stepping between the out of points up and down arrow so you don't have to grab that mouse and slide something. It's very easy to get to places. So we have our three clips in here and we want to add something more to this. I wanna start her talking. So I've organized this already with keywords on. We'll learn about that in the next lesson. But this is all preset has already been ingested. So if you have the media because you've bought the class, you'll have these already pre organized. So I did something just for the interview, and I'm going to focus on that. I'm gonna go ahead and scroll up here second and close some of these disclosure triangle so we're not distracted, and there we are. I put all the interview media into its own event. Just a reminder. We're talking about events earlier on, and we'll talk about it a lot more, but I have all the interview footage in one event, and I even refined it by putting keywords on what I thought was the best opening soundbite. The story I wanted to tell. She has one of her dance story of when she was a child. In her first ballet lesson, she talks about when she was playing the piano and studying in Italy. I thought that was really cool. And then I have, ah, close. So I've kind of pre organized this with keywords, so I confined the chunks that I want to put together. So we're gonna cut those in, and we're gonna learn some editing techniques while we do that. So let's go ahead. I'm gonna zoom right out and let's listen to some of these sound bites. Now I can do this a couple of ways. You would think these ways just to select something. But if you click and select something and just that the play button we're Avenue clicked is where it's going to start playing. I wanted to start playing at the beginning of the clip that I thought was a good sound bite. So here's a great keyboard shortcut. If you select any range. Okay? And here I have the entire clip. And if I hit the forward slash key, that's the key. That's underneath the question mark on your keyboard. It will play from the beginning of my range to the end of the range. It's a great way to preview Ah chunk of video. I'm Anna Wrestle. I, my dancer from Crimea and I also play the piano and I seats and I motto. So that's one take. So we have the first clip, she says. I'm a dancer in Crimea. I also have another version. I asked her to do it again. So let's go ahead. Hit that forward planning Anna Russell and I'm a dancer and I also play the piano. I'm for Rush service. No, from Crimea, and I'm living in D. C. Okay, so she does a couple of different reads. I want to pick the 1st 1 to bring in, and I've already actually kind of cut these down a little bit. You'll notice is additional versions here? I'm Anna because I ran this with two different cameras, and as the course goes through, we're actually going to create a multi cam clip from this in, I believe lesson nine and we're also gonna look at doing some color correction for balancing the two different cameras in Lesson eight something to look forward to. So let's go ahead and pick the clip that we want to bring in. I think we'll go with the 1st 1 and what I want to do is I want to bring this to my sequence. So what we did yesterday and this is kind of interesting. We put three clips in and then I threw this music in because we wanted to hear what it sounded like with music. Well, something happened here that was unique. It put in what's called a gap clip. OK, if you've end a traditional or legacy enter, you would think of this as a slug. This is just like a blank holding place. So if I went and I did and Extend added on a pendant, which is the e key, I think of it as extends. I remember Keyboard shortcut. Is it gonna put it where I want here, or do you think it's gonna put it at the at? Well, let's go ahead and try that. I'm gonna hit the e key. It puts it where it should. At the end. It's always just a pending it to the end, but I don't want it to go the end I wanted to go right here so I could do this a lot of different ways. I could bring it in. I could go ahead. I could delete that. It automatically snaps in. That's the beautiful thing about magnetic timeline. If you select something and then you delete what's before it gonna close that gap there times you don't want to close the gap in. We'll talk about that, too. But suppose this waas an actual clip, and I wanted to insert this between this point and this point. So let me go ahead. Remove this from my sequence, and I want to insert my clip right on that edit point. So instead of doing and upended it, I'm going to do an insert at it now. The button for the insert at it. We have all these three things here. There's a connected at which we started to talk about. There's the insert added, and there's the a pendant that we did before so I could go ahead and do an insert at it. I want you to see what happens. So I'm gonna just click that button and it throws that into my timeline. Now take into account I have music here, right? I also have her voice. So final cut 10 really wants to keep everything together. It doesn't overwrite The music here knows that I have it there for a reason. It doesn't delete her audio. So I now I have to sounds going on. So I want to be aware of that. And if I need to do anything, I can break those apart. So an insert at it squeezes something in and there's that empty gap clip that's there. So it just push this down So an insert at it and be careful with an insert at it because you can actually split a clip in half by accident if you put it in the wrong place. So if she's talking here, So maybe I also play the piano so I can position my play had right there. And what if I want to put in a shot of the piano? I'm probably going to save this till later, cause I wanted to be a surprise to the viewer, but I'm gonna go ahead and I'm gonna look for that piano shot and that's in the dance media folder. I believe I have something labeled piano and I could pick a piano shop that I want to put in. So there is a nice one. I pre selected that range and again if I do an insert now and we're gonna do the insert, I use the button before, but there's a great keyboard shortcut for it. It's the w key. Think of it as wedging something in There are three edits that you're gonna do all the time. Ah, connected it. Will you attach a clip to the top? We kind of went talked about that when I did the general overview. There's the insert at it when you wedge something in and the upended it where you extend the length of the show. Okay, so this little pinky is the connect at the keyboard. Shortcut is the letter. Q. Think of that circle with a line down, so it's kind of attaching. Okay, the insert added, is a w your wedging it in the a pendant. It is extending the left. Guess what? Three keys are next to each other on your keyboard que W e. On a corti keyboard, so that's really quick. You can very quickly do the three types of edits that you often do with those keys. So from now on, I probably won't be using those buttons. I'll be using Q, w and E to get things where I want them to be. So w is the wedge. So I'm gonna go ahead and I'm gonna probably put this clipping to see what it looks like. I'm gonna play it back. I selected it. I hate that. Forward slash key. Ah, that's a nice little chunk. So go ahead and I'm gonna hit W I haven't had to split this clip yet. It will do it automatically. As soon as I hit the W k, it pops in the piano. OK, let's take a quick listen and I play the piano. And so I like that. That's one way to tell the story. We have to massage a little bit. She goes and they play the piano. I also teach. What do you think you would like to see as a viewer? Why is that? Not necessarily Ah good. Cut its ok. Got But you have a problem with, right? What problem might you have? You don't have. You could just shout it out. I'll repeat it for the people at home. You have a problem, but you don't want to tell me what it is. It's breaking up the dialogue. It's to staccato. It's distracting. Okay, I want to hear her keep speaking. So I kind of want to maybe have her talk and also see the piano. So in this case, maybe I don't want to do an insert. I'm gonna undo that Command Z. And instead, let's see what happens if I did a connected it. If I put it on this next layer up here, she says that. So I'm gonna hit the cuchi now. I don't break it up. Let's see how that feels. I like that. If the volume was a little bit louder and the piano was a little bit softer, that could work. So we're gonna deal with audio later, but it's distracting not to be able to hear her. Now someone go ahead and bring the piano volume down and I will bring her very soft voice up just for this and let's hear that works. And I also play the piano and seats and I motto so and I model and she does. But I have no footage of her modeling. Um, so I want to cut that out. Well, there's several different ways I could trim that we learned yesterday. If I wanted to, I could just grab it by the right end. And when you go grab the edge, you see how your cursor changes. Well, that means I can just do a trim by dragging it. And because I have snapping on, we learned about snapping yesterday because it's the one keyboard shortcut that makes no sense because you're napping. It's n so if it doesn't snap, that just means snapping is often I get Thean Kia turned it off intentionally, and now it doesn't snap to the end. Okay, I wanted to. Most of times I'm gonna hit the n key again and it snaps. So that's one way that I could do this at it. But I want to point out that as you get more proficient with final cut pro 10 there may be times you want to use other techniques that have the same result. That might be quicker. So a lot of people discover that if they want to chop off something from the end, they can use the Blade key. Okay, Another test. Wild guess what, You keyboard shortcut for the blade Kids Bay. You guys are great. I don't even you guys could have added it before, Right? You've used this. So if I hit the Beaky, my cursor changes to a red razor blade, and wherever I click, it cuts. So I'm gonna switch back to the A key. And by the way, that's an important thing to know. A is like your neutral position. If you are, you have the wrong tool selected. A is what you always want to go back to. It looks like an arrow. Okay, so a is your standard selection tool. So for some reason, you've intentionally or accidentally switched to a different tool. A is what's going to get you back. So what we've done here is we've actually razor bladed this in half. You can see the dotted line and it's a dotted line because it indicates that thes two clips are continuous. If you have two clips together that aren't continuous, that's an edit point. They'll just be regular limping. A dotted line indicates that this is called a through edit. You don't need to know that necessarily, but that means it's continuous. It should have been connected. But you decided to break it up. At this point, I could go ahead and select it. And if I wanted to remove it, I would simply hit the delete key. So there's two things. A lot of times you want to remove something, you can blade it and then you can delete what I'm gonna do throughout. Part of this lesson is I'm going to give you some basic techniques. And for those who have already done something or we're going back to watch it again, the show again, I'm gonna throw out an advanced technique. So a lot of times you may not want to hit the B key and then go selected because you already know where you want to cut today. Okay? So if I wanted to command it to make the cut, Okay. So I don't have that cup there anymore. I want a commander to make the cut with its blade instead of having to select it. How do you think I would make that cut without switching keys? I want to command it to make ah, Blade cut. Command be will actually where every that play head is parked, it will slice that clip in half. So if you're playing along, you know you want to just cut everything at a point. You don't have to do anything. You could just take command, be razor blades it right there. So remember, a lot of these keyboard shortcuts relate to each other. Okay, you can switch a tool you can use to automatically.
Class Materials
Bonus Materials with Purchase
Ratings and Reviews
a Creativelive Student
Wonderful. This is the first time I've seen any of Abba's classes, and he's a great teacher. I've been watching the live sessions for the past few days and have picked up a ton of great tips that will indeed speed up my workflow in FCPX. He's a great teacher, and does a wonderful job of setting people at ease, ie. where he says things like, 'there's no trick questions', and times where he will click on something wrong, then he'll go back and show his mistake (pointing out his minor mistakes are actually a beneficial lesson). In all, wonderful wonderful wonderful. Thank you!
Lara
Fantastic teacher. I enjoyed every video, super worth it. I've been reluctant to jump into FCP X since it got upgraded from FCP. Now I feel confident to work with it again. Seems pretty self explanatory, but I am glad I watched the course. Abba covers pretty much everything you need to know. I also loved his personality, made me want to learn more each day.
Alan Pole
Absolutely brilliant. Abba gets to the point, is clear, organized and articulate, and lays it all out in a manner that quickly brings your confidence level from zero to hero. Highly recommend this to any photographer who wants to blog, build ads, or include video in their offering. I feel like an amazing new world has been provided to me. Thank you!