Lesson Info
8. Refining Your Edit: Roll and Overwrite Edits
Lessons
Class Introduction
12:34 2Exploring Final Cut Pro X: Navigating the Interface
32:32 3Exploring Final Cut Pro X: Project Timeline
18:23 4Exploring Final Cut Pro X: Basic Editing
16:07 5Refining Your Edit Introduction
15:15 6Refining Your Edit: Trimming
37:06 7Refining Your Edit: J and L Cuts
09:00 8Refining Your Edit: Roll and Overwrite Edits
06:25Refining Your Edit: Slip and Slide Edits
03:51 10Refining Your Edit: Auditions
09:27 11Setting Up a Project From Scratch
17:03 12Setting Up a Project: Importing Media
35:52 13Setting Up a Project: Keywords and Smart Collections
21:07 14Working with Audio
13:56 15Working with Audio: Syncing
23:40 16Working with Audio: Mixing
21:28 17Working with Photos and Graphics
09:55 18Working with Photos and Graphics: Scaling and Positioning
14:05 19Working with Photos and Graphics: Ken Burns Effect
15:17 20Working with Photos and Graphics: Animating with Keyframes
15:51 21Filters and Transitions Introduction
03:04 22Filters and Transitions: Applying Transitions
18:13 23Filters and Transitions: Applying Filters
14:23 24Titles and Generators: Lower Thirds
11:43 25Titles and Generators: Titles
05:40 26Titles and Generators: Backgrounds
11:46 27Advanced Skills: Color Correction
38:35 28Advanced Skills: Speed Changes
15:48 29Advanced Skills: Stabilization
05:53 30Advanced Skills: Green Screen
13:11 31Multi Camera Editing
06:04 32Multi Camera Editing: Organizing Your Media
08:54 33Multi Camera Editing: Creating a Clip
07:12 34Multi Camera Editing: Audio
09:25 35Multi Camera Editing: Working with 4K Footage
06:56 36Finalizing, Exporting and Archiving: Final Checks and Tweaks
04:34 37Finalizing, Exporting and Archiving: Exporting Final Project
25:46 38Finalizing, Exporting and Archiving:Cleaning House and Archiving
15:22 39Bootcamp QnA
14:53Lesson Info
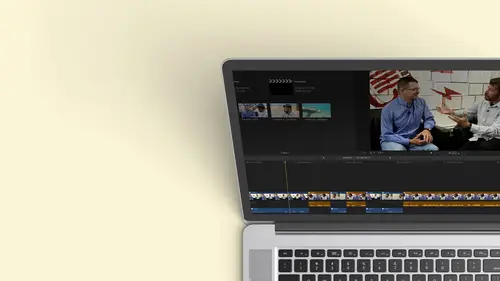
Refining Your Edit: Roll and Overwrite Edits
there's something called a role at it. We saw that before. Okay, we've been doing trims which have been single sided affects the duration of the show, a role that it says I have two clips and I want to change where the actual cut its so as one gets short of the other ones, going to get longer when clicked through the duration of both clips together will always stay the same. All I'm doing is moving that center point. Let's take a look at our beginning clips first. So here's the dancing and that's got to the oh, there's the turn. So maybe that was perfect it waas. But maybe it wasn't so. I want to do a role at it. I need to switch to a special tool trimming tool. Dreaming tool is the T key. So I hit the T key or I go down to my tool menu and I choose trim. Now, when I select an edit point, do you notice it's now facing both clips, and what I can do here is if I go ahead and drag that, do you see how I see a little image on the left in a little image on the right. So that's telling me th...
e last frame of the first clip, the outgoing, incoming outgoing clip and the first frame of the incoming. So it's the last against the first, and I can see exactly where I want that cut toe happen. So really, maybe I'm thinking the movement would be better there. By the way, while we're here, you can see that that is not a precise match edit of her arm. Okay, but when we watch that, it wasn't a problem. Go ahead and play just to prove a little tight. But you can often remove a few frames if the person is raising their hand. If you cut out of the medium shot and cut here to the wide shot, that is a little gap. Our brains automatically fill that in. People don't notice that. But if you go up here and you cut on the hands down here is there She's raising her. It's a repeat action. Definitely. People kept up there like what? What was that? So we have done swap edits we've done insert at its we've done connect that it's another type of edit that you may do but we don't use it that often. In final cut is is. Actually, you have a new key for it. Now, let me go ahead and zoom in. Is an over right at it that I was like, really being the guy was trying to click on it to get that, and I didn't come. That's definitely didn't over right over right at it. Okay? What? It over right at it does is maybe you threw down a bunch of stuff into your timeline. So I'm right here. It's like, You know what? I need to just replace this chunk. I want to just obliterate what's there. So if I do it over right at it, select this range. This is a photograph. I hit this button, it puts it in the main storyline and removes what's underneath. Okay, so maybe you're swapping something out. Or usually this is at the end of a show. You put something into long and you just want to override it. What I found is in a traditional editing program. I had to do this all the time because I didn't have this magnetic timeline. I didn't have these smart storylines, so I did override efforts. I find now I very rarely use that. The reason I bring it up is there are people coming from other editing platforms that are so used to say, Well, where's my over right at it that they're upset when they can't find it? So in the latest, our most recent version, Apple decided to put the button in and give you an override. I mean, it was always there was always there was a drop down. I was always there is a keyboard shortcut, by the way. It's D two keyboard shortcuts, but you know, people grumble, and that's one of the things I really do like about. You know, the team at Apple is that they've made a lot of changes to the initial release, the final cut 10. Listening to what people have asked for and, you know, they're constantly working to make a better. I mean, there's things that they know they want to do. It just takes time to write code, so it's always getting better. But they really have listened, and people said they wanted that, and they brought that in. So those are the four basic type of edits that you're normally dealing with. So what? I want gap clips. Sometimes you want to open up the space in your timeline. Okay, Maybe. I know I want this, but I want it later. So I would go and I grabbed this And what's problematic years I'm in the wrong tool and go to the selection tool and then I got to move it. And what's gonna happen? Snaps back. This drives editor is not who are used to the old way because you say I want to get it, But later you can drag and move something, but you need to switch tools. You're going to switch from the arrow tool to the position tool is basically an arrow without a tail. And this is actually pretty cool. If I hit the peaky and I dragged this when I drag it somewhere and let go, it puts a gap clip in to keep these from snapping together. Okay, so it's very easy. And then, you know, a gap clip is just like a regular clip. I can grab the edge of it, go back and switch on the position tool to my trim tool. There we go. Actually, the a key so I can trim that. Okay, so it works. Just like a regular clip that holds a space. You could also, if you just want to put, like, a break in somewhere, zoom out a little bit. So maybe between these edits I want to put something in. I can put in a gap keyboard shortcut, I believe is option W. But if you need to find it, um, typing gap should be under here. We go replaced with gap. So there we go. I should be able to replace Is for the gap. Oh, I have that selected side there. Option w puts in gap. So if you want to just put like a little separator in sometimes I'll do this if I'm cutting an interview and I'm on the timeline of cut the heads and tails off everything, but I want to visually see where I've broken it up. I'll throw in option W and through a little got gap clips in between. So visual econ listen to sections, you know, I'll do a string to, and I want to be able to see where things are broken up, especially if I have a really long sequence and those, you know, I want to see that it didn't run into something else. So that's really useful
Class Materials
Bonus Materials with Purchase
Ratings and Reviews
a Creativelive Student
Wonderful. This is the first time I've seen any of Abba's classes, and he's a great teacher. I've been watching the live sessions for the past few days and have picked up a ton of great tips that will indeed speed up my workflow in FCPX. He's a great teacher, and does a wonderful job of setting people at ease, ie. where he says things like, 'there's no trick questions', and times where he will click on something wrong, then he'll go back and show his mistake (pointing out his minor mistakes are actually a beneficial lesson). In all, wonderful wonderful wonderful. Thank you!
Lara
Fantastic teacher. I enjoyed every video, super worth it. I've been reluctant to jump into FCP X since it got upgraded from FCP. Now I feel confident to work with it again. Seems pretty self explanatory, but I am glad I watched the course. Abba covers pretty much everything you need to know. I also loved his personality, made me want to learn more each day.
Alan Pole
Absolutely brilliant. Abba gets to the point, is clear, organized and articulate, and lays it all out in a manner that quickly brings your confidence level from zero to hero. Highly recommend this to any photographer who wants to blog, build ads, or include video in their offering. I feel like an amazing new world has been provided to me. Thank you!