Lessons
Class Introduction
12:34 2Exploring Final Cut Pro X: Navigating the Interface
32:32 3Exploring Final Cut Pro X: Project Timeline
18:23 4Exploring Final Cut Pro X: Basic Editing
16:07 5Refining Your Edit Introduction
15:15 6Refining Your Edit: Trimming
37:06 7Refining Your Edit: J and L Cuts
09:00 8Refining Your Edit: Roll and Overwrite Edits
06:25Refining Your Edit: Slip and Slide Edits
03:51 10Refining Your Edit: Auditions
09:27 11Setting Up a Project From Scratch
17:03 12Setting Up a Project: Importing Media
35:52 13Setting Up a Project: Keywords and Smart Collections
21:07 14Working with Audio
13:56 15Working with Audio: Syncing
23:40 16Working with Audio: Mixing
21:28 17Working with Photos and Graphics
09:55 18Working with Photos and Graphics: Scaling and Positioning
14:05 19Working with Photos and Graphics: Ken Burns Effect
15:17 20Working with Photos and Graphics: Animating with Keyframes
15:51 21Filters and Transitions Introduction
03:04 22Filters and Transitions: Applying Transitions
18:13 23Filters and Transitions: Applying Filters
14:23 24Titles and Generators: Lower Thirds
11:43 25Titles and Generators: Titles
05:40 26Titles and Generators: Backgrounds
11:46 27Advanced Skills: Color Correction
38:35 28Advanced Skills: Speed Changes
15:48 29Advanced Skills: Stabilization
05:53 30Advanced Skills: Green Screen
13:11 31Multi Camera Editing
06:04 32Multi Camera Editing: Organizing Your Media
08:54 33Multi Camera Editing: Creating a Clip
07:12 34Multi Camera Editing: Audio
09:25 35Multi Camera Editing: Working with 4K Footage
06:56 36Finalizing, Exporting and Archiving: Final Checks and Tweaks
04:34 37Finalizing, Exporting and Archiving: Exporting Final Project
25:46 38Finalizing, Exporting and Archiving:Cleaning House and Archiving
15:22 39Bootcamp QnA
14:53Lesson Info
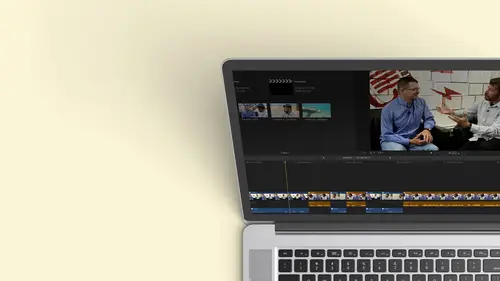
Working with Audio: Mixing
Now we're ready to move on to mixing, so I'm gonna go ahead and clean this up a little bit. So I'm going to close the inspector. We've been back and forth in that sense. Lesson one is in the upper right hand corner command for is if you like keyboard shortcuts. So now I have a little more space here and I don't need my filters anymore. So I'll just click the filter button that'll go away and we have our clips and I don't want to work on this one. I want to work on the previous one, which is this one right here. And we're ready to start mixing it so we can hear her voice so the music isn't too loud and really start massaging it. So it sounds great. Let's go ahead and do that so I could go ahead. I'm gonna turn on my index because I want my rolls to be on. So if I just played this right out of the box, my music's at a good level. It might be a little, um now it's good. If it's a little hot, you'll see it go into the red. One of the things about music. When you get stock music, it usually...
peaks almost at zero. Because the idea is that if you're listening to music, you want it to be as loud as possible. So a lot of times you need to bring it down a little bit, so it doesn't peak. We definitely will bring it down when she starts talking s so I can hear it over. So what I want to do, I want to go in. I want to start working with the audio and this is where the roles will come into play. You know, I'm not using this area of stuff right here. I can close this out, so it's not a distraction. So remember, we have these buttons here. I can close my browser window. Now, I focus really on the video that's going on. So we're gonna go ahead and I'm going to actually resize the windows. I can really see what I'm working on. So the first thing I think her audio is pretty clean already, But if I want to just hear her her voice, I'm gonna turn off everything but Anna and I can hear our she sounds clean and what Her levels are clean. So it's fixed. But she's too soft. And now the nice thing is, I don't have to do these clips and fix them one at a time. If I wanted to, I can grab all of them and I'm assuming they're all of equal volume. And if I open up the inspector, I should be able to increase the loudness of these all at once. So there's, Ah, volume slider, but I can actually bring up the volume level. Um, unless I brought it up to the maximum I could type in. Brought it up for DB. Let's hear it sounds. And she would invite some of her best, really bringing turn at her music institute. We voiced its treated on top of this mountain look like little houses on one house. We would people. One house speaks very softly from Graham Area Crime Area s. So there's an accent. So it is a little hard to kind of follow along, but we're going to clean it up. So this is loud enough that I should be able to hear, and I did the volume for all of these at once. Okay, there's a couple ways to increase or decrease the volume of a clip. Let me pick a single clip and show you on a zoom all the way it. So if I have a clip, there is this little bar here, this sound bar and it's easier to see actually, on my music or my ambiance is that this is the audio level. I can bring it up or bring it down right on the interface. Okay, that's one way to do it again. With the clip selected, I could also bring it up this way. So it's just a slider. I could type in a numerical value. So there's three ways that you could easily, and what I'm doing is this is just a bar that represents the audio volume, okay? And this is going to be key that represented. This is a slider that represents the audio volume to give away. It's called volume. Okay, there's a little thing here where I can type in a number. If I know I just want to global. Let's bring it up. 60. Be okay, double it and double it again. So all I'm doing is controlling the volume globally on a clip to bring it up. If I bring it up too high, you might see a tries to give your warning. She's gonna start flattening out here. It's going into that yellow area, which is warning. And if you see a turn red, you're probably going above zero. Okay, so if I play that, let's see what she's speaking at our Maybe it's me talking in the background. You can pretty close to zero. That's probably a little too loud, but that should kind of keep you, you know, things that you want to consider. So let's assume that her audio level is where I kind of wanted that Zoom back out. And now I want to start working with the music. I want to start bringing the music under when she starts speaking. So what am I gonna dio? I want to be able to turn that music on, and that music is over here. Now the music is on. I could listen to that level by itself. If I turn her off on may be, I want to bring it globally down just about three db just because, um, it's still speaking a little bit higher here, so I don't want it to come in and blow the audience away and then bring everything down and she soft so I won't be able to bring that down. I could grab that little slider here and bring it down, and as you can see, I grab it. I pull it down and it jumps down. Jumps pretty severely, doesn't it's like 0 to 4 12 Kind of like when I hit the brakes when I'm speeding 40 12 Ticket. Um, if you hold down the command key, it kind of notches it down. And now I could bring it down one step at a time, so it gives me a lot of control. In addition, I could also use keyboard shortcuts to bring it down. And to do that, let me zoom all the way out, and I want to show you where you can find things. So let's say that I don't remember what the keyboard shortcut is from my audio levels. I could type in what I think would be the location. Maybe it's levels or loudness, not loudness levels. So I'm guessing it's like I'm not coming up with anything here, but I know what I really want to do is I want her, and this is what I kind of want. I know I want to modify the clip somehow. So instead of going through each of these and looking, I'm like, Oh, I'm doing something to a clip. I bet the keyboard shortcut are the drop down window would be under modifying something, and there it is, modifying adjust volume, and any time you see a little diamond our little triangle, that means you could go deeper in. And there's my options. I go up and down one db by hitting control and the minus key to go down. The equals is also the same. Key is the plus key on your keyboard, so it's just control plus control minus, and I can actually bring the volume up or down one db or one notch at a time and get the level. I want someone to hit, play control minus. And if you look at this very closely so again you have that fine tuning. So there it's peaking at minus six. That's nice. That's what she's really doing. So I think that's probably a good level. It's also reflected up here minus six. I could've typed that number in. So we're good. We have our music coming in at the right level. She's starting to speak, so I need to duck the music under so that we can actually hear her. But I don't want to lose it completely. So I want to bring the volume down. There's a couple ways to do this. If you have worked in other non the new programs or worked another final cut, you would use something called key frames where you can actually control. Precisely. You know, at this point, I wanted to be this volume a second later, I wanted to go down and you draw and we're gonna be using key frames. But the beautiful thing about final cut pro 10 is you can actually do it in a couple of clicks. You can say I want this range of audio and I want to bring it down just a chunk. So one of the tools were used This actually, in the earlier lessons the range selection tool, both on import and also when we were editing, I can go ahead and choose that tool. The R key is the keyboard shortcut. If you want to get the drop down. It's right there. Range selection. Okay. And now I'll go here and I can see this is where she's starting to talk. So I'm gonna grab this and I'm going to just draw a range where she's talking. Maybe a little bit beyond. So if I haven't grabbed the full area, grab just a little bit more, I'm gonna be good. There we go. So I grab a little bit more range when you zoom in your mouth. Doesn't like the work that way should OK, there we go. So I grabbed a range while she's talking. And now if I bring down my audio to a nice level, I want you to see what it's done and switch back to my selection tool. It's created key frames, and it's gonna gradually get softer and then gradually get louder. Let's take a list. Now we're ultimately getting throughout minus 18. DB is probably gonna need to be a little bit softer. Let me turn her voice back on, and I'm gonna hit play starts talking down. I'm an arrest. So I my dancer from long earlier or not, because we don't have stepped on so I can continue to tweak that because maybe I think it's too soft. Maybe I think it came in a little too early. I could grab any of these and move them all after his grab them, and I could move them back and forth when I goes yellow. So that's a more gradual dip of the music. I could go ahead and say, You know what? I think it needs to be a little bit softer, a little bit louder. I can grab it by the middle. If I grab it too far on do. There we go and it's gonna work perfectly. If I wanted to, I could also grab a couple of key frames. Come on now, don't worry. The reason it's doing this is because I've zoomed in on my screen, which you normally don't do when editing. And I can't quite get the mouse where it should be. If I go back to this point, look how easy it is for me to actually select thes and they really do work. Okay, so I can click on those. I'm going to just go ahead command click, and now I have two of them selected and I can move them as a group. Really hard to see there. So you can readjust, ease as a group. Very easy. So that's what you're gonna start doing? You're gonna start ducking your audio down. If I didn't want to use the range selection tool, I could do the same thing by applying key frames. Okay, Before I did arrange and pulled it down. If I take my mouse and I put it over this middle line and I hold down the option key wherever I click, it puts a little diamond on that bar and let me zoom in a little bit so you can see it better now with ease. Diamonds here. I can go ahead and pull this down, and I have the same result so I can create key frames and I if I wanted something to come up gradually, or maybe I have a point where the door slams in the background, I might go all the way in, said, Let's pretend this is the door slam I could get really detailed here. I'm zooming in really tight, put a couple of key frames in. He's a really close to each other and go ahead and grab the right one. And I just brought this down toe pretty silent If I go ahead and zoom out and I hit Ah, shift Z So I see the whole timeline You can't even see barely where I brought it down But that could be a door slam are cough So these are the things that after I kind of peace my show together I start massaging the audio. Teoh, get it! So it sounds that I wanted to sound okay. I could bring down volume. I can bring up volume. I can He framed the volume. The other thing that I like to do is I like to sometimes fade music out or fade audio in. So it's not abrupt, even if our persons being interviewed sometimes because of the background noise. If you just cut into the audio, you'll hear like and then the person speaks. It's unsettling. So if I wanted to, let's go ahead and zoom in again, and as a matter fact, let me switch completely to audio. So you really have this big and make this nice and high. So if I go down toe any of my audio clips and at the very left and right edge. You see, there's a little dot right there. See that little dot I congrats that dot See if I can grab when I'm zoomed in, and I'm pulling it to the left. This is creating an audio fade. Okay, so it's fading down at this point, and this is actually a pretty long fade, so I'm gonna go back and make it reasonable. I'll have nightmares about zooming in. Nice. Gradual. It looks sounds nice. And I just want to show you that everybody likes audio toe sometimes fade out differently. Sometimes you want a gradual at the beginning and then fast at the end. Sometimes you want fast at the beginning and gradual at the end. Sometimes you want it linear. Well, the nice thing is, if I go ahead and I go and click on this dot Here be good. There we go. I can change the way that audio fades. Outer fades in. So maybe you know, this is the traditional plus three db It starts off slowly and drops off, but maybe I want to drop off much quicker and it changes the curve so again you'll start fading. things in fading things out. And the goal when you're ultimately done is to have nice, smooth audio. One of the things I did put in here did I have my Ambien track my sound effects track. I think I did. Yeah. So I did put that sound effect in, and I'm gonna go ahead and shrink my view. Actually, I'm not going to shrink my view cause I'm gonna show you another cool trick. I could go back here and resize stuff, but I want to really see some stuff that's below. And I don't have a lot of real estate because we're working on a small resolution for a television so I could go back here into my rolls and there's these little dots. If I click on one of these dots, it will focus on just that. So I want to focus just on the effects. It made everything really small, except for the effects one. So now I can see that nice and big, and I'm not distracted by the other elements. Okay, I can focus on a couple things out of time. Um, so you can go ahead. Actually, I wouldn't do it that way. do it another way, but I can definitely focus on what I want to do, something to go ahead to the effects. They're probably really loud. I remember you can really hear it. So it iss subtle enough. I guess I did make it subtle enough that is just in background. It goes back to what I was saying at the beginning. You know, you might see some people walking in the background. If you hear a little bit of the sound, it justifies the visual. OK, um, and you control things. And a lot of times, maybe when I recorded her a couple things I dio is in addition to recording her interview, I try to record some empty sound just when nobody's talking before the interview and at the end, that's called room tone, and I don't do it on an empty room. I do it with everybody in place because the way audio reflects off a room with people in it is different when it's empty. So sometimes I'll aim the camera at the microphone. So if I'm skimming through it, I know that this is room tone, and this is clean audio that if I cut out a word I can put it in in another layer underneath. And now it's nice and smooth because we can hear if there's like like, less than 1/3. If there's 1/30 of a 2nd 1 frame of video off no sound, you'll actually hear the lack of it. It drop out. So you know, yes, sometimes you know, you bury it in the music. They don't here it. But if you don't have the music, if there's no justification for it, sometimes you just need to get that room tone. And that's one of the things that you would bring in and bring up and down and again you would fade in and fade out, so it's nice and smooth. You don't just put it in, cut in and cut it out. You had faded in underneath and faded out, so that's some ideas behind mixing audio. Any questions? You guys have been awfully quiet today. How do you change a mono track to a stereotype? Act like you recorded one of your interviews in mono? How can you make that stereo? So if you've recorded something and it is not playing back the way it was intended. Um, mano, A lot of times should come out of the challenge. Isn't that you have a mono track? And it should be Steri. So it's only coming out of one channel, which is was a challenge with previous editing systems will call them Final Cut seven. Really model should stay mono, but come out of the center channel as it should be, you know, dual. So if I things were interpreted wrong. And here we have this music conducive. The couple clips. This one is stereo. So I select the clip in my timeline, I open up the inspector and then I can click on this and I can get a drop down window and see how it's gonna interpret. So maybe I don't want this to be stereo. Maybe it really should be doing mono because I'm afraid that somebody might only have one speaker on, and they're not gonna hear the other side of the music. So I can say to that is dull mono and it automatically turns these into a single mono clips. If my mike's were backwards, the other nice thing I can do here is if I recorded something dual mono and one track was completely empty. Well, it should catch that when I analyse and say delete empty tracks. But if it doesn't and sometimes there's like a low hum on one channel, so it errs on the side of caution and keeps that channel alive. But you know, for a fact there's no way form because it's just room buzz. Okay, you can uncheck a track and it you don't even see it. It turns it doesn't delete it, it just turns it off So it doesn't appear okay by just clicking that I could bring it back. So this is very useful. If we're in a case of let's bring back our browser, the interview stuff. If you notice, for example, the audio Onley clip, that would be her quick way for me to find the actual interview. Sound bites Click on that. It assumed it was mono, it's gonna assume is going to come out of the center, but I could control if I wanted. And as a matter of fact, um, most of us will probably mix in stereo, but Final could has the ability to actually do a full surround mix. Ideally, if you're going to do that. You're gonna, um, do it in a in an editing suite where you actually have speakers in front of you and behind you and in the middle instead of guessing. But it does have that luxury if you wanted to. Yes, does Final cut pro have kind of like a old school mixing boy where you can actually look at all the audio trucks and move it with a fader back and forth? Not yet. We know it's on the horizon, Um, but there is no traditional mixing board that what you would see, like in a traditional editing pregnant with Vader's. The roles, as a matter of fact, is something that's relatively recent. Um, this is being recorded, obviously February 2017. We can hide that fact, but Final Co. Was updated with all these really roll controls a zoo recently, I believe it was October of 2016 and this was a big jump, and they've been very aggressive, and I wouldn't be surprised if the next roll out. If they focus on sound you, you would see that it's definitely request good. So that's some ideas. With audio, it can go much deeper but I think my goal was to open your eyes and open your ears on what you can do with sound and how you would mix it in how you would think about it. Ah, lot of the techniques that we learned in this lesson you would use from the very beginning, all the way through finishing your show on. You don't have to just panic and do it all at once.
Class Materials
Bonus Materials with Purchase
Ratings and Reviews
a Creativelive Student
Wonderful. This is the first time I've seen any of Abba's classes, and he's a great teacher. I've been watching the live sessions for the past few days and have picked up a ton of great tips that will indeed speed up my workflow in FCPX. He's a great teacher, and does a wonderful job of setting people at ease, ie. where he says things like, 'there's no trick questions', and times where he will click on something wrong, then he'll go back and show his mistake (pointing out his minor mistakes are actually a beneficial lesson). In all, wonderful wonderful wonderful. Thank you!
Lara
Fantastic teacher. I enjoyed every video, super worth it. I've been reluctant to jump into FCP X since it got upgraded from FCP. Now I feel confident to work with it again. Seems pretty self explanatory, but I am glad I watched the course. Abba covers pretty much everything you need to know. I also loved his personality, made me want to learn more each day.
Alan Pole
Absolutely brilliant. Abba gets to the point, is clear, organized and articulate, and lays it all out in a manner that quickly brings your confidence level from zero to hero. Highly recommend this to any photographer who wants to blog, build ads, or include video in their offering. I feel like an amazing new world has been provided to me. Thank you!