Adjust Skin Tones
Lesson 42 from: Fine Art Conceptual Photography from Shoot through Post-ProcessingBella Kotak, Pratik Naik
Adjust Skin Tones
Lesson 42 from: Fine Art Conceptual Photography from Shoot through Post-ProcessingBella Kotak, Pratik Naik
Lessons
Class Introduction
04:47 2Artistic Vision and Inspiration
17:06 3Personal Projects
18:59 4Creative Motivation and Defining Your Story
15:15 5Organizing Your Inspiration
16:26 6Building A Character
03:19 7Creating Wardrobe and Props
33:59 8Location Scouting
12:55Resourcing a Team
17:52 10Working with Talent
06:39 11Building Community
05:06 12Scouting Location Pros and Cons
11:29 13Camera Gear and Modifiers
10:03 14Shoot Set Up and Styling
11:34 15Test Shots With Model
06:04 16Location Shoot: Model in Red Azaleas
26:04 17Location Shoot: Composite Pieces
16:35 18Plates Extending the Scene
07:11 19Set Concept and Design Overview
08:31 20Demo: Equipment Overview
04:39 21Shoot Set Up
08:12 22Shoot: Test Shots
15:08 23Shoot: Standing Against Flower Wall
06:47 24Composite Pieces: Hair
05:31 25Shoot: Overhead on Flower Wall
22:22 26Adjusting Images With Composite Shots
07:25 27Color Theory
11:40 28Capture One: Image Selection and Color Toning
19:42 29Moving from Capture One to Photoshop
17:01 30Compositing Hair
15:52 31Healing Brush Tool
06:42 32Dodge and Burn Tool
08:14 33Liquify Tool
12:01 34Adjustment Layers of Color Toning
35:05 35Blending Modes
10:44 36Channels and Channel Mixer
05:16 37Selects for In Studio Image
08:57 38Compositing Background
13:58 39Compositing Additional Elements
09:49 40Gradient Maps
15:51 41Color Toning with Controlled Light
21:32 42Adjust Skin Tones
17:27 43Retouching Skin
17:12 44Spot Healing Brush
06:11 45Clone Brush
03:47 46Dodge and Burn
18:49 47Sharpening
10:42 48Critique
15:40Lesson Info
Adjust Skin Tones
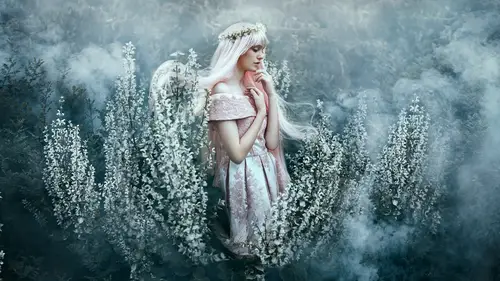
As we mentioned we have this other shot that we did with the studio set up where she was standing and I think we're gonna use this shot as a reference for what we're gonna do for retouching process. Now, the thing about retouching is this in itself is a massively long subject and we have 90 minutes to cover as much as possible. So what I'm trying to say is that in case you want something more in-depth I do have a class on my website that goes over retouching specifically in broader detail, more than we can cover in minutes, so keep that in mind, but in the meantime let me show you the most pertinent things that we can address and help people with. Now, when it comes to skin tones, a lot of people say "how do I just skin tones and what if there's different tones throughout the body? How can we even that out?" That's usually for me the first step in the process when it comes to retouching because, as you know, when it comes to files that have a lot of detail and color information, it's ...
very difficult to see sometimes what needs to be fixed, number 1. The second is even if you can see what needs to be fixed, it's really difficult to be able to fix it, right? And I think a lot of us that shoot studio and shoot subjects and models have a problem. How many of you guys have that situation happen? So basically all of you. Except people who don't shoot portraits and people. The first step like we've always been doing in continuation is starting in Capture One. Because Capture One does have a skin tone tab that is really interesting. It's in the color editor section. So we have this file here in our program that we've already selected, and I think it's quite beautiful and, Bella, you like this shot as well, is that right? I do. I love the connection we have with her eyes, her head is tilted up so the shadows are falling quite nicely across her face. And I love that she's giving us some beautiful lines, in the way her neck is, her shoulders are back. There's a beautiful line there. And, yeah, I think this image works on so many levels, 'cause I love it when we were zoomed out but I also really like it if we cropped it closer as well. Right. And it's amazing So we have choices. We can see all the detail because we, you know, shot it F12. On this shot you see the focus on the eyes and the details in the jewelry and the hair and every single strand of hair. So we're not gonna edit all that out, okay? Pff, no. Not right now. So select this image as our main image and the first thing that I will do here is come over to the color tab in Capture One. The color tab is where all the color magic happens. And as we've been experimenting with color balance, as Bella showed you earlier, underneath it is the color editor tab. This color editor tab, guess what that does. It makes you pancakes. (audience and Bella laughter) It edits color, right? Really simply put. Under the color editor tab, this in Camera Raw is very similar, where it has HSL section. It's liken to that, where you can adjust hue, saturation, and luminosity. Hue, saturation, and lightness or luminosity. So that's pretty basic, right? You see the reds, or magentas, and there's a red section here and you have all your specific color tones. And you can then manually decide if you want to select another region. Or if you don't know what region it is you just use your color picker and pick that region. But instead what we'll do is, we're gonna come over here and click on skin tone. Even though it says skin tone you can actually edit a lot more than skin because if you want to edit and make things more similar with the greens you can do it here. Yeah. And it so happens that sometimes after a color tone we go back and use this program import the .tiff and use that as a color change process too. I like to have all the options. Yeah. In case she throws anything my way, I'm ready. So first and foremost, first step, click on the color picker. We want to identify what we're gonna fix. What would you say that we should fix when it comes to this skin tone? What stands out to you? The color on her arm is a little bit different to the color on her face, you don't think? Exactly. Yeah. You notice right away that extremities are more of a neutral beige tone and the face has gone red, her fingers have gone red as well. And I don't want to spend a lot of time fixing that because honestly that's the least favorite part of retouching for me, is fixing skin tones. I don't really enjoy it. I just like quickly doing it and moving on to the retouching process in Photoshop. So I'll do this very simply. Click on the color picker. The reason for this color picker is it's gonna ask me the skin tone that I like. What color tone do I like in this skin? And what range? So I'm gonna click on the arm. As you see down here, it selected a nice, neutral beige tone. It even gave me an option to adjust if I didn't like it. So if I say, you know what, maybe I don't like that beige tone, I can come back and click on another part of the image. So it's not finalized, it's just a reference point for the program to feed from. So again I'll click on that beige tone. And over here you'll notice that there is a dot in the middle. That is the exact color that I picked. Okay? All this area outside of it is everything else I've also selected. It's like a range. It said, this is my reference point, and the rest of it is a range of tones that have also masked out. The reason for that is it's gonna mask the skin tone. Right? So if I say "view selected color range" guess what it did? It masks the skin tone. A lot of your eyes just lit up right now. (laughter) Great. Now that we know we've selected a skin tone range all we have to do is adjust the slider. Now watch this. This section is called uniformity. It also makes you pancakes. (laughter) But it makes things more uniform. So everything we've selected, it's gonna homogenize everything that we've selected to the reference color. So let's see how this works. I'm gonna do it at 100% opacity so you can see the impact. Damn. So if I go back from red to beige and neutral. Same thing for the fingers here. Let's zoom in. Oh look at that, even selected the cast. Yeah. Cats. So more importantly, aside from just making the tone similar, there's another slider called saturation. So if I bring that to the right, guess what? It also made the saturation very similar. So it kept the luminosity but we've tweaked with hue, with saturation, and even cooler, is luminosity. So you can also make everything a bit flatter if you wanted to, while keeping all the detail. So it splits up the image into categories. It says, first what is the hue? What is the saturation? What is the luminosity? And then it keeps the detail last. So you can control everything. That's it, we're done. (laughter) I'm gonna actually keep the luminosity the same 'cause I don't wanna adjust the lighting, right? I like all of it, but we are able to adjust saturation and hue. So here is an interesting thing. It's flawless, but it's too flawless. I like to keep a little bit of naturalness in the skin. So I'm gonna bring that down. Okay? Like so. Just do it over here. So I think that is quite nice. If it ever gets to the point where anything else is being affected, this area here, this color editor, is also in the masking section. So this local adjustments also have layers. I can say new layer, I can do the same thing again, and they have an area as well. And all you need to do is the same thing, and then use the masking feature to just mask out areas that weren't meant to be touched. But in this case it worked quite nicely so I don't need to go that route. Now, let's take a look really quick I'm gonna go in and duplicate that by selecting, right click, and "new variant." Actually you know what, let me go ahead and go back and make sure that the thing was selected here. Okay. Let's do this. Let me just go and import this that way we can work in Photoshop. I'm gonna say "export," "variants," .tiff file, 16 bit, everything else the same. And I say "export one variant." And it's gonna export and now we're gonna start our process in Photoshop itself. Before we do the actual healing and cloning process, and the cleaning up stage, now that we've exported this in Capture One, I'm sorry, from Capture one into Photoshop, there are a couple things that I want to mention. Number one is that when we work together, there's usually a couple ways that we work. Sometimes when it comes to studio portraits like this, I might heal and clone everything first and then send it off for color work. I might have her do the color work first, and the compositing, and then I might edit the skin. However the process of actually retouching the image stays the same. If she gave me the color-toned image, I would then import it to Capture one as a .tiff file use the color editor, fix the skin with all those really random tones, and then I'll bring into Photoshop and continue my process. So regardless it stays the same. And that's why when you look at your work you can see the skin is still beautiful but the color tone and the vibrancy of everything stays really nice and beautiful. Yeah. I think that is really good to know as well because if you are a photographer who doesn't work with a retoucher, then it's good to know that you don't have to send them the file beforehand, you can always send them the file once you've finished working on it and they can do the final polish. Right. Yeah. 'Cause I wasn't sure how to work with a retoucher before I met Pratik. Retouchers are quite quiet people and they're quite alright. I'm really quiet. You guys are hiding. (laugher) Yeah you guys are hiding. And so I didn't really know the process of when you're working with a retoucher. I always assumed that you would send them the file first, but actually, you are saying That is a good point. you can do both. Yes, and also you can do an in-between too. So say if Bella says, you know what, I like everything about this image except for the fact that I'm not able to do this one thing. Can you do it? And the answer is yes. 'Cause we don't have to take the raw file and work from the raw file. We can jump in at any stage of the process that photographers need help in. And at the end you maintain full control over creativity and direction. The one thing that I did notice, though, when I brought this image into Photoshop itself, there was a problem that I wanted to fix. One thing is that I want to bring back more detail in the shadows on her back. Because although I like this image, and we're probably going to crop it in closer, I want to bring that back a little bit. So let's leverage that raw data in Capture One really quickly and then I'm gonna export this one more time. Good, I'm glad you mentioned that, 'cause I was gonna say it. (laughs) I read your mind. Yeah. I was like, are you sure honey? That's too close. Okay. I'm gonna go back to my adjustment layers here. To avoid confusion, I'm gonna delete these. I will set a new layer. I'm going to call this shadow exposure. Okay? By default the way this works is that any adjustment you make here is basically loading the settings for your brush so that if I decide that I want to increase the shadows here, I will first load my settings before actually brushing, so you're not gonna see anything happen. It's not a global change that these sliders will apply, okay? So I'll go to, let's just go to exposure, or high dynamic range. I'm gonna increase my shadows here. Okay, so as you see nothing is happening right now I'm just, again, loading my settings and I can tweak that later if necessary. I'm also gonna increase my exposure a little bit and we'll use that as a starting point. If it doesn't work, it's no problem. I'll click on my brush tool under the settings here I have my size which is also my bracket keys, I have my hardness, so I'll keep that to zero and opacity and flow, which is great because I'm gonna do the same principle of opacity to and flow something around there. And at this point I think, you know, when we communicate these things, you always give me direction on what you're looking for, or sometimes you don't. When do you decide? It really depends on what needs doing. We've worked together often enough that I know that he knows exactly what kind of look I'm going for, and I think if he's ever gone too far I will tell you. Right. But often I'm very open in my communication so I always tell him exactly what I'm looking for and I'll be like, I think this part of the image looks a bit like this but I would love to hear your opinion and we can go forward from there. 'Cause I still like to maintain full creative control but I also respect that his eyes might also be sharper in some things than mine, so, yeah. That's true. Okay. Yeah. So now let's see what happens when I start brushing. So you can see that this red is basically my mask. And it's showing me where I've painted and where I haven't, generally speaking. And as you see, that's too bright. So I can easily bring that back down from the exposure, and suddenly, went from like nothing, oh here you go, and now instead what I'm going to do is I'm going to use the eraser tool and then erase some areas. Like for example, I'm going to erase a little bit of the back and a little bit of the edges over here. So I'll go erase, same thing, and then, let's see. I'll say, let's say "never display mask" so we can see what we're doing here. I'm gonna increase my brush size. There we go. Just gently bring a little bit back here. So we have some data there. Right? So I turn that on and off. You can see how much we brought back and areas that we want to take away or not take away. I'm gonna increase a little bit of that, and the top here like so. And that's a bit better. It just opens up the amount of shadow information here to match the face. What do you think? I think so, and you can always darken it later if you need to. Exactly. Yeah. So the more data the better. I think so. We did want to show you though that you can rescue shadows and highlights very beautifully using Capture One whether you are shooting with a DSLR or medium format. Right. Obviously with the medium format you have more range but Capture One actually does work very beautifully with any raw file. Exactly. Which is why we use this program to process and it's why most people in the industry use it as well. And again the biggest difference is actually the color, how vibrant the colors are starting off as the base and how beautiful they look in comparison. So why do you think that is? Do they have a different raw processor? Basically. Every company has a different algorithm in how they read these raw files so if you have a Canon file it's not gonna read the same in whatever program you use, it's just depending on the company that manufactures the product that changes so that's pretty much it. Yeah. Okay, so I'm gonna say "export variant" again. I'll hit okay and I'll let that process and then start the retouching from there. Brilliant.
Class Materials
Bonus Materials with Purchase
Ratings and Reviews
Kathleen
Great class and great instructors. Genuine and informative. Practical tips to create stunning images. Seeing them work through the process from shoot to finished image was great and I loved that they shared the thought processes behind the creative decisions. Definitely recommended!
RoxSpiegel
Truly a remarkable duo. Bella is so down-to-earth and humble for a photographer with such a strong beautiful and ethereal voice. Her explanations of her process really inspired me--I was sketching concepts throughout the class. Pratik's process really opened my eyes to "smart" retouching--understanding what can be done in fewer brush strokes and slimmer PS files. All in all a really unique and inspiring class that makes me excited to realize my next conceptual shoot. They're also adorable together!
Mai Her
I've gained sooooo much from this I can't even contain my appreciation and excitement! So much inspiration and so much generous advice and tips to help me! Thank you so much Bella and Pratik and Creative Live!